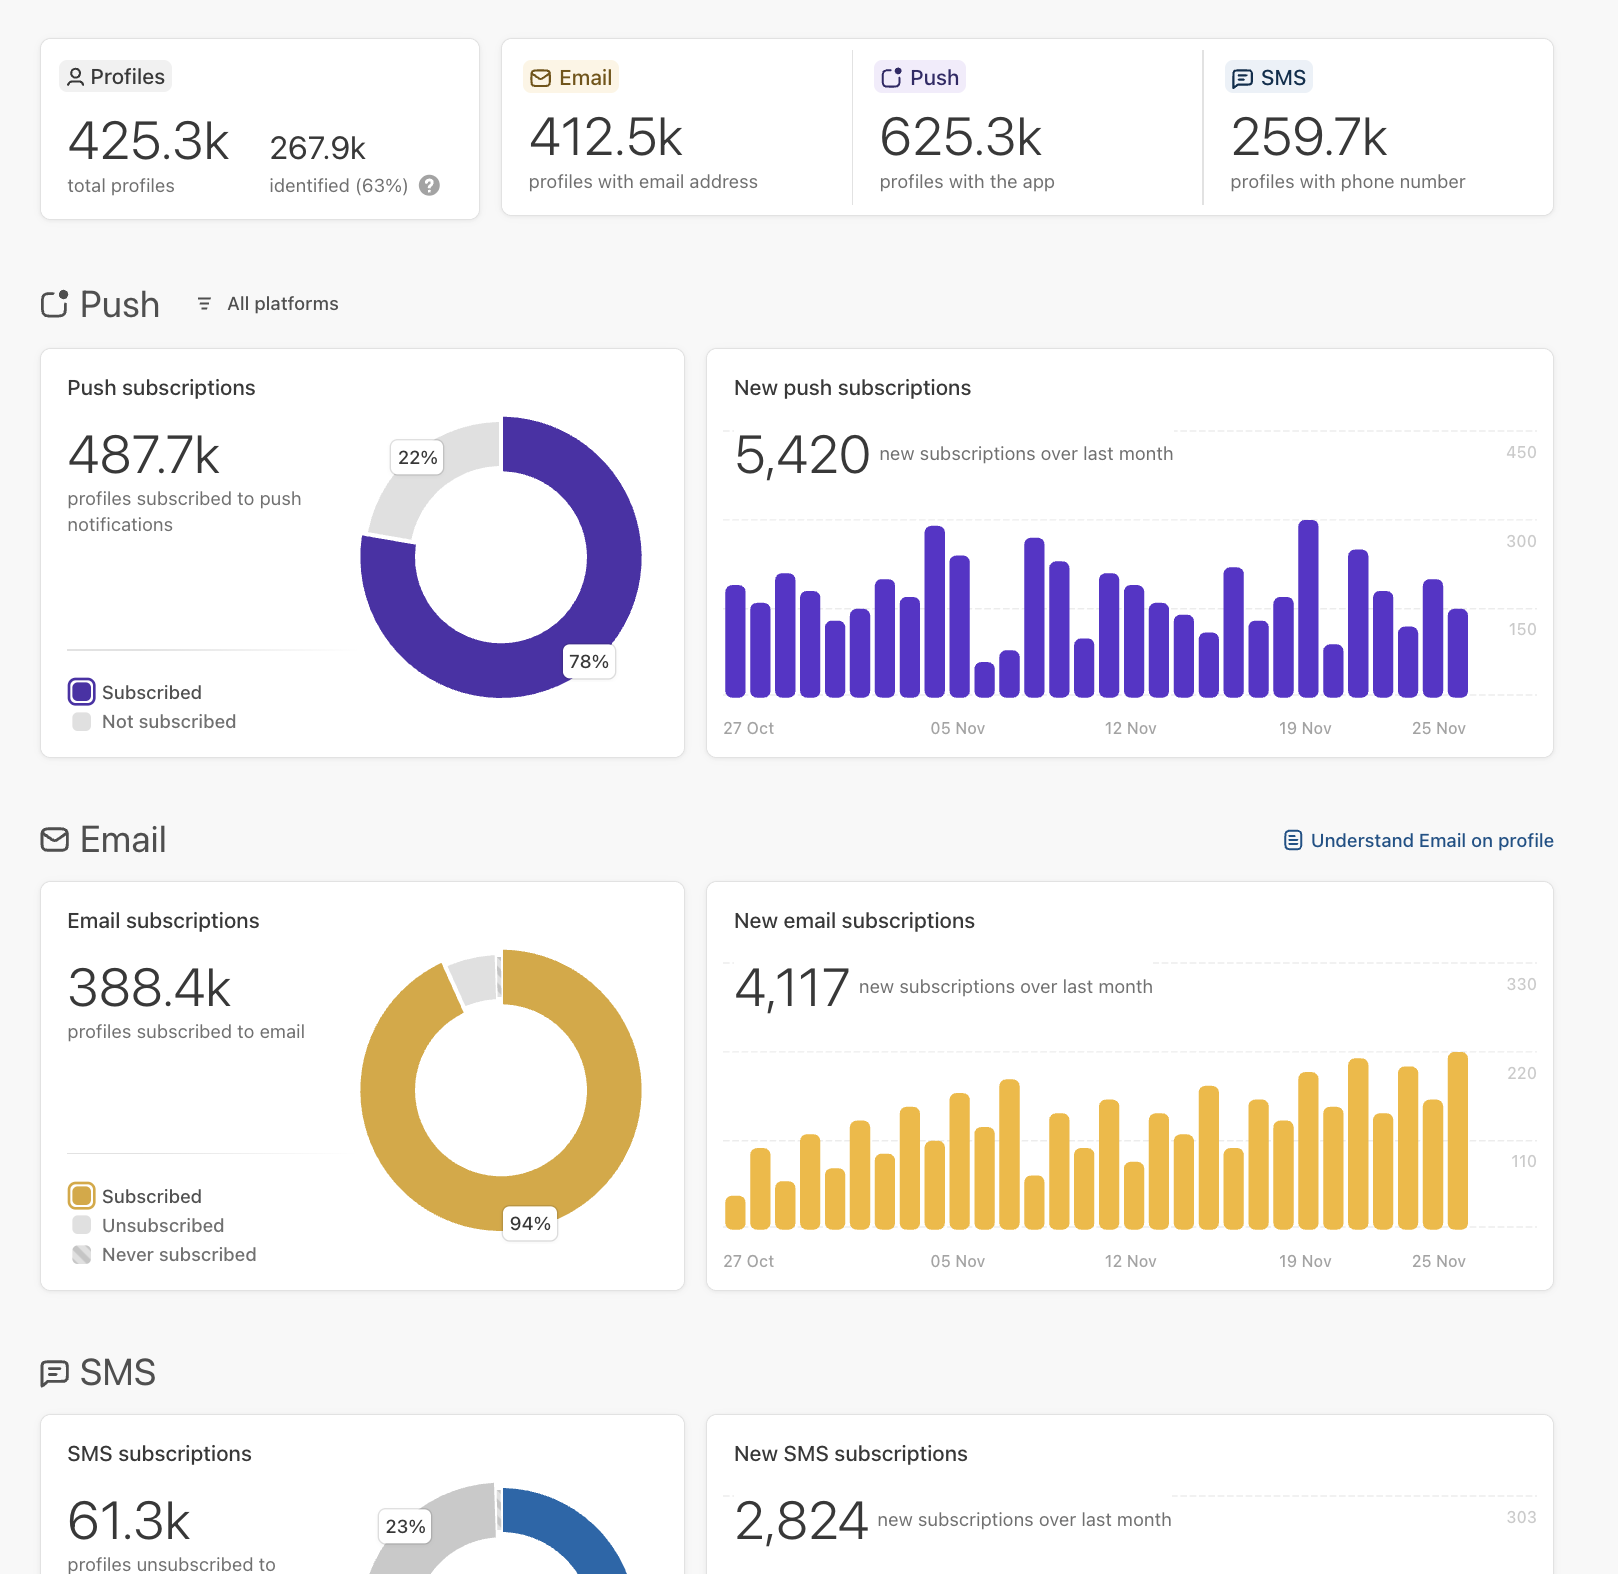
# Batch Documentation

{% hint style="info" %}
**Moving to Batch's Customer Engagement Platform (CEP)?**\
Access our extensive **migration guides** to upgrade from our **Mobile Engagement Platform (MEP)** over here **→** [MEP to CEP migration](/getting-started/other/implementation-guides/mep-to-cep-migration)
{% endhint %}

The documentation provides everything you need to integrate and make the most of Batch. Whether you're a developer setting up integrations or a user looking for best practices, you'll find technical guides, feature documentation, and strategic insights.&#x20;

<table data-view="cards" data-full-width="false"><thead><tr><th></th><th></th><th data-hidden data-card-cover data-type="files"></th><th data-hidden data-card-target data-type="content-ref"></th></tr></thead><tbody><tr><td><strong>Developers</strong></td><td>Find everything you need to integrate our platform, including API references, SDK documentation, and implementation guides.</td><td><a href="/files/ZyH4nOH8MNKBGfrQX9No">/files/ZyH4nOH8MNKBGfrQX9No</a></td><td><a href="/spaces/CL8wF0y1T2vLnm3yR2MW">/spaces/CL8wF0y1T2vLnm3yR2MW</a></td></tr><tr><td><strong>New users</strong></td><td>Get started on how to use our platform effectively with step-by-step tutorials and feature overviews.</td><td><a href="/files/6mXGvdFOrbN5gT6R5HgO">/files/6mXGvdFOrbN5gT6R5HgO</a></td><td><a href="/spaces/UIK868wiiK9XOVyETGZS">/spaces/UIK868wiiK9XOVyETGZS</a></td></tr><tr><td><strong>Advanced users</strong></td><td>Dive deeper with advanced guides, best practices, and expert tips to maximize your engagement strategy.</td><td><a href="/files/Dvn6XQeoKztgE4DQBqkg">/files/Dvn6XQeoKztgE4DQBqkg</a></td><td><a href="/spaces/fiAYaWDWqtFZeXxyg67F">/spaces/fiAYaWDWqtFZeXxyg67F</a></td></tr></tbody></table>

### Explore the key components of Batch

<table data-card-size="large" data-view="cards" data-full-width="false"><thead><tr><th></th><th></th><th data-hidden data-card-cover data-type="image">Cover image</th><th data-hidden data-card-target data-type="content-ref"></th></tr></thead><tbody><tr><td><h4>Batch AI</h4></td><td>Batch AI brings everything CRM teams need to make AI work in practice, depending on their maturity level.</td><td><a href="/files/n9u4nw26dOb26h5PNfJB">/files/n9u4nw26dOb26h5PNfJB</a></td><td><a href="/spaces/UIK868wiiK9XOVyETGZS/pages/3v7qgExdVOQ1KRogog82">/spaces/UIK868wiiK9XOVyETGZS/pages/3v7qgExdVOQ1KRogog82</a></td></tr><tr><td><h4>Data Platform</h4></td><td>Centralize all your customer knowledge in Batch Data Platform from all your data sources in real time: mobile, websites, and data warehouses, etc.</td><td><a href="/files/5LIgz1ysZdQkf4OQHXkn">/files/5LIgz1ysZdQkf4OQHXkn</a></td><td><a href="/spaces/UIK868wiiK9XOVyETGZS/pages/sdREnYil3MG6XynRKOB3">/spaces/UIK868wiiK9XOVyETGZS/pages/sdREnYil3MG6XynRKOB3</a></td></tr><tr><td><h4>Email</h4></td><td>Compose and orchestrate email scenarios (One shot messages, recurring sendings, trigger based multistep automations or transactional messages) with the deepest level of segmentation and personalization.</td><td><a href="/files/M4NtyYvay36VuFti0VC1">/files/M4NtyYvay36VuFti0VC1</a></td><td><a href="https://doc.batch.com/getting-started/features/customer-engagement-platform/message/email">https://doc.batch.com/getting-started/features/customer-engagement-platform/message/email</a></td></tr><tr><td><h4><strong>SMS</strong></h4></td><td>Compose and orchestrate Marketing and transactional SMS scenarios with advanced decisioning logics and the deepest level of segmentation and personalization.</td><td><a href="/files/nFAfk28QlbVPaHswwYHe">/files/nFAfk28QlbVPaHswwYHe</a></td><td><a href="https://doc.batch.com/getting-started/features/customer-engagement-platform/message/sms">https://doc.batch.com/getting-started/features/customer-engagement-platform/message/sms</a></td></tr><tr><td><h4>Mobile &#x26; Web Push Notifications</h4></td><td>Send notifications on mobile (iOS, Android) and web browsers. Batch currently processes and sends millions of notifications each days, and has the backend to handle entire mobile conglomerates eager to retain their users.</td><td><a href="/files/UvrQmJGnbKkcab4Svqzl">/files/UvrQmJGnbKkcab4Svqzl</a></td><td><a href="https://doc.batch.com/getting-started/features/customer-engagement-platform/message/push">https://doc.batch.com/getting-started/features/customer-engagement-platform/message/push</a></td></tr><tr><td><h4>In-App Messaging</h4></td><td><p>Trigger In-app messages when users open your app, perform a specific action or as landing pages after a push notification is opened.<br></p><p>All that using formats that neatly fit your app design, bring the same experience to your users and engage them better.</p></td><td><a href="/files/aOOjZKkOUKDyv6ZMrPTd">/files/aOOjZKkOUKDyv6ZMrPTd</a></td><td><a href="/spaces/UIK868wiiK9XOVyETGZS/pages/Y4AQYuJiYwbdjp2Wd1n8">/spaces/UIK868wiiK9XOVyETGZS/pages/Y4AQYuJiYwbdjp2Wd1n8</a></td></tr><tr><td><h4>Analytics</h4></td><td>Analytics is the cornerstone of Batch, giving real-time insights on your orchestrations.</td><td><a href="/files/WegSgCGgFvrmhy8lIyzm">/files/WegSgCGgFvrmhy8lIyzm</a></td><td><a href="https://doc.batch.com/getting-started/features/customer-engagement-platform/analytics/overview">https://doc.batch.com/getting-started/features/customer-engagement-platform/analytics/overview</a></td></tr><tr><td><h4>Automations</h4></td><td>Set up triggered and recurring messages that guide users through personalized journeys based on their in-app behavior and key lifecycle moments.</td><td><a href="/files/KmAywP3QxosMSQk4tQPx">/files/KmAywP3QxosMSQk4tQPx</a></td><td><a href="/spaces/UIK868wiiK9XOVyETGZS/pages/yTHTYINKl9UPPSUPb5bh">/spaces/UIK868wiiK9XOVyETGZS/pages/yTHTYINKl9UPPSUPb5bh</a></td></tr><tr><td><h4>Campaigns</h4></td><td>Send one-time messages to a broad audience. Ideal for announcements, promotions, and breaking news to engage your user base instantly.</td><td><a href="/files/b5yJ7dBXbBQfuZfbSyBP">/files/b5yJ7dBXbBQfuZfbSyBP</a></td><td><a href="/spaces/UIK868wiiK9XOVyETGZS/pages/BTILyMn2XbSTE5mEqc8X">/spaces/UIK868wiiK9XOVyETGZS/pages/BTILyMn2XbSTE5mEqc8X</a></td></tr></tbody></table>


# How to add a member to your team?

You can invite members of your team and grant them different permissions depending on their role in your company.

Batch allows users with the "Administrate" permission to [add new people](https://doc.batch.com/getting-started/features/customer-engagement-platform/settings/manage-team) to their team. This enables your tech, marketing and editorial teams to work together on the same interface with different accesses to Batch's features.

{% hint style="danger" %}
Make sure you are the **admin of the account** to add new team members or choose the apps they can access.
{% endhint %}

## Inviting new members <a href="#inviting-new-members" id="inviting-new-members"></a>

First, open your account's menu located on the top right corner of the dashboard (in Batch Customer Engagement Platform) or the bottom left corner (in Batch Mobile Engagement Platform).

Click '**Manage team**', then click '**Invite user**':

<figure><img src="/files/fbCjJSTI8Fe09uRLqHFu" alt=""><figcaption></figcaption></figure>

{% hint style="info" %}
To reinforce access control to our product, the Dashboard forces administrators to use **multi-factor authentication** (MFA) to perform certain sensitive operations. If your company is not set up with an MFA method, the modal will simply ask for password authentication.
{% endhint %}

<figure><img src="/files/LUBRO12XI8ifYC0EU8Gt" alt=""><figcaption></figcaption></figure>

Then, pick the right permissions for the new team member and select the apps they will be able to see the dashboard:

<figure><img src="/files/oKMIxh8xexaRUqtGRiOj" alt=""><figcaption></figcaption></figure>

There are several permissions you can grant or revoke:

* **Administrate**: Grants full access to company account (team members, users permissions, etc). Note: an account can have more than one Administrator.
* **Review**: Grants read-only access to the dashboard. Review users will not be able to create or edit campaigns.
* **App**: Grants users' rights to create, edit, and archive apps, and to create and edit themes (for in-app messages and mobile landings).&#x20;
* **Campaign**: Grants users rights to create, edit and delete campaigns and automations.
* **Privacy**: Grants users' rights to manage GDPR settings.

{% hint style="warning" %}
If one of your teammates already has a Batch account registered with his email address, **contact our support team** *(*[*support@batch.com*](mailto:support@batch.com)*)* with the following information:

* Email address of his first account.
* Email address of the team he wants to join.

We will add them to your team with all the apps created with the previous account.
{% endhint %}

## Managing Existing Users <a href="#managing-existing-users" id="managing-existing-users"></a>

### Adding/removing existing users <a href="#h_9b81018bcb" id="h_9b81018bcb"></a>

You can resend invites, delete and manage existing users from the **Account Manager** too:

<figure><img src="/files/rcRIMFU5rSm919cG4WiZ" alt=""><figcaption></figcaption></figure>

### Setting app-level permissions <a href="#h_78ede5f1e6" id="h_78ede5f1e6"></a>

To facilitate collaborative work, a user with '**Administrate**' rights can also grant another user access to a group of selected apps. This is handy to ensure specific users cannot access certain apps on the dashboard or if you have multiple projects with separate teams working on each one.

<figure><img src="/files/WpGSfGO9N9Z1dpabfgbe" alt=""><figcaption></figcaption></figure>

### Setting a country/language restriction <a href="#h_ce1c372f17" id="h_ce1c372f17"></a>

In addition to app-level permissions, you can restrict the rights of existing users to make sure they can only create push campaigns or In-App automations for users living in specific countries.

This is useful to avoid targeting mistakes if an international team is working on the same app on Batch dashboard (e.g. editors sending a notification to all your users by forgetting to target a specific country). Here is what the campaign editor looks like for a user who can only send notifications to Canada, in French or English:

<figure><img src="/files/I5Cn0iBSXyS0QEvQx9Dp" alt=""><figcaption></figcaption></figure>

<figure><img src="/files/FCw7fxrtrHMOO8j0OW72" alt=""><figcaption></figcaption></figure>

On Batch dashboard, users with a country/language restriction (e.g. Canada + English/French) will exclusively see in their campaign list:

* Campaigns matching their country/language restriction (e.g. Canada + English/French)
* Campaigns that don't include any country/language targeting (e.g. templates).

{% hint style="success" %}
Your Batch Customer Success Manager will be here to help and set up these restrictions for you!&#x20;
{% endhint %}

<br>


# How to secure your account using two-factor authentication (2FA)?

2FA (Two-Factor Authentication) is the best way to secure your account from any intrusion.

Batch allows you and your team to [use 2FA](https://doc.batch.com/dashboard/settings/account-settings#two-factor-authentication-2fa) to fully secure your access to the dashboard with an additional security layer. But first, what is 2FA and how does it work?

## 2FA for Two-Factor Authentication <a href="#id-2fa-for-two-factor-authentication" id="id-2fa-for-two-factor-authentication"></a>

As its name suggests, 2FA allows you to add an **extra step in your authentication process** on a desktop website/app, via a code verification from your smartphone.

&#x20;After having prompted your password as you would normally do, you will be asked to input a code fetched from a dedicated 2FA mobile app, **previously linked with the website/app you're logging into:**

### Step 1: Input your password <a href="#step-1-input-your-password" id="step-1-input-your-password"></a>

<figure><img src="/files/UcXUAzck0a5xZPSxYb7d" alt=""><figcaption></figcaption></figure>

### Step 2: Type the 'Batch.com' code from the 2FA mobile app on Batch dashboard login menu <a href="#step-2-type-the-batchcom-code-from-the-2fa-mobile-app-on-batch-dashboard-login-menu" id="step-2-type-the-batchcom-code-from-the-2fa-mobile-app-on-batch-dashboard-login-menu"></a>

<figure><img src="/files/Mx8IorXxsf9p1rPCdxUY" alt=""><figcaption></figcaption></figure>

And now you're connected in a fully secure way!

## How to set up 2FA on Batch? <a href="#how-to-set-up-2fa-on-batch" id="how-to-set-up-2fa-on-batch"></a>

First, hop into your **Security** settings via the top right-hand corner menu by clicking on 'Security'.

<figure><img src="/files/MEvAQS9s0iIwr6c10Q3v" alt=""><figcaption></figcaption></figure>

In the **Security tab**, click on 'Enable' under the Two-factor authentication section.

<figure><img src="/files/81lHPHLz1CNUqK4d4zNa" alt=""><figcaption></figcaption></figure>

Then follow the given instructions: open your favorite 2FA Mobile app, add a new login, scan the given QR Code and type the code your 2FA app gives you in the Batch dashboard. You will find a list of apps you can use to set up 2FA below.

<figure><img src="/files/LfqIYPkb7rsEMniZFJ12" alt=""><figcaption></figcaption></figure>

There you go, 2FA has been set up on your account! Last but not least, the **Team** section of the Account Manager gives your team Manager insights on who has already set up 2FA.

<figure><img src="/files/vxporN0wvTS0VAniVCC4" alt=""><figcaption></figcaption></figure>

{% hint style="info" %}
If you're seeking a 2FA tool:​

Authy is a good solution if you are looking for a simple 2FA authentication app that includes multiple backup options: [iOS](https://apps.apple.com/us/app/authy/id494168017)/[Android](https://play.google.com/store/apps/details?id=com.authy.authy\&hl=en).

You can also use one of these alternatives. The list is not exhaustive:

* Duo Mobile: [iOS](https://apps.apple.com/us/app/duo-mobile/id422663827)/[Android](https://play.google.com/store/apps/details?id=com.duosecurity.duomobile)
* Google Authenticator: [iOS](https://apps.apple.com/us/app/google-authenticator/id388497605)/[Android](https://play.google.com/store/apps/details?id=com.google.android.apps.authenticator2)
* Microsoft Authenticator: [iOS](https://apps.apple.com/us/app/microsoft-authenticator/id983156458)/[Android](https://play.google.com/store/apps/details?id=com.azure.authenticator)
  {% endhint %}


# How to create a CRM scenario Planning?

Learn how to build a complete and actionable CRM scenario planning to structure your customer journeys, anticipate your data needs, and successfully launch your automations in Batch ⛳️

## A key document

The **CRM Scenario Planning** is a central document in your onboarding with Batch. It is not simply a tracking file, but a **structuring tool for your entire CRM strategy 🌟**

<figure><img src="/files/GHfzU0DV44QSKmjgQlIb" alt=""><figcaption></figcaption></figure>

It allows you to:

#### 1. Centralize all your use cases

This file becomes your **single source of truth**:

* A global view of your CRM strategy
* Tracking of existing and future scenarios in Batch
* Prioritization of activations

👉 *It ensures you cover all your use cases and maintain a consistent CRM strategy.*

#### 2. Build your data mapping (tagging plan)

Each scenario allows you to identify:

* Events to track
* Required data (attributes, events, properties)

👉 *The scenario planning defines what you want to run in Batch. The data mapping makes it possible.*

💡 **Note**: Batch provides a set of **native data** (events and attributes called [built-in data](https://doc.batch.com/guides-and-best-practices/message/push-notifications/how-to-use-batch-built-in-data-in-your-push-notifications-and-in-app-scenarios)) that allow you to orchestrate many scenarios without specific implementation.

{% hint style="info" %}
As an example, if you define an *abandoned cart reminder* scenario, you will need to track:

* A trigger event → add to cart
* An exit event → purchase
* Personalization → products, amount, date, etc.

👉 Without this data, the scenario cannot run.
{% endhint %}

For more details on creating your data mapping, check our [dedicated documentation](https://doc.batch.com/developer/technical-guides/how-to-guides/how-to-create-a-tagging-plan) 👈

#### 3. Structure your email strategy (warm-up)

For the email channel, this document is essential to:

* Estimate sending volumes
* Identify message types (marketing vs transactional)
* Assess expected user engagement

These elements allow you to plan a **progressive ramp-up (warm-up)**, a key step to ensure strong deliverability from the start.

👉 *An incomplete planning may lead to delays and deliverability risks.*

## File structure

The document is divided into 3 main sections: marketing automations, transactional automations and campaigns.

### Marketing automations

These are messages with a marketing purpose such as promotions, abandoned cart, product recommendations, welcome pack, etc.

👉 Marketing scenarios require **explicit user consent** and the user must be able to **unsubscribe easily** at any time (via a one-click unsubscribe link).

### Transactional automations

These are messages related to a transaction or an action performed by the user or a service such as password reset, purchase confirmation, shipping tracking, server maintenance, etc.

👉 Transactional scenarios **are critical**, not subject to specific consent and the user is not supposed to be able to unsubscribe.

{% hint style="info" %}
**Important**: choosing the right type (marketing or transactional) is critical, especially for email and SMS.

It has direct impact on:

* Email warm-up (volume ramp-up)
* Deliverability
* Orchestration setup in Batch

**This distinction is not defined by Batch. It is regulated (GDPR / local laws) and depends on the message’s purpose.**

* Transactional → expected, service-related
* Marketing → promotional

A transactional message containing promotional content may be reclassified as marketing.
{% endhint %}

### Campaigns

One-off messages (one-shot), such as promotions, newsletters, or key events.

👉 Make sure to include your key campaigns.

{% hint style="success" %}
Each section can include categories (Onboarding, Anti-churn, Account management, etc.)

These are **examples**. You can adapt or create your own categories to organize your scenarios clearly.
{% endhint %}

## Understanding the columns

The idea is simple: one row = **one step of your scenario 🚀**

### Status

This column refers to the current status of the scenario (active, to activate, under consideration)

💡 **Best practices**

* Update this column regularly to track progress
* Use it as a tool to manage your CRM strategy
* Avoid leaving outdated statuses (e.g. “to come” for several months)

### Journey Name

This column refers to the name of the complete scenario (the orchestration). It groups all the messages that make up a user journey, for example:

* An onboarding
* An abandoned cart reminder
* A reactivation scenario

💡 **Best practices**

* Think “complete user journey”, not “individual message”
* Give a name that is:
  * clear
  * stable over time
  * business-oriented

{% hint style="success" icon="hand-peace" %}
Examples:

* *New users onboarding*
* *Abandoned cart reminder*
* *Churn prevention - card expiration*

To avoid:

* *Email J+1*
* *Push reminder*
* *Message 1*

👉 These names describe steps, not a scenario.
{% endhint %}

### Step name

This column refers to a specific message within the scenario. Each row = one send (one step) in a journey.

💡 **Best practices**

* Think “individual message”
* The name should reflect:
  * the content
  * or the objective of the message
  * and ideally the timing

{% hint style="success" icon="hand-peace" %}
Examples (for the same onboarding journey):

* Welcome D+1
* Feature discovery D+2
* Activation reminder D+3
  {% endhint %}

### Priority

This column refers to the business priority of the scenario (1 or 2)

* **1 = Priority scenarios**

  * To be migrated/activated first during implementation and onboarding
  * Includes scenarios used for email warm-up

  👉 Example: high-impact scenarios, high-volume scenarios, onboarding, transactional…
* **2 = Secondary scenarios**
  * To be activated later once implementation is complete

💡 **Best practices**

* Prioritize based on:
  * business impact (revenue, activation, retention)
  * user volume
* Avoid setting everything as priority 1 → it makes prioritization ineffective

### New / existing scenarios

This column indicates whether the scenario already exists in your previous tool or needs to be created.

💡 **Best practices**

* Clearly identify existing scenarios to:
  * avoid duplicates
  * facilitate migration

### Channel

This column refers to the channel(s) used for the scenario (Email, Push App, Push Web, SMS, In-app)

💡 **Best practices**

* Choose the channel based on the objective: *“which channel is the most relevant to reach my user?”*
* Guidelines:
  * Push / SMS → fast messages requiring immediate action
  * Email → richer content, consumed later
  * In-app → product guidance
* Avoid over-solicitation: favor a sequenced approach (example: Push → then Email if no engagement)

### Scheduling mode

This column refers to how the message is triggered. There are two main types:

* **Trigger**

  Message sent following:

  * an event (for example: add to cart)
  * an attribute change (for example: from 0 to 100 loyalty points, from silver to gold)

  👉 Examples: onboarding, abandoned cart, etc.
* **Recurring**

  Message sent on a schedule (daily, weekly, monthly)

  👉 Examples: newsletter, periodic summary.

💡 **Best practices**

* Prefer trigger scenarios (more contextual and performant)
* Use recurring for regular marketing communications
* Ensure the scheduling mode matches the use case

{% hint style="info" icon="book" %}
If you want to better understand how trigger and recurring modes work, you can refer to:

* [Batch Academy](https://go.meltingspot.io/spot/60d29fcc-0957-41b4-bbe9-8c43b1fab19d/home)
* [Batch documentation](https://doc.batch.com/getting-started#:~:text=Ready%20to%20create%20your%20first%20communications%3F%20Let%E2%80%99s%20get%20started!%20%F0%9F%9A%80)

👉 This can help you structure your scenarios before completing the planning
{% endhint %}

### Targeting

This column refers to the target audience of the scenario (who receives the message).

💡 **Best practices**

* Be precise and actionable

✕ To avoid:

* “All users”
* “Active users”

✓ Prefer:

* “Users registered less than 7 days ago without purchase”
* “Users who added a product to cart without purchasing”

👉 A vague segmentation = a low-performing and hard-to-activate scenario

### Timing

This column refers to what triggers the message. It depends on the scheduling mode:

* **Trigger**

  The message is sent following:

  * an event → *add to cart, account creation, page visit*
  * an attribute change → *from 0 to 100 loyalty points* or *from silver to gold*
* **Recurring**

  The message is sent at a defined time:

  * a date or frequency → *every Monday, the 1st of the month*

💡 **Best practices**

* Define a clear, precise and measurable trigger
* Prefer easily trackable events or conditions
* Avoid vague wording

### Delay (trigger only)

This column refers to the time between the trigger and the message send.

The delay can take different forms:

* **A specific time (*****wait delay*****)** → *1 hour, 24 hours, 7 days or at 11am the next day*
* **An specific (*****wait event*****)** → *wait for the user to become premium within 7 days*

💡 **Best practices**

* Adapt the delay to the scenario context
* Give users time to act (avoid sending messages too quickly)
* Avoid delays that are too long (loss of relevance)
* Ensure consistency between steps (space messages properly within a journey)

{% hint style="info" %}
Once live, you will be able to test and adjust your delay over time (the best timing depends on your business and your users’ behavior).
{% endhint %}

### Exit events (trigger only)

This column refers to conditions that stop or prevent sending.

💡 **Best practices**

* Always define at least one exit condition (if relevant)
* Base it on the achievement of the scenario goal

{% hint style="success" icon="hand-peace" %}
**Example: abandoned cart scenario**

✓ Trigger event: add to cart or empty cart

✓ Cancellation event: purchase

👉 Without exit event, you risk sending irrelevant or inconsistent messages.

👉 Make sure your logic is consistent across the entire journey (a single action can cancel multiple steps).

👉 A good scenario also knows when not to send a message.
{% endhint %}

### Personalization

This column refers to the data used to adapt the message to the user. The more personalized a message is, the more performant it is.

You can personalize messages using different types of data:

**1. User-centric data (related to the user: from user attributes or tracked events)**

Examples: *first name, age, favorite category, number of orders or articles read, last action, etc.*

{% hint style="success" %}
“Hi *Nina*, you didn’t complete your order.”
{% endhint %}

**2. Catalog data (related to products or content: from Batch catalogs)**

Examples: *product catalog, price, image, recommended category, etc.*

{% hint style="success" %}
“*Thanks for your order Nina, you might also like: Running shoes and Sports jacket.*”
{% endhint %}

💡 **Best practices**

* Identify the data needed for your step (for example: *first name, product, amount, etc.*)
* Prioritize useful and contextual personalization (linked to user actions or behavior)
* Avoid over-personalization (too much information = the message is harder to understand)
* Adapt personalization to the channel (richer in email, more concise in push)
* Combine both types of data to maximize impact: "*It’s been a while, Nina! Discover this week’s new sneakers* �&#xDCAA;*”*

### Conversion goal (campaigns only)

👉 This column refers to the main objectives you want to measure after sending your campaign, such as a *purchase*, a *sign-up*, or an *add to cart*. It represents the actions you expect from your users after your campaign.&#x20;

{% hint style="info" icon="book" %}
Documentation on [Conversion settings](https://doc.batch.com/getting-started/features/customer-engagement-platform/orchestration/campaigns#creating-a-campaign) and [Conversion analytics](https://doc.batch.com/getting-started/features/customer-engagement-platform/analytics/orchestration-analytics#conversion-goal-dedicated-insights).
{% endhint %}

💡 **Best practices**

* Define clear objectives per campaign
* Choose an objective aligned with your intent (examples: promotion → *purchase*, newsletter → *click*, free trial → *sign-up*)

### Estimated engagement (email only)

This column refers to an estimate of your email scenario performance (*open rate*, *click rate*, *conversion*).

💡 **Best practices**

* Base your estimate on your past performance (if available)
* Even an approximate estimate is useful (it helps prioritize scenarios and anticipate warm-up)

{% hint style="success" icon="hat-chef" %}
**How to estimate simply?**

Take your overall average open rate (from your current email campaigns), then position your scenario:

* Above average → high engagement (active+ users)
* Around average → medium engagement (active users)
* Below average → low engagement (inactive users)
  {% endhint %}

### Sending volume (email only)

This column refers to the daily volume of emails sent for this scenario. It is essential to properly prepare the warm-up.

💡 **Best practices**

* Provide realistic estimates
* Estimate on a daily basis
* Try not to underestimate volumes (direct impact on deliverability)

## Best practices

#### 1. Think “user jouney” before “tracking”

The campaign planning should not be a list of technical elements. Its goal is to structure a coherent experience for your users and define scenarios aligned with your business and marketing objectives.

{% hint style="success" icon="hand-peace" %}
To avoid:

* “Track checkout button”
* “Send product push”

To prioritize:

* “Remind users who did not complete their purchase”
* “Encourage new users to complete their first action”

👉 Always ask yourself: *“What user behavior do I want to trigger or influence?”*
{% endhint %}

#### 2. Think “data”

For each row, ask yourself:

* What data is required?
* Can I clearly identify:
  * a trigger?
  * a target?
  * an exit condition (for trigger scenarios only)?

👉 If these elements are not clearly defined, the data mapping may be incomplete and the scenario difficult to activate.

#### 3. Be exhaustive

Even if some use cases are not a priority, it is recommended to include them in your CRM scenario planning. This allows you to:

* anticipate tagging
* have a complete view of your strategy
* avoid additional developments later

{% hint style="info" %}
Priorities help you break down scenarios into multiple batches and plan their rollout progressively over time.
{% endhint %}

#### 4. Challenge the value of each scenario

Before adding a scenario, ask yourself: *“What is its business value?”*

* Does it generate revenue?
* Does it improve retention?
* Does it meet a user need?

👉 This exercise will help you prioritize your scenarios more effectively.

#### 5. Align your teams

This document should ideally be built with:

* marketing
* product

To ensure:

* consistency across scenarios
* feasibility
* better quality of the information provided

## What happens next?

Once your planning is completed, two paths are possible depending on your level of support:

### 1. Advanced Onboarding

Your planning is reviewed with your Onboarding Manager during the use case workshop.

👉 The goal:

* Review each scenario
* Validate use cases
* Ensure all information is complete and actionable

{% hint style="warning" %}
**Important**: The document must be fully completed beforehand to ensure the quality of the workshop.
{% endhint %}

👉 Once the planning is validated:

* The Implementation Manager in charge of your setup builds the data mapping
* Technical implementation can then start

### 2. Standard Onboarding (self-service)

You complete the planning independently, without a validation workshop.

👉 Once your planning is finalized:

* You can directly move on to creating your data mapping by following our [dedicated documentation](https://doc.batch.com/developer/technical-guides/how-to-guides/how-to-create-a-tagging-plan?q=conversion+goal).

{% hint style="success" %}
**In both cases:** the **CRM Scenario Planning** remains the foundation of your Batch setup:

* It structures your CRM strategy
* It guides the creation of your data mapping
* It determines the success of your scenarios
  {% endhint %}


# Channels

Batch allows you to communicate with your users through multiple channels, each with its own characteristics, benefits, and best use cases. To help you make the most of them, each channel has a dedicated documentation page focused on message composition:

<table data-card-size="large" data-view="cards"><thead><tr><th></th><th data-hidden data-card-cover data-type="files"></th><th data-hidden data-card-target data-type="content-ref"></th></tr></thead><tbody><tr><td>Push</td><td><a href="/files/x0DILI1SocIGtwCk1Pyx">/files/x0DILI1SocIGtwCk1Pyx</a></td><td><a href="/pages/KKOK15ItxUlb54JiOups">/pages/KKOK15ItxUlb54JiOups</a></td></tr><tr><td>In-App</td><td><a href="/files/5XXOAlRIRm4luDsBO9ME">/files/5XXOAlRIRm4luDsBO9ME</a></td><td><a href="/pages/uz89Uogn4IkHDWIbBCIA">/pages/uz89Uogn4IkHDWIbBCIA</a></td></tr><tr><td>Email</td><td><a href="/files/iYRpjaLswoHrxWY21ZaJ">/files/iYRpjaLswoHrxWY21ZaJ</a></td><td><a href="/pages/EU34sU8GAJq7Pn5GQ9rF">/pages/EU34sU8GAJq7Pn5GQ9rF</a></td></tr><tr><td>SMS</td><td><a href="/files/WbXFeOputvBxD1d4fiab">/files/WbXFeOputvBxD1d4fiab</a></td><td><a href="/pages/yraVR3MUo0jLYbUWJNy0">/pages/yraVR3MUo0jLYbUWJNy0</a></td></tr></tbody></table>


# Push

A **Push notification** is a message sent directly to your users' smartphones at the moment you choose. It’s a powerful communication channel on iOS and Android, helping you engage with your customers and prompt them to take action.

This guide will walk you through composing your Push message. Let’s get started! 🚀

## Compose your Push message

Before composing your message, the first step is to decide **which platform(s)** you want to send your push notification to:

* **iOS & Android** – mobile apps.
* **Web Push** – For browser-based notifications (mobile and desktop).
* **All platforms** – If you want to reach your audience on mobile and desktop

<figure><img src="/files/e73YJpKgWXxdUhhdo7By" alt=""><figcaption></figcaption></figure>

### Add message

Once you've selected your platform(s), it is time to bring your message to life ✨

This is the most crucial part of your notification — it’s what captures attention and drives engagement.&#x20;

* **Title**: Keep it short, human, and relevant. Your title should grab attention instantly while staying concise.
* **Body**: Be clear, concise, and actionable. The body text expands on the title and tells users *why* they should tap.

<figure><img src="/files/JPh3UmMy1Fd8QOUp4rQM" alt=""><figcaption></figcaption></figure>

{% hint style="info" %}
You can [use emojis](https://doc.batch.com/getting-started/features/mobile-engagement-platform/push/message-edition#emoji-emoticons:~:text=this%20page.-,Emoji%20emoticons,-You%20can%20add) (sparingly) to add visual appeal 🌟
{% endhint %}

### Add personalization

Personalized push notifications feel more relevant and create a sense of direct communication with the user. Make your message feel personal by [inserting variables](https://doc.batch.com/getting-started/features/customer-engagement-platform/message/personalization)!

This grabs attention, but it also builds trust and increases engagement.

All you need to do is to click the **{...}** **Insert variable** button next to the title or the body of your message and pick an attribute:

<figure><img src="/files/FEJPEIUkAeiUX3S81BkI" alt=""><figcaption></figcaption></figure>

### Add Media

A great push notification isn’t just about text — visual elements like icons and media can increase visibility, engagement, and click-through rates! When used correctly, they help your notification stand out in a crowded notification tray.

You can include an **image** to appear in the **expanded version of the notification** — ideal for promotions, visuals, or content highlights:

<figure><img src="/files/GwMLJILt0y6LJMaGpbdq" alt=""><figcaption></figcaption></figure>

### A/B Testing

You can [**A/B test**](https://doc.batch.com/getting-started/features/customer-engagement-platform/message/overview#:~:text=deleted%20language%20versions.-,A/B%20Test,-The%20A/B) your push notifications! Here's how:

* Enable the feature by toggling the switch at the top right of the Message section.
* **Create variants**: You can create up to **four variants**, either by duplicating an existing one or starting from scratch:

<figure><img src="/files/6dG3wPRQ2VOxuR4M1w8K" alt=""><figcaption></figcaption></figure>

{% hint style="info" %}
Variants work with the multi-language functionality, so you can easily combine both!
{% endhint %}

### Multi-language

You can also create multiple versions of a message, one for each language, by clicking [**Multi-language**](https://doc.batch.com/getting-started/features/customer-engagement-platform/message/overview#:~:text=SMS-,Multi%2DLanguage%20Selection,-Composition)**,** ensuring that profiles receive the message in their own language:

<figure><img src="/files/9T4tcRViVDx6VG7DpFMh" alt=""><figcaption></figcaption></figure>

When adding a new language version, the default version will be duplicated, keeping your format options, images, and other elements intact, so you only need to edit the text that requires translation.

*A default version will be sent to profiles that don’t have a message already specified in their language.*

### Define the action

What should happen when a user taps the notification?

#### **Open deeplink**

You can add a redirection link towards a page of your app, your website, a landing page, or stores.

<figure><img src="/files/BAQuyzsD2mqEV40zdsvx" alt=""><figcaption></figcaption></figure>

{% hint style="info" %}
You can choose to use the same deeplink across all platforms, or define separate links for iOS, Android, and Web by clicking on "Split by platform" to ensure users are redirected to the most relevant destination based on their device:
{% endhint %}

#### **Show Mobile Landing**

You can trigger a [Mobile Landing](https://doc.batch.com/getting-started/features/customer-engagement-platform/message/in-app) right after a user opens a push notification. Mobile Landings extend the push experience with a follow-up pop-up that drives the next action 💪

To do so :

1. Create (or reuse) a Mobile Landing template (same [creation flow as In-App messages](https://doc.batch.com/getting-started/channels/in-app-1#:~:text=Let%E2%80%99s%20get%20started%20%F0%9F%9A%80%E2%9C%A8-,Create%20an%20In%2DApp%20template,-The%20key%20element)).
2. Select the template and edit the content (title, copy, visuals, CTA).

<figure><img src="/files/TPcZYWJ6p5BEtX7EML4g" alt=""><figcaption></figcaption></figure>

### Advanced settings <a href="#h_3cca27ce66" id="h_3cca27ce66"></a>

In the **Advanced settings** section, you can add an [expiration (TTL)](https://doc.batch.com/getting-started/features/mobile-engagement-platform/push/message-edition#emoji-emoticons:~:text=alert%2C%20etc\).-,Expiration%20\(TTL\),-You%20can%20set) and [customize the payload](https://doc.batch.com/getting-started/features/mobile-engagement-platform/push/message-edition#emoji-emoticons:~:text=an%20HTTPS%20server.-,Custom%20payload,-An%20optional%20JSON).

## Testing your push <a href="#h_3cca27ce66" id="h_3cca27ce66"></a>

1. #### Directly in your notification center

Now that your push message is ready to be sent, you can test how it looks on your device!

Use the **Send test** button on the push message window and add your [Custom ID](https://doc.batch.com/getting-started/features/customer-engagement-platform/profiles/data-lifecycle#installation-id:~:text=different%20installation%20IDs.-,Custom%20ID,-The%20custom%20user) or [Installation ID](https://doc.batch.com/getting-started/features/customer-engagement-platform/profiles/data-lifecycle#installation-id:~:text=generated%20by%20Batch.-,Installation%20ID,-The%20installation%20ID) and click on Send test:

<figure><img src="/files/qhDSvtwWeXnlx3NetfrN" alt=""><figcaption></figcaption></figure>

The push is immediately sent! ✨

{% hint style="info" %}
💡 We recommend testing on various device types (iOS, Android, OS versions and screen sizes) to ensure your message displays correctly across all of them.
{% endhint %}

2. #### Test your user data directly on Batch

It is possible to preview the dynamic data of your email using the "Preview As" feature. To do so, use your [Custom user ID](https://doc.batch.com/getting-started/features/customer-engagement-platform/profiles/data-lifecycle#:~:text=different%20installation%20IDs.-,Custom%20ID,-The%20custom%20user) (or one of your users), then enter it in the dedicated field:

<figure><img src="/files/wxA5DWhzsAF0QiZ4yn73" alt=""><figcaption></figcaption></figure>

🚀 Your push is now ready to be sent! Click on the 'Save and run' button at the bottom of the form to activate it or save it as a draft and come back later.


# Email

**Email** is a versatile and impactful way to communicate with your users.\
Delivered straight to their inbox, it’s ideal for sharing rich content, building loyalty, and driving action. Whether you’re welcoming new users, promoting an offer, or nurturing long-term relationships, email is a key touchpoint in your customer journey.

This guide will walk you through composing your Email message. Let’s get started! 🚀

## Compose your Email message

### Header Informations

First, you will need to define your header information with:

* the Sender which is the email address and name that will appear as the sender of the message
* the Reply to field (optional)
* the Subject of your message.

<figure><img src="/files/Ejf6BOLzi1DtCKMeHx9L" alt=""><figcaption></figcaption></figure>

### Create the body of your email

1. #### Design your message with our Email Composer <a href="#h_5bab5ec55c" id="h_5bab5ec55c"></a>

Batch allows you to create an email from scratch through our Email Composer.&#x20;

<figure><img src="/files/aGzBtBzVKmhopSE9HZh9" alt=""><figcaption></figcaption></figure>

2. #### Upload your HTML template <a href="#h_41b70dafd9" id="h_41b70dafd9"></a>

If you have a template ready to be used, you can upload it here!&#x20;

<figure><img src="/files/PrxeryRsioArH8EQjTgd" alt=""><figcaption></figcaption></figure>

### Multi-language

You can also create multiple versions of a message, one for each language, by clicking [Multi-language](https://doc.batch.com/getting-started/features/customer-engagement-platform/message/overview#:~:text=SMS-,Multi%2DLanguage%20Selection,-Composition), ensuring that profiles receive the message in their own language:

<figure><img src="/files/F4paJcClDMk2pjuDiGyZ" alt=""><figcaption></figcaption></figure>

When adding a new language version, the default version will be duplicated, keeping your format options, images, and other elements intact, so you only need to edit the text that requires translation.

{% hint style="info" %}
A default version will be sent to profiles that don’t have a message already specified in their language.
{% endhint %}

### A/B Test

You can [A/B test](https://doc.batch.com/getting-started/features/customer-engagement-platform/message/overview#:~:text=deleted%20language%20versions.-,A/B%20Test,-The%20A/B) your email! Here's how:

* Enable the feature by toggling the switch at the top right of the Message section.
* **Create variants**: You can create up to **four variants**, either by duplicating an existing one or starting from scratch:

<figure><img src="/files/2raaDViyrwGYvIfHnXKr" alt=""><figcaption></figcaption></figure>

### Testing your email message <a href="#h_0a21758190" id="h_0a21758190"></a>

1. #### Directly in your inbox

Now that your message is written and ready to captivate your readers, you can test how it looks on your device!

Use the Send test button on the email message window and type your email address:

<figure><img src="/files/XBZNarXUzTJT7xg6AKVN" alt=""><figcaption></figcaption></figure>

If you want to reach more than one address, don't forget to separate all of them with a comma:

<figure><img src="/files/yhCTwkGgYHSuV7H2UeRL" alt=""><figcaption></figcaption></figure>

The email is immediately sent! ✨

{% hint style="info" %}
We recommend sending tests to different email clients (Apple Mail, Thunderbird, etc.) and mailbox providers (Gmail, Yahoo, Outlook, etc.) to make sure your message is well displayed on all of them.
{% endhint %}

2. #### Test your user data directly on Batch

It is possible to preview the dynamic data of your email using the "Preview As" feature. To do so, use your custom user ID (or one of your users), then enter it in the dedicated field:

<figure><img src="/files/FsdGhpSiZ72z3CkGEsNi" alt=""><figcaption></figcaption></figure>

You can also send this email, filled-in with the personalization data of the selected profile, using the 'Send test' feature as shown above.

:rocket: Your first email campaign is now ready to be sent! Click on the 'Save and run' button at the bottom of the form to activate it or save it as a draft and come back later.


# Design your template with the Email Composer

### Introduction

Batch Email Composer helps you build beautiful and impactful email templates, no code needed.

Email remains one of the most impactful ways to connect with your users. Whether you're welcoming new customers, promoting an offer, or building long-term loyalty, email is a key touchpoint in the customer journey.

This guide will walk you through how to make the most of the Email Composer. Let’s get started! 🚀

***

## **Appearance Menu**

Let’s start with the **Appearance menu**. Why? Because the styles you define here will apply to your entire email 💪

<figure><img src="/files/IWf1A2mPSHKe7CLqfDTL" alt=""><figcaption></figcaption></figure>

You only need to configure design elements once — these settings will automatically apply wherever that element is used. No need to restyle buttons, text blocks, or headings every single time.

This saves time and ensures design consistency across your entire template.

In the **Appearance** menu, you will find the following settings:

* [**General settings**](#general-settings)
* [**Stripes**](#stripes)
* [**Headings**](#headings)
* [**Buttons**](#buttons)
* [**Mobile formatting**](#h_72726fcaa5)

### **General Settings**

In this tab, you define the overall look and feel of your email. You can:

1. Set the **Message width** (default is 600px, the most common width across email clients);
2. Choose the **Message alignment** (centered, left, or right-aligned within the inbox);
3. Define **default padding** for structures you will add later;
4. Pick a general **background color** and optional **background image** for your entire email;
5. Set the **default font** used across all text blocks (except headings);
6. Adjust **line spacing** to make your content more readable or match your brand tone;
7. Enable or disable **paragraph bottom spacing;**

<figure><img src="/files/fEF6hZaWpHJYUdcV6mcX" alt=""><figcaption></figcaption></figure>

8. Choose whether to **underline links** throughout the email;
9. Activate **RTL text direction** if you're writing in right-to-left languages (like Arabic or Hebrew for example);
10. Manage **responsive design** (enabled by default, so your emails look great on both desktop and mobile).

<figure><img src="/files/Cj0Sok267MauiokjjmWK" alt=""><figcaption></figcaption></figure>

### **Stripes**

A **stripe** is a horizontal section of your email that contains structures, containers, and content blocks.

To add a stripe, click the **"+"** icon at the bottom left of an existing stripe:

<figure><img src="/files/Z8OfdQDG6fXR6VJ3r2TF" alt=""><figcaption></figcaption></figure>

Each stripe can be manually assigned a type: **Header, Content, Footer, or Info area**. Using different types of stripes can be helpful for structure and styling adjustments:

<figure><img src="/files/Rdz4PQhvrSX59To1dHto" alt=""><figcaption></figcaption></figure>

You can:

* Define unique font sizes for each stripe (especially useful for footers, which often use smaller text);
* Customize text and link colors;
* Apply a **stripe background color** to draw attention to specific sections;
* Add a **background image** if your brand requires it.

{% hint style="info" %}
Some email clients, like Outlook, may not display background images. We recommend setting a solid background color as a fallback that matches your image's tones.
{% endhint %}

### **Headings**

Need to highlight a key message or divide sections? Use **Headings**.

Just select your text and apply a heading style from the formatting menu:

<figure><img src="/files/llrj4ElpGPhQpTDZdedx" alt=""><figcaption></figcaption></figure>

In the Settings panel, you can customize the **font**, **size**, **style**, **color**, and **line spacing** of your **headings** to fit your design:

<figure><img src="/files/uEYGRwpd9emijpHR876m" alt=""><figcaption></figcaption></figure>

### **Buttons**

Buttons drive action. Whether it's visiting your website, redeeming a promo, or following on social media— they matter.

You can set global look for all your buttons:

* Outlook support toggle (enabled by default, to ensure better rendering in Outlook via VML code)
* Font and button size, style, and color;
* Highlight hovered buttons (change colors when you hover the mouse over it);
* Border radius;
* Borders (full or per side, including color);
* Inner padding;

<figure><img src="/files/3B7wGeGHER1eqBBZzCiu" alt=""><figcaption></figcaption></figure>

### Mobile formatting <a href="#h_72726fcaa5" id="h_72726fcaa5"></a>

All emails built with Batch are responsive by default. This means they automatically adapt to mobile screens. But for full control over how your content appears on smaller devices, you can customize certain settings specifically for mobile.

#### Adjust your email for mobile

1. Go to the "**Appearance"** tab in the editor;
2. Open the "**Mobile view**" section:

<figure><img src="/files/ZiyIypeXJajZYcijQoTo" alt=""><figcaption></figcaption></figure>

Here, you’ll be able to:

* **Set custom font sizes** for headings H1, H2, and H3;
* **Adjust text size for buttons** (we recommend 18px or higher for readability);
* **Apply different font sizes** and **margins for content**;
* **Enable "Full-width buttons"** to make your call-to-action buttons span the full width of the mobile screen;

<figure><img src="/files/6AJ5wwHh0VRWoI8aXVyK" alt=""><figcaption></figcaption></figure>

{% hint style="info" %}
Back to **Desktop view** you can disable "**Responsive images**" for specific elements, if needed.
{% endhint %}

#### Hide elements on mobile or desktop

If you want to hide some elements on mobile or desktop devices, you don’t need to write a single line of HTML! To hide content from mobile users:

1. Select the element you want to hide.
2. Click the **"Hide on mobile or desktop"** option in the settings panel;

<figure><img src="/files/eSe3UOuxCOHrl5679HUk" alt=""><figcaption></figcaption></figure>

With this enabled, the selected element won’t appear in the mobile/desktop version of your email — ideal for simplifying layouts or removing non-essential visuals.

***

## **Content Menu**

Now that we've set our general styles in the **Appearance** menu, editing your template becomes much faster — no need to manually style each element one by one.

<figure><img src="/files/Se4DdKVnHT62L98vClie" alt=""><figcaption></figcaption></figure>

In the **Content** menu, you will find three main building elements of your email:

* [**Structure**](#what-is-a-structure)
* [**Blocks**](#what-are-blocks)
* [**Modules**](#what-are-modules)

#### **What is a Structure?**

In Batch, the **stripe** sits at the top of the email layout hierarchy. Each stripe must contain **structures**, which are automatically added by default.

To insert an additional structure, just drag and drop it from the **Content** menu to the desired section of your email:

<figure><img src="/files/Tlv4nUIsyxDguTtKRf1u" alt=""><figcaption></figcaption></figure>

{% hint style="info" %}
Each stripe can hold multiple structures. And each structure can contain **up to 8 containers in a row**.
{% endhint %}

You can **move, copy, delete**, or **save** a structure as a module by hovering over it and using the dropdown menu:

<figure><img src="/files/5qtVwPwIfaZ5oPrMPWhs" alt=""><figcaption></figcaption></figure>

#### **What are Blocks?**

Blocks are the **foundation** of your email layout—they’re the most granular elements you’ll work with in Batch. In the **Content → Blocks** menu, you have access to **13 essential blocks** such as:

* [**Image**](#adding-a-logo-or-image)
* [**Text**](#adding-text)
* [**Button**](#adding-cta-button)
* [**Spacer**](#add-a-spacer)
* [**Video**](#add-video)
* [**Social**](#add-social-media)
* [**Banner**](#add-banner)
* [**Menu**](#add-menu)
* [**HTML**](#add-html-code)

To use a block, just drag and drop it into your email layout and customize it as needed:

<figure><img src="/files/zA2NLRNrTG08Ajl7VeHc" alt=""><figcaption></figcaption></figure>

#### **What are modules?**

**Modules** are reusable sections — made up of stripes, structures, or containers — that help you speed up email creation:

<figure><img src="/files/oGMEY2vKPvtwDIOO0LMB" alt=""><figcaption></figcaption></figure>

You can create your own custom modules and reuse them across templates. Learn [how to save modules on the email composer](https://doc.batch.com/guides-and-best-practices/message/email/how-to-save-modules-on-the-email-composer).

#### Now that you're familiar with the **Content section** of the Email Composer, it's time to start building your template 🚀

### **Adding a logo or image**

Images bring your emails to life — whether it’s your logo for brand recognition or a banner to support your message. In Batch, adding visuals is quick and intuitive. You can upload images directly, link to them via URL, and adjust their appearance to fit seamlessly into your design. You can add images to your email in **two simple ways**:

#### 1. **Drag and drop / upload from Computer**

* Drag your image directly into your email layout, or
* Click the **arrow icon** to browse and upload from your device.

<figure><img src="/files/MsrzL4sGakHDLWTJQY64" alt=""><figcaption></figcaption></figure>

{% hint style="info" %}
Supported formats: JPEG, PNG, GIF\
Max file size: 3 MB\
Max resolution: 4000 × 4000 px
{% endhint %}

#### 2. Paste **external image URL**

Don’t have the image locally?\
Paste a link to the image in the **External Link** field to pull it directly from the web.

<figure><img src="/files/581ScnPFaGTcL455Dml8" alt=""><figcaption></figcaption></figure>

It is also possible to [edit images directly into the Email Composer](https://doc.batch.com/guides-and-best-practices/message/email/how-to-add-and-edit-images-in-your-email).

### **Adding text**

Text is a core element of any email — whether you're crafting a warm welcome message, highlighting a promotion, or guiding users to take action. In Batch, [adding and customizing text and links](https://doc.batch.com/guides-and-best-practices/message/email/how-to-add-text-and-links-to-your-email) is simple and flexible. You can easily drag a text block into your layout:

<figure><img src="/files/WitgRMTPFhx65YmiOIs7" alt=""><figcaption></figcaption></figure>

Then, you can style it to match your brand, and structure your content for maximum impact:

<figure><img src="/files/Zv0pWxU3Gc5uryMvw7qM" alt=""><figcaption></figcaption></figure>

### **Adding CTA button**

A CTA (Call to Action) button is one of the most critical elements in your email — it directly impacts your **click rate**. Without a clear button, your audience can’t take the next step, whether it's making a purchase, signing up, or learning more.

<figure><img src="/files/ooXQH479yZu7ogYoKzYC" alt=""><figcaption></figcaption></figure>

Here’s how to create one in **Batch**:

* **Drag and drop** the **"Button" block** into your email layout, ideally next to the content it relates to.
* Click the button block to activate the **Settings panel**.

<figure><img src="/files/SwlWIZzKZphbZVen0lMB" alt=""><figcaption></figcaption></figure>

1. Enter the **destination URL** your button should link to.
2. Add your **button label** (this is the call to action your users will see for example: *Shop Now*, *Get Started*).
3. Customize the **text styles**: choose your font, size, and colors for both text and background.
4. Set the **border-radius** to round the button corners, if desired.
5. Define an **alignment.**

{% hint style="info" %}
In the [Appearance tab](#appearance-menu), you can globally enable “Highlight hovered buttons.” The hover color itself is configured in the Content tab when editing a specific button.
{% endhint %}

### **Add a spacer**

While a spacer won’t increase conversions, it plays an essential **design role** — it helps structure your content, adds breathing room, and improves overall readability.

<figure><img src="/files/fyAS6yqaOzaRxcyb23MU" alt=""><figcaption></figcaption></figure>

Here’s how to add and customize a **spacer** in **Batch**:

* Drop the **"Spacer" block** inside that structure.
* **Click the spacer** to open the settings panel.

<figure><img src="/files/zHvYzCVQN2snYqGCHV0r" alt=""><figcaption></figcaption></figure>

1. Enable **dynamic resizing** to manually adjust the spacer’s size by dragging;
2. Choose a **background** **color**;
3. Pick a **line style** — options include **solid**, **dashed**, or **dotted**;
4. Define the **width** of the spacer.
5. Adjust the **alignment** (centered by default, but you can change it to left or right);
6. Toggle **"Responsive spacer"** to ensure proper rendering on mobile devices;
7. Set **padding** to manage the space around the spacer within its container;
8. If needed, add **anchor links** (they are not supported in some email clients: iOS Gmail app, iOS Apple Mail, Outlook app on Android, Outlook app for macOS and AMP Emails).

{% hint style="info" %}
A well-placed spacer keeps your email clean, balanced, and easier to scan — small detail, big visual impact.
{% endhint %}

### Add video

Want to make your emails more dynamic and engaging? Adding videos to your email is a great way to capture attention and increase interaction. Whether you’re showcasing a product demo, a testimonial, or event highlights, [adding videos in your Batch email template](https://doc.batch.com/guides-and-best-practices/message/email/how-to-add-a-video-to-your-email) is quick and easy.

<figure><img src="/files/AugzLKiiHW85F3Aaq2ia" alt=""><figcaption></figcaption></figure>

### **Add social media**

Including social media icons in your emails is a great way to encourage your audience to connect with your brand beyond the inbox.

<figure><img src="/files/2RhaDo6XjxXe3184B4qj" alt=""><figcaption></figcaption></figure>

Whether it's Facebook, LinkedIn, Instagram, or others, adding these links is simple with Batch. You can easily [embed social media links using our Email Composer](https://doc.batch.com/guides-and-best-practices/message/email/how-to-add-social-media-to-your-email).

{% hint style="info" %}
Social blocks not only complete your email visually — they also help drive traffic to your online communities. Add them strategically, typically in the header or footer, to stay connected with your audience.
{% endhint %}

### Add banner

Banners are the first element your reader will see at the opening of your email. They introduce your brand and set the tone of the e-mail, which is why it's so important to make them as impactful as possible.

<figure><img src="/files/h5aTDvkCodJy12bkHTX9" alt=""><figcaption></figcaption></figure>

Let's see [how to create an email banner?](https://doc.batch.com/guides-and-best-practices/message/email/how-to-create-an-email-banner)

### Add menu

The **Menu block** allows users to navigate to specific pages on your website — or even to sections within the email itself. It is a smart way to guide your readers and encourage click-throughs, make sure it’s clear, concise, and consistent with your branding!

Here’s how to add and customize a menu block in **Batch**:

* **Drag the "Menu" block** into your email template.
* **Add additional menu items** if needed. By default, Batch provides three items to start with.

<figure><img src="/files/webo2XBlZcdQgKdbGlVh" alt=""><figcaption></figcaption></figure>

* In the **Settings panel**, choose whether your menu should display:
  * Icons only
  * Links only
  * Icons and links
* Adjust the **font size** if needed for better visibility. For example, set it to “18” for a more prominent look.
* If using **Icons and links**, choose the desired **alignment** and **upload your icons**.

<figure><img src="/files/WJ3McCKe14LlYKNlPZV7" alt=""><figcaption></figcaption></figure>

{% hint style="info" %}
If you choose **Links**, the font and colors you defined in your **General settings** will automatically apply. You can further customize the font style (e.g., make it bold) directly from the settings panel.
{% endhint %}

<figure><img src="/files/2vfibRYxCQzQfi68mcDq" alt=""><figcaption></figcaption></figure>

* **Label each menu item** and **insert the corresponding URL** for redirection.
* Repeat for all menu tabs.
* To **hide menu items on mobile**, simply click the **“Hide on mobile”** icon next to each item.

{% hint style="info" %}
**Mobile optimization**: enable the **"Adaptive menu"** toggle to ensure menu items stack vertically on mobile devices. This greatly improves readability and usability on smaller screens.
{% endhint %}

### <mark style="background-color:yellow;">Add countdown timer</mark>

A countdown timer is a great way to capture attention and inspire action. It adds excitement by clearly showing how much time remains before an offer begins or ends — perfect for creating anticipation and encouraging quick decisions.

<figure><img src="/files/NfJPZ3N9VU1Fn6MtR3Fu" alt=""><figcaption></figcaption></figure>

To add a timer:

* Drag a structure into your template.
* Drop the **"Timer"** block into it.

<figure><img src="/files/ex9bUSf3BDzPJsz6pv5W" alt=""><figcaption></figcaption></figure>

1. Set the **end date and time;**
2. Choose the **time zone;**
3. Choose **number font, size and color**
4. Add **background color**&#x20;
5. Toggle **"Display days"** if you want the timer to show days
6. Choose your preferred **separator** (e.g., “:”, “-”, “/”).
7. Enable **"Number labels"** to show "days", "hours", etc., under digits.
8. Choose the **language** of your label
9. Style the labels (font, size, color).
10. Toggle **"Expired timer image"** to show a fallback image after expiry.

<figure><img src="/files/69zXuPgIqsgkuMAA6ZBn" alt=""><figcaption></figcaption></figure>

11. Add a **URL** to redirect users to a specific page when they click the timer.
12. Set **alt text** for the expired timer image for better accessibility.
13. Align the timer to match your brand’s layout and design.
14. Adjust the **size** for optimal display across devices.
15. Define the **timer’s width** to suit your layout.
16. Choose whether to make the timer **responsive**
17. Use **Advanced Settings** to further customize digit and label colors.
18. Add padding to give the timer breathing room.

That’s it — your countdown timer is all set to drive engagement!

### **Add HTML code**

Sometimes, your email design might require specific features or layouts that go beyond what the visual editor offers. In these cases, you can easily insert your own **custom HTML** code into your Batch template.

Here’s how to do it:

<figure><img src="/files/xyN2hWxnmZTjKnL6uHX0" alt=""><figcaption></figcaption></figure>

* Inside a structure, **drag and drop the “HTML” block**.
* Click **“Insert your HTML in the Code editor”** to open the code editor window.

<figure><img src="/files/jxF5ufwPDUhv5sFSiKer" alt=""><figcaption></figcaption></figure>

1. **Paste your custom HTML code** into the editor.
2. **Customize or fine-tune the code** as needed.

{% hint style="info" %}
This feature gives you the flexibility to embed widgets, dynamic content, or any HTML-based elements that fit your brand’s needs.
{% endhint %}

## **Save a custom module**

If you find yourself reusing the same layout blocks across multiple emails — like headers, footers, product sections, or CTAs—Batch lets you save time by turning them into reusable **custom modules**.&#x20;

Once saved, you can quickly drag and drop these modules into future templates, keeping your emails consistent and efficient to build. Here is [how to save modules on the email composer?](https://doc.batch.com/guides-and-best-practices/message/email/how-to-save-modules-on-the-email-composer)<br>

### Add hidden preheader <a href="#h_ae4ed7cbcb" id="h_ae4ed7cbcb"></a>

Email marketing is a powerful tool for engaging with your audience, but optimizing your campaigns for maximum impact requires attention to detail!

One crucial element often overlooked is the **pre-header**, a valuable asset that can significantly improve the open rate of your email campaigns:

<figure><img src="/files/zlDKRSi1c255DdHWx0Z1" alt=""><figcaption></figcaption></figure>

You can [add the pre-header](https://doc.batch.com/guides-and-best-practices/message/email/how-to-save-modules-on-the-email-composer) directly into the HTML.

***

Once your email template is complete, you can preview and test it by returning to the [email message editor](https://doc.batch.com/getting-started/channels/email#h_0a21758190:~:text=starting%20from%20scratch%3A-,Testing%20the%20campaign,-Directly%20in%20your). This allows you to review how the template will appear in recipients' inboxes and make any final adjustments before sending 🚀


# Upload your ready-to-use HTML template

Uploading an HTML email template into Batch requires careful attention to detail. It is essential to review a few key elements to ensure everything looks and functions as expected. This final check helps you deliver a polished and professional email that matches your original design and renders properly across all inboxes.

By following this step-by-step guide, you’ll catch any small issues before going live — giving your template the best chance to perform and engage your audience effectively.

Let’s dive in and get your campaign ready for success 🚀

### Introduction and prerequisites

#### Which tool should you use?

To modify the HTML of your emails, we recommend using a code editor of your choice, such as:&#x20;

* Visual Studio Code (download [here](https://code.visualstudio.com/))
* Sublime text (download [here](https://www.sublimetext.com/))
* Any other tool of your preference 🔧

<figure><img src="/files/9j28HIAvuP6eLjqhqh9G" alt=""><figcaption></figcaption></figure>

These tools allow you to visualize your code more clearly using color coding and save your changes in HTML format.

{% hint style="success" %}
Find your HTML poorly structured? Go to [Small DevTool](https://smalldev.tools/html-formatter-online) to make it more intelligible.
{% endhint %}

#### Prerequisites

Before uploading your template to Batch, make sure you’ve completed the following steps:

* Save your HTML file as **`index.html`** or **`mail.html`** (max size: 512 KB).
* Place all images used in your email inside a folder named **`images`**.

👉 Once these two steps are done, you’re ready to start editing the HTML to make it Batch-compatible.\
Need more guidance? Check out our article [How to upload my email templates?](https://doc.batch.com/guides-and-best-practices/message/email/how-to-upload-your-email-templates)

\
HTML modification
-----------------

### Add a pre-header

A [**pre-header**](https://doc.batch.com/guides-and-best-practices/message/email/how-to-add-a-pre-header-to-an-email-template) is the short line of text that appears right after the subject line in the inbox preview. It’s a great opportunity to grab attention and increase your **open rate**.

To add one, simply insert a hidden element at the very top of your HTML email, just after the opening `<body>` tag:

```
<div style="display: none; max-height: 0px; overflow: hidden;"> YOUR PREHEADER TEXT </div>
```

{% hint style="info" %}
This text won’t be visible in the email body, but it will show up in the inbox preview. Choose something catchy and relevant to encourage your user to open your email!
{% endhint %}

### Mirror link management

Mirror links (“View this email in your browser”) are **not supported** and must be removed from your HTML template:

<figure><img src="/files/1yHa75mxtEvjvilapLov" alt=""><figcaption></figcaption></figure>

To do this, search your HTML for phrases such as `"View this email in your browser"` or `"view online"`. Once located, **delete the entire block** of code that includes the mirror link.

{% hint style="success" %}
Don’t forget to remove both the **opening and closing tags** of the block to avoid any display issues.
{% endhint %}

### Manage your links

When an email campaign is sent, all redirection links are automatically rewritten to enable click tracking. That is why it is crucial to ensure that the links in your HTML **accurately reflect your original URLs**. Search for all `href` attributes in your HTML:

* Replace each one with your **original redirect link**, including any **tracking parameters** from your analytics platform (e.g., `xtor` for Piano, `utm` for Google Analytics, etc.).

<figure><img src="/files/mspK2YE8wrBhScGwcLcP" alt=""><figcaption></figcaption></figure>

This ensures both proper tracking and a seamless user experience.

### Manage images and gifs

When uploading your email template as a `.zip` file to the Batch dashboard, it must contain **two essential components**:

1. An HTML file named `index.html`
2. A folder named `images` that includes **all visuals used in the email** (images, GIFs, etc.)

To ensure images display properly in the final email, all image links in your HTML must reference this `images` folder.

#### How to do it:

1. In your HTML file, search for all `src=` attributes.
2. Update each image path to follow this format:

```
src="images/image-name"
```

<figure><img src="/files/q1oAgrmTzYAt4QU9T6VS" alt=""><figcaption></figcaption></figure>

This step is key to making sure your visuals render correctly when the email is sent.

{% hint style="info" %}

1. To speed things up, there is a function that allows you to replace one word with another:&#x20;
2. on your html tool, once you're in the html file of your e-mail, press ctrl + F
3. A pop-up window will appear at the top right of the screen

![](/files/fmKv08ShulHjNqu1jIjj)

4. Once you have entered the new value, click on "Replace all".
   {% endhint %}

### Adding the unsubscribe link

When a user clicks the unsubscribe link in your email, this action must be properly tracked by Batch to ensure they are no longer targeted in future campaigns.

To do this, your HTML must include **two key elements** in the unsubscribe section:

1. **The unsubscribe variable** – This allows Batch to register the user's unsubscription in real time.
2. **The unsubscribe confirmation page** – On clicking on "Unsubscribe": the user will be sent to a landing page indicating that their request has been taken into account.

<figure><img src="/files/gp5lGZZH97GJPylfRHFW" alt=""><figcaption></figcaption></figure>

{% hint style="info" %}
You can find all the links to Batch unsubscribe landing pages by following this link: [How to add an unsubscribe link to your email template](broken://spaces/fiAYaWDWqtFZeXxyg67F/pages/4CBatEGXf9lJtFejxGqU)
{% endhint %}

## Personalization

### Personalizing with user attributes

You can personalize your message using user attributes — a common use case is displaying the recipient’s first name.&#x20;

<figure><img src="/files/n0NdcyelFdljVIz1uECe" alt=""><figcaption><p>Insert the recipient's first name dynamically</p></figcaption></figure>

👉 Head over to our complete [personalization guide](https://doc.batch.com/getting-started/features/customer-engagement-platform/message/personalization) for more details and best practices.

### Dynamic images

You can display dynamic images using `IF` conditional blocks in your HTML. Here’s how to do it:

* Use the attribute name exactly as it is sent to Batch (e.g. `subscription_end_date`).
* Adjust the `src=` value for each condition to show a different image depending on the user's data.\
  Example:&#x20;

```
{% if user_gender == 'female' %}
  <img src="images/female.png">
{% else %}
  <img src="images/male.png">
{% endif %}
```

<figure><img src="/files/03gOxva1lTMl95Otm25F" alt=""><figcaption></figcaption></figure>

{% hint style="info" %}
Use the `src` keyword in your code editor to quickly locate image links in your HTML.
{% endhint %}

### Dynamic links

If your email has dynamic links or if the links contain customization, here are the steps to follow in order to make them effective:

**Dynamic redirect link** &#x20;

Here is the Batch structure to use:

```
https://drive.google.com/{{ triggerEventAttr('attribut') }}
```

If you want the user to be redirected to a specific page related to actions they have previously carried out when they click on the link.

**Link with customization**

Here is the Batch structure to use:

```
https://nom-entreprise.typeform.com/to/xxxx#email={{attribut1}};user_id={{attribut2}};language={{attribut3}}
```

If you want to collect a some information about your users (e.g. first name, email, language, etc.) when the link is clicked.

<figure><img src="/files/wyvYSLxHc2CySqCkDGRb" alt=""><figcaption></figcaption></figure>

{% hint style="info" %}
To find redirection links in your HTML, search for **href**.
{% endhint %}

### Final checks

Once you have made all the changes required to migrate your template to Batch, we invite you to [test its appearance in Batch and then in your inboxes](https://doc.batch.com/getting-started/channels/email#h_0a21758190:~:text=starting%20from%20scratch%3A-,Testing%20your%20email%20message,-Directly%20in%20your) 🪄<br>


# SMS

**SMS** is a message sent straight to your users' phones, exactly when you want.\
It’s a fast, direct, and highly effective communication channel, perfect for grabbing attention, engaging customers, and driving action!

This guide will walk you through composing a powerful SMS message. Let’s get started! 🚀

## Compose your SMS message

### Add message

Composing your SMS message is the first and most important step. To make it effective:

* **Start strong**: use attention-grabbing words right from the first line.
* **Be clear and concise**: focus on one key idea, keep it short and easy to understand.
* **Add a direct call to action**: let users know exactly what to do next.
* **\[optional] Use a link**: keep your message clickable.

<figure><img src="/files/eRJBrkYG6NfUhHFMFAB0" alt=""><figcaption></figcaption></figure>

{% hint style="info" %}
You can [use emojis](https://doc.batch.com/getting-started/features/mobile-engagement-platform/push/message-edition#emoji-emoticons:~:text=this%20page.-,Emoji%20emoticons,-You%20can%20add) (sparingly) to add visual appeal 🌟&#x20;
{% endhint %}

### Add personalization

Adding personalization to your SMS feel more relevant and create a sense of direct communication with the user. Make your message feel personal by [inserting variables](https://doc.batch.com/getting-started/features/customer-engagement-platform/message/personalization)!

This grabs attention but it also builds trust and increases engagement.

All you need to do is to click the **{...}** **Insert variable** button next to the title or the body of your message and pick an attribute:

<figure><img src="/files/FEg5l8sCDC4ctdtpfrbo" alt=""><figcaption></figcaption></figure>

### Multi-language

You can also create multiple versions of a message, one for each language, by clicking [**Multi-language**](https://doc.batch.com/getting-started/features/customer-engagement-platform/message/overview#:~:text=SMS-,Multi%2DLanguage%20Selection,-Composition)**,** ensuring that profiles receive the message in their own language:

<figure><img src="/files/aPvw0oP5PuiTDZOL1kD1" alt=""><figcaption></figcaption></figure>

When adding a new language version, the default version will be duplicated, keeping your format options, images, and other elements intact, so you only need to edit the text that requires translation.

{% hint style="info" %}
A default version will be sent to profiles that don’t have a message already specified in their language.
{% endhint %}

## Testing your SMS <a href="#h_3cca27ce66" id="h_3cca27ce66"></a>

1. #### Directly in your notification center

Now that your SMS message is ready to be sent, you can test by sending you a test!

Use the **Send test** button on the SMS message window and add your <mark style="color:purple;">phone number</mark>:

<figure><img src="/files/45F7XxumKE4SVRpx72VH" alt=""><figcaption></figcaption></figure>

The SMS is immediately sent! ✨

2. #### Test your user data directly on Batch

It is possible to preview the dynamic data of your email using the "Preview As" feature. To do so, use your custom user ID (or one of your users), then enter it in the dedicated field:

<figure><img src="/files/pkn5ysTxYO2NJP9fHdTx" alt=""><figcaption></figcaption></figure>

🚀 Your SMS is now ready to be sent! Click on the 'Save and run' button at the bottom of the form to activate it or save it as a draft and come back later.


# In-App v1 (old)

{% hint style="info" %}
This guide is specific to Batch's Mobile Engagement Platform(More on the [difference between Batch's CEP and MEP](/getting-started/other/faq/what-are-the-differences-between-batch-customer-engagement-platform-and-mobile-engagement-platform)).
{% endhint %}

An **In-App message** appears right inside your app while your user is actively using it.\
It is a great way to communicate in the moment and in context, perfect for guiding, informing, or prompting action.

This guide will walk you through crafting a clear, impactful In-App message. Let’s get started! 🚀✨

## Prerequisite: Create a theme

Before launching your first In-App automation, you will need to create a **theme**.

To do so: go to **Settings → Themes → Create your first theme**:

<figure><img src="/files/2EQp40EIrbPtjpQJgImJ" alt=""><figcaption></figcaption></figure>

You can choose between five formats:

* Fullscreen
* Banner
* Modal
* Image
* WebView

### Customize your theme&#x20;

<figure><img src="/files/uYtNMSKQcee2L11dCLVb" alt=""><figcaption></figcaption></figure>

**Themes are fully customizable**, including:

* Background and text colors
* Header, title, and image
* Number of CTAs
* Overall layout and appearance

Once your theme is ready, you will be able to select it from the dropdown menu during the **"Message"** step when setting up your campaign.\
(See: *In-App - Part 4 - Editing Your In-App Campaign Message*)

## Create your In-App automation

Now that your theme is ready, go to Automations > iOS or Android > Create a New Campaign:

<figure><img src="/files/ZGZ8MWMy4PgeKkxK1oFD" alt=""><figcaption></figcaption></figure>

### Name your In-app automation and set up targeting

Just like with a push campaign or automation, you can define the **audience targeting conditions**.

<figure><img src="/files/P9d0CbbzYXH6k4p0lRgC" alt=""><figcaption></figcaption></figure>

{% hint style="info" %}
If you’re using dynamic targeting (e.g., opt-in status), enable **"Re-evaluation just before display"** to ensure the SDK recalculates the audience in real time before the message is shown.
{% endhint %}

### Set the trigger action

This is the user action that will cause the message to be displayed:

<figure><img src="/files/0yGrINSG28t1IRnc3z4t" alt=""><figcaption></figcaption></figure>

* Choose from any **tagged and tracked event** collected by the Batch SDK
* You can also set:
  * **Priority**: if multiple campaigns use the same trigger, set which one takes precedence.
  * **Capping (optional)**: limit how many times a user can see this message.
  * **Grace Period (optional)**: define a minimum delay between two displays of the same campaign.
  * **Start/End Date**: schedule your campaign’s availability window with start and end times.

### Customize the message and CTA behavior

Now it’s time to craft your message 🌟

**Select a theme** for your In-App message using the dropdown menu:

<figure><img src="/files/fRXbQMcRMsKvdg1BT731" alt=""><figcaption></figcaption></figure>

Fill in the **content** for your campaign: title, body text, visuals, etc.

<figure><img src="/files/TlvpmUO6HU1CqQui1M8E" alt=""><figcaption></figcaption></figure>

Define the behavior of your **Call-to-Action (CTA)**:

* Choose what the CTA should do:
  * Redirect to a URL or screen
  * Trigger a smart re-opt-in
  * Copy something to the clipboard
  * Open the rating popup
  * …and more

You can also attach **secondary actions** to the CTA, such as:

* Tracking an event
* Adding or removing a tag

{% hint style="info" %}
These secondary actions can later be used in **audience segmentation** or as **future triggers**.
{% endhint %}

And that is it! With these steps, you are ready to launch personalized, real-time In-app automations that engage users exactly where they are: inside your app ✨


# In-App

An **In-App message** appears inside your app while your user is actively using it.\
It’s a great way to communicate *in the moment* and *in context,* perfect for guiding, informing, or prompting users to take action. It’s also an interesting channel because it lets you reach **opted-out users** (those who didn't enabled push notifications).

This guide will walk you through how to craft a clear, impactful In-App message step by step.\
Let’s get started 🚀✨

## Create an In-App template

The key element will be your message, so it’s essential to create a theme that aligns with the message you want to convey and your branding 🧩\
The **Batch In-App Composer** lets you design beautiful, fully customizable messages, no coding required, thanks to an intuitive drag-and-drop editor.

### Themes available

Different default templates are available to get you started:

<figure><img src="/files/F25XUccz4f9jedQY9qvG" alt=""><figcaption></figcaption></figure>

* **Fullscreen :** a fullscreen format can contain text, an image, up to two buttons, and a close button.\
  It’s ideal for highlighting new products, promoting offers, encouraging app updates, or driving sharing.
* **Modal:** the modal format can include an image, text fields, buttons, and an auto-dismiss option.\
  Usually displayed at the center of the screen (in landscape orientation), it’s perfect for capturing the user’s full attention.
* **Image:** this format displays a standalone image, optionally within a modal, either fullscreen or with margins.\
  You can customize the duration, background color, and auto-close behavior, while keeping your app visible in the background.
* **Banner:** displayed at the top or bottom of the screen, a banner can include text, two buttons, a close button, and an optional auto-dismiss timer (10 seconds by default).\
  It’s perfect to encourage feature usage, promoting notifications, or delivering quick updates.
* **WebView:** the WebView format gives you complete creative freedom with custom HTML. You can build rich, interactive content (like carousels or dynamic layouts). Note: this format can only be displayed in *fullscreen* mode.

You can also [**Start from scratch**](https://app.gitbook.com/o/yV0lmz43uUZMgWmM3297/s/UIK868wiiK9XOVyETGZS/~/changes/508/channels/in-app-1#compose-the-message-and-cta-behavior) if you feel inspired 👨‍🎨

### Where to create your In-App template

You can create your In-App templates from two different places:

* **Settings → In-App Templates**
* Or directly **from the Message creation screen** while setting up your automation.

<figure><img src="/files/kHQMmdKyqzx2NV6Ec23V" alt=""><figcaption></figcaption></figure>

## Create your In-App automation

Whether you’ve already created your theme in **Settings → In-App Templates** or plan to do it later, you can now move on to building your first automation. Go to **Automations → New Automation → In-App**.

<figure><img src="/files/89rAPIZaYsMmSEB3Qqt8" alt=""><figcaption></figcaption></figure>

{% hint style="info" %}
Choose a clear and explicit name for your automation, and add labels if needed to keep your workspace organized.
{% endhint %}

### Set the trigger action

In-App messages are **event-based**, meaning they are displayed when a specific event occurs within your app.

Start by selecting the **event(s)** that will make your message appear to users. You can trigger an In-App on:

* **New session** (a native event triggered when the app is opened)
* **Any tagged or tracked event** collected by the **Batch SDK**

<figure><img src="/files/rjJGhb8OPU3KcS8PcLH9" alt=""><figcaption></figcaption></figure>

{% hint style="info" %}
If you add multiple events, they are combined using the **OR** condition, meaning the message will display as soon as **any** of those events occurs. You can add up to 10 trigger events.
{% endhint %}

#### Configure the Display Delay

You can define a delay between the trigger event and the actual display of the In-App message:

<figure><img src="/files/vH0E0SK137D13wlhGadg" alt=""><figcaption></figcaption></figure>

* **Immediately**
* **Between 3 and 30 seconds**
* **Custom delay (up to 60 seconds)**

{% hint style="info" %}
Avoid setting a delay that’s too long : the user might leave the app before the message appears.
{% endhint %}

#### Control the marketing pressure

You can fine-tune how often and when your In-App is displayed with these optional parameters:

* **Capping:** Limit how many times a user can see the message.
* **Grace Period:** Define a minimum delay between two displays of the same communication.

<figure><img src="/files/TolYE4tFAGpNfZsNvybr" alt=""><figcaption></figcaption></figure>

{% hint style="info" %}
These controls help you avoid message fatigue and keep the user experience smooth.
{% endhint %}

### Add targeting

Just like with a campaign or automation, you can define [**targeting conditions**](https://doc.batch.com/getting-started/features/customer-engagement-platform/orchestration/targeting) to reach the right audience or segments. Combine attributes, events, or custom user data to make your In-App relevant and contextual!

### Choose the timing

You can schedule your campaign’s **availability window**, including start and end dates, hours, and timezone options.

<figure><img src="/files/TFPCqfdX7qP5yU3YnMPf" alt=""><figcaption></figcaption></figure>

You can base your schedule on either:

* **Universal Time (UTC)**, or
* **The user’s local timezone** (based on profile data).

### Add quiets times (optional)

Quiet Times give you more control over when your In-App messages can appear.\
This feature allows you to define **specific time slots or days** during which messages will *not* be displayed to users.

<figure><img src="/files/bOieIXyUshucc8nxwxmK" alt=""><figcaption></figcaption></figure>

You can configure two levels:

* **Quiet Hours:** Define daily time slots during which no messages are shown.
* **Weekly Quiet Days:** Define one or several days when no messages are shown.

{% hint style="success" %}
⏰ **Example 1 :** **Quiet Hours**

Use case: Avoid showing messages late at night.\
Example: For a shopping app, limit In-App offers to active hours.\
Setup:

* Enable Quiet Hours.
* Set from 10:00 PM to 8:00 AM.

Messages will pause overnight and resume in the morning.

**📅 Example 2 : Quiet Days**

Use case: Skip engagement messages on low-activity days.\
Example: For a B2B app, disable In-Apps on weekends.\
Setup:

* Enable Quiet Hours (e.g., 10:00 PM – 8:00 AM).
* Activate Weekly Quiet Days for Saturday and Sunday.

Your In-Apps will only run Monday to Friday, during active hours.
{% endhint %}

### Set up your messages

Before composing your In-App message, the first step is to decide **which platform(s)** you want to send display your In-app message to:

<figure><img src="/files/HAZtHxK056q23hePS4tR" alt=""><figcaption></figcaption></figure>

* **iOS only**
* **Android only**
* **Both**

{% hint style="info" %}
In-Apps are only available on mobile apps.
{% endhint %}

#### Multi-language <a href="#multi-language" id="multi-language"></a>

You can create multiple versions your In-App message, one for each language, by clicking [**Multi-language**](https://doc.batch.com/getting-started/features/customer-engagement-platform/message/overview#:~:text=SMS-,Multi%2DLanguage%20Selection,-Composition)**,** ensuring that profiles receive the message in their own language:

<figure><img src="/files/LqdGBF1jmvPnXdxgcFIe" alt=""><figcaption></figcaption></figure>

When adding a new language version, the default version will be duplicated, keeping your format options, images, and other elements intact, so you only need to edit the text that requires translation.

{% hint style="info" %}
A default version will be sent to profiles that don’t have a message already specified in their language.
{% endhint %}

#### A/B Testing <a href="#a-b-testing" id="a-b-testing"></a>

You can [**A/B test**](https://doc.batch.com/getting-started/features/customer-engagement-platform/message/overview#:~:text=deleted%20language%20versions.-,A/B%20Test,-The%20A/B) your In-App messages! Here's how:

* Enable the feature by toggling the switch at the top right of the Message section.
* **Create variants**: You can create up to **four variants**, either by duplicating an existing one or starting from scratch:

<figure><img src="/files/vx6Suj5ZB4UHnkjWeCqC" alt=""><figcaption></figcaption></figure>

{% hint style="info" %}
Variants work with the multi-language functionality, so you can easily combine both!
{% endhint %}

### Compose the message and CTA behavior

Now it’s time to craft your In-App message 🌟

You can either use **pre-created templates** or build a message **from scratch**.&#x20;

The Composer uses a **drag-and-drop system** to add and arrange blocks: Text, Image, Button, Divider, Spacer and Colums.

For this tutorial, we’ll start **from scratch** using the **In-App Composer** 👨‍🎨

<figure><img src="/files/lmSuu5TpgUlACfUGZ3pb" alt=""><figcaption></figcaption></figure>

{% hint style="info" %}
When creating an In-App message from scratch, you can choose:

* **Format:** Modal or Fullscreen
* **Position:** Top, Center, or Bottom of the screen

Depending on your choices, the same format can serve different purposes. For example, a **bottom modal** can work like a **banner**, while a **center modal** feels more like a **classic modal**. Let your creativity shine!
{% endhint %}

**Global Settings**

Before adding specific blocks, you can configure **global settings** for your In-App:

<figure><img src="/files/tiJRYZqKUAYFnbnA8B4X" alt=""><figcaption></figcaption></figure>

* **Type & Position:** choose where the In-App appears on the screen.
* **Margins & Radius:** adjust spacing and corner roundness.
* **Background & Border:** set background color and optional border.
* **Close Options:** enable a close button, auto-dismiss after X seconds, both, or none.

You can also configure a **dark mode version** for each In-App template to match user device settings:

<figure><img src="/files/qrhdQva5mz07HIQ0WkiW" alt=""><figcaption></figcaption></figure>

With dark mode enabled, you can specify **separate colors for light and dark themes** and preview each mode directly in the In-App Composer.

**Add Text**

The Text block lets you include customizable text in your message.&#x20;

<figure><img src="/files/VAU8bGdejfVF0VIsD46J" alt=""><figcaption></figcaption></figure>

You can personalize content dynamically based on user attributes. Customizations include: margin, alignment, color, font size, and decorations (bold, italic, underline, strikethrough).

{% hint style="info" %}
Text is essential to communicate your core message clearly, highlight key benefits, or create urgency (e.g., promotions, product updates). It ensures users understand what action they should take.
{% endhint %}

**Add call to action Button**

Buttons allow users to take specific actions in your message.&#x20;

<figure><img src="/files/o9NRiIMnWy0chrKbPTwi" alt=""><figcaption></figcaption></figure>

Each button can trigger [built-in actions](https://doc.batch.com/getting-started/features/customer-engagement-platform/message/in-app#button:~:text=action%20is%20selected.-,Available%20built%2Din%20actions,-Configurable%20built%2Din) like:

* Dismiss
* Deeplink
* Copy to Clipboard
* Smart Push Re-optin
* App Rating
* Redirect to Settings
* or use a Custom action via custom JSON

You can customize margin, padding, width, alignment, color, radius, and border.

{% hint style="info" %}
Buttons drive conversions by turning interest into action. A well-placed CTA encourages users to explore features, claim offers, or engage with your app immediately.
{% endhint %}

**Illustrate your message with Images**

The Image block displays pictures within your message.&#x20;

<figure><img src="/files/tStdvga0iCClNxsznLXt" alt=""><figcaption></figcaption></figure>

Images can trigger actions like buttons and support PNG/JPG formats up to 4MB. Height options: auto, fill space, or custom pixels. Sizing modes:

* Fill: scales to fill the block (may crop edges).
* Fit: ensures the full image is visible (may leave empty space).\
  Pro tip: Place critical info in Text/Button blocks, and test on real devices.

{% hint style="info" %}
Images capture attention quickly and convey messages visually. They are perfect for showcasing products, branding, or promotions in a memorable way.
{% endhint %}

**Organize the message with Dividers**

Divider blocks add a horizontal line to separate content.&#x20;

<figure><img src="/files/rl3ORUTtTSgTRxgC73sf" alt=""><figcaption></figcaption></figure>

You can customize margin, width, alignment, thickness, and color

{% hint style="info" %}
Dividers help organize content visually, making your message easier to scan and increasing the likelihood users notice key CTAs or info.
{% endhint %}

**Set up Spacers**

[Spacer blocks](https://doc.batch.com/getting-started/features/customer-engagement-platform/message/in-app#spacer:~:text=Color-,Spacer,-Note%3A%20The) insert vertical space between content elements. Height can be fixed in pixels or set to Fill space (fullscreen only) to share remaining vertical space.

{% hint style="info" %}
Proper spacing improves readability and design clarity, ensuring users focus on the most important elements without feeling overwhelmed.
{% endhint %}

**Design with Columns**

Columns allow horizontal layout by creating up to 5 columns.&#x20;

<figure><img src="/files/LKo0V4i2U28TQyKcDQhx" alt=""><figcaption></figcaption></figure>

You can place Text, Button, or Image blocks inside columns. Customizations: number of columns, sizing (auto/custom percentages), spacing, padding, and vertical content alignment.

{% hint style="info" %}
Columns enable structured, eye-catching layouts that can highlight multiple offers, features, or images side by side, great for comparison or promoting multiple actions at once.
{% endhint %}

## Testing your In-App <a href="#h_3cca27ce66-1" id="h_3cca27ce66-1"></a>

1. **Directly in your notification center**

Now that your In-App message is ready to be sent, you can test how it looks on your device!

Use the **Send test** button on the push message window and add your [Custom ID](https://doc.batch.com/getting-started/features/customer-engagement-platform/profiles/data-lifecycle#installation-id:~:text=different%20installation%20IDs.-,Custom%20ID,-The%20custom%20user) or [Installation ID](https://doc.batch.com/getting-started/features/customer-engagement-platform/profiles/data-lifecycle#installation-id:~:text=generated%20by%20Batch.-,Installation%20ID,-The%20installation%20ID) and click on Send test:

<figure><img src="/files/afHIYw7jgeOOoL241KpI" alt=""><figcaption></figcaption></figure>

{% hint style="info" %}
Note that when using the “Send test option”, the In-App message will render according to the test device's dark mode setting, not the mode selected in the composer preview.
{% endhint %}

A push notification is sent immediately, and clicking on it displays the test in-app once the application is opened ✨

💡 We recommend testing on various device types (iOS, Android, OS versions and screen sizes) to ensure your message displays correctly across all of them.

2. **Test your user data directly on Batch**

It is possible to preview the dynamic data of your In-App using the "Preview As" feature. To do so, use your [Custom user ID](https://doc.batch.com/getting-started/features/customer-engagement-platform/profiles/data-lifecycle#:~:text=different%20installation%20IDs.-,Custom%20ID,-The%20custom%20user) (or one of your users), then enter it in the dedicated field:

<figure><img src="/files/8j2HTx1nSvDbgN0h8xim" alt=""><figcaption></figcaption></figure>

🚀 And that is it! With these steps, you are ready to launch personalized, real-time In-app automations that engage users exactly where they are: inside your app ✨

Click on the 'Save and run' button at the bottom of the form to activate it or save it as a draft and come back later.

***

## Advanced Settings

#### **Priority**

Set the priority of your In-App: **Standard, Important, or Critical**:

<figure><img src="/files/majNWRRqnNSXe9mAq8q2" alt=""><figcaption></figcaption></figure>

When multiple automations share the same trigger (and label), the one with the highest priority will be shown.

**Examples:**

* **Standard:** onboarding, app review.
* **Important:** temporary campaigns (subscriptions, re-opt-in).
* **Critical:** urgent alerts (downtime, app updates).

#### **Tracking ID**

Optional field for apps with an analytics setup. Adds an extra **tracking dimension** for orchestration-level analysis:&#x20;

<figure><img src="/files/NnprCE9c8qBztlRSJDB0" alt=""><figcaption></figcaption></figure>

#### **Payload**

Optional JSON data your app can use when receiving the message.

<figure><img src="/files/ancTzdL7f5YbnwSHyfQZ" alt=""><figcaption></figcaption></figure>

* Must be an object.
* Avoid `com.batch` key.

**Use:** Send extra info to your In-App messages for custom behavior or analytics via SDK.

## **Managing an In-App Automation** <a href="#managing-an-in-app-automation" id="managing-an-in-app-automation"></a>

You can [modify](https://doc.batch.com/getting-started/features/customer-engagement-platform/orchestration/in-app-automations#managing-an-in-app-automation:~:text=In%2DApp%20Automation-,Modifying%20an%20In%2DApp%20Automation,-Batch%20doesn%27t%20send) or [stop](https://doc.batch.com/getting-started/features/customer-engagement-platform/orchestration/in-app-automations#managing-an-in-app-automation:~:text=the%20targeting.-,Stopping%20an%20In%2DApp%20Automation,-If%20you%20need) an in-app automation 👈


# Customer Engagement Platform


# Batch AI


# Batch AI Assist

{% hint style="info" %}
Batch AI Assist features are subject to token consumption limitations. Reach out to your CSM or Account Manager to learn more.
{% endhint %}

Batch CEP comes with Batch AI Assist, a rich set of AI Assistants for the utmost CRM manager's productivity. Among them:

### AI Home

A 100% AI-powered homepage that analyzes the last 7 days of sends (rolling UTC window, aggregated data only — no personal data) and turns them into scannable, actionable insights. The AI Home is built from six blocks:

* **Morning Brew** — a narrative overview of your project's global health and weekly trend, rendered as metric cards (channel, value, trend, one-line insight). It reports the big picture only; it does not rank or alert on individual orchestrations.
* **Campaigns** — a *Best of* and a *Flops* ranking of the week's campaigns, based on absolute performance (minimum 100 messages sent to qualify).
* **Automations** — one *Trending* automation card plus an *Alerts* table, prioritized most-important-first (p0/p1/p2: engagement drop, deliverability issue, or a RUNNING automation that has stopped sending).
* **Opportunities** — concrete, recommended next steps to act on.
* **Ask Home** — natural-language Q\&A over your project's data.
* **Orchestration preview** — clicking any orchestration or alert opens its full analytics in a side sheet, on top of the Home (no navigation, no URL change).

### AI Targeting Insights

An AI expert embedded in the Query Builder that analyzes and validates your targeting logic before launch. Returns: a plain-language summary of who is being targeted, logical warnings (zero audience, mutually exclusive conditions, over-restriction), and structural suggestions to simplify or clean up your query. [Learn more](https://doc.batch.com/release-notes/release-notes/march-26-2026-ia-targeting-insights)

### AI Translation

One-click AI translation of your content into one or more target languages, directly within the multi-language module. [Learn more](https://doc.batch.com/release-notes/release-notes/january-5-2026-automated-ai-translation-push-and-sms) about the SMS and Push translation. [Learn more](https://doc.batch.com/release-notes/release-notes/june-18-2026-automated-ai-translation-email) about the Email translation.

### AI A/B Test Variant Generator - Push & Email

AI-powered generation of A/B test variants for Push notifications and email subject lines. The AI uses your existing variants as context to suggest the next one (B, C, D). [Learn more](https://doc.batch.com/release-notes/release-notes/october-13-2025-generate-a-b-test-variants-with-ai)

### AI Email Subject Generator

Generates an email subject line from your message body using AI, directly inside the Email Composer. [Learn more](https://doc.batch.com/release-notes/release-notes/january-12-2026-ai-email-subject-generator)

### Intelligent Warm-up

An intelligent warm-up mode in Recurring Automations for gradually ramping up email sending volumes. Configurable (initial volume, increase percentage, engagement criterion) with manual intervention allowed at any point during the process. [Learn more](https://doc.batch.com/release-notes/release-notes/november-24-2025-intelligent-warm-up)

### AI Smart Naming — Automation Builder

Automatically generates descriptive labels for Message and Yes/No Split steps in the Automation Builder, based on each step's actual content and configuration. Triggers automatically when closing the side-sheet, or manually via the sparkle icon. [Learn more](https://doc.batch.com/release-notes/release-notes/february-11-2026-ai-smart-naming-for-automation-buider)

### &#x20;AI Profile Data Alerting

Get proactive alerts on potential issues in your profile data (e.g. inactive attributes, duplicates, or inconsistent sources). Quickly review, ignore, or resolve recommendations to keep your data clean and reliable. [Learn more](https://doc.batch.com/release-notes/release-notes/march-31-2026-ai-profile-data-alerting)

### AI Profile Data Renaming

Automatically get smart naming suggestions for new attributes to improve clarity and consistency. Review and confirm names before making them available in your orchestrations. [Learn more](https://doc.batch.com/release-notes/release-notes/march-31-2026-ai-profile-data-renaming)


# Batch AI Predict

{% hint style="info" %}
Batch AI Predict is a priced offering. Reach out to your CSM or Account Manager to learn more.
{% endhint %}

Batch AI Predict calculates predictive scores for each of your profiles using machine learning models trained on your data: purchase behavior, browsing events, campaign reactions, subscription status, and more.

Scores are refreshed on a schedule you define and are available across the Batch interface for targeting, personalization, orchestration, and analytics.

## How it works

The Scoring Engine processes your customer and event data to generate scores at profile level. Each score is stored as a profile attribute and can be used anywhere you can apply a targeting condition or a personalization variable.

For product affinity scores (cross-sell, upsell, replenishment, product recommendation), you can define the categories or products to include in the model.

## Predictive Scores

Batch AI Predict uses predictive AI to create personalized scores for each of your customers. Scores are refreshed on your preferred schedule and are available throughout the Batch interface for targeting, personalization, orchestration, and analytics.

Each score is stored as a profile attribute and can be used anywhere you can apply a targeting condition or a personalization variable.

### Available scores

{% hint style="info" %}
**Parameterized scores:** Some scores can be computed for any group of products you define: a category, a sub-category, a brand, or a specific selection of SKUs. For example, a product propensity score can be calculated independently for "skincare", "haircare", and "fragrance", generating a separate attribute on each profile for each scope.&#x20;
{% endhint %}

#### Products Recommendation (**Parameterized score)**

Identify, for each customer, the top N products or product categories to promote in order to maximize repeat purchase rate and immediate conversion.

**Output format:** List of N product IDs

#### Cross-sell Propensity (**Parameterized score)**

Identify, for each customer who has never purchased in a given product category, their propensity to make a first purchase in that category (i.e., the probability that the customer will buy from this category for the first time in the coming months).

**Output format:** Decimal between 0 and 1

#### Product Propensity (**Parameterized score)**

Identify each customer's propensity for a given product or product category (i.e., the probability that the customer will purchase this product or category in the coming months).

**Output format:** Decimal between 0 and 1

#### Churn Decisive Moment

Identify customers at risk of becoming inactive in the coming months and the optimal past date after which they are highly likely to become inactive.

**Output format:** Date

#### Second Purchase Date

Identify the date after which a one-time buyer is most likely to return and make a second purchase.

**Output format:** Date

#### Replenishment Date

Identify, for each customer, the date after which they are most likely to have finished a "consumable" product.

**Output format:** List of SKUs × date

#### Promotion Sensitivity

Identify each customer's sensitivity to promotions (i.e., the ratio between the probability that the customer makes a purchase when not exposed to a promotion vs. the probability that they make a purchase overall).

**Output format:** Decimal between 0 and 1

#### Discount Recommendation

Identify, for each customer, the optimal promotion level in order to maximize both conversion rate and the associated gross margin.

**Output format:** Promotion ID

#### Subscription Churn

Identify, for each customer, their risk of unsubscribing before the next subscription renewal (i.e., the probability that the customer churns).

**Output format:** Decimal between 0 and 1

#### Top Client at Risk

Identify in advance the top historical customers who are at risk of reducing their spending in the coming months.

**Output format:** Boolean

#### Future Lifetime Value

Identify, for each customer, the total future amount they are likely to spend in the coming months or years.

**Output format:** Amount in €

#### High Potential Prospect

Identify, for each prospect, their likelihood of being converted soon (i.e., the probability that the prospect will make their first purchase soon).

**Output format:** Decimal between 0 and 1

#### High Potentiel Customer

Identify, for each customer, their likelihood of becoming a high-value customer soon (i.e., the probability that the customer will generate significant revenue or place high-value orders in the near future).

**Output format:** Decimal between 0 and 1

#### Best Send Time&#x20;

{% hint style="info" %}
Best Send Time is a beta capability for now. Reach out to your CSM or Account Manager to learn more.
{% endhint %}

Identify, for each recipient, what is the best time to send a message to him or her within a given time window.&#x20;

**Output format**: Score only usable in Automation Builder, through a Best send time step.


# Batch AI Decide

{% hint style="info" %}
Batch AI Decide is an Alpha feature. It requires an expert evaluation of data available and your targeted engagement scenario before implementation. It is also a priced offering. Reach out to your CSM or Account Manager to learn more.
{% endhint %}

Batch AI Decide is the most advanced level of Batch AI, currently in Alpha phase. Rather than assisting or predicting, it builds, orchestrates, and optimizes autonomously in real time, based on an explicit business objective. There are no predefined scenarios, no fixed send times. The system learns from every interaction and continuously improves its decisions.

### AI Decisioning

You define the objective — incremental revenue, retention, conversion, margin — and Batch AI Decisioning determines in real time the best action for each individual: which content, which channel, which timing, which frequency.

The system learns continuously from results and improves with every campaign, every send, every interaction. No rules to write. No trade-off between personalization and scale.

You can also define constraints — pressure caps, editorial guardrails, channel exclusions — to ensure the engine operates within your policy boundaries.

### Autonomous Agents

Autonomous Agents run 24/7, make orchestration decisions without waiting for manual validation, and report transparently on every action taken.

When they detect a signal — a drop in average order value on a high-potential segment, a churn risk spike, an underperforming journey — they act: adjust journey parameters, personalize offers, modify send timing, launch or pause campaigns. Every action is logged and surfaced in the reporting interface.

You define the business objectives, the pressure constraints, and the editorial guardrails. The agent operates autonomously within these boundaries.


# Analytics


# Overview

Batch allows you to track the performance of your orchestrations across different channels with two comprehensive views:

* **Performance Analytics:** An analytics tab offering a macro-level view to monitor the evolution of key metrics over time.
* **Orchestration Analytics:** A detailed, orchestration-specific view providing additional insights, accessible within each orchestration.

Analytics data is updated in real time and assigned to the date the message was originally sent. For instance, if a message is sent on January 1st and recipients interact with it (e.g., open or click) on January 2nd or 3rd, all such interactions are recorded under January 1st.

For Trigger and Recurring Automations, Profiles can receive messages repeatedly if they re-enter a Trigger Automation or are targeted again by a Recurring Automation. Analytics will reflect these multiple message sendings by displaying cumulative metrics, including the total number of sent messages, opens, clicks, and other engagement data.

{% hint style="warning" %}
Deleting an orchestration, a step in a trigger automation, or removing a language version of a campaign does not erase related analytics. Metrics for messages sent in these cases remain available.
{% endhint %}

{% hint style="info" %}
Note that you can access raw analytics data (e.g., when a profile opened an email) via the Export Profile Events API.
{% endhint %}


# Key metrics

## Targeted Metrics

Messages planned for a given orchestration can be categorized into several states:

* **Skipped (email only):** The message was not sent because the email address was flagged due to hard bounces or excessive soft bounces. In the Profile Export Events API, this status is also included in the `email_bounce` event with the bounce code `recipient_in_suppression_list`.
* **Sending:** The message is in transit. Delivery confirmation may take time, especially if you’ve chosen a low send rate .
* **Sent:** The message has been successfully sent by Batch.

## Delivery metrics

### Email

* **Sent:** The message was dispatched by Batch.
* **Delivered**: The email was successfully accepted by the recipient's email server.
* **Opened:** The email was opened, this rate can be seen with and without machine opens (for instance due to Mail Privacy Protection). The open rate is calculated by dividing the number of email opens by the number of emails delivered. When consent-based open tracking is enabled, it is only based on emails delivered that included an open tracking pixel.
* **Clicked:** At least one of the links in the email has been clicked. Batch unsubscribe links are not taken into account. The click rate is calculated by dividing the number of emails clicked at least once by the number of emails delivered.
* **Bounced:** Delivery failed. The bounce rate is calculated by dividing the number of email bounced by the number of emails sent. Detailed explanation about Bounces available here. For a detailed explanation, refer to [Understanding the Email Subscribers Lifecycle](/guides-and-best-practices/email-deliverability/list-hygiene-and-recipients-management/understanding-the-email-subscribers-lifecycle#h_0ee1615dc3).
* **Unsubscribed:** The recipient opted out via the **List-Unsubscribe** header or Batch unsubscribe link. The unsubscribe rate is calculated by dividing the number of email that led to an unsubscription by the number of emails delivered.&#x20;

### Push

* **Sent:** The message was accepted by the push provider (Apple or Firebase(Google)) for a specific device installation.
* **Sent opt-in:** The message was accepted by the push provider (Apple or Firebase(Google)) for a specific **opt-in** device installation. We recommend tracking this metric as pushes sent to opt-out devices are unlikely to be seen, making *sent opt-in* a more realistic indicator of deliverability.
* **Opened:** The recipient opened the notification or was influenced to open the app/site. This metric includes both d*irect opens* (user taps/clicks the push) and i*nfluenced opens* (user opens the app/site within 3 hours after receiving the push).\
  The open rate is calculated by dividing the number of unique opens (direct & influenced) by the number of *sent opt-in*.\
  *Influenced opens are only available for messages sent after August 1st 2025.*
* **Opened directly:** A complementary metric showing only direct opens (taps on the push notification).&#x20;
* **Bounced:** Delivery failed, often because the app was uninstalled or other errors occurred. The bounce rate is calculated by dividing the number of bounces by the total number of messages injected into the push provider (where injected equals sent plus bounce).

Push analytics can be filtered by platform type: **Web Push**, **Mobile Push**, or specific platforms like **Android** or **iOS**.

{% hint style="info" %}
A profile with multiple devices (e.g., phone, tablet, computer) may receive multiple notifications, resulting in more **sent** messages than targeted profiles. Each interaction (open, unsubscribe) is recorded independently. For example, if a profile receives and opens the push notification on both their phone and computer, the dashboard will reflect 2 sent messages and 2 unique opens.
{% endhint %}

In case your push notification redirects to a Mobile Landing (see [In-App & Mobile Landing](/getting-started/features/customer-engagement-platform/message/in-app)), Mobile Landing metrics can also be available:&#x20;

* **Clicked**: The number of clicks on any button within the In-App message, **excluding** clicks on buttons configured with a “Dismiss”. This metric does **not** include other dismissal methods like clicking the top-right 'X' button or swiping.
* **Click rate**: total of clicked messages divided by the total of displayed Mobile Landings. For a push orchestration with Mobile Landing, the number of displayed Mobile Landings should be equivalent to “Push Opened” ones apart from rare exceptions (user opens its push in airplane mode, etc.)<br>

{% hint style="warning" %}
The metrics above are the ones of **Push v2**. Push v1 that is siloed by Platform (iOS, Android, Web) offers comparable push specific metrics and other ones such as uninstalls or reengaged, that are fully described in the interface.
{% endhint %}

### In-App

* **Delivered**: The in-app was successfully displayed to the recipient who may then either click on a CTA or dismiss it after reading.
* **Clicked:** The number of clicks on any button within the In-App message, **excluding** clicks on buttons configured with a “Dismiss”. This metric does **not** include other dismissal methods like clicking the top-right 'X' button or swiping.
* **Click rate**: Total of clicked messages divided by the total of delivered In-App.&#x20;

{% hint style="info" %}
If an in-app is displayed several times to the same profile, each click is still counted distinctly.
{% endhint %}

{% hint style="info" %}
Delivered messages may exceed Clicked messages. This is expected.

The SDK tracks CTA clicks, close-button taps, and swipe dismissals. However, it cannot track outside taps or app closures while the in-app is visible.

In those cases, the in-app disappears before an action is tracked. The message remains **Delivered** without generating a **Click**.
{% endhint %}

### SMS

* **Sent:** The message was dispatched by Batch.
* **Delivered:** The message successfully reached the recipient's phone number.
* **Clicked:** SMS [SMS](/getting-started/features/customer-engagement-platform/message/sms#url-shortening-and-tracking) must be enabled to track clicks. At least one of the links in the SMS has been clicked. The click rate is calculated by dividing the number of SMS messages clicked at least once by the number of SMS messages delivered.
* **Bounced:** The message could not be delivered due to issues like:

  * **Absent subscriber:** The phone is turned off or out of network coverage.
  * **Unknown subscriber:** The phone number is inactive.

  The bounce rate is calculated by dividing the number of SMS bounced by the number of SMS sent.
* **Unsubscribed:** The recipient opted out by replying with the appropriate STOP keyword.\
  The unsubscribe rate is calculated by dividing the number of SMS that led to an unsubscription by the number of SMS delivered.&#x20;

### Universal channel

{% hint style="info" %}
Universal Channel metrics show how the external system responded to the request sent by Batch.\
They indicate whether the webhook was delivered and accepted by the external system.

These metrics confirm that the **instruction was received**, but they do **not** reflect what happened afterward (for example, whether a message triggered by that system was actually delivered to the end-user).
{% endhint %}

* **Sent:** The request was successfully dispatched by Batch.
* **Delivered:** The external system accepted the request and returned a successful response (2xx). This confirms that the API endpoint received the call.
* **Bounced:** The request was not accepted by the external system. This occurs when the API returns an error (3xx/4xx/5xx) or does not respond. Common reasons include incorrect destination URL, incorrect credentials, invalid JSON structure, missing fields, or temporary endpoint unavailability.\
  The bounce rate is calculated by dividing the number of bounced requests by the number of requests sent.

## Business metrics

* **Conversion Rate**: Calculated as Unique Conversions / Delivered (or Sent Opt-in for Push)\*100.
  * To be noted that for profiles with multiple devices, the rate may not be completed accurate as we can’t divide Unique Conversions by Sent Opt-in per profile.
* **Unique Conversions** : The number of distinct profiles that have converted.
* **Total Conversion** : The total number of conversions among all profiles.
  * For example, if the conversion event is 'add to cart' and a single profile adds three items to their cart within the given timeframe after receiving the message, we will count 1 unique conversion and 3 total conversions."
* **Business value**: Sum of a chosen numeric attribute value within the conversion event. Based on Total Conversions.
  * For example, if the conversion event is 'add to cart' and a single profile adds three items to their cart with amounts of 30, 15 and the last event with no value, the business value will be 45 euros.
* **RPM** (Revenue Per Mille): Displays the revenue generated per 1,000 messages to provide a more readable financial metric. Calculated as (Total Revenue / Delivered (or Sent Opt-in for Push))\*1000.


# Orchestration analytics

Orchestration Analytics provides an in-depth view of how individual orchestrations perform, offering detailed insights and tailored metrics for each channel.

<figure><img src="/files/80QRuZSPR31qKx4Y4aSb" alt="orchestration analytics"><figcaption></figcaption></figure>

## Key features

### **Channel-specific metrics**

Metrics for the selected orchestration are displayed based on the chosen date range and filters, such as:

* [Email key metrics](/getting-started/features/customer-engagement-platform/analytics/key-metrics#email)
* [Push key metrics](/getting-started/features/customer-engagement-platform/analytics/key-metrics#push)
* [In-App key metrics](/getting-started/features/customer-engagement-platform/analytics/key-metrics#in-app)
* [SMS key metrics](/getting-started/features/customer-engagement-platform/analytics/key-metrics#sms)

### **Date range**

By default, analytics for **Trigger** and **Recurring Automations** show data for the past 7 days. The date range can be adjusted to match your analysis needs.

### AI-powered performance insights

An AI block is displayed at the top of the orchestration analytics page. Based on the data currently in view (channel, active filters, date range, and orchestration status) it generates a plain-language interpretation of the performance: what's working, what to watch, and what the numbers actually mean in context.

### **Trends**

Trends compare current metrics with those from the previous period to let you detect and measure variations.

### **A/B testing reports**

Campaigns and Recurring Automations with A/B tests have dedicated reports to compare the performance of each variant, helping you identifying the most effective one.

In cases where a winner is selected (either **manually** for a Recurring Automation or using the **Automatic Winner selection** feature for a campaign), the dashboard will display two tables:

* One with the variant results during the test period (we do not count opens and clicks that occur after the winning variant is selected).
* One with the results of the winning variant after its selection.

### **Bounce reports (email & push)**

Tracks bounce trends over time and provides a detailed distribution of bounce reasons. \
For **email** bounces by mailbox provider are also displayed. See additional detais in [Understanding the Email Subscribers Lifecycle](/guides-and-best-practices/email-deliverability/list-hygiene-and-recipients-management/understanding-the-email-subscribers-lifecycle#h_0ee1615dc3).

For **push** it helps distinguishing between errors (technical delivery failures) and uninstalls (devices that can no longer receive push notifications).

### **Detailed breakdowns**

Analyze specific subsets of the orchestration, such as:

* **Languages:** For multi-language orchestrations.
* **Steps:** For Trigger Automations with multiple steps.

### **Exportable metrics**

From the orchestration listing page, you can export detailed performance data split by orchestration, step, and language. The default time range includes messages from the past 7 days but you can extend it up to the past 6 months. Reactions (open, click, etc.) within 5 days after sending are included.

### **Trigger Automation specificities**

Trigger Automation dedicated analytics are described in [Omnichannel Trigger Automations](/getting-started/features/customer-engagement-platform/orchestration/trigger-automations#analysing-automation-with-analytics).

## Email dedicated insights

Email orchestrations include additional analytics tools to refine performance analysis:

### **Mailbox provider report**

Breaks down key metrics by recipient mailbox provider to identify potential issues (e.g., spikes in bounces or unsubscribes) with specific providers. Non-identifiable providers are grouped under “Other.”

Standard [Email key metrics](/getting-started/features/customer-engagement-platform/analytics/key-metrics#email) are displayed, in addition to **Spam complaint.**\
An email is flagged as **spam** when a recipient reports it to their mailbox provider, typically based on their personal judgment of content, send frequency, or relevance. This information is provided by most mailbox providers, but notably not by Gmail or GSuite.

In your reports, a spam complaint rate higher than 0.1% will be highlighted in **orange** as **concerning**, while a rate exceeding 0.3% will be highlighted in **red**, indicating a **critical issue** that demands immediate corrective action.

### **Delivery report**

Displays how messages were categorized (e.g., Sent, Delivered, Bounced). Refer to the [Targeted Metrics](/getting-started/features/customer-engagement-platform/analytics/key-metrics#targeted-metrics) section for more details.

### **Clicks per URL**

Analyzes the distribution of clicks among URLs. URLs are grouped algorithmically for easier visualization. To maintain a maximum of 50 distinct URLs, the algorithm first removes URL parameters and, if necessary, trims parts of the path. Alternatively they can be grouped by tags see more in[How to handle link tracking in emails?](/guides-and-best-practices/message/email/link-and-tracking-settings/how-to-handle-link-tracking-in-emails).

## In-App & Mobile Landing dedicated insights

### In-App Actions distribution report

This report is designed to help you understand how users interact with your In-App messages, providing valuable insights into the distribution of clicks and actions.&#x20;

The report details various user interactions within the In-app, which can include:

* Dismissal actions, such as clicking on the close icon or other system-based dismissals (e.g., swiping the in-app away on iOS).
* Auto-dismiss if the option is enabled, tracking instances where the in-app disappears automatically.
* Clicks on buttons or images.

For clicks on buttons or images, the report provides more specific information, including the button's label, the action configured behind it, and details related to that action (e.g., the specific deeplink URL or the text copied to the clipboard).

When multiple languages are enabled, the button label from the default language version is displayed in the report for aggregated actions. However, if different language versions of the same button trigger distinct underlying actions, each unique action will appear as a separate row, with non-default actions showing the label from their respective language version. Furthermore, as Call-to-actions (CTAs) may differ across A/B test variants, their performance data is segmented and presented in dedicated sections or tabs for clear comparison.

If the In-app message is edited, please note that modifications are propagated to user devices only after synchronization. This means that for a given period, some users may still see the previous version of the in-app while others have already accessed the new one. This overlap can explain why analytics data for that period may include interactions with both the old and new versions.

<figure><img src="/files/HwDbHLxR4HJVSm6r7jSc" alt=""><figcaption></figcaption></figure>

## Conversion Goal dedicated Insights

You can mesure conversions and business on the Analytics tab of your Campaigns (Email, Push, SMS). Displayed metrics are:

* **Conversion Rate.**&#x20;
* **Unique Conversions.**&#x20;
* **Total Conversion** (displayed in the unique conversions tooltip).&#x20;
* **Business value.**&#x20;
* **RPM** (Revenue Per Mille).

<figure><img src="/files/jd8bE16CjtepsJam81Ct" alt=""><figcaption></figcaption></figure>

Check the [Business metrics](https://doc.batch.com/getting-started/features/customer-engagement-platform/analytics/key-metrics#business-metrics) section to learn more about these metrics.&#x20;


# Performance analytics

The **Analytics** tab provides a comprehensive view of your key metrics across all channels, allowing you to track their evolution over time. Metrics are grouped by day, week, or month for an easy-to-understand overview. For detailed explanations of each metric, refer to the Delivery metrics section.

<figure><img src="https://1464139620-files.gitbook.io/~/files/v0/b/gitbook-x-prod.appspot.com/o/spaces%2FUIK868wiiK9XOVyETGZS%2Fuploads%2Fy7QzBHuXWYsB6grtGPlk%2Fimage.png?alt=media&#x26;token=a23239c1-0ee3-443b-9804-ae4e0e7acda0" alt="performance analytics"><figcaption></figcaption></figure>

### Date Range <a href="#h_d750d948e0" id="h_d750d948e0"></a>

Select a date range of up to 1 year to analyze long-term performance trends or focus on recent activity:

### Filters <a href="#h_1a58524571" id="h_1a58524571"></a>

Narrow down the data by applying filters such as:

* Labels
  * Please note: Orchestrations labeled after completion are not included when filtering by label in the Analytics section.
* Languages

### Channels <a href="#h_35de0bec63" id="h_35de0bec63"></a>

Thanks to this tab, you gain a comprehensive view of your key metrics, easily identify trends, and explore details with advanced filters for each channel.

#### Email <a href="#h_d920137a6b" id="h_d920137a6b"></a>

See Email key metrics available in the Performance Analytics view.

You can drill down into data by specific mailbox provider or by  to evaluate performance at a more granular level:

<figure><img src="https://1464139620-files.gitbook.io/~/files/v0/b/gitbook-x-prod.appspot.com/o/spaces%2FUIK868wiiK9XOVyETGZS%2Fuploads%2FN9q9S4BZUcvF5tyRn7TC%2Fimage.png?alt=media&#x26;token=ff0bc123-dfcd-47d4-9219-d62dde90f933" alt=""><figcaption></figcaption></figure>

#### Push <a href="#h_b24267a41c" id="h_b24267a41c"></a>

See Push key metrics available in the Performance Analytics view.

Here, you can focus on specific platforms such as Android, iOS, or Web to assess platform-specific engagement:

<figure><img src="https://1464139620-files.gitbook.io/~/files/v0/b/gitbook-x-prod.appspot.com/o/spaces%2FUIK868wiiK9XOVyETGZS%2Fuploads%2FD6kq6BsCHCBwMckMyfYR%2Fimage.png?alt=media&#x26;token=13a481de-d82d-4e47-b4bb-e2cbbdcd1475" alt="push filter"><figcaption></figcaption></figure>

{% hint style="info" %}
A profile with multiple devices (e.g., phone, tablet, computer) may receive multiple notifications, resulting in more Sent messages than targeted profiles.
{% endhint %}

Each interaction (open, unsubscribe) is recorded independently. For example, if a profile receives and opens the push notification on both their phone and computer, the dashboard will reflect 2 Sent messages and 2 Unique Opens.

#### In-App

See [In-App key metrics](#in-app) available in the Performance Analytics view.

#### SMS <a href="#h_4a4882a855" id="h_4a4882a855"></a>

See SMS key metrics available in the Performance Analytics view.

#### Universal channel

See Universal channel key metrics available in the Performance Analytics view.

### Reach

Alongside delivery and engagement metrics, each channel view (Push, Email and SMS) includes a **Reach** section that tracks how your reachable base evolves over time. It shows the daily number of *new opt-ins* ("New subscriptions") and *new opt-outs* ("Unsubscriptions") for the selected channel, over the selected date range (up to 1 year). For the push channel, you can also filter by platform (iOS, Android, Web).

#### New subscriptions (opt-ins)

Daily count of profiles that newly opted in to the channel over the selected period. A profile is counted as a new opt-in on a given day when its last reachability event that day is an opt-in event.

#### Unsubscriptions (opt-outs)

Daily count of profiles that newly opted out of the channel over the selected period. A profile is counted as a new opt-out on a given day when its last reachability event that day is an opt-out event.


# Profile Analytics

This page provides an overview of the profiles in Batch. It shows how many have an email address, a mobile app/web, or a phone number attached for example.

<figure><img src="https://1464139620-files.gitbook.io/~/files/v0/b/gitbook-x-prod.appspot.com/o/spaces%2FUIK868wiiK9XOVyETGZS%2Fuploads%2Fgit-blob-3f224b32c8551c0f569964202b98fd2436f310b9%2Fprofile-analytics-page.png?alt=media" alt="profile analytics"><figcaption></figcaption></figure>

## Header

**Total of profiles:** Profiles centralize data and events gathered from various sources such as apps, websites, and APIs. They can either be logged-in or anonymous, reachable via email or not. Profiles are automatically generated when a user first engages with your app, visits your website, or if you send data using a Custom ID via API.

**Identified profiles:** Profiles that have a Custom ID, usually shared after login or sign-in.

**Anonymous profiles:** Profiles that didn't log in to their customer accounts yet. Anonymous profiles are automatically generated by Batch when a user visits your app or website and you don't know how to recognize them yet.

## Activity

This section tracks how your app base evolves over time. You can filter it by date range (up to 1 year) and by platform (iOS or Android) — when no platform is selected, counts are summed across all platforms.

{% hint style="info" %}
This section is only available for iOS and Android. Web is not covered.
{% endhint %}

### New installs

This bar chart illustrates the daily number of new app installs over the selected period. An install is counted the first time Batch detects a new app installation, independently of whether the user has enabled push notifications.

### Uninstalls

This bar chart illustrates the daily number of app uninstalls over the selected period. An uninstall is counted when Batch receives an uninstall notification from Apple (APNs) or Google (FCM) following a push delivery attempt.

{% hint style="info" %}
Account deletions (for example following a GDPR request) or clean-ups of inactive profiles are not counted as uninstalls here — only uninstalls detected via push delivery feedback are included.
{% endhint %}

{% hint style="warning" %}
Data is available from July 2026 onward. There is no historical data for installs and uninstalls prior to that date.
{% endhint %}

## Push

You can filter the push section to access specific information about iOS, Android, or Web push subscritpions.

### Push subscriptions

This sections provides a breakdown of profiles that are subscribed and not subscribed to push notifications, based on the total number of profiles eligible for push notification subscriptions. For example, when filtering for iOS push notifications, you would only consider profiles that have the iOS app installed.

### New subscriptions

This bar chart illustrates the daily count of new push notification subscriptions over the past 30 days. It exclusively shows new sign-ups and does not reflect any unsubscriptions that occurred during the same timeframe.

## Email

### Email subscriptions

This section provides a breakdown of profiles according to their marketing email subscription status, based on the total number of profiles with an email address.

**Subscribed**: Subscribed profiles have explicitly given their consent to receive marketing emails. You can send them both transactional and marketing emails.

**Unsubscribed**: Unsubscribed profiles have opted out of receiving marketing emails. Unsubscriptions are automatically tracked when a user clicks on an unsubscribe link in your email. You can also manage unsubscribed profiles through the Profile API, for instance, if a user unsubscribes from a preference center in your app. You can send them transactional emails only.

**Never subscribed**: Never subscribed profiles have shared an email address with you, such as during the creation of a user account, but they did not subscribe to marketing emails. You can send them transactional emails only. It's also possible to reset a profile email subscription status to "Never Subscribed" using the Profile API.

### New email subscriptions

This bar chart illustrates the daily count of new email marketing subscriptions over the past 30 days. It exclusively shows new sign-ups and does not reflect any unsubscriptions that occurred during the same timeframe.

## SMS

This section provides a breakdown of profiles according to their marketing SMS subscription status, based on the total number of profiles with a phone number.

**Subscribed**: Subscribed profiles have explicitly given their consent to receive marketing SMS. You can send them both transactional and marketing SMS.

**Unsubscribed**: Unsubscribed profiles have opted out of receiving marketing SMS. Unsubscriptions are automatically tracked when a user unsubscribes from SMS using a STOP code. You can also manage unsubscribed profiles through the Profile API, for instance, if a user unsubscribes from a preference center in your app. You can send them transactional SMS only.

**Never subscribed**: Never subscribed profiles have shared a phone number with you, such as during the creation of a user account, but they did not subscribe to marketing SMS. You can send them transactional SMS only. It's also possible to reset a profile SMS subscription status to "Never Subscribed" using the Profile API.

{% hint style="warning" %}
Profiles are powering Push v2, email and SMS channels. Push v1 is powered by an installation based data model, siloed by platform (iOS, Android, Web).
{% endhint %}


# Profile Overview

The userbase tab gives you an overview of your current iOS, Android or Web userbase, allowing you to elaborate new push strategies and understand how to best engage with your users.

There are three kind of information you can see on your userbase:

* Basic statistics: Total number of users, opt-in rate, etc.
* Smart Segments: Distribution of your users in Batch Smart segments.
* Native and custom segments statistics.

## Basic statistics

<figure><img src="/files/nGlkdZu7ankVzDlGb2St" alt=""><figcaption></figcaption></figure>

There are **4 metrics** you should check to see how your app is performing:

### **Installs**

Total **number of installs** of your app since you released it with Batch SDK. This number includes users who still have your app on their device or who already uninstalled it.

{% hint style="info" %}
The number of users is updated in real time.
{% endhint %}

### **Opt-ins**

This is the percentage of users **who have opted-in** to push notifications in your app or website.

### **Number of tokens**

Appears on hover on *"Opt-ins"*. The interpretation of this metric differs from an OS to another:

**Android**

On Android, Batch retrieves automatically the token of your new users. Users who have a token are users who **still have your app** on their device.

**iOS**

On iOS, the token collection can depend on the *background refresh*. You can go in Xcode and see if *"Remote notifications"* is checked as a background mode in your app's Capabilities to see if it's enabled.

* **If enabled**: Batch collects tokens for all your users, even for those who choose not to receive push notifications. In this case, users who have a token are also users who have your app on their device.
* **If disabled**: Batch only collects tokens for users who opt-in for push notifications. In this case, users who don't have a token are users who didn't accept notifications or uninstalled your app.

Please note that users can disable background refresh for your application so these stats may be imprecise.

## Smart Segments

#### Understanding smart segmentation

<figure><img src="/files/JL7FnczCTaC0bEkagg9h" alt="smart segments"><figcaption></figcaption></figure>

Smart Segments are automatically created by Batch using **a proprietary algorithm**. They let you visualize precisely who is using your app, and who is not, who is buying your product, and who is churning away.

Our **algorithm** analyses the sessions of your users from the moment they install your app and put them in 4 different segments. Here is a short definition of every segment:

* **New**: Newcomers to your app that haven't yet established themselves as engaged, lasting users.
* **Engaged**: Congratulations! These users are actively using your app.
* **Dormant**: These promising users haven't used your app in a while. Reengage them!
* **One-time**: Users that have had your app for a while but have only opened it once.

We are also showing the predictive and intermediate Smart Segments that our algorithm calculates:

* **Risky Engaged**: Users with a high risk of becoming dormant in the next days if you don’t re-engage them with a targeted notification.
* **Promising New / Dormant** users: Users who are about to become engaged. Don’t miss the opportunity to send them a message!

Batch also shows the number of **imported tokens** who haven't been reintegrated to Batch Smart Segments yet. You will find more information on token import [here](/getting-started/features/customer-engagement-platform/profiles/import-tokens).

{% hint style="warning" %}
The Profile overview page provides insights on the installation base that powers **Push v1**, siloed by platform (iOS, Android, Web). For details about Push v2 Profile Analytics [go there](/getting-started/features/customer-engagement-platform/analytics/profile-analytics).
{% endhint %}


# Data


# Overview

Profiles centralize user data and events from multiple sources, such as Apps, Websites, and APIs, in a single place based on a custom user ID.

A unified user base made up of Profiles, anonymous or identified is associated with each Projects.

When a user interacts with any of the platforms within a Project, their actions are fed into the associated Profiles. For example, this allows you to trigger automated emails based on user behavior, regardless of which platform the user used.

Profiles also store engagement information such a user's email address and email subscriptions, making it easy for you to send targeted and relevant communications to your customers.

<figure><img src="/files/b9j0wStY2bW9adDaGszY" alt="profile view"><figcaption></figcaption></figure>

{% hint style="warning" %}
**Profiles** are powering **Push V2**, email and SMS channels. Push V1 is powered by an installation based data model, siloed by platform (iOS, Android, Web).
{% endhint %}


# Segments

This feature allows you to create and save dynamic user Segments and use these Segments in the targeting of omnichannel Orchestrations.

<figure><img src="/files/ApzkvPXOwdybPY4TxQMZ" alt=""><figcaption></figcaption></figure>

**You can leverage Segments in three area of Batch described below.**

## The Segment page

From this page, you can see the list of all your Segments with their names, estimated reach and the number of orchestrations to which they are attached.

From the Segments table you can :

* **Create your Segments**.
  * You can have up to 500 active Segments.
* **Access a filtered view of the Campaigns and Automations that use the different Segments** ("View X campaign" and "View X automation" buttons in the three dots menu).
* **Modify or delete your Segments**.
  * It is not possible to delete a segment if it is used in one or several running orchestrations.
  * If a Segment used in a running orchestration is modified, the orchestration will automatically take into account the change. To be noted that the update is not instantaneous: if a message sending has already begun, the modifications to the Segment cannot be taken into account.
* **Duplicate your Segments.**&#x20;
  * You can create a new Segment from an existing one.&#x20;
* **Export your Segments**
  * Click on the "Export profiles" option in the three dots menu to request a Segment export. You will then receive a link to download the export by Email. The link will remain available for 3 months after receipt of the Email.
    * As profile data is sensitive, only Admin users can export Segments.
  * Details of the export file :
    * It is in CSV format.
    * Its name contains the extract date and the Segment name.
    * It contains the list of profiles in the Segment at the time of export, with the following information on each profile: Custom ID, Profile ID, phone number and email (when information is available for user).
    * Profiles that have neither install nor custom ID are not exported.

## The Query Builder

When creating an Orchestration, you can click on a “Use segment” button, allowing you to :

* **Call Segments as blocks in the targeting.**
* **Nest Segments** (inclusions and/or exclusions) by calling up to 20 Segments in your targeting.

When a Segment is linked to an Orchestration, you can access/ view the Segment from the query builder regardless of the campaign status (draft, running, complete) by clicking on the eye icon.

You can also call Segments in the targeting of Campaigns created by API.

## The Campaigns and Automations listings

You can filter these listings by Segments in addition to existing filters (channel, date, status...).


# Audiences

Audiences allow you to upload static target lists (e.g. top 500 buyers, etc) coming from other sources.

<figure><img src="/files/0r4r2s0NdceNv0gpaJZa" alt="audiences"><figcaption></figcaption></figure>

## Creating an Audience

You can easily create an Audience from the "Audiences" tab:

* Click on the “Add Audience” button of your dashboard.
* Choose a Display Name (mandatory).
* Choose a Name (optional).
  * If you don’t define a Name Batch will generate one based on the Display Name.
* Choose an Audience type, it can be:&#x20;
  * Customer User IDs
  * Emails
  * Install IDs
* Upload your file:
  * Your file must be a csv or txt file (50MB maximum) containing a list of IDs (one per line) in the first column and up to 10 optional attributes\* in the following columns. *Adding attributes is useful for personalization purposes.*

Other methods to import Audiences in Batch:

* Via API. [See more details.](/developer/api/cep/audiences)&#x20;
* Via the Audience Importer. The importer automatically imports audiences from your data stores via (S)FTPs. Audience Importer setup is upon request. Reach support or your CSM to know more.

\***Functional details about the attributes sent in your file:**

* Format: All attributes are strictly treated as strings.
  * Any other data type included in the CSV will be automatically converted to a string.
* String attributes have a maximum length of 300 characters.&#x20;
* Naming Convention: It is not possible to give a custom name to these attributes.
  * They are automatically assigned generic names: `att1`, `att2`, `att3`, etc.
* Personalization: To use these attributes to personalize your messages, you must use the following syntax: `{{audienceAttribute('audience_code', 'att1')}}`

## Managing an Audience

You can easily edit and delete your Audiences from the "Audiences" tab.\
For each Audience, Batch displays information such as:

* **Display name**: Name of the audience, only used in the dashboard.
* **Name**: This is the unique ID of your audience.
* **Type**: Type of ID used in the campaign.&#x20;
* **Estimate / IDs**: estimated number of Profiles matching the IDs in the audience. Depending on the number of IDs included in your audience, the estimate may take several minutes to calculate the number of tokens matching your audience.
* **Last update:** Date of the last update.

#### Functional help on Email and Install ID Audiences

* **Audience Targeting is Profile-Based:**
  * If an Email or Install ID in your audience is not linked to an existing profile in Batch, that email/ID will be ignored during targeting. **No new profiles are created** (e.g., this does not support importing new anonymous users).
  * **Multiple Profiles linked to one Email:**
    * If a single Email in your audience is linked to multiple profiles, Batch will initially target all of them.
    * However, due to Batch's standard **email deduplication**, **only one profile will ultimately receive the communication.** This might not be the 'primary' profile, but this is considered acceptable, as clients should ideally manage a clean, one-to-one email-to-profile database.
  * **Multiple Installs per Profile:**

    * If you upload only one Install ID for a profile that has multiple installations, **the communication will be sent to ALL installations** linked to that profile.

{% hint style="warning" %}
The Dashboard displays Audiences associated to Push v1 which is siloed by Platform (in iOS, Android and Web tabs) and Audiences associated to Push v2, email and SMS channels, in the Omnichannel tab.
{% endhint %}


# Catalogs

Catalogs are collections of non-user-centric data (e.g., product catalogs, media articles). This data can be used directly within messages to power advanced personalization scenarios like abandoned cart campaigns, product recommendations or sales opening.<br>

* [Catalogs API](/developer/api/cep/catalogs)
* [Referencing catalog data](/getting-started/features/customer-engagement-platform/message/personalization#referencing-catalog-data)


# Cloud Sync

{% hint style="info" %}
Cloud Sync is a priced offering. Reach out to your CSM or Account Manager to learn more.&#x20;
{% endhint %}

**Cloud Sync** lets you automatically synchronize customer data from your **data warehouse** or your **relational databases** into **Batch** without building custom pipelines or relying on third-party tools.

In just a few minutes, your profile data and behavioral events stay up to date in Batch, helping you launch campaigns faster, reduce engineering dependency, and simplify implementation.

***

### What can you sync?

Cloud Sync supports two **Destination** types:

| Destination                  | What it does                                                                                                                           |
| ---------------------------- | -------------------------------------------------------------------------------------------------------------------------------------- |
| **Batch Profile attributes** | Updates customer profile attributes (email, plan, country, lifetime value, etc.) in Batch from a table containing one row per profile. |
| **Batch Profile events**     | Creates behavioral events (purchases, add-to-cart, page views, etc.) in Batch from a table containing one row per event.               |

You select the destination type when creating a sync in the Batch dashboard.

{% hint style="info" %}
Note that in addition to Cloud Sync, Batch offers a capacity to connect to Ads destinations, through [Ads Sync](/getting-started/features/customer-engagement-platform/profiles/ads-sync).
{% endhint %}

Cloud Sync supports a large variery of **Sources:**

This sections explains in specific sub-pages the different databases and data warehouses we can integrate with, through Cloud Sync.

{% hint style="info" %}
It is possible to integrate Batch with other databases or data warehouse, on request. Reach out to your CSM or Account Manager to learn more.&#x20;
{% endhint %}

***

### How it works

All Cloud Sync configurations share the same core mechanism:

1. **You prepare a table or view** in your data source that follows the Cloud Sync schema (required columns, naming conventions, type formatting).
2. **You create a sync** in the Batch dashboard by selecting a source, a sync frequency, and a destination type.
3. **Batch runs incremental syncs** on your chosen schedule, fetching only rows that changed since the last run using a `last_updated_at` cursor.

Once enabled, Batch automatically handles batching, retries, and error reporting.

{% hint style="info" %}
**Rate limits** — Cloud Sync writes profile attributes and events to Batch through the same pipeline as the Profile API `/profiles/mass-update` endpoint, and is therefore subject to the same rate limit. See [Mass update profile → Rate Limiting](https://doc.batch.com/developer/api/cep/profiles/mass-update-profile#rate-limiting).
{% endhint %}


# Create a Sync from Snowflake to Batch Profile Attributes

## Create a Sync from Snowflake to Batch Profile Attributes

### Before you start

To create a Snowflake → Batch sync, you'll need:

* Access to the **Batch dashboard**
* A **Snowflake table or view** containing one row per profile
* Your **Snowflake credentials** (Username & Password, or Key Pair)
* Your **Host, Warehouse, Role, Database, and Table/View** details
* A table (or view) that follows the **Cloud Sync input format** (see below)

***

### 1) Prepare your Snowflake table or view

Cloud Sync expects your Snowflake source (table or view) to include:

1. A **profile identifier** (to know which profile to update)
2. A **cursor field** (to know what changed since the last run)
3. Any number of **attribute columns** (sent to Batch as profile attributes)

***

#### 1.1 One row per profile

Your source must contain **one row per profile**.\
Each row is interpreted as an update to a single Batch profile.

***

#### 1.2 Required columns

Your table (or view) must include:

| Column            | Required | Description                      |
| ----------------- | :------: | -------------------------------- |
| `custom_id`       |     ✅    | The profile identifier in Batch  |
| `last_updated_at` |     ✅    | Cursor used for incremental sync |

{% hint style="warning" %}
`last_updated_at` must be updated **every time any synced attribute changes**, otherwise updates may not be picked up by the next run.
{% endhint %}

***

#### 1.3 Attribute naming rules (Snowflake-compatible)

Cloud Sync reads Snowflake columns and converts them into Batch profile attributes.

Snowflake column names do not support characters like `$`, `(`, or `)`. Cloud Sync relies on **prefixes** in column names to represent typed or native fields.

**Supported prefixes**

| Prefix    | Meaning                                   | Example                |
| --------- | ----------------------------------------- | ---------------------- |
| `date__`  | Date attribute                            | `date__birthday`       |
| `url__`   | URL attribute                             | `url__avatar`          |
| `batch__` | Native profile fields (instead of `$...`) | `batch__email_address` |

***

#### 1.4 Handling arrays

Snowflake does not natively support array column types in this context. **Array attributes must be stringified as a JSON array** before being passed to Cloud Sync.

```sql
'["value1","value2","value3"]'
```

Example:

```sql
SELECT
  user_id                          AS custom_id,
  updated_at                       AS last_updated_at,
  '["yoga","wellness"]'            AS interests  -- stringified array
FROM raw.users;
```

***

#### 1.5 Example schema (e-commerce)

```sql
CREATE OR REPLACE TABLE customer_data.batch_profiles (
    custom_id        STRING,
    last_updated_at  TIMESTAMP_TZ,

    -- Native profile fields
    batch__email_address  STRING,

    -- Standard attributes
    plan             STRING,
    country          STRING,
    lifetime_value   FLOAT,
    is_vip           BOOLEAN,

    -- Array attribute (stringified)
    interests        STRING,   -- e.g. '["yoga","wellness"]'

    -- Typed attributes
    url__avatar          STRING,
    date__birthday       STRING,
    date__last_purchase  STRING
);
```

**How this maps in Batch:**

* `custom_id` identifies the profile
* `batch__email_address` updates the profile's native email field
* `plan`, `country`, `lifetime_value`, `is_vip` become standard attributes
* `interests` is interpreted as an array attribute (must be a stringified JSON array)
* `url__avatar` is interpreted as a URL attribute
* `date__birthday` and `date__last_purchase` are interpreted as date attributes

***

#### 1.6 Using a View

If your raw table doesn't match the expected naming or format, create a **Snowflake View** that converts your schema into the correct conventions.

```sql
CREATE OR REPLACE VIEW customer_data.batch_profiles_view AS
SELECT
  CAST(u.user_id AS STRING)                        AS custom_id,
  GREATEST(u.updated_at, o.last_order_updated_at)  AS last_updated_at,

  u.email                                          AS batch__email_address,
  u.country,
  u.plan,

  u.avatar_url                                     AS url__avatar,
  TO_VARCHAR(u.birth_date, 'YYYY-MM-DD')           AS date__birthday,

  o.last_order_date                                AS date__last_purchase,
  o.total_spent                                    AS lifetime_value,
  u.is_vip,

  -- Stringify arrays before passing to Cloud Sync
  ARRAY_TO_STRING(PARSE_JSON(u.interests), ',')    AS interests
FROM raw.users u
LEFT JOIN raw.user_orders_summary o
  ON u.user_id = o.user_id;
```

This approach lets you:

* rename fields with the correct prefixes (`batch__`, `date__`, `url__`)
* compute a reliable `last_updated_at`
* stringify array columns correctly
* ensure you always expose **one row per profile**

***

#### 1.7 Handling nulls

If a column value is `NULL`, Batch interprets it as **attribute removal** for that profile.

If you don't want an attribute removed:

* ensure your view returns a non-null value, or
* exclude the column from the sync entirely.

***

#### 1.8 Attributes limits and constraints

All attributes sent through Cloud Sync must respect the same limits and constraints as the Batch Profile API. See Profile API documentation, [the attributes object](https://doc.batch.com/getting-started/features/customer-engagement-platform).

***

### 2) Create the Sync in the Batch dashboard

Cloud Sync is configured from the dashboard via a dedicated **Sync module**.

1. Open the **Batch dashboard**
2. Go to **Data → Cloud Sync**
3. Click **Create Sync**
4. Select **Snowflake** as the source

***

#### 2.1 Configure your Snowflake connection

Select an **Authentication** method, then fill in the corresponding fields:

{% tabs %}
{% tab title="Username & Password" %}

| Field        | Description                                                        |
| ------------ | ------------------------------------------------------------------ |
| Username     | Your Snowflake username                                            |
| Password     | Your Snowflake password                                            |
| Host         | Your Snowflake account URL (e.g. `account.snowflakecomputing.com`) |
| Role         | The Snowflake role with read access on the source table/view       |
| Warehouse    | The Snowflake virtual warehouse to use for queries                 |
| Database     | The database containing your source table/view                     |
| Table        | The table or view name                                             |
| {% endtab %} |                                                                    |

{% tab title="Key Pair" %}

| Field         | Description                                                        |
| ------------- | ------------------------------------------------------------------ |
| Username      | Your Snowflake username                                            |
| Private Key   | Your RSA private key (PEM format)                                  |
| Host          | Your Snowflake account URL (e.g. `account.snowflakecomputing.com`) |
| Role          | The Snowflake role with read access on the source table/view       |
| Warehouse     | The Snowflake virtual warehouse to use for queries                 |
| Database      | The database containing your source table/view                     |
| Table         | The table or view name                                             |
| {% endtab %}  |                                                                    |
| {% endtabs %} |                                                                    |

Batch validates the connection before continuing.

***

#### 2.2 Configure profile mapping

Cloud Sync applies a simple mapping model:

* `custom_id` → identifies which Batch profile to update
* all other columns → mapped to profile attributes
* `last_updated_at` → used only for incremental sync logic

***

### 3) How incremental sync works

Cloud Sync uses **incremental processing**, which means it does not re-import your full dataset at every run. Instead, it fetches only the rows that changed since the last successful sync.

***

#### 3.1 The `last_updated_at` cursor

Batch stores the last successful cursor value internally.

At each run, Batch fetches only rows where:

* `last_updated_at` is greater than the last stored cursor

This makes sync runs faster, more scalable, and more cost-efficient.

***

#### 3.2 Inserts, updates, and deletes

Incremental syncs naturally capture:

* ✅ inserts
* ✅ updates

They do **not** automatically capture:

* ❌ deletes

If you need deletions reflected in Batch, rely on a different pipeline or implement soft deletes by setting all attributes to null in the Snowflake view when a profile is deleted.

***

#### 3.3 Best practices for reliable incremental syncs

To avoid missing changes:

* Ensure `last_updated_at` updates **every time a synced column changes**
* Avoid timestamps that only reflect partial updates
* Use a View if you need computed fields or type conversions
* Cluster on `last_updated_at` for large tables

***

### 4) Test and enable your Sync

Before enabling the schedule:

1. Run a **test sync**
2. Verify:
   * Profiles are created or updated correctly
   * `batch__`, `date__`, and `url__` fields are interpreted correctly
   * Array attributes are correctly stringified (e.g. `["yoga","wellness"]`)
   * Null values behave as expected (null → attribute removal)

Once enabled, Batch automatically handles batching and retries.


# Create a Sync from BigQuery to Batch Profile attributes

## Before you start

To create a BigQuery → Batch sync, you’ll need:

* Access to the **Batch dashboard**
* A **BigQuery table or view** containing one row per profile
* A **Google Cloud service account key (JSON)** to grant Batch read access
* A table (or view) that follows the **Cloud Sync input format** (see below)

***

## 1) Prepare your BigQuery table

Cloud Sync expects your BigQuery source (table or view) to include:

1. A **profile identifier** (to know which profile to update)
2. A **cursor field** (to know what changed since the last run)
3. Any number of **attribute columns** (sent to Batch as profile attributes)

***

### 1.1 One row per profile

Your source must contain **one row per profile**.\
Each row is interpreted as an update to a single Batch profile.

***

### 1.2 Required columns

Your table (or view) must include:

| Column            | Required | Description                      |
| ----------------- | -------: | -------------------------------- |
| `custom_id`       |        ✅ | The profile identifier in Batch  |
| `last_updated_at` |        ✅ | Cursor used for incremental sync |

**Important:** `last_updated_at` must be updated **every time any synced attribute changes**, otherwise updates may not be picked up by the next run.

***

### 1.3 Attribute naming rules (BigQuery-compatible)

Cloud Sync reads BigQuery columns and converts them into Batch profile attributes.

However, **BigQuery column names cannot contain characters like `$`, `(`, or `)`**. That means you can’t use the exact Profile API formats such as:

* `url(avatar)`
* `date(birthday)`
* `$email_address`

✅ Instead, Cloud Sync relies on **prefixes** in column names to represent typed or native fields.

#### Supported prefixes

| Prefix    | Meaning                                   | Example                |
| --------- | ----------------------------------------- | ---------------------- |
| `date__`  | Date attribute                            | `date__birthday`       |
| `url__`   | URL attribute                             | `url__avatar`          |
| `batch__` | Native profile fields (instead of `$...`) | `batch__email_address` |

***

### 1.4 Example schema (e-commerce)

Here’s a table format you can use as a reference:

```sql
create table customer_data.batch_profiles (
    custom_id string,
    last_updated_at timestamp,

    -- Native profile fields
    batch__email_address string,

    -- Standard attributes
    plan string,
    country string,
    lifetime_value float64,
    is_vip bool,

    -- Typed attributes
    url__avatar string,
    date__birthday string,
    date__last_purchase string
);
```

**How this maps in Batch:**

* `custom_id` identifies the profile
* `batch__email_address` updates the profile’s native email field
* `plan`, `country`, `lifetime_value`, `is_vip` become attributes
* `url__avatar` is interpreted as a URL attribute
* `date__birthday` and `date__last_purchase` are interpreted as date attributes

***

### 1.5 Using a View

If your raw table doesn’t match the expected naming or format, create a **BigQuery View** that converts your schema into the correct conventions.

Example:

```sql
create or replace view customer_data.batch_profiles_view as
select
  cast(u.user_id as string) as custom_id,
  greatest(u.updated_at, o.last_order_updated_at) as last_updated_at,

  u.email as batch__email_address,
  u.country,
  u.plan,

  u.avatar_url as url__avatar,
  format_date('%Y-%m-%d', u.birth_date) as date__birthday,

  o.last_order_date as date__last_purchase,
  o.total_spent as lifetime_value,
  u.is_vip
from raw.users u
left join raw.user_orders_summary o
  on u.user_id = o.user_id;
```

This approach lets you:

* rename fields with the correct prefixes (`batch__`, `date__`, `url__`)
* compute a reliable `last_updated_at`
* ensure you always expose **one row per profile**

***

### 1.6 Handling nulls

If a column value is `NULL`, Batch interprets it as **attribute removal** for that profile.

If you don’t want an attribute removed:

* ensure your view returns a non-null value, or
* exclude the column from the sync entirely.

***

### 1.7 Attributes limits and constraints

When syncing data from BigQuery to Batch, all attributes sent through Cloud Sync must respect the same limits and constraints as the Batch Profile API. See Profile API documentation, [the attributes object](/getting-started/features/customer-engagement-platform).

## 2) Create a Service Account key in Google Cloud

Batch uses a **Service Account Key (JSON)** to securely access your BigQuery dataset.

1. Go to **Google Cloud Console → IAM & Admin → Service Accounts**
2. Create a service account (or reuse an existing one)
3. Generate a **JSON key**
4. Grant the service account:
   * `roles/bigquery.jobUser`
   * Dataset-level permission: **BigQuery Data Editor** on the dataset containing your source table/view

***

## 3) Create the Sync in the Batch dashboard

Cloud Sync is configured from the dashboard via a dedicated **Sync module**.

1. Open the **Batch dashboard**
2. Go to **Data → Cloud Sync**
3. Click **Create Sync**
4. Select **BigQuery** as the source

***

### 3.1 Configure your BigQuery connection

Enter:

* **Dataset**
* **Table or View**
* Upload your **Service Account Key (JSON)**

Batch validates the connection before continuing.

***

### 3.2 Configure profile mapping

Cloud Sync applies a simple mapping model:

* `custom_id` → identifies which Batch profile to update
* all other columns → mapped to profile attributes
* `last_updated_at` → used only for incremental sync logic

***

## 4) How incremental sync works

Cloud Sync uses **incremental processing**, which means it does not re-import your full dataset at every run. Instead, it fetches only the rows that changed since the last successful sync.

***

### 4.1 The `last_updated_at` cursor

Batch stores the last successful cursor value internally.

At each run, Batch fetches only rows where:

* `last_updated_at` is greater than the last stored cursor

This makes sync runs faster, more scalable, and more cost-efficient.

***

### 4.2 Inserts, updates, and deletes

Incremental syncs naturally capture:

* ✅ inserts
* ✅ updates

They do **not** automatically capture:

* ❌ deletes

If you need deletions reflected in Batch, rely on a different pipelines or implement soft deletes by setting all attributes to null in the BigQuery view when a profile is deleted.

***

### 4.3 Best practices for reliable incremental syncs

To avoid missing changes:

* Ensure `last_updated_at` updates **every time a synced column changes**
* Avoid timestamps that only reflect partial updates
* Use a View if you need computed fields or type conversions
* Partition or cluster on `last_updated_at` for large datasets

***

## 5) Test and enable your Sync

Before enabling the schedule:

1. Run a **test sync**
2. Verify:
   * Profiles are created or updated correctly
   * `batch__`, `date__`, and `url__` fields are interpreted correctly
   * Null values behave as expected (null → attribute removal)

Once enabled, Batch automatically handles:

* batching
* retries


# Create a Sync from Clickhouse to Batch Profile Attributes

### Before you start

To create a ClickHouse → Batch sync, you'll need:

* Access to the **Batch dashboard**
* A **ClickHouse table or view** containing one row per profile
* Your **ClickHouse credentials** (Host, Port, Database, Username, Password)
* A table (or view) that follows the **Cloud Sync input format** (see below)

***

### 1) Prepare your ClickHouse table or view

Cloud Sync expects your ClickHouse source (table or view) to include:

1. A **profile identifier** (to know which profile to update)
2. A **cursor field** (to know what changed since the last run)
3. Any number of **attribute columns** (sent to Batch as profile attributes)

***

#### 1.1 One row per profile

Your source must contain **one row per profile**.\
Each row is interpreted as an update to a single Batch profile.

***

#### 1.2 Required columns

Your table (or view) must include:

| Column            | Required | Description                      |
| ----------------- | :------: | -------------------------------- |
| `custom_id`       |     ✅    | The profile identifier in Batch  |
| `last_updated_at` |     ✅    | Cursor used for incremental sync |

{% hint style="warning" %}
`last_updated_at` must be updated **every time any synced attribute changes**, otherwise updates may not be picked up by the next run.
{% endhint %}

***

#### 1.3 Attribute naming rules (ClickHouse-compatible)

Cloud Sync reads ClickHouse columns and converts them into Batch profile attributes.

ClickHouse column names do not support characters like `$`, `(`, or `)`. Cloud Sync relies on **prefixes** in column names to represent typed or native fields.

**Supported prefixes**

| Prefix    | Meaning                                   | Example                |
| --------- | ----------------------------------------- | ---------------------- |
| `date__`  | Date attribute                            | `date__birthday`       |
| `url__`   | URL attribute                             | `url__avatar`          |
| `batch__` | Native profile fields (instead of `$...`) | `batch__email_address` |

***

#### 1.4 Handling arrays

Array attributes must be passed as a **`String` column** containing a stringified JSON array. Native ClickHouse `Array()` types are not supported.

```sql
'["value1","value2","value3"]'
```

Example:

```sql
SELECT
  user_id                          AS custom_id,
  updated_at                       AS last_updated_at,
  '["art","design"]'               AS interests  -- String, not Array(String)
FROM raw.users;
```

***

#### 1.5 Example schema (e-commerce)

```sql
CREATE TABLE customer_data.batch_profiles (
    custom_id            String,
    last_updated_at      DateTime64(3, 'UTC'),

    -- Native profile fields
    batch__email_address String,

    -- Standard attributes
    plan                 String,
    country              String,
    lifetime_value       Float64,
    is_vip               UInt8,

    -- Array attribute (stringified, not Array(String))
    interests            String,   -- e.g. '["art","design"]'

    -- Typed attributes
    url__avatar          String,
    date__birthday       String,
    date__last_purchase  String
) ENGINE = MergeTree()
ORDER BY (custom_id);
```

**How this maps in Batch:**

* `custom_id` identifies the profile
* `batch__email_address` updates the profile's native email field
* `plan`, `country`, `lifetime_value`, `is_vip` become standard attributes
* `interests` is interpreted as an array attribute (must be a stringified JSON array)
* `url__avatar` is interpreted as a URL attribute
* `date__birthday` and `date__last_purchase` are interpreted as date attributes

***

#### 1.6 Using a View

If your raw table doesn't match the expected naming or format, create a **ClickHouse View** that converts your schema into the correct conventions.

```sql
CREATE OR REPLACE VIEW customer_data.batch_profiles_view AS
SELECT
  toString(u.user_id)                              AS custom_id,
  greatest(u.updated_at, o.last_order_updated_at)  AS last_updated_at,

  u.email                                          AS batch__email_address,
  u.country,
  u.plan,

  u.avatar_url                                     AS url__avatar,
  formatDateTime(u.birth_date, '%Y-%m-%d')         AS date__birthday,

  o.last_order_date                                AS date__last_purchase,
  o.total_spent                                    AS lifetime_value,
  u.is_vip,

  -- Stringify arrays before passing to Cloud Sync
  toJSONString(u.interests)                        AS interests
FROM raw.users u
LEFT JOIN raw.user_orders_summary o
  ON u.user_id = o.user_id;
```

This approach lets you:

* rename fields with the correct prefixes (`batch__`, `date__`, `url__`)
* compute a reliable `last_updated_at`
* stringify array columns correctly
* ensure you always expose **one row per profile**

***

#### 1.7 Handling nulls

If a column value is `NULL`, Batch interprets it as **attribute removal** for that profile.

If you don't want an attribute removed:

* ensure your view returns a non-null value, or
* exclude the column from the sync entirely.

***

#### 1.8 Attributes limits and constraints

All attributes sent through Cloud Sync must respect the same limits and constraints as the Batch Profile API. See Profile API documentation, [the attributes object](https://doc.batch.com/getting-started/features/customer-engagement-platform).

***

### 2) Create the Sync in the Batch dashboard

Cloud Sync is configured from the dashboard via a dedicated **Sync module**.

1. Open the **Batch dashboard**
2. Go to **Data → Cloud Sync**
3. Click **Create Sync**
4. Select **ClickHouse** as the source

***

#### 2.1 Configure your ClickHouse connection

Enter the following fields:

| Field    | Description                                                         |
| -------- | ------------------------------------------------------------------- |
| Host     | Your ClickHouse server hostname (e.g. `your-host.example.com`)      |
| Port     | ClickHouse HTTP(S) port — defaults to `8123`                        |
| Database | The database containing your source table/view (default: `default`) |
| Username | Your ClickHouse username                                            |
| Password | Your ClickHouse password                                            |
| SSL      | Toggle on to use a secure connection (recommended for production)   |
| Table    | The table or view name                                              |

Batch validates the connection before continuing.

***

#### 2.2 Configure profile mapping

Cloud Sync applies a simple mapping model:

* `custom_id` → identifies which Batch profile to update
* all other columns → mapped to profile attributes
* `last_updated_at` → used only for incremental sync logic

***

### 3) How incremental sync works

Cloud Sync uses **incremental processing**, which means it does not re-import your full dataset at every run. Instead, it fetches only the rows that changed since the last successful sync.

***

#### 3.1 The `last_updated_at` cursor

Batch stores the last successful cursor value internally.

At each run, Batch fetches only rows where:

* `last_updated_at` is greater than the last stored cursor

This makes sync runs faster, more scalable, and more cost-efficient.

***

#### 3.2 Inserts, updates, and deletes

Incremental syncs naturally capture:

* ✅ inserts
* ✅ updates

They do **not** automatically capture:

* ❌ deletes

If you need deletions reflected in Batch, rely on a different pipeline or implement soft deletes by setting all attributes to null in the ClickHouse view when a profile is deleted.

***

#### 3.3 Best practices for reliable incremental syncs

To avoid missing changes:

* Ensure `last_updated_at` updates **every time a synced column changes**
* Avoid timestamps that only reflect partial updates
* Use a View if you need computed fields or type conversions
* Use `ReplacingMergeTree` and order by `last_updated_at` for large tables

***

### 4) Test and enable your Sync

Before enabling the schedule:

1. Run a **test sync**
2. Verify:
   * Profiles are created or updated correctly
   * `batch__`, `date__`, and `url__` fields are interpreted correctly
   * Array attributes are correctly stringified (e.g. `["art","design"]`)
   * Null values behave as expected (null → attribute removal)

Once enabled, Batch automatically handles batching and retries.


# Create a Sync from Snowflake to Batch Profile Events

### Before you start

To create a Snowflake → Batch Profile Events sync, you'll need:

* Access to the **Batch dashboard**
* A **Snowflake table or view** containing one row per event
* Your **Snowflake credentials** (Username & Password, or Key Pair)
* Your **Host, Warehouse, Role, Database, and Table/View** details
* A table (or view) that follows the **Cloud Sync events input format** (see below)

***

### 1) Prepare your Snowflake table or view

Cloud Sync expects your Snowflake source (table or view) to include:

1. A **profile identifier** (to know which profile the event belongs to)
2. An **event name** (the type of event being recorded)
3. A **cursor field** (to know which rows are new since the last run)
4. Any number of **event attribute columns** (sent to Batch as event properties)

***

#### 1.1 One row per event

Your source must contain **one row per event**.\
Unlike profile attribute syncs, multiple rows can share the same `custom_id` — each row creates a separate event on the corresponding profile.

***

#### 1.2 Required columns

Your table (or view) must include the following columns:

| Column            | Required | Description                                            |
| ----------------- | :------: | ------------------------------------------------------ |
| `custom_id`       |     ✅    | The identifier of the profile the event belongs to     |
| `event_name`      |     ✅    | The name of the event (e.g. `add_to_cart`, `purchase`) |
| `last_updated_at` |     ✅    | Cursor used for incremental sync                       |

{% hint style="warning" %}
`last_updated_at` must be set **at the time the event row is inserted** and must not change afterwards. It is used only to determine which rows to fetch on the next sync run, not as the event timestamp.
{% endhint %}

***

#### 1.3 Optional columns

| Column       | Description                                                                                                                         |
| ------------ | ----------------------------------------------------------------------------------------------------------------------------------- |
| `event_time` | The timestamp of the event, in **RFC 3339 UTC** format (e.g. `2026-04-17T04:25:00Z`). If omitted, Batch uses the time of reception. |

***

#### 1.4 Event attribute naming rules (Snowflake-compatible)

Snowflake column names do not support characters like `$`, `(`, or `)`. Cloud Sync relies on **prefixes** in column names to represent typed event attributes.

**Supported prefixes**

| Prefix   | Meaning        | Example              |
| -------- | -------------- | -------------------- |
| `date__` | Date attribute | `date__purchased_at` |
| `url__`  | URL attribute  | `url__item_url`      |

Any column without a prefix is sent to Batch as a standard string, number, or boolean attribute.

***

#### 1.5 Handling arrays

Array event attributes must be **stringified as a JSON array** before being passed to Cloud Sync.

```sql
'["value1","value2","value3"]'
```

Example:

```sql
SELECT
  user_id               AS custom_id,
  'add_to_cart'         AS event_name,
  inserted_at           AS last_updated_at,
  '["yoga","wellness"]' AS interests   -- stringified array
FROM raw.events;
```

***

#### 1.6 Handling objects

Object event attributes must also be **stringified as a JSON object** before being passed to Cloud Sync. The connector parses the string and sends it in the correct format to the Profile API.

```sql
'{"color":"red","size":"M"}'
```

Example:

```sql
SELECT
  user_id                          AS custom_id,
  'purchase'                       AS event_name,
  inserted_at                      AS last_updated_at,
  '{"brand":"Nike","size":"42"}'   AS product_details  -- stringified object
FROM raw.purchases;
```

***

#### 1.7 Example schema (e-commerce)

```sql
CREATE OR REPLACE TABLE events_data.batch_events (
    custom_id          STRING,
    event_name         STRING,
    last_updated_at    TIMESTAMP_TZ,

    -- Optional event fields
    event_time         STRING,         -- RFC 3339 UTC, e.g. '2026-04-17T04:25:00Z'

    -- Standard event attributes
    item               STRING,
    quantity           INTEGER,
    price              FLOAT,

    -- Typed event attributes
    url__item_url      STRING,         -- URL attribute
    date__purchased_at STRING,         -- date attribute

    -- Object event attribute (stringified)
    product_details    STRING          -- e.g. '{"brand":"Nike","size":"42"}'
);
```

**How this maps in Batch:**

* `custom_id` identifies the profile the event is attached to
* `event_name` sets the event type
* `event_time` sets the event timestamp (falls back to reception time if omitted)
* `item`, `quantity`, `price` become standard event attributes
* `url__item_url` is interpreted as a URL attribute
* `date__purchased_at` is interpreted as a date attribute
* `product_details` is interpreted as an object attribute

***

#### 1.8 Using a View

If your raw event table doesn't match the expected naming or format, create a **Snowflake View** that converts your schema into the correct conventions.

```sql
CREATE OR REPLACE VIEW events_data.batch_events_view AS
SELECT
  CAST(e.user_id AS STRING)               AS custom_id,
  e.event_type                            AS event_name,
  e.inserted_at                           AS last_updated_at,

  TO_VARCHAR(e.occurred_at, 'YYYY-MM-DD"T"HH24:MI:SS"Z"') AS event_time,

  e.item_name                             AS item,
  e.qty                                   AS quantity,
  e.unit_price                            AS price,

  e.item_url                              AS url__item_url,
  TO_VARCHAR(e.purchase_date, 'YYYY-MM-DD') AS date__purchased_at,

  -- Stringify object attributes
  '{"brand":"' || e.brand || '","size":"' || e.size || '"}'  AS product_details
FROM raw.events e;
```

This approach lets you:

* rename fields with the correct prefixes (`date__`, `url__`)
* set a reliable `last_updated_at` based on insertion time
* stringify array and object columns correctly
* format `event_time` to RFC 3339 UTC

***

#### 1.9 Handling nulls

If an optional column value is `NULL`, that attribute is simply omitted from the event. It does not affect other attributes on the same event or on the profile.

***

### 2) Create the Sync in the Batch dashboard

Cloud Sync is configured from the dashboard via a dedicated **Sync module**.

1. Open the **Batch dashboard**
2. Go to **Data → Cloud Sync**
3. Click **Create Sync**
4. Select **Snowflake** as the source

***

#### 2.1 Configure your Snowflake connection

Select an **Authentication** method, then fill in the corresponding fields:

{% tabs %}
{% tab title="Username & Password" %}

| Field        | Description                                                        |
| ------------ | ------------------------------------------------------------------ |
| Username     | Your Snowflake username                                            |
| Password     | Your Snowflake password                                            |
| Host         | Your Snowflake account URL (e.g. `account.snowflakecomputing.com`) |
| Role         | The Snowflake role with read access on the source table/view       |
| Warehouse    | The Snowflake virtual warehouse to use for queries                 |
| Database     | The database containing your source table/view                     |
| Table        | The table or view name                                             |
| {% endtab %} |                                                                    |

{% tab title="Key Pair" %}

| Field         | Description                                                        |
| ------------- | ------------------------------------------------------------------ |
| Username      | Your Snowflake username                                            |
| Private Key   | Your RSA private key (PEM format)                                  |
| Host          | Your Snowflake account URL (e.g. `account.snowflakecomputing.com`) |
| Role          | The Snowflake role with read access on the source table/view       |
| Warehouse     | The Snowflake virtual warehouse to use for queries                 |
| Database      | The database containing your source table/view                     |
| Table         | The table or view name                                             |
| {% endtab %}  |                                                                    |
| {% endtabs %} |                                                                    |

Batch validates the connection before continuing.

***

#### 2.2 Select the destination

In the **Destination** dropdown, select **Batch > Profile events**.

***

#### 2.3 Configure event mapping

Cloud Sync applies a simple mapping model:

* `custom_id` → identifies which Batch profile to attach the event to
* `event_name` → sets the event type
* `last_updated_at` → used only for incremental sync logic
* all other columns → mapped to event attributes

***

### 3) How incremental sync works

Cloud Sync uses **incremental processing**, which means it does not re-import your full dataset at every run. Instead, it fetches only the rows that are new since the last successful sync.

***

#### 3.1 The `last_updated_at` cursor

Batch stores the last successful cursor value internally.

At each run, Batch fetches only rows where:

* `last_updated_at` is greater than the last stored cursor

This makes sync runs faster, more scalable, and more cost-efficient.

{% hint style="warning" %}
For events, `last_updated_at` should reflect when the row was **inserted** into the table, not when the event occurred (`event_time`). Do not backfill or modify `last_updated_at` after insertion.
{% endhint %}

***

#### 3.2 Inserts and deletes

Incremental syncs capture:

* ✅ new event rows (inserts)

They do **not** capture:

* ❌ deletions — events sent to Batch are immutable; they cannot be removed via Cloud Sync

***

#### 3.3 Best practices for reliable incremental syncs

To avoid missing events:

* Set `last_updated_at` at **insertion time** and never modify it afterwards
* Use a View if you need to rename columns or apply type conversions
* Cluster on `last_updated_at` for large tables

***

### 4) Test and enable your Sync

Before enabling the schedule:

1. Run a **test sync**
2. Verify:
   * Events are created on the correct profiles
   * `event_time` is set correctly (or defaults to reception time as expected)
   * `date__` and `url__` fields are interpreted correctly
   * Array and object attributes are correctly stringified

Once enabled, Batch automatically handles batching and retries.


# Create a Sync from BigQuery to Batch Profile Events

### Before you start

To create a BigQuery → Batch Profile Events sync, you'll need:

* Access to the **Batch dashboard**
* A **BigQuery table or view** containing one row per event
* A **Google Cloud service account key (JSON)** to grant Batch read access
* A table (or view) that follows the **Cloud Sync events input format** (see below)

***

### 1) Prepare your BigQuery table or view

Cloud Sync expects your BigQuery source (table or view) to include:

1. A **profile identifier** (to know which profile the event belongs to)
2. An **event name** (the type of event being recorded)
3. A **cursor field** (to know which rows are new since the last run)
4. Any number of **event attribute columns** (sent to Batch as event properties)

***

#### 1.1 One row per event

Your source must contain **one row per event**.\
Unlike profile attribute syncs, multiple rows can share the same `custom_id` — each row creates a separate event on the corresponding profile.

***

#### 1.2 Required columns

Your table (or view) must include the following columns:

| Column            | Required | Description                                            |
| ----------------- | :------: | ------------------------------------------------------ |
| `custom_id`       |     ✅    | The identifier of the profile the event belongs to     |
| `event_name`      |     ✅    | The name of the event (e.g. `add_to_cart`, `purchase`) |
| `last_updated_at` |     ✅    | Cursor used for incremental sync                       |

{% hint style="warning" %}
`last_updated_at` must be set **at the time the event row is inserted** and must not change afterwards. It is used only to determine which rows to fetch on the next sync run, not as the event timestamp.
{% endhint %}

***

#### 1.3 Optional columns

| Column       | Description                                                                                                                         |
| ------------ | ----------------------------------------------------------------------------------------------------------------------------------- |
| `event_time` | The timestamp of the event, in **RFC 3339 UTC** format (e.g. `2026-04-17T04:25:00Z`). If omitted, Batch uses the time of reception. |

***

#### 1.4 Event attribute naming rules (BigQuery-compatible)

BigQuery column names cannot contain characters like `$`, `(`, or `)`. Cloud Sync relies on **prefixes** in column names to represent typed event attributes.

**Supported prefixes**

| Prefix   | Meaning        | Example              |
| -------- | -------------- | -------------------- |
| `date__` | Date attribute | `date__purchased_at` |
| `url__`  | URL attribute  | `url__item_url`      |

Any column without a prefix is sent to Batch as a standard string, number, or boolean attribute.

***

#### 1.5 Handling objects

Object event attributes must be **stringified as a JSON object** before being passed to Cloud Sync. The connector parses the string and sends it in the correct format to the Profile API.

```sql
'{"color":"red","size":"M"}'
```

Example:

```sql
SELECT
  user_id                              AS custom_id,
  'purchase'                           AS event_name,
  inserted_at                          AS last_updated_at,
  TO_JSON_STRING(product_details_struct) AS product_details  -- stringified object
FROM raw.purchases;
```

***

#### 1.6 Example schema (e-commerce)

```sql
CREATE TABLE events_data.batch_events (
    custom_id          STRING,
    event_name         STRING,
    last_updated_at    TIMESTAMP,

    -- Optional event fields
    event_time         STRING,            -- RFC 3339 UTC, e.g. '2026-04-17T04:25:00Z'

    -- Standard event attributes
    item               STRING,
    quantity           INT64,
    price              FLOAT64,

    -- Typed event attributes
    url__item_url      STRING,            -- URL attribute
    date__purchased_at STRING,            -- date attribute

    -- Object event attribute (stringified)
    product_details    STRING             -- e.g. '{"brand":"Nike","size":"42"}'
);
```

**How this maps in Batch:**

* `custom_id` identifies the profile the event is attached to
* `event_name` sets the event type
* `event_time` sets the event timestamp (falls back to reception time if omitted)
* `item`, `quantity`, `price` become standard event attributes
* `url__item_url` is interpreted as a URL attribute
* `date__purchased_at` is interpreted as a date attribute
* `product_details` is interpreted as an object attribute

***

#### 1.7 Using a View

If your raw event table doesn't match the expected naming or format, create a **BigQuery View** that converts your schema into the correct conventions.

```sql
CREATE OR REPLACE VIEW events_data.batch_events_view AS
SELECT
  CAST(e.user_id AS STRING)                         AS custom_id,
  e.event_type                                      AS event_name,
  e.inserted_at                                     AS last_updated_at,

  FORMAT_TIMESTAMP('%Y-%m-%dT%H:%M:%SZ', e.occurred_at) AS event_time,

  e.item_name                                       AS item,
  e.qty                                             AS quantity,
  e.unit_price                                      AS price,

  e.item_url                                        AS url__item_url,
  FORMAT_DATE('%Y-%m-%d', e.purchase_date)          AS date__purchased_at,

  TO_JSON_STRING(STRUCT(e.brand, e.size))           AS product_details
FROM raw.events e;
```

This approach lets you:

* rename fields with the correct prefixes (`date__`, `url__`)
* set a reliable `last_updated_at` based on insertion time
* format `event_time` to RFC 3339 UTC
* stringify object columns correctly

***

#### 1.8 Handling nulls

If an optional column value is `NULL`, that attribute is simply omitted from the event. It does not affect other attributes on the same event or on the profile.

***

### 2) Create a Service Account key in Google Cloud

Batch uses a **Service Account Key (JSON)** to securely access your BigQuery dataset.

1. Go to **Google Cloud Console → IAM & Admin → Service Accounts**
2. Create a service account (or reuse an existing one)
3. Generate a **JSON key**
4. Grant the service account:
   * `roles/bigquery.jobUser`
   * Dataset-level permission: **BigQuery Data Viewer** on the dataset containing your source table/view

***

### 3) Create the Sync in the Batch dashboard

Cloud Sync is configured from the dashboard via a dedicated **Sync module**.

1. Open the **Batch dashboard**
2. Go to **Data → Cloud Sync**
3. Click **Create Sync**
4. Select **BigQuery** as the source

***

#### 3.1 Configure your BigQuery connection

Enter:

* **Dataset**
* **Table or View**
* Upload your **Service Account Key (JSON)**

Batch validates the connection before continuing.

***

#### 3.2 Select the destination

In the **Destination** dropdown, select **Batch > Profile events**.

***

#### 3.3 Configure event mapping

Cloud Sync applies a simple mapping model:

* `custom_id` → identifies which Batch profile to attach the event to
* `event_name` → sets the event type
* `last_updated_at` → used only for incremental sync logic
* all other columns → mapped to event attributes

***

### 4) How incremental sync works

Cloud Sync uses **incremental processing**, which means it does not re-import your full dataset at every run. Instead, it fetches only the rows that are new since the last successful sync.

***

#### 4.1 The `last_updated_at` cursor

Batch stores the last successful cursor value internally.

At each run, Batch fetches only rows where:

* `last_updated_at` is greater than the last stored cursor

This makes sync runs faster, more scalable, and more cost-efficient.

{% hint style="warning" %}
For events, `last_updated_at` should reflect when the row was **inserted** into the table, not when the event occurred (`event_time`). Do not backfill or modify `last_updated_at` after insertion.
{% endhint %}

***

#### 4.2 Inserts and deletes

Incremental syncs capture:

* ✅ new event rows (inserts)

They do **not** capture:

* ❌ deletions — events sent to Batch are immutable; they cannot be removed via Cloud Sync

***

#### 4.3 Best practices for reliable incremental syncs

To avoid missing events:

* Set `last_updated_at` at **insertion time** and never modify it afterwards
* Use a View if you need to rename columns or apply type conversions
* Partition on `last_updated_at` for large datasets

***

### 5) Test and enable your Sync

Before enabling the schedule:

1. Run a **test sync**
2. Verify:
   * Events are created on the correct profiles
   * `event_time` is set correctly (or defaults to reception time as expected)
   * `date__` and `url__` fields are interpreted correctly
   * Object attributes are correctly stringified

Once enabled, Batch automatically handles batching and retries.


# Create a Sync from ClickHouse to Batch Profile Events

### Before you start

To create a ClickHouse → Batch Profile Events sync, you'll need:

* Access to the **Batch dashboard**
* A **ClickHouse table or view** containing one row per event
* Your **ClickHouse credentials** (Host, Port, Database, Username, Password)
* A table (or view) that follows the **Cloud Sync events input format** (see below)

***

### 1) Prepare your ClickHouse table or view

Cloud Sync expects your ClickHouse source (table or view) to include:

1. A **profile identifier** (to know which profile the event belongs to)
2. An **event name** (the type of event being recorded)
3. A **cursor field** (to know which rows are new since the last run)
4. Any number of **event attribute columns** (sent to Batch as event properties)

***

#### 1.1 One row per event

Your source must contain **one row per event**.\
Unlike profile attribute syncs, multiple rows can share the same `custom_id` — each row creates a separate event on the corresponding profile.

***

#### 1.2 Required columns

Your table (or view) must include the following columns:

| Column            | Required | Description                                            |
| ----------------- | :------: | ------------------------------------------------------ |
| `custom_id`       |     ✅    | The identifier of the profile the event belongs to     |
| `event_name`      |     ✅    | The name of the event (e.g. `add_to_cart`, `purchase`) |
| `last_updated_at` |     ✅    | Cursor used for incremental sync                       |

{% hint style="warning" %}
`last_updated_at` must be set **at the time the event row is inserted** and must not change afterwards. It is used only to determine which rows to fetch on the next sync run, not as the event timestamp.
{% endhint %}

***

#### 1.3 Optional columns

| Column       | Description                                                                                                                         |
| ------------ | ----------------------------------------------------------------------------------------------------------------------------------- |
| `event_time` | The timestamp of the event, in **RFC 3339 UTC** format (e.g. `2026-04-17T04:25:00Z`). If omitted, Batch uses the time of reception. |

***

#### 1.4 Event attribute naming rules (ClickHouse-compatible)

ClickHouse column names do not support characters like `$`, `(`, or `)`. Cloud Sync relies on **prefixes** in column names to represent typed event attributes.

**Supported prefixes**

| Prefix   | Meaning        | Example              |
| -------- | -------------- | -------------------- |
| `date__` | Date attribute | `date__purchased_at` |
| `url__`  | URL attribute  | `url__item_url`      |

Any column without a prefix is sent to Batch as a standard string, number, or boolean attribute.

***

#### 1.5 Handling arrays

Array event attributes must be passed as a **`String` column** containing a stringified JSON array. Native ClickHouse `Array()` types are not supported.

```sql
'["value1","value2","value3"]'
```

Example:

```sql
SELECT
  user_id               AS custom_id,
  'add_to_cart'         AS event_name,
  inserted_at           AS last_updated_at,
  '["yoga","wellness"]' AS interests    -- String, not Array(String)
FROM raw.events;
```

***

#### 1.6 Handling objects

Object event attributes must also be **stringified as a JSON object** before being passed to Cloud Sync. The connector parses the string and sends it in the correct format to the Profile API.

```sql
'{"color":"red","size":"M"}'
```

Example:

```sql
SELECT
  user_id                           AS custom_id,
  'purchase'                        AS event_name,
  inserted_at                       AS last_updated_at,
  toJSONString(product_details_map) AS product_details  -- stringified object
FROM raw.purchases;
```

***

#### 1.7 Example schema (e-commerce)

```sql
CREATE TABLE events_data.batch_events (
    custom_id          String,
    event_name         String,
    last_updated_at    DateTime64(3, 'UTC'),

    -- Optional event fields
    event_time         String,        -- RFC 3339 UTC, e.g. '2026-04-17T04:25:00Z'

    -- Standard event attributes
    item               String,
    quantity           UInt32,
    price              Float64,

    -- Typed event attributes
    url__item_url      String,        -- URL attribute
    date__purchased_at String,        -- date attribute

    -- Object event attribute (stringified)
    product_details    String         -- e.g. '{"brand":"Nike","size":"42"}'
) ENGINE = MergeTree()
ORDER BY (custom_id, last_updated_at);
```

**How this maps in Batch:**

* `custom_id` identifies the profile the event is attached to
* `event_name` sets the event type
* `event_time` sets the event timestamp (falls back to reception time if omitted)
* `item`, `quantity`, `price` become standard event attributes
* `url__item_url` is interpreted as a URL attribute
* `date__purchased_at` is interpreted as a date attribute
* `product_details` is interpreted as an object attribute

***

#### 1.8 Using a View

If your raw event table doesn't match the expected naming or format, create a **ClickHouse View** that converts your schema into the correct conventions.

```sql
CREATE OR REPLACE VIEW events_data.batch_events_view AS
SELECT
  toString(e.user_id)                              AS custom_id,
  e.event_type                                     AS event_name,
  e.inserted_at                                    AS last_updated_at,

  formatDateTime(e.occurred_at, '%Y-%m-%dT%H:%M:%SZ') AS event_time,

  e.item_name                                      AS item,
  e.qty                                            AS quantity,
  e.unit_price                                     AS price,

  e.item_url                                       AS url__item_url,
  formatDateTime(e.purchase_date, '%Y-%m-%d')      AS date__purchased_at,

  -- Stringify object attributes
  toJSONString(map('brand', e.brand, 'size', e.size)) AS product_details
FROM raw.events e;
```

This approach lets you:

* rename fields with the correct prefixes (`date__`, `url__`)
* set a reliable `last_updated_at` based on insertion time
* stringify array and object columns correctly
* format `event_time` to RFC 3339 UTC

***

#### 1.9 Handling nulls

If an optional column value is `NULL`, that attribute is simply omitted from the event. It does not affect other attributes on the same event or on the profile.

***

### 2) Create the Sync in the Batch dashboard

Cloud Sync is configured from the dashboard via a dedicated **Sync module**.

1. Open the **Batch dashboard**
2. Go to **Data → Cloud Sync**
3. Click **Create Sync**
4. Select **ClickHouse** as the source

***

#### 2.1 Configure your ClickHouse connection

Enter the following fields:

| Field    | Description                                                         |
| -------- | ------------------------------------------------------------------- |
| Host     | Your ClickHouse server hostname (e.g. `your-host.example.com`)      |
| Port     | ClickHouse HTTP(S) port — defaults to `8123`                        |
| Database | The database containing your source table/view (default: `default`) |
| Username | Your ClickHouse username                                            |
| Password | Your ClickHouse password                                            |
| SSL      | Toggle on to use a secure connection (recommended for production)   |
| Table    | The table or view name                                              |

Batch validates the connection before continuing.

***

#### 2.2 Select the destination

In the **Destination** dropdown, select **Batch > Profile events**.

***

#### 2.3 Configure event mapping

Cloud Sync applies a simple mapping model:

* `custom_id` → identifies which Batch profile to attach the event to
* `event_name` → sets the event type
* `last_updated_at` → used only for incremental sync logic
* all other columns → mapped to event attributes

***

### 3) How incremental sync works

Cloud Sync uses **incremental processing**, which means it does not re-import your full dataset at every run. Instead, it fetches only the rows that are new since the last successful sync.

***

#### 3.1 The `last_updated_at` cursor

Batch stores the last successful cursor value internally.

At each run, Batch fetches only rows where:

* `last_updated_at` is greater than the last stored cursor

This makes sync runs faster, more scalable, and more cost-efficient.

{% hint style="warning" %}
For events, `last_updated_at` should reflect when the row was **inserted** into the table, not when the event occurred (`event_time`). Do not backfill or modify `last_updated_at` after insertion.
{% endhint %}

***

#### 3.2 Inserts and deletes

Incremental syncs capture:

* ✅ new event rows (inserts)

They do **not** capture:

* ❌ deletions — events sent to Batch are immutable; they cannot be removed via Cloud Sync

***

#### 3.3 Best practices for reliable incremental syncs

To avoid missing events:

* Set `last_updated_at` at **insertion time** and never modify it afterwards
* Use a View if you need to rename columns or apply type conversions
* Use `ReplacingMergeTree` and order by `last_updated_at` for large tables

***

### 4) Test and enable your Sync

Before enabling the schedule:

1. Run a **test sync**
2. Verify:
   * Events are created on the correct profiles
   * `event_time` is set correctly (or defaults to reception time as expected)
   * `date__` and `url__` fields are interpreted correctly
   * Array and object attributes are correctly stringified

Once enabled, Batch automatically handles batching and retries.


# Create a Sync from MSSQL to Batch Profile Attributes

### Before you start

To create an MSSQL → Batch sync, you'll need:

* Access to the **Batch dashboard**
* An **MSSQL-compatible database** (Azure SQL Database, Azure SQL Managed Instance, Microsoft Fabric Warehouse, or SQL Server 2012+) containing one row per profile
* Credentials to connect: either a **username/password** or a **Microsoft Entra ID service principal** (Client ID + Client Secret)
* A table (or view) that follows the **Cloud Sync input format** (see below)

***

### 1) Prepare your MSSQL table

Cloud Sync expects your MSSQL source (table or view) to include:

1. A **profile identifier** (to know which profile to update)
2. A **cursor field** (to know what changed since the last run)
3. Any number of **attribute columns** (sent to Batch as profile attributes)

***

#### 1.1 One row per profile

Your source must contain **one row per profile**.\
Each row is interpreted as an update to a single Batch profile.

***

#### 1.2 Required columns

Your table (or view) must include:

| Column            | Required | Description                      |
| ----------------- | :------: | -------------------------------- |
| `custom_id`       |     ✅    | The profile identifier in Batch  |
| `last_updated_at` |     ✅    | Cursor used for incremental sync |

**Important:** `last_updated_at` must be updated **every time any synced attribute changes**, otherwise updates may not be picked up by the next run.

***

#### 1.3 Attribute naming rules

Cloud Sync reads your MSSQL columns and converts them into Batch profile attributes.

Because the Batch Profile API uses characters like `$`, `(`, or `)` that are not valid in SQL column names, Cloud Sync relies on **prefixes** in column names to represent typed or native fields.

**Supported prefixes**

| Prefix    | Meaning                                   | Example                |
| --------- | ----------------------------------------- | ---------------------- |
| `date__`  | Date attribute                            | `date__birthday`       |
| `url__`   | URL attribute                             | `url__avatar`          |
| `batch__` | Native profile fields (instead of `$...`) | `batch__email_address` |

***

#### 1.4 Example schema (e-commerce)

Here's a table format you can use as a reference:

```sql
CREATE TABLE customer_data.batch_profiles (
    custom_id          VARCHAR(255),
    last_updated_at    DATETIME2(3),

    -- Native profile fields
    batch__email_address VARCHAR(255),

    -- Standard attributes
    plan               VARCHAR(100),
    country            VARCHAR(100),
    lifetime_value     FLOAT,
    is_vip             BIT,

    -- Typed attributes
    url__avatar        VARCHAR(2048),
    date__birthday     VARCHAR(30),           -- RFC 3339 UTC, e.g. '2026-04-17T04:25:00Z'
    date__last_purchase VARCHAR(30)           -- RFC 3339 UTC, e.g. '2026-04-17T04:25:00Z'
);
```

**How this maps in Batch:**

* `custom_id` identifies the profile
* `batch__email_address` updates the profile's native email field
* `plan`, `country`, `lifetime_value`, `is_vip` become attributes
* `url__avatar` is interpreted as a URL attribute
* `date__birthday` and `date__last_purchase` are interpreted as date attributes

***

#### 1.5 Using a View

If your raw table doesn't match the expected naming or format, create an **MSSQL View** that converts your schema into the correct conventions.

Example:

```sql
CREATE OR ALTER VIEW customer_data.batch_profiles_view AS
SELECT
    CAST(u.user_id AS VARCHAR(255))          AS custom_id,
    CASE
        WHEN u.updated_at > o.last_order_updated_at THEN u.updated_at
        ELSE o.last_order_updated_at
    END                                        AS last_updated_at,

    u.email                                    AS batch__email_address,
    u.country,
    u.plan,

    u.avatar_url                               AS url__avatar,
    CONVERT(VARCHAR(30), u.birth_date, 23)    AS date__birthday,

    CONVERT(VARCHAR(30), o.last_order_date, 23) AS date__last_purchase,
    o.total_spent                              AS lifetime_value,
    u.is_vip
FROM raw.users u
LEFT JOIN raw.user_orders_summary o
    ON u.user_id = o.user_id;
```

This approach lets you:

* rename fields with the correct prefixes (`batch__`, `date__`, `url__`)
* compute a reliable `last_updated_at`
* ensure you always expose **one row per profile**

***

#### 1.6 Handling nulls

If a column value is `NULL`, Batch interprets it as **attribute removal** for that profile.

If you don't want an attribute removed:

* ensure your view returns a non-null value, or
* exclude the column from the sync entirely.

***

#### 1.7 Attributes limits and constraints

When syncing data from MSSQL to Batch, all attributes sent through Cloud Sync must respect the same limits and constraints as the Batch Profile API. See Profile API documentation, the attributes object.

***

### 2) Set up database access

Batch connects to your MSSQL database using either **username/password** or **Microsoft Entra ID** (recommended for Azure SQL).

#### Option A — Username / Password

Create a dedicated read-only user in your database and grant it `SELECT` access on the relevant table or view:

```sql
CREATE LOGIN batch_sync WITH PASSWORD = 'YourStrongPassword!';
CREATE USER batch_sync FOR LOGIN batch_sync;
GRANT SELECT ON customer_data.batch_profiles_view TO batch_sync;
```

#### Option B — Microsoft Entra ID (recommended for Azure SQL)

This method uses a **service principal** (App Registration) to authenticate without storing a password.

**2.1 Create an App Registration in Entra ID**

1. Go to [entra.microsoft.com](https://entra.microsoft.com)
2. Navigate to **Entra ID → App registrations → New registration**
3. Give it a name (e.g. `Batch Cloud Sync`) and register it
4. Note the **Application (Client) ID** — you'll need it later
5. Go to **Certificates & secrets → New client secret**
6. Note the **Value** of the client secret — it is only shown once

**2.2 Create a database user for the service principal**

In your Azure SQL Database, run the following as an admin:

```sql
CREATE USER [Batch Cloud Sync] FROM EXTERNAL PROVIDER;
GRANT SELECT ON customer_data.batch_profiles_view TO [Batch Cloud Sync];
```

{% hint style="warning" %}
The user name in brackets must match exactly the **display name** of your App Registration in Entra ID.
{% endhint %}

***

### 3) Create the Sync in the Batch dashboard

Cloud Sync is configured from the dashboard via a dedicated **Sync module**.

1. Open the **Batch dashboard**
2. Go to **Data → Cloud Sync**
3. Click **Create Sync**
4. Select **MSSQL** as the source

***

#### 3.1 Configure your MSSQL connection

Enter:

* **Host** — your server hostname (e.g. `myserver.database.windows.net` for Azure SQL, or `<workspace>.datawarehouse.fabric.microsoft.com` for Microsoft Fabric Warehouse)
* **Port** — default is `1433`
* **Database** — the name of your database
* **Schema** — the schema containing your table or view
* **Table or View** — the name of the source table or view

Then fill in your credentials:

* **Username / Password** if using SQL authentication, or
* **Entra ID Client ID** and **Entra ID Client Secret** if using Microsoft Entra ID

{% hint style="warning" %}
When using Microsoft Entra ID authentication, an encrypted connection is required. Make sure your server accepts encrypted connections.
{% endhint %}

Batch validates the connection before continuing.

***

#### 3.2 Configure profile mapping

Cloud Sync applies a simple mapping model:

* `custom_id` → identifies which Batch profile to update
* `last_updated_at` → used only for incremental sync logic
* all other columns → mapped to profile attributes

***

### 4) How incremental sync works

Cloud Sync uses **incremental processing**, which means it does not re-import your full dataset at every run. Instead, it fetches only the rows that changed since the last successful sync.

***

#### 4.1 The `last_updated_at` cursor

Batch stores the last successful cursor value internally.

At each run, Batch fetches only rows where:

* `last_updated_at` is greater than the last stored cursor

This makes sync runs faster, more scalable, and more cost-efficient.

***

#### 4.2 Inserts, updates, and deletes

Incremental syncs naturally capture:

* ✅ inserts
* ✅ updates

They do **not** automatically capture:

* ❌ deletes

If you need deletions reflected in Batch, implement soft deletes by setting all attributes to `NULL` in the view when a profile is deleted.

***

#### 4.3 Best practices for reliable incremental syncs

To avoid missing changes:

* Ensure `last_updated_at` updates **every time a synced column changes**
* Ensure `last_updated_at` reflects the most recent change across **all** synced columns — not just one of them. If your source table tracks update timestamps per field, compute `last_updated_at` in your view using the maximum across all relevant timestamps
* Use a View if you need computed fields or type conversions
* Index on `last_updated_at` for large tables

***

### 5) Test and enable your Sync

Before enabling the schedule:

1. Run a **test sync**
2. Verify:
   * Profiles are created or updated correctly
   * `batch__`, `date__`, and `url__` fields are interpreted correctly
   * Null values behave as expected (null → attribute removal)

Once enabled, Batch automatically handles:

* batching
* retries


# Create a Sync from MSSQL to Batch Profile Events

### Before you start

To create an MSSQL → Batch Profile Events sync, you'll need:

* Access to the **Batch dashboard**
* An **MSSQL-compatible database** (Azure SQL Database, Azure SQL Managed Instance, Microsoft Fabric Warehouse, or SQL Server 2012+) containing one row per event
* Credentials to connect: either a **username/password** or a **Microsoft Entra ID service principal** (Client ID + Client Secret)
* A table (or view) that follows the **Cloud Sync events input format** (see below)

***

### 1) Prepare your MSSQL table or view

Cloud Sync expects your MSSQL source (table or view) to include:

1. A **profile identifier** (to know which profile the event belongs to)
2. An **event name** (the type of event being recorded)
3. A **cursor field** (to know which rows are new since the last run)
4. Any number of **event attribute columns** (sent to Batch as event properties)

***

#### 1.1 One row per event

Your source must contain **one row per event**.\
Unlike profile attribute syncs, multiple rows can share the same `custom_id` — each row creates a separate event on the corresponding profile.

***

#### 1.2 Required columns

Your table (or view) must include the following columns:

| Column            | Required | Description                                            |
| ----------------- | :------: | ------------------------------------------------------ |
| `custom_id`       |     ✅    | The identifier of the profile the event belongs to     |
| `event_name`      |     ✅    | The name of the event (e.g. `add_to_cart`, `purchase`) |
| `last_updated_at` |     ✅    | Cursor used for incremental sync                       |

{% hint style="warning" %}
`last_updated_at` must be set **at the time the event row is inserted** and must not change afterwards. It is used only to determine which rows to fetch on the next sync run, not as the event timestamp.
{% endhint %}

***

#### 1.3 Optional columns

| Column       | Description                                                                                                                         |
| ------------ | ----------------------------------------------------------------------------------------------------------------------------------- |
| `event_time` | The timestamp of the event, in **RFC 3339 UTC** format (e.g. `2026-04-17T04:25:00Z`). If omitted, Batch uses the time of reception. |

***

#### 1.4 Event attribute naming rules

SQL column names cannot contain characters like `$`, `(`, or `)`. Cloud Sync relies on **prefixes** in column names to represent typed event attributes.

**Supported prefixes**

| Prefix   | Meaning        | Example              |
| -------- | -------------- | -------------------- |
| `date__` | Date attribute | `date__purchased_at` |
| `url__`  | URL attribute  | `url__item_url`      |

Any column without a prefix is sent to Batch as a standard string, number, or boolean attribute.

***

#### 1.5 Handling objects

Object event attributes must be **stored as a JSON string** in your MSSQL column. The connector parses the string and sends it in the correct format to the Profile API.

```json
'{"color":"red","size":"M"}'
```

Example using `FOR JSON PATH`:

```sql
SELECT
    user_id                                      AS custom_id,
    'purchase'                                   AS event_name,
    inserted_at                                  AS last_updated_at,
    (SELECT brand, size FROM product_details
     WHERE id = p.id FOR JSON PATH, WITHOUT_ARRAY_WRAPPER) AS product_details
FROM raw.purchases p;
```

***

#### 1.6 Example schema (e-commerce)

```sql
CREATE TABLE events_data.batch_events (
    custom_id          VARCHAR(255),
    event_name         VARCHAR(255),
    last_updated_at    DATETIME2(3),

    -- Optional event fields
    event_time         VARCHAR(30),         -- RFC 3339 UTC, e.g. '2026-04-17T04:25:00Z'

    -- Standard event attributes
    item               VARCHAR(255),
    quantity           INT,
    price              FLOAT,

    -- Typed event attributes
    url__item_url      VARCHAR(2048),        -- URL attribute
    date__purchased_at VARCHAR(30),          -- RFC 3339 UTC, e.g. '2026-04-17T04:25:00Z'

    -- Object event attribute (stringified JSON)
    product_details    VARCHAR(MAX)          -- e.g. '{"brand":"Nike","size":"42"}'
);
```

**How this maps in Batch:**

* `custom_id` identifies the profile the event is attached to
* `event_name` sets the event type
* `event_time` sets the event timestamp (falls back to reception time if omitted)
* `item`, `quantity`, `price` become standard event attributes
* `url__item_url` is interpreted as a URL attribute
* `date__purchased_at` is interpreted as a date attribute
* `product_details` is interpreted as an object attribute

***

#### 1.7 Using a View

If your raw event table doesn't match the expected naming or format, create an **MSSQL View** that converts your schema into the correct conventions.

```sql
CREATE OR ALTER VIEW events_data.batch_events_view AS
SELECT
    CAST(e.user_id AS VARCHAR(255))                             AS custom_id,
    e.event_type                                                  AS event_name,
    e.inserted_at                                                 AS last_updated_at,

    FORMAT(e.occurred_at AT TIME ZONE 'UTC', 'yyyy-MM-ddTHH:mm:ssZ') AS event_time,

    e.item_name                                                   AS item,
    e.qty                                                         AS quantity,
    e.unit_price                                                  AS price,

    e.item_url                                                    AS url__item_url,
    CONVERT(VARCHAR(30), e.purchase_date, 23)                    AS date__purchased_at,

    (SELECT e.brand, e.size FOR JSON PATH, WITHOUT_ARRAY_WRAPPER) AS product_details
FROM raw.events e;
```

This approach lets you:

* rename fields with the correct prefixes (`date__`, `url__`)
* set a reliable `last_updated_at` based on insertion time
* format `event_time` to RFC 3339 UTC
* stringify object columns correctly

***

#### 1.8 Handling nulls

If an optional column value is `NULL`, that attribute is simply omitted from the event. It does not affect other attributes on the same event or on the profile.

***

### 2) Set up database access

Batch connects to your MSSQL database using either **username/password** or **Microsoft Entra ID** (recommended for Azure SQL).

#### Option A — Username / Password

Create a dedicated read-only user in your database and grant it `SELECT` access on the relevant table or view:

```sql
CREATE LOGIN batch_sync WITH PASSWORD = 'YourStrongPassword!';
CREATE USER batch_sync FOR LOGIN batch_sync;
GRANT SELECT ON events_data.batch_events_view TO batch_sync;
```

#### Option B — Microsoft Entra ID (recommended for Azure SQL)

This method uses a **service principal** (App Registration) to authenticate without storing a password.

**2.1 Create an App Registration in Entra ID**

1. Go to [entra.microsoft.com](https://entra.microsoft.com)
2. Navigate to **Entra ID → App registrations → New registration**
3. Give it a name (e.g. `Batch Cloud Sync`) and register it
4. Note the **Application (Client) ID** — you'll need it later
5. Go to **Certificates & secrets → New client secret**
6. Note the **Value** of the client secret — it is only shown once

**2.2 Create a database user for the service principal**

In your Azure SQL Database, run the following as an admin:

```sql
CREATE USER [Batch Cloud Sync] FROM EXTERNAL PROVIDER;
GRANT SELECT ON events_data.batch_events_view TO [Batch Cloud Sync];
```

{% hint style="warning" %}
The user name in brackets must match exactly the **display name** of your App Registration in Entra ID.
{% endhint %}

***

### 3) Create the Sync in the Batch dashboard

Cloud Sync is configured from the dashboard via a dedicated **Sync module**.

1. Open the **Batch dashboard**
2. Go to **Data → Cloud Sync**
3. Click **Create Sync**
4. Select **MSSQL** as the source

***

#### 3.1 Configure your MSSQL connection

Enter:

* **Host** — your server hostname (e.g. `myserver.database.windows.net` for Azure SQL, or `<workspace>.datawarehouse.fabric.microsoft.com` for Microsoft Fabric Warehouse)
* **Port** — default is `1433`
* **Database** — the name of your database
* **Schema** — the schema containing your table or view
* **Table or View** — the name of the source table or view

Then fill in your credentials:

* **Username / Password** if using SQL authentication, or
* **Entra ID Client ID** and **Entra ID Client Secret** if using Microsoft Entra ID

{% hint style="warning" %}
When using Microsoft Entra ID authentication, an encrypted connection is required. Make sure your server accepts encrypted connections.
{% endhint %}

Batch validates the connection before continuing.

***

#### 3.2 Select the destination

In the **Destination** dropdown, select **Batch > Profile events**.

***

#### 3.3 Configure event mapping

Cloud Sync applies a simple mapping model:

* `custom_id` → identifies which Batch profile to attach the event to
* `event_name` → sets the event type
* `last_updated_at` → used only for incremental sync logic
* all other columns → mapped to event attributes

***

### 4) How incremental sync works

Cloud Sync uses **incremental processing**, which means it does not re-import your full dataset at every run. Instead, it fetches only the rows that are new since the last successful sync.

***

#### 4.1 The `last_updated_at` cursor

Batch stores the last successful cursor value internally.

At each run, Batch fetches only rows where:

* `last_updated_at` is greater than the last stored cursor

This makes sync runs faster, more scalable, and more cost-efficient.

{% hint style="warning" %}
For events, `last_updated_at` should reflect when the row was **inserted** into the table, not when the event occurred (`event_time`). Do not backfill or modify `last_updated_at` after insertion.
{% endhint %}

***

#### 4.2 Inserts and deletes

Incremental syncs capture:

* ✅ new event rows (inserts)

They do **not** capture:

* ❌ deletions — events sent to Batch are immutable; they cannot be removed via Cloud Sync

***

#### 4.3 Best practices for reliable incremental syncs

To avoid missing events:

* Set `last_updated_at` at **insertion time** and never modify it afterwards
* Use a View if you need to rename columns or apply type conversions
* Index on `last_updated_at` for large tables

***

### 5) Test and enable your Sync

Before enabling the schedule:

1. Run a **test sync**
2. Verify:
   * Events are created on the correct profiles
   * `event_time` is set correctly (or defaults to reception time as expected)
   * `date__` and `url__` fields are interpreted correctly
   * Object attributes are correctly stringified

Once enabled, Batch automatically handles batching and retries.


# Create a Sync from Redshift to Batch Profile Attributes

## Create a Sync from Redshift to Batch Profile Attributes

### Before you start

To create a Redshift → Batch sync, you'll need:

* Access to the **Batch dashboard**
* A **Redshift table or view** containing one row per profile
* Your **Redshift credentials** (Username & Password)
* Your **Host, Port, Database, and Table** details
* A table (or view) that follows the **Cloud Sync input format** (see below)

***

### 1) Prepare your Redshift table

Cloud Sync expects your Redshift source (table or view) to include:

1. A **profile identifier** (to know which profile to update)
2. A **cursor field** (to know what changed since the last run)
3. Any number of **attribute columns** (sent to Batch as profile attributes)

***

#### 1.1 One row per profile

Your source must contain **one row per profile**.\
Each row is interpreted as an update to a single Batch profile.

***

#### 1.2 Required columns

Your table (or view) must include:

| Column            | Required | Description                      |
| ----------------- | -------: | -------------------------------- |
| `custom_id`       |        ✅ | The profile identifier in Batch  |
| `last_updated_at` |        ✅ | Cursor used for incremental sync |

**Important:** `last_updated_at` must be updated **every time any synced attribute changes**, otherwise updates may not be picked up by the next run.

***

#### 1.3 Attribute naming rules (Redshift-compatible)

Cloud Sync reads Redshift columns and converts them into Batch profile attributes.

However, **Redshift column names cannot contain characters like `$`, `(`, or `)`**. That means you can't use the exact Profile API formats such as:

* `url(avatar)`
* `date(birthday)`
* `$email_address`

✅ Instead, Cloud Sync relies on **prefixes** in column names to represent typed or native fields.

**Supported prefixes**

| Prefix    | Meaning                                   | Example                |
| --------- | ----------------------------------------- | ---------------------- |
| `date__`  | Date attribute                            | `date__birthday`       |
| `url__`   | URL attribute                             | `url__avatar`          |
| `batch__` | Native profile fields (instead of `$...`) | `batch__email_address` |

***

#### 1.4 Example schema (e-commerce)

Here's a table format you can use as a reference:

```sql
CREATE TABLE customer_data.batch_profiles (
    custom_id VARCHAR,
    last_updated_at TIMESTAMP,

    -- Native profile fields
    batch__email_address VARCHAR,

    -- Standard attributes
    plan VARCHAR,
    country VARCHAR,
    lifetime_value FLOAT8,
    is_vip BOOLEAN,

    -- Typed attributes
    url__avatar VARCHAR,
    date__birthday VARCHAR,           -- RFC 3339 UTC, e.g. '2026-04-17T04:25:00Z'
    date__last_purchase VARCHAR           -- RFC 3339 UTC, e.g. '2026-04-17T04:25:00Z'
);
```

**How this maps in Batch:**

* `custom_id` identifies the profile
* `batch__email_address` updates the profile's native email field
* `plan`, `country`, `lifetime_value`, `is_vip` become attributes
* `url__avatar` is interpreted as a URL attribute
* `date__birthday` and `date__last_purchase` are interpreted as date attributes

***

#### 1.5 Using a View

If your raw table doesn't match the expected naming or format, create a **Redshift View** that converts your schema into the correct conventions.

Example:

```sql
CREATE OR REPLACE VIEW customer_data.batch_profiles_view AS
SELECT
  CAST(u.user_id AS VARCHAR) AS custom_id,
  GREATEST(u.updated_at, o.last_order_updated_at) AS last_updated_at,

  u.email AS batch__email_address,
  u.country,
  u.plan,

  u.avatar_url AS url__avatar,
  TO_CHAR(u.birth_date, 'YYYY-MM-DD') AS date__birthday,

  o.last_order_date AS date__last_purchase,
  o.total_spent AS lifetime_value,
  u.is_vip
FROM raw.users u
LEFT JOIN raw.user_orders_summary o
  ON u.user_id = o.user_id;
```

This approach lets you:

* rename fields with the correct prefixes (`batch__`, `date__`, `url__`)
* compute a reliable `last_updated_at`
* ensure you always expose **one row per profile**

***

#### 1.6 Handling nulls

If a column value is `NULL`, Batch interprets it as **attribute removal** for that profile.

If you don't want an attribute removed:

* ensure your view returns a non-null value, or
* exclude the column from the sync entirely.

***

#### 1.7 Attributes limits and constraints

When syncing data from Redshift to Batch, all attributes sent through Cloud Sync must respect the same limits and constraints as the Batch Profile API. See Profile API documentation, the attributes object.

### 2) Create the Sync in the Batch dashboard

Cloud Sync is configured from the dashboard via a dedicated **Sync module**.

1. Open the **Batch dashboard**
2. Go to **Data → Cloud Sync**
3. Click **Create Sync**
4. Select **Redshift** as the source

***

#### 2.1 Configure your Redshift connection

Enter:

| Field    | Description                                                                      |
| -------- | -------------------------------------------------------------------------------- |
| Host     | Your Redshift cluster endpoint (e.g. `cluster.region.redshift.amazonaws.com`)    |
| Port     | The port your cluster listens on (default `5439`)                                |
| Username | Your Redshift username                                                           |
| Password | Your Redshift password                                                           |
| Database | The database containing your source table/view                                   |
| Schema   | *(optional)* The schema containing your source table/view (defaults to `public`) |
| Table    | The table or view name                                                           |

Batch validates the connection before continuing.

***

#### 2.2 Configure profile mapping

Cloud Sync applies a simple mapping model:

* `custom_id` → identifies which Batch profile to update
* all other columns → mapped to profile attributes
* `last_updated_at` → used only for incremental sync logic

***

### 3) How incremental sync works

Cloud Sync uses **incremental processing**, which means it does not re-import your full dataset at every run. Instead, it fetches only the rows that changed since the last successful sync.

***

#### 3.1 The `last_updated_at` cursor

Batch stores the last successful cursor value internally.

At each run, Batch fetches only rows where:

* `last_updated_at` is greater than the last stored cursor

This makes sync runs faster, more scalable, and more cost-efficient.

***

#### 3.2 Inserts, updates, and deletes

Incremental syncs naturally capture:

* ✅ inserts
* ✅ updates

They do **not** automatically capture:

* ❌ deletes

If you need deletions reflected in Batch, rely on a different pipeline or implement soft deletes by setting all attributes to null in the Redshift view when a profile is deleted.

***

#### 3.3 Best practices for reliable incremental syncs

To avoid missing changes:

* Ensure `last_updated_at` updates **every time a synced column changes**
* Avoid timestamps that only reflect partial updates
* Use a View if you need computed fields or type conversions
* Sort your table on `last_updated_at` for large datasets

***

### 4) Test and enable your Sync

Before enabling the schedule:

1. Run a **test sync**
2. Verify:
   * Profiles are created or updated correctly
   * `batch__`, `date__`, and `url__` fields are interpreted correctly
   * Null values behave as expected (null → attribute removal)

Once enabled, Batch automatically handles:

* batching
* retries


# Create a Sync from Databricks to Batch Profile Attributes

## Create a Sync from Databricks to Batch Profile Attributes

### Before you start

To create a Databricks → Batch sync, you'll need:

* Access to the **Batch dashboard**
* A **Databricks table or view** containing one row per profile, exposed through a **SQL Warehouse**
* A **Databricks personal access token**
* Your **Server URL, HTTP Path, Database, and Table** details
* A table (or view) that follows the **Cloud Sync input format** (see below)

***

### 1) Prepare your Databricks table

Cloud Sync expects your Databricks source (table or view) to include:

1. A **profile identifier** (to know which profile to update)
2. A **cursor field** (to know what changed since the last run)
3. Any number of **attribute columns** (sent to Batch as profile attributes)

***

#### 1.1 One row per profile

Your source must contain **one row per profile**.\
Each row is interpreted as an update to a single Batch profile.

***

#### 1.2 Required columns

Your table (or view) must include:

| Column            | Required | Description                      |
| ----------------- | -------: | -------------------------------- |
| `custom_id`       |        ✅ | The profile identifier in Batch  |
| `last_updated_at` |        ✅ | Cursor used for incremental sync |

**Important:** `last_updated_at` must be updated **every time any synced attribute changes**, otherwise updates may not be picked up by the next run.

***

#### 1.3 Attribute naming rules (Databricks-compatible)

Cloud Sync reads Databricks columns and converts them into Batch profile attributes.

However, **Databricks column names cannot contain characters like `$`, `(`, or `)`**. That means you can't use the exact Profile API formats such as:

* `url(avatar)`
* `date(birthday)`
* `$email_address`

✅ Instead, Cloud Sync relies on **prefixes** in column names to represent typed or native fields.

**Supported prefixes**

| Prefix    | Meaning                                   | Example                |
| --------- | ----------------------------------------- | ---------------------- |
| `date__`  | Date attribute                            | `date__birthday`       |
| `url__`   | URL attribute                             | `url__avatar`          |
| `batch__` | Native profile fields (instead of `$...`) | `batch__email_address` |

***

#### 1.4 Example schema (e-commerce)

Here's a table format you can use as a reference:

```sql
CREATE TABLE customer_data.batch_profiles (
    custom_id STRING,
    last_updated_at TIMESTAMP,

    -- Native profile fields
    batch__email_address STRING,

    -- Standard attributes
    plan STRING,
    country STRING,
    lifetime_value DOUBLE,
    is_vip BOOLEAN,

    -- Typed attributes
    url__avatar STRING,
    date__birthday STRING,           -- RFC 3339 UTC, e.g. '2026-04-17T04:25:00Z'
    date__last_purchase STRING           -- RFC 3339 UTC, e.g. '2026-04-17T04:25:00Z'
);
```

**How this maps in Batch:**

* `custom_id` identifies the profile
* `batch__email_address` updates the profile's native email field
* `plan`, `country`, `lifetime_value`, `is_vip` become attributes
* `url__avatar` is interpreted as a URL attribute
* `date__birthday` and `date__last_purchase` are interpreted as date attributes

***

#### 1.5 Using a View

If your raw table doesn't match the expected naming or format, create a **Databricks View** that converts your schema into the correct conventions.

Example:

```sql
CREATE OR REPLACE VIEW customer_data.batch_profiles_view AS
SELECT
  CAST(u.user_id AS STRING) AS custom_id,
  GREATEST(u.updated_at, o.last_order_updated_at) AS last_updated_at,

  u.email AS batch__email_address,
  u.country,
  u.plan,

  u.avatar_url AS url__avatar,
  DATE_FORMAT(u.birth_date, 'yyyy-MM-dd') AS date__birthday,

  o.last_order_date AS date__last_purchase,
  o.total_spent AS lifetime_value,
  u.is_vip
FROM raw.users u
LEFT JOIN raw.user_orders_summary o
  ON u.user_id = o.user_id;
```

This approach lets you:

* rename fields with the correct prefixes (`batch__`, `date__`, `url__`)
* compute a reliable `last_updated_at`
* ensure you always expose **one row per profile**

***

#### 1.6 Handling nulls

If a column value is `NULL`, Batch interprets it as **attribute removal** for that profile.

If you don't want an attribute removed:

* ensure your view returns a non-null value, or
* exclude the column from the sync entirely.

***

#### 1.7 Attributes limits and constraints

When syncing data from Databricks to Batch, all attributes sent through Cloud Sync must respect the same limits and constraints as the Batch Profile API. See Profile API documentation, the attributes object.

### 2) Create the Sync in the Batch dashboard

Cloud Sync is configured from the dashboard via a dedicated **Sync module**.

1. Open the **Batch dashboard**
2. Go to **Data → Cloud Sync**
3. Click **Create Sync**
4. Select **Databricks** as the source

***

#### 2.1 Configure your Databricks connection

Enter:

| Field      | Description                                                                              |
| ---------- | ---------------------------------------------------------------------------------------- |
| Token      | A Databricks **personal access token** with the `sql` API scope                          |
| Server URL | Your workspace instance name (e.g. `dbc-xxxxxxxx-xxxx.cloud.databricks.com`)             |
| HTTP Path  | The HTTP path of the **SQL Warehouse** to query (e.g. `sql/1.0/warehouses/xxxxxxxxxxxx`) |
| Database   | The catalog/database containing your source table/view (e.g. `workspace`)                |
| Schema     | *(optional)* The schema containing your source table/view (defaults to `default`)        |
| Table      | The table or view name                                                                   |

Batch validates the connection before continuing.

***

#### 2.2 Configure profile mapping

Cloud Sync applies a simple mapping model:

* `custom_id` → identifies which Batch profile to update
* all other columns → mapped to profile attributes
* `last_updated_at` → used only for incremental sync logic

***

### 3) How incremental sync works

Cloud Sync uses **incremental processing**, which means it does not re-import your full dataset at every run. Instead, it fetches only the rows that changed since the last successful sync.

***

#### 3.1 The `last_updated_at` cursor

Batch stores the last successful cursor value internally.

At each run, Batch fetches only rows where:

* `last_updated_at` is greater than the last stored cursor

This makes sync runs faster, more scalable, and more cost-efficient.

***

#### 3.2 Inserts, updates, and deletes

Incremental syncs naturally capture:

* ✅ inserts
* ✅ updates

They do **not** automatically capture:

* ❌ deletes

If you need deletions reflected in Batch, rely on a different pipeline or implement soft deletes by setting all attributes to null in the Databricks view when a profile is deleted.

***

#### 3.3 Best practices for reliable incremental syncs

To avoid missing changes:

* Ensure `last_updated_at` updates **every time a synced column changes**
* Avoid timestamps that only reflect partial updates
* Use a View if you need computed fields or type conversions
* Partition or Z-order on `last_updated_at` for large tables

***

### 4) Test and enable your Sync

Before enabling the schedule:

1. Run a **test sync**
2. Verify:
   * Profiles are created or updated correctly
   * `batch__`, `date__`, and `url__` fields are interpreted correctly
   * Null values behave as expected (null → attribute removal)

Once enabled, Batch automatically handles:

* batching
* retries


# Create a Sync from Redshift to Batch Profile Events

## Create a Sync from Redshift to Batch Profile Events

#### Before you start

To create a Redshift → Batch Profile Events sync, you'll need:

* Access to the **Batch dashboard**
* A **Redshift table or view** containing one row per event
* Your **Redshift credentials** (Username & Password)
* Your **Host, Port, Database, and Table** details
* A table (or view) that follows the **Cloud Sync events input format** (see below)

***

#### 1) Prepare your Redshift table or view

Cloud Sync expects your Redshift source (table or view) to include:

1. A **profile identifier** (to know which profile the event belongs to)
2. An **event name** (the type of event being recorded)
3. A **cursor field** (to know which rows are new since the last run)
4. Any number of **event attribute columns** (sent to Batch as event properties)

***

**1.1 One row per event**

Your source must contain **one row per event**.\
Unlike profile attribute syncs, multiple rows can share the same `custom_id` — each row creates a separate event on the corresponding profile.

***

**1.2 Required columns**

Your table (or view) must include the following columns:

| Column            | Required | Description                                            |
| ----------------- | :------: | ------------------------------------------------------ |
| `custom_id`       |     ✅    | The identifier of the profile the event belongs to     |
| `event_name`      |     ✅    | The name of the event (e.g. `add_to_cart`, `purchase`) |
| `last_updated_at` |     ✅    | Cursor used for incremental sync                       |

**Important:** `last_updated_at` must be set **at the time the event row is inserted** and must not change afterwards. It is used only to determine which rows to fetch on the next sync run, not as the event timestamp.

***

**1.3 Optional columns**

| Column       | Description                                                                                                                         |
| ------------ | ----------------------------------------------------------------------------------------------------------------------------------- |
| `event_time` | The timestamp of the event, in **RFC 3339 UTC** format (e.g. `2026-04-17T04:25:00Z`). If omitted, Batch uses the time of reception. |

***

**1.4 Event attribute naming rules (Redshift-compatible)**

Redshift column names cannot contain characters like `$`, `(`, or `)`. Cloud Sync relies on **prefixes** in column names to represent typed event attributes.

**Supported prefixes**

| Prefix   | Meaning        | Example              |
| -------- | -------------- | -------------------- |
| `date__` | Date attribute | `date__purchased_at` |
| `url__`  | URL attribute  | `url__item_url`      |

Any column without a prefix is sent to Batch as a standard string, number, or boolean attribute.

***

**1.5 Handling objects**

Object event attributes must be **stringified as a JSON object** before being passed to Cloud Sync. The connector parses the string and sends it in the correct format to the Profile API.

```sql
'{"color":"red","size":"M"}'
```

Example:

```sql
SELECT
  user_id                     AS custom_id,
  'purchase'                  AS event_name,
  inserted_at                 AS last_updated_at,
  '{"brand":"Nike","size":"42"}' AS product_details  -- stringified object
FROM raw.purchases;
```

***

**1.6 Example schema (e-commerce)**

```sql
CREATE TABLE events_data.batch_events (
    custom_id          VARCHAR,
    event_name         VARCHAR,
    last_updated_at    TIMESTAMP,

    -- Optional event fields
    event_time         VARCHAR,           -- RFC 3339 UTC, e.g. '2026-04-17T04:25:00Z'

    -- Standard event attributes
    item               VARCHAR,
    quantity           INTEGER,
    price              FLOAT8,

    -- Typed event attributes
    url__item_url      VARCHAR,           -- URL attribute
    date__purchased_at VARCHAR,           -- date attribute

    -- Object event attribute (stringified)
    product_details    VARCHAR            -- e.g. '{"brand":"Nike","size":"42"}'
);
```

**How this maps in Batch:**

* `custom_id` identifies the profile the event is attached to
* `event_name` sets the event type
* `event_time` sets the event timestamp (falls back to reception time if omitted)
* `item`, `quantity`, `price` become standard event attributes
* `url__item_url` is interpreted as a URL attribute
* `date__purchased_at` is interpreted as a date attribute
* `product_details` is interpreted as an object attribute

***

**1.7 Using a View**

If your raw event table doesn't match the expected naming or format, create a **Redshift View** that converts your schema into the correct conventions.

```sql
CREATE OR REPLACE VIEW events_data.batch_events_view AS
SELECT
  CAST(e.user_id AS VARCHAR)                        AS custom_id,
  e.event_type                                      AS event_name,
  e.inserted_at                                     AS last_updated_at,

  TO_CHAR(e.occurred_at, 'YYYY-MM-DD"T"HH24:MI:SS"Z"') AS event_time,

  e.item_name                                       AS item,
  e.qty                                              AS quantity,
  e.unit_price                                       AS price,

  e.item_url                                        AS url__item_url,
  TO_CHAR(e.purchase_date, 'YYYY-MM-DD')            AS date__purchased_at
FROM raw.events e;
```

This approach lets you:

* rename fields with the correct prefixes (`date__`, `url__`)
* set a reliable `last_updated_at` based on insertion time
* format `event_time` to RFC 3339 UTC
* stringify object columns correctly

***

**1.8 Handling nulls**

If an optional column value is `NULL`, that attribute is simply omitted from the event. It does not affect other attributes on the same event or on the profile.

***

#### 2) Create the Sync in the Batch dashboard

Cloud Sync is configured from the dashboard via a dedicated **Sync module**.

1. Open the **Batch dashboard**
2. Go to **Data → Cloud Sync**
3. Click **Create Sync**
4. Select **Redshift** as the source

***

**2.1 Configure your Redshift connection**

Enter:

| Field    | Description                                                                      |
| -------- | -------------------------------------------------------------------------------- |
| Host     | Your Redshift cluster endpoint (e.g. `cluster.region.redshift.amazonaws.com`)    |
| Port     | The port your cluster listens on (default `5439`)                                |
| Username | Your Redshift username                                                           |
| Password | Your Redshift password                                                           |
| Database | The database containing your source table/view                                   |
| Schema   | *(optional)* The schema containing your source table/view (defaults to `public`) |
| Table    | The table or view name                                                           |

Batch validates the connection before continuing.

***

**2.2 Select the destination**

In the **Destination** dropdown, select **Batch > Profile events**.

***

**2.3 Configure event mapping**

Cloud Sync applies a simple mapping model:

* `custom_id` → identifies which Batch profile to attach the event to
* `event_name` → sets the event type
* `last_updated_at` → used only for incremental sync logic
* all other columns → mapped to event attributes

***

#### 3) How incremental sync works

Cloud Sync uses **incremental processing**, which means it does not re-import your full dataset at every run. Instead, it fetches only the rows that are new since the last successful sync.

***

**3.1 The `last_updated_at` cursor**

Batch stores the last successful cursor value internally.

At each run, Batch fetches only rows where:

* `last_updated_at` is greater than the last stored cursor

This makes sync runs faster, more scalable, and more cost-efficient.

**Important:** For events, `last_updated_at` should reflect when the row was **inserted** into the table, not when the event occurred (`event_time`). Do not backfill or modify `last_updated_at` after insertion.

***

**3.2 Inserts and deletes**

Incremental syncs capture:

* ✅ new event rows (inserts)

They do **not** capture:

* ❌ deletions — events sent to Batch are immutable; they cannot be removed via Cloud Sync

***

**3.3 Best practices for reliable incremental syncs**

To avoid missing events:

* Set `last_updated_at` at **insertion time** and never modify it afterwards
* Use a View if you need to rename columns or apply type conversions
* Sort your table on `last_updated_at` for large datasets

***

#### 4) Test and enable your Sync

Before enabling the schedule:

1. Run a **test sync**
2. Verify:
   * Events are created on the correct profiles
   * `event_time` is set correctly (or defaults to reception time as expected)
   * `date__` and `url__` fields are interpreted correctly
   * Object attributes are correctly stringified

Once enabled, Batch automatically handles batching and retries.


# Create a Sync from Databricks to Batch Profile Events

## Create a Sync from Databricks to Batch Profile Events

#### Before you start

To create a Databricks → Batch Profile Events sync, you'll need:

* Access to the **Batch dashboard**
* A **Databricks table or view** containing one row per event, exposed through a **SQL Warehouse**
* A **Databricks personal access token**
* Your **Server URL, HTTP Path, Database, and Table** details
* A table (or view) that follows the **Cloud Sync events input format** (see below)

***

#### 1) Prepare your Databricks table or view

Cloud Sync expects your Databricks source (table or view) to include:

1. A **profile identifier** (to know which profile the event belongs to)
2. An **event name** (the type of event being recorded)
3. A **cursor field** (to know which rows are new since the last run)
4. Any number of **event attribute columns** (sent to Batch as event properties)

***

**1.1 One row per event**

Your source must contain **one row per event**.\
Unlike profile attribute syncs, multiple rows can share the same `custom_id` — each row creates a separate event on the corresponding profile.

***

**1.2 Required columns**

Your table (or view) must include the following columns:

| Column            | Required | Description                                            |
| ----------------- | :------: | ------------------------------------------------------ |
| `custom_id`       |     ✅    | The identifier of the profile the event belongs to     |
| `event_name`      |     ✅    | The name of the event (e.g. `add_to_cart`, `purchase`) |
| `last_updated_at` |     ✅    | Cursor used for incremental sync                       |

**Important:** `last_updated_at` must be set **at the time the event row is inserted** and must not change afterwards. It is used only to determine which rows to fetch on the next sync run, not as the event timestamp.

***

**1.3 Optional columns**

| Column       | Description                                                                                                                         |
| ------------ | ----------------------------------------------------------------------------------------------------------------------------------- |
| `event_time` | The timestamp of the event, in **RFC 3339 UTC** format (e.g. `2026-04-17T04:25:00Z`). If omitted, Batch uses the time of reception. |

***

**1.4 Event attribute naming rules (Databricks-compatible)**

Databricks column names cannot contain characters like `$`, `(`, or `)`. Cloud Sync relies on **prefixes** in column names to represent typed event attributes.

**Supported prefixes**

| Prefix   | Meaning        | Example              |
| -------- | -------------- | -------------------- |
| `date__` | Date attribute | `date__purchased_at` |
| `url__`  | URL attribute  | `url__item_url`      |

Any column without a prefix is sent to Batch as a standard string, number, or boolean attribute.

***

**1.5 Handling objects**

Object event attributes must be **stringified as a JSON object** before being passed to Cloud Sync. The connector parses the string and sends it in the correct format to the Profile API.

```sql
'{"color":"red","size":"M"}'
```

Example:

```sql
SELECT
  user_id                            AS custom_id,
  'purchase'                         AS event_name,
  inserted_at                        AS last_updated_at,
  to_json(product_details_struct)    AS product_details  -- stringified object
FROM raw.purchases;
```

***

**1.6 Example schema (e-commerce)**

```sql
CREATE TABLE events_data.batch_events (
    custom_id          STRING,
    event_name         STRING,
    last_updated_at    TIMESTAMP,

    -- Optional event fields
    event_time         STRING,            -- RFC 3339 UTC, e.g. '2026-04-17T04:25:00Z'

    -- Standard event attributes
    item               STRING,
    quantity           INT,
    price              DOUBLE,

    -- Typed event attributes
    url__item_url      STRING,            -- URL attribute
    date__purchased_at STRING,            -- date attribute

    -- Object event attribute (stringified)
    product_details    STRING             -- e.g. '{"brand":"Nike","size":"42"}'
);
```

**How this maps in Batch:**

* `custom_id` identifies the profile the event is attached to
* `event_name` sets the event type
* `event_time` sets the event timestamp (falls back to reception time if omitted)
* `item`, `quantity`, `price` become standard event attributes
* `url__item_url` is interpreted as a URL attribute
* `date__purchased_at` is interpreted as a date attribute
* `product_details` is interpreted as an object attribute

***

**1.7 Using a View**

If your raw event table doesn't match the expected naming or format, create a **Databricks View** that converts your schema into the correct conventions.

```sql
CREATE OR REPLACE VIEW events_data.batch_events_view AS
SELECT
  CAST(e.user_id AS STRING)                          AS custom_id,
  e.event_type                                       AS event_name,
  e.inserted_at                                      AS last_updated_at,

  date_format(e.occurred_at, "yyyy-MM-dd'T'HH:mm:ss'Z'") AS event_time,

  e.item_name                                        AS item,
  e.qty                                               AS quantity,
  e.unit_price                                        AS price,

  e.item_url                                         AS url__item_url,
  date_format(e.purchase_date, 'yyyy-MM-dd')         AS date__purchased_at,

  to_json(struct(e.brand, e.size))                   AS product_details
FROM raw.events e;
```

This approach lets you:

* rename fields with the correct prefixes (`date__`, `url__`)
* set a reliable `last_updated_at` based on insertion time
* format `event_time` to RFC 3339 UTC
* stringify object columns correctly

***

**1.8 Handling nulls**

If an optional column value is `NULL`, that attribute is simply omitted from the event. It does not affect other attributes on the same event or on the profile.

***

#### 2) Create the Sync in the Batch dashboard

Cloud Sync is configured from the dashboard via a dedicated **Sync module**.

1. Open the **Batch dashboard**
2. Go to **Data → Cloud Sync**
3. Click **Create Sync**
4. Select **Databricks** as the source

***

**2.1 Configure your Databricks connection**

Enter:

| Field      | Description                                                                              |
| ---------- | ---------------------------------------------------------------------------------------- |
| Token      | A Databricks **personal access token** with the `sql` API scope                          |
| Server URL | Your workspace instance name (e.g. `dbc-xxxxxxxx-xxxx.cloud.databricks.com`)             |
| HTTP Path  | The HTTP path of the **SQL Warehouse** to query (e.g. `sql/1.0/warehouses/xxxxxxxxxxxx`) |
| Database   | The catalog/database containing your source table/view (e.g. `workspace`)                |
| Schema     | *(optional)* The schema containing your source table/view (defaults to `default`)        |
| Table      | The table or view name                                                                   |

Batch validates the connection before continuing.

***

**2.2 Select the destination**

In the **Destination** dropdown, select **Batch > Profile events**.

***

**2.3 Configure event mapping**

Cloud Sync applies a simple mapping model:

* `custom_id` → identifies which Batch profile to attach the event to
* `event_name` → sets the event type
* `last_updated_at` → used only for incremental sync logic
* all other columns → mapped to event attributes

***

#### 3) How incremental sync works

Cloud Sync uses **incremental processing**, which means it does not re-import your full dataset at every run. Instead, it fetches only the rows that are new since the last successful sync.

***

**3.1 The `last_updated_at` cursor**

Batch stores the last successful cursor value internally.

At each run, Batch fetches only rows where:

* `last_updated_at` is greater than the last stored cursor

This makes sync runs faster, more scalable, and more cost-efficient.

**Important:** For events, `last_updated_at` should reflect when the row was **inserted** into the table, not when the event occurred (`event_time`). Do not backfill or modify `last_updated_at` after insertion.

***

**3.2 Inserts and deletes**

Incremental syncs capture:

* ✅ new event rows (inserts)

They do **not** capture:

* ❌ deletions — events sent to Batch are immutable; they cannot be removed via Cloud Sync

***

**3.3 Best practices for reliable incremental syncs**

To avoid missing events:

* Set `last_updated_at` at **insertion time** and never modify it afterwards
* Use a View if you need to rename columns or apply type conversions
* Partition or Z-order on `last_updated_at` for large tables

***

#### 4) Test and enable your Sync

Before enabling the schedule:

1. Run a **test sync**
2. Verify:
   * Events are created on the correct profiles
   * `event_time` is set correctly (or defaults to reception time as expected)
   * `date__` and `url__` fields are interpreted correctly
   * Object attributes are correctly stringified

Once enabled, Batch automatically handles batching and retries.


# Create a Sync from SFTP to a Batch Catalog

## Create a Sync from SFTP to a Batch Catalog

#### Before you start

To create an SFTP → Batch sync, you'll need:

* Access to the **Batch dashboard**
* An **SFTP server** Batch can reach, and a user with **read access** to the synced files
* Credentials to connect: either a **password** or a **private key**
* An existing **Batch catalog**, created beforehand with the [Create catalog API](https://doc.batch.com/developer/api/cep/catalogs/create)
* One or more **CSV files** containing your **complete catalog**, following the **Cloud Sync input format** (see below)

***

#### 1) Prepare your catalog files

A catalog sync is a **full replace**: at each run, Cloud Sync builds a **complete new version** of the catalog from the files it reads, and replaces the previous version atomically (see section 3).

This means your files must always contain the **entire catalog**, never a delta: any item absent from the new version disappears from the catalog.

***

**1.1 File naming and location**

* Only **`.csv`** files are synced
* A file is synced when its **name contains the catalog name**: for a catalog named `products`, files like `products.csv`, `products_part_2.csv` or `2026-08-06_products.csv` are all picked up
* Files are searched from the **root folder** of your SFTP user, **including all subfolders**
* Each file is limited to **1 GB**
* You can **split your catalog into as many files as necessary**: for example, a 7 GB catalog can be split into `products_v1_part1.csv`, `products_v1_part2.csv`, `products_v1_part3.csv`, ... as long as each file stays under 1 GB

Batch uses the files' **creation/modification date** to detect what to sync: a run only reads the files that are **new or modified since the last run** (see section 3.1).

{% hint style="warning" %}
Always upload the **complete catalog**. The files read by a run **completely overwrite** the previous version of the catalog, they are never merged with it: if your catalog spans several files and you only update one of them, the next version will only contain that file's items. When updating your catalog, re-upload **all** its files.
{% endhint %}

***

**1.2 One row per item**

Your files must contain **one row per catalog item**. Each row becomes one item of the new catalog version.

| Column | Required | Description                                                                     |
| ------ | :------: | ------------------------------------------------------------------------------- |
| `id`   |     ✅    | The item identifier in the catalog. Max 250 characters, unique across all files |

All other columns are item attributes. Each row must carry **at least one attribute value** besides its `id`.

**Good to know:**

* If two rows carry the same `id`, the **first one wins**: treat duplicates as a bug in your export
* A row with an `id` but no attribute values is skipped
* An **empty cell** means the attribute is simply not set on the item in this version

***

**1.3 Attribute columns and your catalog schema**

Your Batch catalog declares a **schema** at creation time: a list of typed fields (string, integer, double, boolean, date, URL, array of strings).

At each run, Cloud Sync reads that schema and maps your CSV columns onto it:

* A column is synced when its **name matches a schema field** (names use `a-z`, `0-9` and `_`, max 30 characters)
* Columns that don't match any schema field are **ignored**
* Values are automatically **converted to the declared type**: `2021` is read as a number for an integer field, `true` as a boolean, and so on
* A value that **cannot be converted** (e.g. `twenty-one` for an integer field) makes the run **fail**: nothing is published and the live catalog keeps its current items

For `date` and `url` fields, simply name the column after the schema field (e.g. `release_date`). The `date__` / `url__` prefixes (e.g. `date__release_date`) are also accepted.

***

**1.4 Value formats**

| Type            | Format in CSV                                                                                          | Example                            |
| --------------- | ------------------------------------------------------------------------------------------------------ | ---------------------------------- |
| String          | Plain text, max 10,000 characters                                                                      | `Trail running shoes`              |
| Integer / Float | Plain number                                                                                           | `2021`, `49.99`                    |
| Boolean         | `true` / `false`, `1` / `0`, `yes` / `no`                                                              | `true`                             |
| Date            | RFC 3339 UTC string or Unix timestamp                                                                  | `2026-04-17T04:25:00Z`             |
| URL             | Absolute URL, max 2,048 characters                                                                     | `https://cdn.example.com/shoe.jpg` |
| Array           | Comma-separated values. Double-quote elements containing commas. Max 15 elements of 64 characters each | `"running,shoes,men"`              |

***

**1.5 Example file (e-commerce)**

For a `products` catalog whose schema declares `name` (string), `brand` (string), `price` (double), `in_stock` (boolean), `image` (URL), `release_date` (date) and `tags` (array):

```csv
id,name,brand,price,in_stock,image,release_date,tags
SKU-001,Trail running shoes,Acme,89.99,true,https://cdn.example.com/img/sku-001.jpg,2026-03-01T00:00:00Z,"running,shoes"
SKU-002,Hiking backpack 30L,Northway,59.90,false,https://cdn.example.com/img/sku-002.jpg,2025-11-15T00:00:00Z,"hiking,bags"
```

**How this maps in Batch:**

* `id` identifies the catalog item
* `name` and `brand` become string attributes, `price` a number, `in_stock` a boolean
* `image` is interpreted as a URL attribute, `release_date` as a date attribute
* `tags` becomes an array of strings (`["running", "shoes"]`)

***

**1.6 Best practices**

* Always export the **complete catalog**: any item missing from the new version is removed from the live catalog
* Upload new exports under a **temporary name** that does not contain the catalog name, then rename them once the upload is complete, so a run never reads a half-written file
* Keep `id` values **stable across runs**: they are how items are matched between versions

***

#### 2) Create the Sync in the Batch dashboard

Cloud Sync is configured from the dashboard via a dedicated **Sync module**.

1. Open the **Batch dashboard**
2. Go to **Data → Cloud Sync**
3. Click **Create Sync**
4. Select **SFTP** as the source
5. Select your **catalog** as the destination: every existing catalog appears in the destination list
6. Pick the **sync frequency** (from every hour to every 24 hours)

{% hint style="info" %}
Your catalog doesn't appear in the destination list? Create it first with the [Create catalog API](https://doc.batch.com/developer/api/cep/catalogs/create): Cloud Sync fills an existing catalog, it does not create one.
{% endhint %}

***

**2.1 Configure your SFTP connection**

Enter:

| Field          | Description                                                                               |
| -------------- | ----------------------------------------------------------------------------------------- |
| Host           | Hostname or IP address of your SFTP server                                                |
| Port           | The port your SFTP server listens on (`22` unless it was configured otherwise)            |
| Username       | The user Batch connects with. It needs read access to the synced files                    |
| Authentication | A **password**, or a **private key** whose public counterpart is installed on your server |
| Delimiter      | The character separating values in your CSV files: comma, semicolon, tab, or pipe         |

Batch validates the connection before continuing.

***

#### 3) How a catalog sync works

**3.1 Only new or modified files are read**

Batch uses each file's **creation/modification date** as a cursor:

* A file is read when it is **new or was modified** since the last successful run
* Files already synced and untouched since then are **skipped**: old exports left on the server are not picked up again
* The files a run reads become the **entire new catalog**: they completely overwrite the previous version, they are not merged into it
* If no matching file changed, the run reads nothing and the catalog **keeps its current version**

***

**3.2 Atomic replace**

When a run finds data, Cloud Sync stages a complete new version of the catalog, then switches to it **atomically**:

* During the run, your live catalog keeps serving its **current items**, unchanged
* The new version becomes visible **all at once**, at the end of the run, and only if the whole run succeeded
* If anything fails mid-run (unreadable file, value that cannot be converted, connection error), the live catalog is **untouched**

***

**3.3 Inserts, updates, and deletes**

Because each run replaces the whole catalog, all changes are captured naturally:

* ✅ inserts: new rows become new items
* ✅ updates: changed rows update existing items
* ✅ deletes: rows removed from your files disappear from the catalog

**Omitting a row deletes the item**: this is why every upload must carry the complete catalog.

***

**3.4 The empty-run guard**

A run that finds **zero rows** never replaces anything: the catalog keeps its current items. An empty source is indistinguishable from a broken one, so emptying a catalog is done deliberately through the [Catalogs API](https://doc.batch.com/developer/api/cep/catalogs), never as a side effect of missing files.

***

#### 4) Test and enable your Sync

Before enabling the schedule:

1. Run a **test sync**
2. Verify in **Data → Catalogs**:
   * The item count matches your files
   * Attributes carry the expected types (numbers, dates, URLs, arrays)
   * Items removed from your files are gone from the catalog

Once enabled, Batch automatically handles:

* batching
* retries
* atomic promotion of each new catalog version


# Troubleshooting

This page lists the error messages you may encounter when creating a Cloud Sync in the Batch dashboard, what they mean, and how to fix them.

## Form validation errors

These errors are detected before any connection attempt to your data source. They usually mean a required field is empty or has an invalid value.

### General validation

| Error message                         | Meaning / How to fix                                                                                 |
| ------------------------------------- | ---------------------------------------------------------------------------------------------------- |
| `Invalid or missing name.`            | The sync name is empty. Give your sync a name.                                                       |
| `Name is too long.`                   | The sync name exceeds 255 characters. Use a shorter name.                                            |
| `Invalid or missing source.`          | The source configuration is missing or malformed. Review the source settings.                        |
| `Unsupported destination type.`       | The selected destination is not supported. Only profile attributes and profile events are supported. |
| `Unsupported source type.`            | The selected source type is not supported.                                                           |
| `Schedule must be an array.`          | The schedule configuration is missing or malformed.                                                  |
| `Unsupported schedule type.`          | The selected schedule type is not supported.                                                         |
| `Unsupported interval unit.`          | The selected interval unit is not supported.                                                         |
| `Every value must be an integer.`     | The interval value must be a whole number.                                                           |
| `Hour interval must be less than 24.` | Hourly intervals must be below 24 hours. Use a daily schedule instead.                               |

### Source configuration fields

These errors appear directly under the field they relate to.

| Error message                                                   | Field       | Applies to                                         | How to fix                                                                                                                                                                                  |
| --------------------------------------------------------------- | ----------- | -------------------------------------------------- | ------------------------------------------------------------------------------------------------------------------------------------------------------------------------------------------- |
| `Invalid JSON for BigQuery credentials`                         | Credentials | BigQuery                                           | The service account key you pasted is not valid JSON. Paste the full, unmodified JSON key file.                                                                                             |
| `Invalid or missing table name`                                 | Table       | All sources                                        | Enter the name of the table or view to sync.                                                                                                                                                |
| `Invalid or missing dataset ID`                                 | Dataset     | BigQuery                                           | Enter the BigQuery dataset ID containing your table.                                                                                                                                        |
| `Invalid or missing credentials`                                | Credentials | BigQuery, Snowflake, Databricks                    | Provide the required credentials for the source.                                                                                                                                            |
| `credentialsJson must be a JSON string or an associative array` | Credentials | BigQuery                                           | The credentials are not in the expected JSON format. Paste the full service account JSON key.                                                                                               |
| `Invalid or missing host`                                       | Host        | ClickHouse, Snowflake, Redshift, Databricks, MSSQL | Enter the host of your database server.                                                                                                                                                     |
| `Invalid or missing database`                                   | Database    | ClickHouse, Redshift, Databricks, MSSQL            | Enter the name of the database to connect to.                                                                                                                                               |
| `Invalid or missing username`                                   | Username    | Redshift                                           | Enter the database username.                                                                                                                                                                |
| `Invalid or missing password`                                   | Credentials | Redshift                                           | Enter the database password.                                                                                                                                                                |
| `Invalid or missing HTTP path`                                  | HTTP path   | Databricks                                         | Enter the HTTP path of your Databricks SQL warehouse.                                                                                                                                       |
| `Invalid port`                                                  | Port        | ClickHouse, Redshift, MSSQL                        | Enter a valid port number.                                                                                                                                                                  |
| `Host must not be empty`                                        | Host        | All except BigQuery                                | Enter the host of your database server.                                                                                                                                                     |
| `Invalid host`                                                  | Host        | All except BigQuery                                | The host is not a valid hostname. Check for typos, spaces, or a protocol prefix (enter the hostname only, without `https://`).                                                              |
| `Private or reserved IP addresses are not allowed`              | Host        | All except BigQuery                                | The host points to a private or reserved IP address. Batch cannot reach private networks directly - use a publicly reachable host, or configure an SSH tunnel if available for your source. |
| `Local network hostnames are not allowed`                       | Host        | All except BigQuery                                | Hostnames like `.local` or `.internal` are not reachable from Batch. Use a publicly resolvable hostname.                                                                                    |

### SSH tunnel fields (ClickHouse and MSSQL)

If you connect through an SSH tunnel, the tunnel configuration is validated as well.

| Error message                                         | Field                       | How to fix                                                                                                                |
| ----------------------------------------------------- | --------------------------- | ------------------------------------------------------------------------------------------------------------------------- |
| `Invalid or missing SSH tunnel host`                  | SSH Tunnel Jump Server Host | Enter the host of your bastion / jump server.                                                                             |
| `SSH tunnel host must resolve to a public IP address` | SSH Tunnel Jump Server Host | The bastion host resolves to a private IP address or does not resolve at all. The jump server must be publicly reachable. |
| `Invalid SSH connection port`                         | SSH Connection Port         | Enter a valid SSH port (usually 22).                                                                                      |
| `Invalid or missing SSH login username`               | SSH Login Username          | Enter the username used to log in to the jump server.                                                                     |
| `Invalid or missing SSH private key`                  | SSH Private Key             | Paste the SSH private key (when using key authentication).                                                                |
| `Invalid or missing SSH tunnel password`              | Password                    | Enter the SSH password (when using password authentication).                                                              |

## Connection errors

Once the form is valid, Batch tests the connection to your data source. If the test fails, a clear message is displayed under the relevant field, or globally when it does not relate to a specific field.

| Error message                                                                                                                      | What it means                                                                                 | How to fix                                                                                                                           |
| ---------------------------------------------------------------------------------------------------------------------------------- | --------------------------------------------------------------------------------------------- | ------------------------------------------------------------------------------------------------------------------------------------ |
| `The table could not be found - check the table name, the database, its dataset or schema, and the configured user's permissions`  | The table, view, or schema does not exist, or the user cannot see it.                         | Verify the table name and its dataset/schema, and make sure the configured user has read access to it.                               |
| `The table does not expose a compatible last_updated_at column`                                                                    | The cursor column used for incremental syncs is missing or has an incompatible type.          | Make sure your table exposes a compatible `last_updated_at` column, as described in the setup guide of your source.                  |
| `The Snowflake private key is invalid or uses an unsupported format - check the key and its passphrase`                            | The Snowflake key-pair authentication failed.                                                 | Verify the private key format and the passphrase, and make sure the public key is registered on the Snowflake user.                  |
| `The Snowflake role does not exist or is not granted to this user - check the role name and user permissions`                      | The configured Snowflake role is unknown or not assigned to the user.                         | Check the role name spelling and grant the role to the configured user.                                                              |
| `Microsoft Entra ID authentication failed - check the client ID, the client secret, and application consent`                       | Authentication against Microsoft Entra ID was rejected.                                       | Verify the client ID and client secret, and make sure admin consent was granted to the application.                                  |
| `The server requires Microsoft Entra ID authentication - provide a client ID and client secret instead of a username and password` | The SQL server only accepts Entra ID authentication, but a username/password was provided.    | Switch to Microsoft Entra ID authentication and provide a client ID and client secret.                                               |
| `The Databricks SQL warehouse could not be found - check the HTTP path`                                                            | The HTTP path does not match an existing SQL warehouse.                                       | Copy the HTTP path from your SQL warehouse's connection details in Databricks.                                                       |
| `Databricks authentication failed - check the access token and workspace settings`                                                 | The Databricks access token was rejected.                                                     | Generate a new access token and verify the workspace configuration.                                                                  |
| `The database could not be found or accessed - check the database name and the configured user's permissions`                      | The database does not exist or the user cannot access it.                                     | Verify the database name and the user's access rights.                                                                               |
| `Authentication failed - check the configured credentials and the database name`                                                   | SQL Server login failed. On Microsoft Fabric, this can also mean the database does not exist. | Verify the username, password, and database name.                                                                                    |
| `Authentication failed - check the configured credentials`                                                                         | The provided credentials were rejected by the source.                                         | Verify the username, password, token, or key configured for the source.                                                              |
| `The configured user is not allowed to read this source - check its database permissions`                                          | The user authenticated successfully but lacks read permissions.                               | Grant the user read access to the table and its schema/database.                                                                     |
| `A secure connection could not be established with the source - check the SSL and encryption settings`                             | The SSL/TLS handshake with the source failed.                                                 | Verify the SSL and encryption settings on both the source and the sync configuration.                                                |
| `The source took too long to respond - check the host, port, credentials, network access, and firewall settings`                   | The connection timed out - the host is unreachable or the connection is silently blocked.     | Verify the host and port, then check for a network policy or IP allowlist blocking the connection (see below).                       |
| `The source could not be reached - check the host, port, network access, and firewall settings`                                    | The connection was refused or the hostname could not be resolved.                             | Verify the host and port, check DNS resolution, then check for a network policy or IP allowlist blocking the connection (see below). |

### Network policies and IP allowlists

**Symptom** - The connection test times out or is refused, or a sync that used to work suddenly stops returning data. On Snowflake, your logs show an error similar to:

```
Incoming request with IP/Token XXX is not allowed to access Snowflake
```

**Cause** - Your data source restricts inbound connections to an allowlist of IP addresses, for example a Snowflake Network Policy, a firewall rule, or a VPC restriction, and Batch's connections are not covered by it.

**How to fix** - Remove the IP restriction on the dedicated user Batch connects with, or disable the network policy temporarily to confirm this is the cause.

{% hint style="info" %}
If your security policy requires an IP allowlist, reach out to your CSM or Account Manager to discuss the options available for your setup.
{% endhint %}

## Generic error

| Error message                                                            | What it means                                                                                                                                                                                                                              |
| ------------------------------------------------------------------------ | ------------------------------------------------------------------------------------------------------------------------------------------------------------------------------------------------------------------------------------------ |
| `The sync could not be created. Please review the fields and try again.` | An unexpected technical error occurred (unrecognized source error, server error, or network issue). These errors are automatically reported to our team. Try again in a few minutes, and contact our support team if the problem persists. |

## Sync behaviour

### I changed my table schema and the sync doesn't reflect it

**Symptom** - You add, rename, or change the type of a column in your source table or view. You re-run the sync, but Batch keeps using the previous schema.

**Cause** - Batch caches the schema of a sync's source. On an **existing** sync, a schema change can take up to 24 hours to be picked up. Re-triggering the same sync does not speed this up.

**How to fix** - **Delete the sync and create a new one** pointing at the same table. A newly created sync always reads the current schema immediately. You do not need to rename your table.

{% hint style="info" %}
This matters most during implementation, when your table format may change several times a day. Deleting and recreating the sync is the expected workflow while you iterate. Once your schema is stable, you can leave the sync in place.
{% endhint %}


# Ads Sync

Ads Sync is Batch's **Paid Media** activation capability: it lets you activate your CRM segments as targeting audiences on paid advertising platforms, using the same segmentation engine you already use for your owned channels.

{% hint style="info" %}
Ads Sync is a paid offering available to customers on specific license tiers. It requires Solution Expert involvement for configuration. Contact your CSM to learn more.
{% endhint %}

### Keeping your ad audiences up to date

Ads Sync automatically shares a Batch segment with your advertising platform on a recurring schedule. Batch exports the segment, formats  it to match the destination platform's requirements, and updates the corresponding audience so it always reflects your latest targeting criteria.

Sync frequency is configurable. Daily and weekly schedules are the most common options.

### Supported destinations

Ads Sync currently supports Meta Ads, Google Ads, etc.

{% hint style="info" %}
Contact your CSM to get the latest updates on managed destinations.
{% endhint %}

Each segment synchronizes to a single destination platform. To activate the same segment on several platforms, set up a separate Ads Sync for each destination.

{% hint style="warning" %}
Ad networks apply their own matching delays and minimum audience size thresholds once Batch delivers a segment update. For reference, a synced audience can take up to 24 hours on Meta Ads and up to 48 hours on Google Ads to become available for targeting. Refer to each platform's documentation for current values.
{% endhint %}

### Use cases

* **Retargeting** — reach users who did not react to an email, push, or SMS campaign.
* **Suppression** — exclude users who already converted or engaged on an owned channel from your ad spend.
* **Lookalike seeding** — export a high-value segment to build a lookalike audience.
* **Dormant reactivation** — target users who have been inactive on owned channels for a defined period.


# Data management

{% hint style="warning" %}
The Data management page shows the list of all the custom data collected on the Profile base that powers **Email, Push v2 & SMS**.
{% endhint %}

The Data management page shows the list of all the custom data collected at least once on your apps and website from Batch SDKs or from the Profile API.

### Enabling New Data

Recently attributes and events that have been tracked and not enabled yet are displayed in a dedicated section. New custom data need to be manually enabled before being displayed in the targeting and personalization fields.&#x20;

### Editing Data

You can add a display name to any attributes or events. This is useful if you want to display simplified names in the interface instead of the technical name of the attributes/events. The technical name will still be displayed in the Profile view for debug purposes.&#x20;

You can also change the data type of an attribute (e.g. from string to date) if you already made that change in the code of your app or in your call to the Profile API. Batch will adapt the operators displayed in the campaign editor to the new data type. If you changed the data type by mistake, Batch indicates with a \* the data type detected for that attribute (e.g. "Integer\*").

### Archive data

Archiving data makes it unavailable for targeting and personalization. It can be restored at any given time.


# Custom Data

{% hint style="warning" %}
The Custom data pages shows the list of all the custom data collected on the installation base that powers **Push v1**, siloed by platform (iOS, Android, Web).
{% endhint %}

The Custom Data tab shows the list of all the custom data collected once for your app/website from the SDK (attributes, tag collections, events) or from the Custom Data API (user attributes, user tag collections).

### Enabling New Custom Data

New custom data need to be manually enabled before being displayed in the userbase tab and used in a campaign. Before activating a new attribute, tag collection or event, make sure the name and the data type is correct.

### Editing Existing Custom Data

You can add a custom name to any attributes or events. This is useful if you want to display simplified names in the interface instead of the technical name of the attributes/events:

You can also change the data type of an attribute (e.g. from string to date) if you already made that change in the code of your app or in your call to the Custom Dara API. Batch will adapt the operators displayed in the campaign editor to the new data type. If you changed the data type by mistake, Batch indicates with a \* the data type detected for that attribute (e.g. "Integer\*").

### Switching Environments

Use the "DEV/PROD" toggle to switch between the list of custom data attached to the Dev API Key or the Live API Key.


# Privacy Center

The Privacy center makes it easy to handle data access and data removal requests. Requests must be submitted for every app separately and must provide a valid data subject identifier (e.g. customer-level or device-level ID). You can also use Batch REST API to do the same thing (know more on the GDPR API):

{% hint style="info" %}
GDPR request information is available via our Dashboard and APIs for 20 to 30 days after request creation. After this time, you will not be able to query its status anymore. Pending requests are always available.
{% endhint %}

The dashboard also shows the status of all your data access/removal requests. You can also filter these requests by origin (Dashboard or API):

<figure><img src="/files/gSCwhzcRuKT3pzuLJarr" alt="privacy center"><figcaption></figcaption></figure>

## Requesting Data Access

As soon as the request is completed, users with the **Privacy** and **Administrate** rights will receive an email (e.g. "\[BATCH] Your GDPR request \[request token] has been processed") with a link to an archive containing all the data Batch has stored for the provided identifier (e.g. list of sent notifications, list of installs attached to the id along with the data collected for each install, etc).

That file can also be downloaded from the Privacy center:

## Requesting a Data Removal

All the data Batch has stored for the provided identifier will be deleted.

{% hint style="warning" %}
Batch will blacklist the ID after the data removal. If you request a data removal for a specific ID and your user keeps or reinstall the app, Batch will not accept the data coming from that install. Batch will also discard the data sent from the [Profile API](/developer/api/cep/profiles) for that specific ID.
{% endhint %}

{% hint style="warning" %}
The Privacy center requests applies to the installation base that powers **Push v1**, siloed by platform (iOS, Android, Web) but also to Profiles leveraged to send emails, SMS and pushes via Push v2.
{% endhint %}


# Search Profiles

## Profile information

You can access the profile view using:

* Custom ID
* Installation ID
* Email address

The profile view page will present all data associated with a profile, including:

* Attributes: Display various profile characteristics and preferences.
* History: Show a history of profile actions, sent messages and interactions.
* Subscriptions: List any subscriptions or opt-ins associated with the profile.

This centralized view provides a complete picture of the user's data, enabling efficient profile management and analysis.

![Screenshot](/files/b9j0wStY2bW9adDaGszY)

## History

### Profile actions

All events tracked by a profile apps or websites via Batch SDKs methods are displayed on the Profile view, as well as events sent via API.

Event display in the Profile view is limited to 3 months & 180 events. However, earlier activity remains available for targeting.&#x20;

Events performed during anonymous sessions (before login) and later attributed to an identified profile are indicated with a specific icon. See [Data Lifecycle page](/getting-started/features/customer-engagement-platform/profiles/data-lifecycle#what-happens-when-setting-a-custom-id-on-an-anonymous-profile) to better understand what happens when login happens.

### Message events

Message events are events related to messages sent by Batch.

The following events are tracked:

* Sent: for Email, Push v2, SMS
* Sent opt-in: for Push v2
* Delivered: for Email , SMS, Mobile Landing and In-App&#x20;
* Open: for Email, Push v2.&#x20;
* Machine open: for Email
* Click: for Email
* Bounces: for Email
* Suppressed: for Email, when an email adress is in the suppression list
* Dismissed: for Mobile Landing and In-App

{% hint style="warning" %}
This page applies to the data lifecycle of Profiles that powers email, SMS, and Push v2 channels.
{% endhint %}


# Data Lifecycle

Profiles store all data sent by API or SDK, as attributes, events, and reachability information. They can be anonymous or identified once you attach a Custom ID to them after login or sign-up.

## Profile anatomy

### Identifiers

#### Profile ID

The profile ID is a unique ID automatically generated by Batch.

#### Installation ID

The installation ID is an anonymous ID generated by Batch the first time users open your app or your website. That ID changes each time users reinstall your app or web session data is wiped. If a users visit your website from the same computer, using different web browsers (e.g. Chrome, then Firefox, then Microsoft Edge), Batch will attach visits to different installation IDs. A profile can store up to 50 installation IDs.

#### Custom ID

The custom user ID is a native field you can use to attach a unique user ID to a profile. That ID will act as a reconciliation identifier between Batch Profile base and your own backend.

### Attributes

#### **Native attributes**

They have preset names and formats and are designed to capture common and essential information about profiles. They can be automatically collected by Batch (e.g. app version after SDK implementation)

#### **Custom attributes**

Any attribute specific to your needs and industry that is relevant to better target profiles and personalize messages (e.g. a loyalty status)

### Events

They are used to trigger automations and refine targeting (eg. add\_to\_cart event)

{% hint style="info" %}
Note that when a mobile device is offline, data can still be captured by Batch SDK and push to Batch later when the connexion is back.
{% endhint %}

## How to create a profile?

Batch automatically generates new profiles in 3 scenarios:

* When a user starts your app or visits your website for the first time
* When the Profile API is called with a Custom ID that isn't yet known to Batch
* When a Custom ID is set via SDK, and this Custom ID isn't yet known to Batch

Developers do not need to explicitly declare the creation of a new Profile. Batch handles this process automatically, either updating an existing profile or creating a new one based on the data set via API or SDK.

Each profile has a unique *profile\_id* generated by Batch. Other identifiers can be linked to it depending on its position in the lifecycle:

* *Custom ID:* The custom ID is a native field you can use to attach a unique user ID to a profile. That ID will act as a reconciliation identifier between Batch Profile base and your own backend. It can only be attached to 1 profile at a time.
* *Installation ID:* The installation ID is an anonymous ID generated by Batch the first time users open your app or your website. That ID changes each time users reinstall your app or web session data is wiped. Think about it as a device identifier that can travel from one profile to another depending on login/logout actions on your app or website. It can only be attached to 1 profile at a time.

### Anonymous Profiles

Before you identify a profile with a Custom ID, Batch generates an anonymous profile.

The installation ID that triggered the creation of the profile is attached to the Profile.

Anonymous profiles are reachable via push notifications once they opt-in.

### Logged-in Profiles

Logged-in Profiles are Profiles with a Custom ID that has been shared:

* via Profile API with any attribute update or event tracking
* via SDK with the *identify* method

Logged-in Profiles are reachable via email, push notifications and SMS.

## What happens when setting a Custom ID on an anonymous profile?

The profile lifecycle in Batch is closely aligned with real-life user interactions. Understanding how data is stored against profiles can be clarified by examining common user actions: sign-up, login, and logout.

### First time identification / Sign-up

**Definition:** This occurs when you set a Custom ID that is not yet known to Batch.

**Process:** The Custom ID will be assigned to the initial profile, and all previously collected data will be retained within this profile.&#x20;

<figure><img src="/files/irvaUuqmI1QZsc9nrpVH" alt="schema lifecycle 1"><figcaption></figcaption></figure>

### Login

**Definition:** This happens when you set a Custom ID that Batch already associates with another profile. This situation can arise if the user has previously logged in on another device or if data was sent via the Profile API using this Custom ID.

**Process:** The anonymous profile will become orphaned, and all installations will be linked to the already existing profile. To transfer attributes from the anonymous profile to the logged-in profile, resend data via SDK after the identify call. Events that have been collected during the anonymous session will be reattributed to the identified Profile (last 3 months of events for apps and last month of event for web, with a limit of 10,000 events).&#x20;

<figure><img src="/files/LThUBi2ZhDw7pWwpnVwv" alt="schema lifecycle 2"><figcaption></figcaption></figure>

## Orphaned Profiles

**Definition:** Orphaned Profiles are profiles that lack both Custom IDs and Installation IDs. This happens after a login from a previously anonymous profile.

**Process:** These profiles become unreachable and are excluded from all dashboard analytics and exports.

## How are attributes reconciled on Profiles?

The majority of attributes on Profiles are reconciled using the "last update rule". This means that the most recently written value for an attribute will be displayed in the Profile view and used for targeting and personalization purposes, regardless of the attribute's source (SDK or API). This rule applies to:

* All custom attributes
* Email address
* Phone number
* Marketing email subscription status
* Marketing SMS subscription status

### Exceptions

Certain native attributes follow different priority rules when being reconciled. These exceptions are as follows.

#### Region and Language

Priority order:

1. Set via API
2. Set via SDK
3. Automatically collected by the SDK

#### Timezone

Priority order:

1. Automatically collected by the SDK
2. API set

## GDPR & Privacy

Profiles are compatible with the GDPR API, as well as all privacy requests made from the dashboard. To respond to privacy requests (data export and data deletion), Batch finds the Profile that matches the identifier in the privacy request and follows standard identity resolution process.

It means that when a data request is made with an Installation ID, Batch will not be able to find a Profile that holds this Installation as well as a custom user ID. To read or delete a logged in Profile (with a custom user ID), it is necessary to provide its custom user ID in the privacy request.

### Event retention

Events tracked by SDKs or the Profile API are stored and can be used for targeting for 1095days (3 years) by default. Contact the support to customize this policy.

### Inactive profiles

Profiles that have not been active for a certain period of time are classified as inactive and deleted.

#### **What is an inactive profile?**

A profile will be considered inactive if no activity is detected for it for a certain period. By default, the period of inactivity is set to 390 days. You can reach out to your Customer Success Manager to shorten this period.

Activity on a profile may be:

* Data sent from a mobile application or website via Batch SDKs. Example: an open or a visit, change of opt-in status for push notifications, custom attribute or event tracking, etc.
* Custom data tracking via Custom Data API or Profile API
* User event tracking via Trigger Events API or Profile API
* Upload or update of email subscription information via Profile API, Email Subscription API or mobile and web SDKs. Example: modification of email address, update of opt-in status for email marketing, etc.
* Engagement events with emails received: open or click.

#### **What is the impact of these deletions?**

Once a profile's data has been deleted, it can no longer be targeted by all messages based on the Profile based data model. This implies email, SMS, and push V2 messages.

If an activity takes place for a user after their profile has been deleted (e.g., a user returns to the application 14 months after their last activity), a new profile will be created for them.

This behavior is consistent with the profile lifecycle management in Batch. When a profile is deleted due to inactivity, the system essentially "forgets" about that user. Upon the user's return and subsequent activity, Batch treats them as a new user, creating a fresh profile to store their data.

{% hint style="warning" %}
This page applies to the data lifecycle of Profiles that powers email, SMS, and Push v2 channels.
{% endhint %}


# Import tokens

If you are coming from another push provider, Batch provides a way to import your existing **iOS** or **Android** tokens from any other push provider.

Here is why you need to import your tokens after a migration:

* **Token collection**: Batch needs to collect all your users' tokens again if you don't import them. Part of your userbase will be unreachable during this period.
* **App updates**: Some users may not update your app. As a consequence, you won't be able to push them after the migration.
* **Inactive users**: In case the OS automatically updates your app, your users will still have to open your app to get a new token.

Batch can import all your existing tokens instantly with basic and custom data (e.g. attributes and arrays). This ensures you won't lose any tokens during the migration and you will still be able to send push messages to 100% of your audience.

## What is a token

A push token is an anonymous ID generated by Apple (iOS) or Google (Android) for your installation. Batch's SDK collects automatically that token each time you open the app and sends it to our servers. If your users were offline the first time they opened your app, Batch will collect the token the next time they open it with a working Internet connection.

Each time you schedule a push message sending from the Dashboard, Batch will:

1. Select the installs associated to profiles matching your targeting;
2. Find the tokens attached to these installs;
3. Send the list of targeted tokens to Apple/Google with the message you want to deliver to these users.

Apple and Google automatically invalidate push tokens when users uninstall the app. They will generate a new token if the same users reinstall the app later.

Batch automatically takes care of updating/cleaning your users’ tokens. Please note we do not receive that kind of feedback in real time. We receive information on the validity of your users' tokens each time you try to send them a push notification.&#x20;

{% hint style="warning" %}
Please note that test push notifications do not trigger a token invalidation feedback by Apple or Google even if the device is no longer reachable, only push orchestrations in production will trigger a token invalidation feedback by Apple or Google if the device is no longer reachable. The response time from Apple or Google is very variable, the push token can be considered valid by Apple for several days or even weeks after their invalidation in some cases.

Also, note that Google invalidates push tokens after 9 months (270 days) of device inactivity (= no activity on the entire device, not only on a specific app). Targeting an inactive user will generate an "invalid token" feedback in this case.
{% endhint %}

## Token import format

The format of your devices' tokens export must be a valid **CSV file** *(comma or semicolon delimited)*. Android/iOS devices tokens must be exported separately.

Before sending us your export, please review the format of each field in your import file. The CSV file **must contain** the following fields, in this order: `push_token`, `custom_id`, `region`, `language`, `timezone`, `install_date` , `custom_data`.Optional columns mean that their value can be empty, but they still **must** be present.

| **Id**         | **Description**                                                                                                                                                                                                                                                                                                                                                                                                                                  |
| -------------- | ------------------------------------------------------------------------------------------------------------------------------------------------------------------------------------------------------------------------------------------------------------------------------------------------------------------------------------------------------------------------------------------------------------------------------------------------ |
| `push_token`   | <p><strong>Required</strong><br>A device's push token</p>                                                                                                                                                                                                                                                                                                                                                                                        |
| `custom_id`    | <p> <strong>Optional</strong><br>The custom ID of a user if you have one <em>(email address, integer, etc).</em></p>                                                                                                                                                                                                                                                                                                                             |
| `region`       | <p><strong>Optional</strong><br>Country of the user. If you do not specify a region, the user will automatically be put in the <strong>XX</strong> <em>(no country)</em> category. This should be written in <strong>ISO 3166-1 alpha-2 format.</strong> See <a href="https://doc.batch.com/developer/api/mep/campaigns/advanced#language-and-country-codes">here</a> for all valid region codes.<br><strong>E.g.</strong> <code>"US"</code></p> |
| `language`     | <p><strong>Required</strong><br>Language of the user in <strong>ISO 639-1 format.</strong> See <a href="https://doc.batch.com/developer/api/mep/campaigns/advanced#language-and-country-codes">here</a> for all valid language codes.<br><strong>E.g.</strong> <code>"en"</code></p>                                                                                                                                                             |
| `timezone`     | <p><strong>Optional</strong><br>User's timezone name in <strong>TZ database format.</strong> If you do not specify a timezone, it will be <code>"GMT"</code>. </p><p><strong>E.g.</strong> <code>"Europe/Paris"</code></p>                                                                                                                                                                                                                       |
| `install_date` | <p><strong>Optional</strong><br>The installation date as a UNIX timestamp (in seconds). It may be used for the initial targeting of imported tokens, but will be overwritten once the token is collected.</p>                                                                                                                                                                                                                                    |
| `custom_data`  | <p><strong>Optional</strong><br>Custom attributes and tag collections. See Importing custom data for more information.</p>                                                                                                                                                                                                                                                                                                                       |

Once you're done, please rename your CSV file as `EXPORT_APPNAME_OS_APIKEY.csv` (e.g. `EXPORT_MYAPP_ANDROID_5BAB93CA7BD1A40183C959DA00CC0F`). The "APIKEY" must be the API key of the app you will find in the dashboard settings. Our team will notify you once the import is complete.

## Importing custom data

Attributes can be attached to imported tokens. All types of attributes supported on profiles can be imported.

They should be represented as a **JSON object of tags and attributes** and then **encoded as Base64**.

### **Attribute rules**

Attribute names are **strings**. They should be made of lowercase letters, numbers or underscores (`[a-z0-9_]`) and can't be longer than 30 characters (e.g. `has_premium`).

Their values must be any of the following types:

* String
  * Must not be longer than 200 characters and can be empty. For better results, you should make them upper/lowercase and trim the whitespaces.
* Numbers
* Dates
  * Must be sent as UNIX timestamps in seconds, and their key wrapped in `date()`. E.g. `"date(birthday)": 1512640800`

### **Array rules**

Array names are **strings**. They should be made of lowercase letters, numbers or underscores (`[a-z0-9_]`) and can't be longer than 30 characters.

They must be represented as an array of strings. Individual values must be **lowercased** strings, and not longer than 64 characters.

### **Example**

JSON Representation of profile attributes.

```json
{
  "age": 26,
  "finished_onboarding": true,
  "first_name": "John",
  "date(became_premium)": 1512640800,
  "interests": ["sports", "finance"]
}
```

Which, encoded in Base64 for the CSV ends up being:

```
ewogICAgImFnZSI6IDI2LAogICAgImZpbmlzaGVkX29uYm9hcmRpbmciOiB0cnVlLAogICAgImZpcnN0X25hbWUiOiAiSm9obiIsCiAgICAiZGF0ZShiZWNhbWVfcHJlbWl1bSkiOiAxNjU5NjQwODAwLAogICAgImludGVyZXN0cyI6IFsic3BvcnRzIiwgImZpbmFuY2UiXQp9
```

## Data lifecycle when importing tokens & their data

### Glossary

* *Anonymous Profile*: a Profile without a Custom ID
* *Identified Profile*: a Profile with a Custom ID, shared to Batch after sign-in or login

#### Trying to import a push token that is already collected by Batch

When your end user starts your app that implements Batch SDK, Batch automatically collects the push token, even if it was previously collected by your former push notification tool.

So, when going through the CSV import file, we first check if the push token doesn't already exist in the Batch Profile base.

In that case, we simply skip the import of the push token and its data.

### Import of anonymous push tokens & their data

When processing your import file, Batch creates new profiles for previously unknown push tokens. Here's how it works:

1. Batch checks if the push token exists in its system.
2. If not found, a new profile is generated to store the token and its associated data.
3. When the user launches the app, Batch creates another profile with the new installation's push token, marked as "collected."
4. The profile with the imported token becomes orphaned.

### Import of push tokens & their data when they're linked to a Custom ID

For push tokens associated with Custom IDs, the import process is as follows:

1. Batch verifies if the push token exists in its system.
2. If not found, Batch attempts to match the Custom ID from the import file with existing profiles.

#### **Scenario 1: Matching Profile Found**

We will merge the imported data with the existing profile according to these rules.

1. Push token: Added to the existing profile.
2. Custom attributes:
   * If the attribute already exists on the target profile or has been previously deleted (with a null value), the imported attribute will be skipped and the attribute value in the existing profile will be kept.
   * If the attribute doesn't exist on the target profile, the imported attribute will be merged into the profile.

#### **No profile exists with this Custom ID**

If no profile exists with the Custom ID:

* A new identified profile is created.
* All data associated with the imported token is linked to this new profile.

### Specific behaviors of native attributes

Native attributes (language, region, timezone) can be imported alongside tokens.

Important considerations:

* These imported native attributes have the lowest priority for targeting or personalization.
* Other methods of setting these attributes (e.g., via API) all take precedence.

## Export steps by provider

### Importing from Airship

If you're coming from Airship, you will only need to request an export of your devices' tokens to your account manager.

Before sending us the export at <support@batch.com>, make sure the data is in the format described above and rename the files as follows to make sure our team can import it as quickly as possible:  EXPORT\_APPNAME\_OS\_APIKEY.csv. We will notify you once the import is complete.

### Importing from PushWoosh

You can request an export of your devices' tokens at <help@pushwoosh.com>, mentioning your username.

Before sending us the export at <support@batch.com>, make sure the data is in the format described above and rename the files as follows to make sure our team can import it as quickly as possible:  EXPORT\_APPNAME\_OS\_APIKEY.csv. We will notify you once the import is complete.

### Importing from OneSignal

If you're coming from OneSignal, you will need to request an export of your devices' tokens through an API export. You can find [here](https://documentation.onesignal.com/reference#csv-export) how to request your raw token export. This can be done from One Signal's dashboard too.

Then, make sure the data is in the format described above and rename the files as follows to make sure our team can import it as quickly as possible:  EXPORT\_APPNAME\_OS\_APIKEY.csv

All you have to do now is send us your exports at <support@batch.com>. Our team will notify you once the import is complete.

## What's next

Once your push tokens have been successfully imported to Batch, your whole userbase is reachable and you can migrate your campaigns.

{% hint style="warning" %}
Note that this page is related to token imports for **Push v2**. Push v1 works in a slightly similar way, but by Platform (iOS, Android).
{% endhint %}


# Orchestration


# Overview

On Batch, you can create and manage three types of Orchestrations:

* **Campaigns**: they allow you to send one-shot messages to your users.
  * **Now**: Send your campaign as soon as you run it.
  * **Scheduled**: Send your campaign whenever you want in the future, based on each Profile's local time or on Universal time (UTC).
* **Recurring Automations**: Send messages in a recurring way, on specific intervals over time.\
  Recurring Automations are great to onboard your new users for instance. You can schedule several automations that will be sent throughout their first week after installing your app, to help them discover all the features and benefits it has to offer. They are also a good way to announce special offers that last over a certain period, encourage them to upgrade to a newer version and more.
* **Trigger Automations**: Send one or a serie of messages, following a user action, via different channels and with decisioning logics.\
  Trigger Automations are useful to manage a wide variety of use cases, from simple welcome notifications sent shortly after users install the app to advanced abandoned cart alerts or user journeys.

On each Orchestration, you have access to a wide range of feature to be able to organize them, set marketing pressure rules, specify your targeting and personalize your message.

The following sections will walk you through the different types of Orchestrations and their capabilities.


# Targeting

Thanks to the Batch Query Builder, present on all Orchestration creation interfaces and Segments, you can define precisely who you are going to target.

Our Query Builder is composed of all the elements encompassed in the block called Targeting:

* Collected/Imported tokens.
* Marketing/transactional
* Segmentation

This documentation walks you through these different targeting capabilities.

<figure><img src="/files/A64Jwa2ZZOmktPEZazwT" alt=""><figcaption></figcaption></figure>

## Targeting collected or imported push tokens

This section is visible on your dashboard only if you are in the process of importing app push tokens\* from a third party tool (through a CSV upload). For more information on how to import tokens check [this documentation.](/getting-started/features/customer-engagement-platform/profiles/import-tokens)

After uploading your CSV file you will be able to define in the targeting of your Campaigns and Recurring Automations\*\* through the “Filter push tokens” section if you want to target :

* **Imported tokens only** (tokens not yet known to our SDK).
* **Collected tokens only** (tokens known to our SDK).
* **Both types of tokens**, imported and collected.
  * This option is only possible from the Campaign API.
* By default, only collected tokens will be targeted.

Unlike the rest of the targeting at query builder level, targeting is done at installation level and not at profile level.\
As a result, if a profile has 2 push tokens, one collected and one imported, if you target the collected tokens then only the collected token of the profile will receive the message and not the other token attached to the same profile.

\*This filtering only concerns app tokens and not web tokens.\
\*\*The targeting on collected/imported is not available for Trigger Automations.

## Defining if the orchestration is Marketing or Transactional

For both SMS and Email Orchestrations, you will have to define in your targeting if:

* Your message is **for transactional purposes**:
  * If you select this option, all your profiles with the channel on which you are creating a message, opt-in or not, will be targeted.
* Your message is **for marketing purposes only**:
  * If you select this option, only opt-in profiles on the channel on which you are creating a message will be targeted.

## Adding conditions

* Click the "Add condition" button to see the list of Built-in and profile data you can use to define your targeting.
* You can add up to 31 targeting conditions and up to 64 values in each targeting condition and nest them into subgroups.
  * Within a group, the same AND & OR operator established the link between conditions.
  * Between groups, you can use different AND & OR operators.

### Using subgroups to mix AND and OR

**By default, all conditions within the same group share the same operator** (either AND or OR). This means that if you have three conditions linked by AND and switch that group's operator to OR, it will apply to all three conditions at once. You cannot make a single condition behave differently while staying in the same group.\
\
**To combine AND and OR logic** within a single targeting (for example: *"App version on iOS = 2.3.10 OR App version on Android = 2.4.3", AND everything else in AND*), you need to isolate the conditions that should follow a different operator into a **subgroup**.

#### Creating a subgroup

<figure><img src="/files/yPK7pFNe5UyPxVJwUIlz" alt=""><figcaption></figcaption></figure>

1. Click "Create subgroup" .

* Once the subgroup is created, a vertical blue line appears next to it, spanning the conditions it contains.
* This line is the only visual confirmation that the sub-group exists. If you don't see it, the conditions are still part of the parent group and changing the operator will affect everything in that parent group, not just the conditions you intended to isolate.

2. Add the conditions you want to isolate (e.g. two "App version" conditions).
3. Set the operator inside the subgroup (AND or OR) independently from the operator of the parent group.

<figure><img src="/files/uYtmxVZEw9M1BxaYz5wO" alt=""><figcaption></figcaption></figure>

{% hint style="info" %}

* Changing the AND/OR operator on a subgroup changes it for every condition in that subgroup, not just the one you're currently editing. If you only want to change the logic for some of the conditions, you can add another subgroup.
* Sub-groups aren't limited to Built-in/profile data conditions. You can also mix in Segments and Audiences.
* For more complex targeting logic, you can nest a subgroup inside another subgroup, up to one level of nesting only (a subgroup within a subgroup).
  {% endhint %}

## Adding Segments

Segments allow you to save time when creating your targeting by **calling pre-defined dynamic user targets.**

* Click the “Use Segment” button to define the Segments you want to include or exclude from your targeting.
* You can call several Segments within the same Segment condition:
  * Up to 20 segments can be called.
  * Segments leverage specific operators allowing you to check the pertenency of a person to at least one of the segments listed (contains any of) or all (contains all of)
* You can access/view the segment from the query builder regardless of the campaign status (draft, running, complete) by clicking on the eye icon.
  * It will open the Segment in a new tab.

Check the [complete section on Segments](/getting-started/features/customer-engagement-platform/profiles/segments).

## Adding Audiences

Audiences allow you to upload **static user targets** exported from your userbase (e.g. top 500 buyers) or created by third-party tools.

* Click the “Use Audience” button or select the “Audiences” condition within the Built-in data to define the Audiences you want to include or exclude from your targeting.
* As for Segments, you can call several Audiences and Audiences leverage specific operators (contains any of, etc.)

Check the [complete section on Audiences](/getting-started/features/customer-engagement-platform/profiles/audiences).

## Targeting on Built-in data

Built-in data allow you to target users based on common and essential information about profiles. They can be automatically collected by Batch (e.g. app version after SDK implementation) or be sent via API or Batch SDK (e.g. email address).

### Country & Language

Use it to target users according to where they live and what language they speak. Batch automatically detects the country and language of your users. This allows you to easily limit the range of your Orchestrations to one or several countries/languages.&#x20;

There is no limit to the number of countries and languages you can select.

**Specific case of companies with country and/or language restrictions:**

Built-in country/language does not enforce restriction rules, thus:

* A restricted user cannot save or run an orchestration if it doesn't include, at the root level, one of the countries/languages they're restricted to.
* If a non-restricted user builds an orchestration using country/language only in the query (not at the root), that orchestration won't be visible to restricted users.
  * This means restricted-company users should continue to rely on root-level country/language for compliant orchestrations, and treat query-level country/language as an additional filter rather than a replacement for restrictions.

### Opt-in statuses

Use it to target users according to whether they are Opt-in or not to your channels:

* **Email Opt-in**: users who are subscribed to your marketing email communications.
* **SMS Opt-in**: users who are subscribed to your marketing SMS communications.
* **Push Opt-in**\*: users who are subscribed to push notifications.
  * You can target users according to whether they are opt-in to Web and/or IOS and/or Android push notifications.
  * If there are several installs attached to your profile, to define the Push Opt-in Status, we look at the last active install by platform (IOS, Android and Web).

\*Imported tokens are not considered as Opt-in.

### Has Custom ID

Use it to target users based on whether they have a custom\_id or not.\
It allows Batch users to target anonymous or identified profiles. For example to target anonymous people and encourage them to create an account.

### Last Visit

Use it to target profiles based on their last visit date e.g. the last time the user opened the app or connected on the website.\
It is often used by Batch customers to reactivate inactive / less active users.

### Email attributes

* **Email domain**.
* **Last email click** (transactional and marketing).
* **Last email open** (transactional and marketing).

### App installation

Use it to target users based on when they last installed the app. It is often used for onboarding scenarios but also to gauge user engagement.

* If there are several installs attached to your profile, the installation data will only reflect the most recent installation date among your devices.&#x20;
  * This way, you can easily manage reinstallation use cases.
* The installation date isn't available on the web.

### Last location

Use it to target profiles based on their last known GPS coordinates. Define a reference address and a radius (in meters) to reach users detected near any point of interest. The time window is limited to the **last 12 hours**.

### Topic preferences

Use it to target users based on preferences stored in their profile via the `$topic_preferences` native attribute (e.g. newsletter for a media, promotions for ecommerce).

### **City** <a href="#city" id="city"></a>

Use it to target users based on the city Batch guessed for your users using IP-based geolocation. Data is refreshed every time your users open your app or visit your website (if there are several installs attached to a profile, the city returned is the one of the last active install).&#x20;

The accuracy of IP-based geolocation varies depending on the network connection of your users. The detection tends to be more accurate if users are connected to a Wi-Fi network. You can test the accuracy of the detection by checking the value Batch has on your install using the debug tool.

## Built-in data with Device filtering logic <a href="#city" id="city"></a>

### App version

Use it to target devices and profiles based on what app version they are using on iOS and Android. It is widely used for app updates, in-app ratings, and promoting new features.

### OS version <a href="#city" id="city"></a>

Use it to target devices and profiles based on what OS version they are using on iOS and Android.&#x20;

### Device model <a href="#city" id="city"></a>

Use it to target devices and profiles based on what device model they are using.&#x20;

#### Device filtering logic <a href="#city" id="city"></a>

These three attributes follow **device-level targeting logic**, which behaves differently depending on the Channel and Orchestration:

* **Push Campaigns, Push Recurrings & In-App Automations** → only the devices/installs matching the criteria receive the message.
  * *Example: targeting `Iphone 15` on a push campaign → a profile with an `iPad` and an `iPhone 15` only receives the push on their iPhone.*
* **Email & SMS Campaigns and Recurrings** → the profile receives the message if **at least one** of their devices matches the criteria.
  * *Example: targeting `Iphone 15` on an email campaign → a profile with an `iPad` and an `iPhone 15` receives the email.*
* **Omnichannel Trigger Automations** **(including Push messages)** → the profile enters and receives the messages if **at least one** of their devices matches the targeting.
  * *Example: targeting on OS version iOS `26.5` in an Omnichannel trigger automation sending a push message → a profile with an Android `13` and an iPhone `26.5` enters the automation and receives the push message on both devices (it is possible to filter on the platform at the message level to make sure, in this type of use case, only the iOS device will receive the message).*
* **Segments with device-level logic usage:**
  * The segment in itself is a list of profile, **Estimated reach and Segments exports** then follow the profile logic → the profile is considered as matching that Segment as long as **at least one** of the profile's devices matches the targeting.
  * When using a Segment in a **Push Campaign, Push Recurring or In-App Automation** → only the devices/installs matching the Segment receive the message.
  * When using a Segment in an **Omnichannel Trigger Automation** → the profile enters and receives the messages if **at least one** of their devices matches the segment.

## Targeting Profile attributes

With Batch you can track events and assign profile attributes to your users in order to personalize your messages and refine your targeting.

There are 3 categories of custom data:

* **Attributes**: they define users based on their settings (signup date, etc), user profile (user city, user gender, etc) or their current status (nb remaining credits, etc). They can contain different type of data (string, number or decimal, boolean, date).
* **Tag Collections**: A tag is a collection of strings. Tags may be called Channels or Topics with other push providers. The difference is that Batch attaches a "tag" to your user and will only make the list of users once you have created your Campaign on the dashboard or from the API.
* **Events:** Events allow you to target your users based on how they interact with your app (read article, play video, follow user). Every event has a key, an occurence date, an optional label, and an optional data object.

## Event Targeting

With Batch Event Targeting you can :

* Target on all events, with no source limit: mobile SDKs, Web SDKs, Profile API.
* Perform multi-attribute targeting on a single event.
* Use a wide range of operators of different types to refine targeting.

To use Event Targeting, start by choosing your events. When on the query builder, click on “Add conditions”. You will see all the custom events you track among the different targeting conditions. To find your events more easily, we recommend that you use the search. Select your events, and click on the “Add conditions” button.

Once back on the query builder, you can build your Event Targeting by choosing among the following options :

**Standard functions:**

* **Last\_event** : Use it to target profiles based on the last occurrence of the event.
  * Example : If you want to target profiles who completed a purchase in the last 30 days.
* **Count** : Use it to target profiles based on the number of occurrences of the event within the past 3 years (the event retention period) without specifying a time period over which the events were triggered.
  * Example : If you want to target profiles who read more than 30 articles.
* **Count\_since** : Use it to target profiles based on the number of occurrences of the event over a specific time period.
  * Example : If you want to target profiles who read more than 3 articles over the past 7 days.

**Aggregate functions:**

Functions appear only if the event has at least one Number attribute. Once you picked the function, you need to pick the numeric attribute you want to aggregate (auto-selected if only one).

* **Total**: Use it to target profiles based on the total value of a numeric attribute across all occurrences of the event.
  * Example: If you want to target profiles who spent more than 500€ in total.
* **Average**: Use it to target profiles based on the average value of a numeric attribute across all occurrences of the event.
  * Example: If you want to target profiles whose average purchase amount is greater than 50€.
* **Maximum :** Use it to target profiles based on the highest value of a numeric attribute across all occurrences of the event.

  * Example: If you want to target profiles who made a single purchase above 500€.

  Total, Average and Maximum all have a "since" variant (total since, Average since, Max since) to let you scope the calculation to a time window (e.g. across the events that occurred in the last 30 days / hours). Without "since", the calculation runs over the full history (3 years).

{% hint style="info" %}
Note that the aggregates calculation happens in real-time.
{% endhint %}

{% hint style="info" %}
Thanks to these aggregates, it is possible to run commonly used scores such as:

* **RFM** score: Recency via last\_event, Frequency via count and Monetary via Total.&#x20;
* **LTV** - lifetime value score: AVG × count\_since over a rolling window.
  {% endhint %}

**Filtering :**

If you want to specify the attributes that need to be attached to the event for it to be taken into account in the targeting, for example the type of article / the product category / the brand, then you can filter the event using the icon to the left of the cross at the far right of your query. It will open a new line under the event query where you can pick your attributes and specify their values.

* Example : If you want to target profiles who completed the purchase of a specific product (a red dress for example).

Be aware that :

* All following Event attributes are supported : String, Number, URL, date, Array, Boolean.
* You can filter on **up to 10 attributes**.
* Only the “and” operator is supported between attributes.

## Retargeting

Use retargeting to target users based on if they have reacted or not to a previous Email, Push, Push Mobile Landing, SMS or In-App communication :

{% hint style="info" %}
**We count Push Retargeting Events and In-App Retargeting Events by device.** If a profile receives the same push/In-App notification on 3 devices, it counts as 3 sent.
{% endhint %}

{% hint style="info" %}
Retargeting events are **stored for 90 days**, except for **In-App clicked\_message** and **delivered\_message** events which are **stored for 366 days**.
{% endhint %}

When on the query builder, click on “Add conditions”.\
You will a dedicated "Retargeting message" section with 6 Built-in data :

* **Bounced message**
  * Event available on Email, Push and SMS. Useful to improve deliverability management.&#x20;
* **Clicked message**
  * Event available on Email, SMS, in-App and Push Mobile Landing.
    * **For Email**, does not include clicks on unsubscribe links. It only includes the first click action on each link.
      * If a user clicks on the same link 5 times, we will only consider the first click. However, if a user clicks on different links in the same Email, it will count as several clicks.
      * When retargeting Email clicks, you can add a filter to specify **up to 10 links with raw URLs or Link Names**. A user will match the targeting if they have clicked on at least one of the links in your list.
        * ⚠️ If your links contain personalization, you must **name them** for retargeting purposes; otherwise, a unique URL is generated for every profile. Check [the documentation](https://doc.batch.com/guides-and-best-practices/message/email/link-and-tracking-settings/how-to-handle-link-tracking-in-emails#h_e1863a7151) on **Grouped Link tracking**.
    * **For In-App and Push Mobile Landing**, tracks clicks on buttons or images (with action other than dismiss). You can filter clicks based on the **specific button clicked.**
      * ⚠️ Be careful when **Multilingual** and/or **A/B Testing** features are active. If you duplicate a variant or a default language and then modify the button action on only one version, different actions may be grouped under the same button ID. However, if a variant or language is created **from scratch**, they will be treated as distinct buttons. Button actions should remain consistent across all versions.
    * **For SMS**, tracks clicks on shortened links using the **Batch Link Shortener.** It is not possible to filter on a specific link for now.
* **Delivered message**
  * Event available on Email, SMS and In-App.
* **Dismissed message**
  * Event available on In-App and Push Mobile Landing. Specifically tracks dismissals via CTA (close, back & swipe excluded), in other words it targets users who closed the message via a "dismiss" action.
* **Opened message**
  * Event available on Email and Push.&#x20;
    * For Email: does not include machine opens, only includes the first open action.
      * If a user opens the same email 5 times , we will only consider the first open (because that is the engagement action) and the date associated with this event is the date of the first open. This is identical to the way Analytics works.
    * For Push: includes only direct opens.
* **Sent message**
  * Event available on Email, Push and SMS, does not include skipped, does include bounces.

\
For each Retargeting Event you need to :

* Specify an occurrence of the event, either within an allotted time (count\_since) or not (count), or look at the last occurrence (last\_event).
  * The retargeting feature includes a simplified `occurred` operator. This boolean simply tracks if an event occurred (yes/no) during the 90-day lookback period.
  * To find out more about operators, check the previous section on Event targeting.
* Specify if you want to observe this event on either a particular orchestration (and optionally, a particular step), or on one or more channels.

Retargeting Events are available :

* In Campaigns and Automations targeting.
* In Yes/No Splits.
* in Wait Event Steps (only clicked and opened message events).&#x20;
* In Segments.

You can also quickly create a new Campaign to retarget users who have reacted to a previous Campaign by clicking on its additional actions menu and selecting **'Retarget campaign'**. You can then choose which reaction event you wish to retarget and which channel you are going to use to send your new Campaign. You will then be redirected to this new Campaign.

## Estimated Reach

The potential reach indicator shows you **the approximate number of users who are going to receive your message**, based on your current targeting options.\
To be relevant, this value needs to be displayed relatively quickly, which rules out calculating it on the entire userbase. Reach estimation is extrapolated by running the selection on a sample of the userbase.

**How the estimate works?**&#x20;

* The profile data is organized into 128 partitions.
* Batch reads the first 16 partitions and extrapolates from the remaining partitions to determine the number of profiles that can be reached.
* If, after reading the first 16 partitions, we can determine that the cardinality is too low (there are fewer than 100 profiles per partition), then the entire set of partitions is read to obtain an exact value.

💡 This estimate is based on data from the Userbase which is updated in real-time, as new installations and uninstallations are reported to Batch.

**Understand you reach**

Move the mouse over the value of your estimated reach to **see the steps and details of its calculation.**

<figure><img src="/files/sFVuUlcK4R97BweRvDhV" alt="estimated reach" width="563"><figcaption></figcaption></figure>

**For push messages,** we provide a more granular view of how an Orchestration targets users across multiple devices. You can see the specific count of installations per platform and a total estimate of messages to be sent. :warning: Be aware that the "Messages to send" calculation assumes all platforms are targeted in the message composer; if you restrict the message to a single platform (e.g., iOS only), the actual volume will be lower.

<figure><img src="/files/atrhiWnXocBsowEaAc4B" alt=""><figcaption></figcaption></figure>

{% hint style="warning" %}
What is explained on this page is focused on how targeting works for email, SMS and Push v2 channels. For Push v1, the behavior is slightly similar with a few differences. For exemples there is no notion of segments in Push v1.
{% endhint %}


# Campaigns

Campaigns are made for schedule-based, one shot messages. You can create Campaigns for each channel: Email, SMS and Push. They can be managed from the “Campaigns” tab of your dashboard.

<figure><img src="/files/79ILyn44jt1nfHpGoRlo" alt="campaign list"><figcaption></figcaption></figure>

## Creating a Campaign

To create a campaign, click on the “New Campaign” button on the top right-hand corner of your Campaigns listing and select the channel you want to use to send your message.

Once on the Campaign builder:

* First, you need to **give a Name to your Campaign.**
  * A draft Campaign cannot be saved if it has no name.
  * The name is how you are going to be able to distinguish the Campaign from the many others you are going to create, so try to be as specific as possible.
* In addition to the name, you can also **attach labels to your Campaign.**
  * On the dashboard, just click on the “Add labels” button on the right of the Campaign name section to choose and associate up to 10 labels to your Campaign.
  * You can also attach up to 5 labels to a Campaign created from the [Campaign API](https://doc.batch.com/developer/api/cep/campaigns).&#x20;
  * Labels can be added even after a Campaign is completed.&#x20;
  * Labels have two main purposes:
    * Marketing pressure limit: You can set a specific marketing pressure limit on all the Campaigns attached to the same label (e.g. no more than 1 push a week for all campaigns using the "onboarding campaigns" label). You will find more information here: [global frequency capping.](https://doc.batch.com/getting-started/features/customer-engagement-platform/settings/cappings#global-capping)
    * Filtering: You can filter your Campaigns listing based on the labels attached to your Campaigns (e.g. "onboarding campaigns"):
* Then you need to **specify your Targeting**; to which profiles you want to send your message to. You will find more information [on the targeting section](https://doc.batch.com/getting-started/features/customer-engagement-platform/orchestration/targeting).
* After this, you have to **define your Timing**; when you want your users to receive your message. You have 2 options:
  * **Now:** Use it to send your message as soon as you click the "SEND" button.
    * Be aware that, with this option, the timezones of the profiles will not be taken into account.
  * **Scheduled**: Use it to schedule your message in the future, you have now 3 options:&#x20;
    * **Your local time**: this default option allows you to send your message based on your own computer's time, reducing reliance on more complex time zone settings.&#x20;
    * **Universal time (UTC)**: allows you to send your message at a specific UTC time regardless of targeted profiles location.
      * For example, if your Campaign is scheduled to be sent on Friday, July 19th at 6pm global time (UTC), your users will receive it at 2PM in the US (UTC -4), 8PM in France (UTC +2) and at 2AM on July 20th in China (UTC +8).
    * **Profile's local time**: Use it for messages intended for an international audience spread across multiple time zones to make sure your message will be received at the same hour in every timezones.
      * For example, if your Campaign is scheduled to be sent on Friday, July 19th at 6pm, your American, French and Chinese users will receive it on Friday, July 19th when it's 6pm in their country.
      * A Profile's local time Campaign can take up to 25 hours to be completed according to where your users live.
* Then, you need to compose your message. You will find more information [on the message section](https://doc.batch.com/getting-started/features/customer-engagement-platform/message/overview).
* Finally, you can **activate the Conversion Goal feature** to track how many users perform a specific event (like a purchase or subscription) over a defined period of time after interacting with a message.
  * Once enabled, you must define:

    * **The conversion event:** The specific action the user must take for the campaign to be considered a success.
      * We support both **Custom Events** and **Native Events** (e.g., Subscription). Retargeting events are excluded to maintain reporting clarity.
      * You can also **add an attribute filter** on a conversion event to provide more granularity in what you want to measure (e.g. event: purchase + product\_category = "subscription").&#x20;
        * Supported attribute types: string, number, boolean, date.
    * **The conversion window and the attribution signal:** The timeframe after the message is sent/open/clicked during which the event must occur to be counted as a conversion.
      * The window is customizable from **1 hour to 7 days**.
      * The time of the conversion is based on the **internal timestamp of the event**, ensuring accuracy even for clients who send events in batches.
      * You choose the interaction signal (the interaction that opens the conversion window) from among “sent,” “opened,” and “clicked.”
        * For **clicks**: all clicks within the conversion window are considered, only the closest to the conversion event is retained.
        * For **opens**: only the **first open** is taken into account (misclick / inbox cleanup protection).
        * Signal options **vary by channel** - not all channels support click or open attribution:
          * Push: Open and Sent supported.
          * Email: Click, Open and Sent supported.
          * SMS: Sent supported and Click support if URL shortening option is activated.
    * **Business tracking:** Whether or not to enable this tracking. If enabled, you must select a **numeric attribute** linked to the event, which will allow a value to be summed each time a conversion event occurs.
      * Negative values are supported (e.g. to take into account refunds).

    How the attribution works:

    * Batch uses a **last-touch point model**. If several Campaigns have the same Conversion Event, The Conversion is attributed to the most recent message interaction (sent, Open or Click) within the defined attribution window.

## Managing a Campaign

### Stopping a Campaign

* A Universal time (UTC) Campaign cannot be stopped after sending.
* A Profile's local time Campaign can be stopped, however, stopping this Campaign only cancels it for users located in timezones that have not yet reached the scheduled sending time.
  * For example, if the Campaign is scheduled for 2PM (local time) and is canceled at 3PM UTC, a targeted user located in the US (UTC-4) will not receive that Campaign.

### Modifying a Campaign

* A Campaign can be modified until it is completed.
* You can modify its targeting, timing and/or content.
* If your Campaign is scheduled to be sent at a later date, or in other words if the sendings have not started, all your changes can be taken into account.
* However, if sendings are already in progress, all the people concerned by these sendings, will not be affected by your changes. Changes will only be effective for sendings that have not yet started.
  * We advise you not to modify your Campaign when sendings have started to avoid errors. This particularly applies to local Campaigns.

### Deleting a Campaign

Any deletion is definitive, you will no longer be able to access your Campaign.

## Understanding Campaigns listing

All the Campaigns you have created since the project was created are available on the listing.

From the Campaigns listing you can:

* **Filter the listing** by:
  * Date: Filter campaigns that were active over the period, meaning sends occurred between the two selected dates.
  * Status: Draft, Planned, Stopped, Completed.
  * Channels: Email, SMS, Push.
  * Labels: All CEP labels attached to the project.
    * You can select several options for each filter and combine filters.
* **Access quick actions** that adapts to the Automation status (by clicking on the three dots buttons):
  * If in draft:
    * Edit Campaign.
    * Run Campaign.
    * Replicate.
    * Delete.
  * If stopped:
    * Edit Campaign.
    * Go to Analytics.
    * Run Campaign.
    * Replicate.
    * Delete.
  * If planned:
    * Edit Campaign.
    * Go to Analytics.
    * Stop Campaign.
    * Replicate.
    * Delete.
  * If completed:
    * Go to Analytics.
    * Replicate.
    * Delete.
* **Access key metrics:**
  * Delivery: number of sent
  * Interaction: percentage of opens
* **Access key dates related to a Campaign's status and content** by hovering over the status icon on the listing page or within the Campaign form:
  * Created at: The date and time the Campaign was initially created (i.e., first saved).
  * Last edit: The date and time the Campaign's content was last modified since its creation.
  * Currently {Campaign status}: The Campaign's current status (e.g., Draft, Planned, Sending, Stopped, Completed) and the date/time it entered this status (this does not apply to the 'Completed' and 'Sending' statuses).&#x20;
    * The dates displayed are based on your browser's local time.
* **Export your Campaigns Analytics** (by clicking on the “Export” button).
* **Search a specific Campaign.**

## Using Calendar View

A calendar view is available on the Campaign listing page. You can switch between a **monthly or weekly view** to visualize how campaigns are distributed over time, alongside the existing table view.\
\
Each campaign appears as a color-coded pill based on its status (running, scheduled, stopped, etc.)

* Hovering over a campaign shows a **tooltip with key details**: full campaign name, channel and status.
* On busy days, a *"+ X more"* link opens a **side panel listing** all campaigns for that day.
* All **existing filters** (channel, status, label, segment) and the **search bar** work the same way in calendar view as in table view. Switching between views preserves the current filters.
* Times are displayed **in UTC**. For Profile's local time campaigns, if the campaign is scheduled to start at 12.30pm in the profile’s time zone, it will be displayed in the calendar at 12.30 pm UTC (the time at which a user in the UTC time zone will receive it).

To be noted that we display a maximum of 150 campaigns per week and per month for reasons of performance and readability. If you have a large number of campaigns, we encourage you to use the filters to make the most of these views.

{% hint style="warning" %}
What is explained on this page is focused on how Campaigns works for Email, SMS and Push v2 channels. For Push v1, the behavior is slightly similar with the main difference that it works by platform (iOS, Android, Web).
{% endhint %}


# Recurring Automations

Recurring Automations are made for message sendings that repeat at specified intervals based on each Profile's local time or on Universal time (UTC). You can create Recurring Automations for each channel: Email, SMS and Push. They can be managed from the “Automations” tab of your dashboard.

<figure><img src="/files/j2A0ux32VAYFRW0w0mQe" alt="recurring"><figcaption></figcaption></figure>

## Creating a Recurring Automation

To create a Recurring Automation, click on the “New Automation” button on the top right-hand corner of your Automations listing and select the channel you want to use to send your message.

Creating a Recurring Automation is similar to creating a Campaign, except for the Timing. Check [Campaign documentation here](/getting-started/features/customer-engagement-platform/orchestration/campaigns).

* On a Recurring Automation, to **define your Timing**, you have to:
  * Set the day and time when you want the first occurrence of your message to be sent.
  * Set the day and time when you want to stop your Automation i.e. when you want the repetition to stop.
    * As for Campaigns, the day and time can be on Your time, Universal Time (UTC) or Profile's local time.
  * Set the frequency with which messages are sent.
    * The frequency has a minimum limit of 1 message per day and no maximum limit.
* If you want to limit the number of occurrences of a message a Profile will receive, you can use [**Capping**](/getting-started/features/customer-engagement-platform/settings/cappings)**.**
  * When Capping is disabled, Profiles in your targeting will be able to receive the message on each occurrence i.e. each time the timing occurs.
  * When Capping is enabled, Profiles in your targeting will only be able to receive X occurrences of the message. X being the value you have set.
    * If a profile has several devices, then we will send X occurrences of the message per profile AND per device. For example, if you set the capping to 2 and a user targeted by your Automation has an iPhone and an iPad, they will receive 2 occurrences of the message on each of these devices.

## Managing a Recurring Automation

### Stopping a Running Orchestration

* A Recurring Automation can be stopped and relaunched as many times as necessary until the end date is reached.
* Sendings will resume on the sending date defined in the form and not immediately after the Automation is relaunched.

### Modifying a Recurring Automation

* A Recurring Automation can be modified until the end date is reached.
* You can modify its targeting, timing and/or content.
* If your Automation is scheduled to be sent at a later date, or in other words if the sendings have not started, all your changes can be taken into account.
* However, if sendings are already in progress, all the people concerned by these sendings, will not be affected by your changes. Changes will only be effective for sendings that have not yet started.
  * We advise you not to modify your Campaign when sendings have started to avoid errors. This particularly applies to local Campaigns.
* If you change the start date to within 24 hours of the first send, people will not receive the message again; they will receive a message on the next occurrence.

### Deleting a Recurring Automation

Any deletion is definitive, you will no longer be able to access your Automation.

## Intelligent Warm-up mode

Intelligent Warm-up mode help you manage your email sender reputation by gradually increasing sending volumes in order to build trust with email providers.&#x20;

You can **define and manage** the warm-up process with **three key parameters**:

* **Initial Sending Volume:** The volume for the first day's send (default: **500**).
* **Volume Increase Percentage:** The percentage increase applied to the sending volume for each subsequent day (default: **50%**).
* **Engagement Selection Criteria:** A single criterion used to target people from the least engaged to the most engaged. It creates an ordering based on a user attribute. Users without a value for the selected attribute are targeted last. Supported attributes are:
  * **Date Attributes** (e.g., *last\_email\_open*) are sorted by default from **most recent to oldest**.
  * **Number** (Float or Integer) **Attributes** (e.g., a custom scoring). The sort order is determined by you between descending or ascending. Integers are converted to floats for normalization before sorting.

The **behaviors specific to the warm-up mode** are as follows, the rest is identical to the functioning of Recurrings:

* **Creation Blockers & Warnings:** The system includes checks to prevent unsuitable warm-up plans:
  * **Blocker (before launch):** Warm-up duration less than 2 days or more than 89 days.
  * **Warning:** Volume increase percentage greater than 100%.
  * **Warning (after launch)**: Warm-up duration more than 89 days. If certain criteria are modified during the warm-up process, it can result in a warm-up exceeding 89 days. In this context, we will not block saving the modifications, but the automation will stop after 89 days and the remaining tasks (sends) will be abandoned.
* **Manual Intervention Allowed:** You can manually intervene by modifying:
  * The **daily increase percentage**.
  * The **engagement criteria.**
  * The **email content**.
  * The **targeting**.
  * The ability to **stop and resume** the Automation.
* **Restrictions (even before launch):**
  * Timing cannot be based on **Profile's local time** (Global Time is enforced).
  * **Capping** setting is forced to 1 and occurrence is **daily**.
  * **A/B testing** is not allowed.
  * **Replicating** an IP warm-up orchestration is not allowed.
  * **Stop/Rerun** is blocked from the main listing (to enforce awareness of changes).
* **Restrictions (after launch):** Once the orchestration has started sending, the following cannot be changed:
  * Market/Transac **subdomain**.
  * **Start date** (unless the start date hasn't passed).
  * **Initial sending volume**.
* **Data overload prevention:**
  * A maximum of **4 Warm-up Automations** can be running simultaneously across the same project.

## Understanding Automations listing

The listing is common for Recurring Automations and Trigger Automations.\
All the Automations you have created since the project was created are available on the listing.

From the Automation listing you can:

* **Filter the listing** by:
  * Date: Filters out Automations that were active over the period.
  * Status: Draft, Running, Stopped, Completed.
  * Channels: Email, SMS, Push.
  * Labels: All CEP labels attached to the project.
    * You can select several options for each filter and combine filters.
* **Access quick actions** that adapts to the Automation status (by clicking on the three dots buttons):
  * If in draft:
    * Edit Orchestration.
    * Launch Automation.
    * Replicate.
    * Delete.
  * If Stopped:
    * Edit Orchestration.
    * Go to Analytics.
    * Launch Automation.
    * Replicate.
    * Delete.
  * If running:
    * Edit Orchestration.
    * Go to Analytics.
    * Stop Automation.
    * Replicate.
    * Delete.
  * If completed:
    * Go to Analytics.
    * Replicate.
    * Delete.
* **Access key metrics:**
  * Delivery: number of sent.
  * Interaction: percentage of opens.
* **Access key dates related to an Automation's status and content** by hovering over the status icon on the listing page or within the Automation form:
  * Created at: The date and time the Automation was initially created (i.e., first saved).
  * Last edit: The date and time the Automation's content was last modified since its creation.
  * Currently {Automation status}: The Automation's current status (e.g., Draft, Planned, Running, Stopped, Completed) and the date/time it entered this status (this does not apply to the 'Completed' status).
  * First run: The date and time the Automation was run for the first time.&#x20;
    * The dates displayed are based on your browser's local time.
* **Export your Automations Analytics** (by clicking on the “Export” button).
* **Search a specific Automation.**

{% hint style="warning" %}
What is explained on this page is focused on how Recurring Automations works for Email, SMS and Push v2 channels. For Push v1, the behavior is slighly similar with the main difference that it works by platform (iOS, Android, Web).
{% endhint %}


# Omnichannel Trigger Automations

Batch Automation Builder is an interface where you can create multi-step and multi-channel Trigger Automations. Thanks to different branching and targeting options you can create advanced scenarios in order to deliver personalised customer experiences.

<figure><img src="/files/44FxbWWQIaaZXIcSQVjj" alt="trigger automation"><figcaption></figcaption></figure>

## Entering and exiting the scenario

You have **2 options** to initiate the user's journey:

* The triggering of a **custom or native event**, regardless of its source (API, SDK).
  * Before a first attempt to send a message to the user, new similar events received will make the user restart the automation.
  * After a first attempt to send a message within the automation, new similar events received while the user is waiting in the Automation will not restart the automation, and as such the user will continue their progress in the flow.
    * If you want the user to enter a new instance of the Automation each time they fire the trigger event, check "Parallel Automations" section below.
  * 2 native trigger events are available: **Subscribed to mobile push notifications** (iOS/Android) and **Subscribed to web push notifications**
    * Use these triggers to automate onboarding journeys, such as welcoming a user right after they opt in.
    * Combine the **Subscribed to mobile push notifications** trigger with targetings on **Installation date** to create app onboardings and limit onboarding to new app users.
    * A push subscription event is created **each time** a device subscribes, not only the first time. Apply capping at the automation level to avoid over-sending.
    * Push subscription events are tracked at the profile level, allowing messages to reach all devices of a profile or be filtered by platform (iOS, Android, Web).
* A change in the value of a **custom** **profile attribute thanks to the Attribute Change Trigger feature**: with this option, you can specify the old (optional) and new (mandatory) values for the attribute.
  * Native attributes and attributes of types Array, Object, and URL are not supported at the moment.
  * Trigger on attribute change is designed to work in **near real-time**, firing as soon as the attribute change is processed on a profile. Thus, we advise you to use **Wait until** or **Quiet hours** steps in your Automations to prevent messages from being sent at inappropriate times.

{% hint style="info" %}
Note these behaviours for attribute change scenarios:

* Profile creations will not be considered an attribute change.
* There are no issues if you regularly update your profile attributes by resubmitting all attributes each time. If the attribute value does not change, it will not be considered an attribute change so it will not trigger the Automation with every update.
* If the attribute type is modified with an override, the conditions will still apply to the previous type. The automation needs to be updated if you want to track the new attribute type. We do not recommend changing the type of an attribute used as a trigger for an Automation.
  {% endhint %}

**To further refine user entry, you can:**

* **Use event filters** (only available on event-based scenarios)**.** This feature allows you to filter the entry event based on event attributes.
  * Ex: in a retail scenario, upon an 'add to cart' event, you can ensure that only customers with a product of a specific value and/or belonging to a particular product category will enter the sequence.
* **Define your targeting.** Use the query builder to specify which users you want to target by selecting targeting conditions amongst all events, attributes, segments and audiences at your disposal.
  * Targeting is checked at the entry of the Automation and after each delay step.
* **Specify a Capping at the Automation level**. The capping is the maximum number of times a user can enter the automation. We count an entrance when at least one message has been sent to the user.
  * Ex: If the capping is 1 and the user first enters the Automation but ends up being excluded from it by an exit event before being addressed by a message, it will not count in the capping and the user will be able to re-enter the Automation.
* **Specify a Grace Period at the Automation level.** The grace period is the minimum time between a user exiting the Automation and re-entering it. It can be up to 60 days. The grace period is counted from the moment a user reaches a final state in an automation (user finishes the automation, is excluded from it by an exit event etc.). Just like Capping, if an Automation has never attempted to send a message to a user, we do not apply the grace period.
  * Ex: If a user reaches a final state of an automation that never tried to send them a message, he can re-enter this same automation immediately.
* **Enable Parallel Automations** (only available on event-based scenarios) **.** When this option is activated, the user can trigger and advance through the same Automation several times in parallel. The Automation is triggered each time the user fires the trigger event with a new event parameter. The event parameter can be an attribute attached to the event or the event label but can only be a String.
  * Ex: Trigger a series of messages each time a user adds a product to his cart, based on the product category.
    * When Parallel Automations option is enabled, any external event later used in the scenario will be automatically checked to see if they carry the same discriminating attribute as the one specified on the entry event so it is not necessary to do it manually. For example: you create a scenario on an add\_purchase event and enable parallel automations with an id associated with each add\_purchase event as the discriminant attribute. If you add cancellation events to your scenario, Batch will automatically check that the cancellation events triggered by the user carry the same id as the one that the event that prompted entry into the Automation.
* **Specify a start date.** Any event triggered before the start date will not trigger the Automation.
* **Specify an end date**. When the end date is reached, the automation essentially goes to sleep, stopping any further progress and preventing any more messages from being sent.

**Regarding exiting from an Automation, users can exit for 3 reasons:**

* **The user triggered an exit event.** The user was in a wait until step and they triggered an exit event within the allotted time. When a user triggers an exit event, they are excluded from the Automation, and thus will not continue their journey.
* **The user arrived at the end of the Automation**. The user just finished their journey and arrives at the final step of the Automation.
* **The user no longer complies with the targeting conditions.** Each time the user moves from a delay step to another step, we re-check whether they still comply with the targeting conditions. If this is no longer the case, the user is excluded from the Automation.

**Behaviour when modifying an Automation:**

* **If you stop an Automation and restart it**, it's treated as if the Automation had just been created. Everyone has to go through the entry event. If a user was already part-through the scenario before the Automation was stopped, they are removed from their state and they must once again wait for the entry event.
* **If you update the Automation to modify...**
  * **the trigge**r: Users who performed the trigger event before you modified it will remain in the waiting queue.
  * **the exit events:** The new exit events will be taken into account immediately, even for users who are already in the waiting queue.
  * **the timer increasing the timer duration**: Batch will apply the new timer duration for users who are already in the waiting queue and for new users entering the automation.
  * **the timer decreasing the timer duration**: ​Batch will only apply the new timer duration for new users entering the automation. Users who were already in the waiting queue will receive a notification based on the previous timer duration.
  * **the splits** : It will be applied immediately to users.
  * **the frequency capping**: It will be applied next time the user enter the automation.
  * **the end date to a later date:**

    * If there are less than 367 days between the initial end date and the date on which the new end date was set, then we listen to the events again and the users who were in the Automation retain their previous state (their place in the scenario).
    * If there are more than 367 days between the initial end date and the date on which the new end date was set, then the events are listened to again, but all users are evicted from the automation and must once more go through the entry event.

    Why 367 days? A user's state remains available for 367 days after its last change. After 367 days, it is automatically deleted.

## Choosing between Marketing and Transactional Automations

Batch supports marketing and transactional messages through Campaigns and Trigger Automations.

This categorization does more than classify Automations. It changes several business rules.

Categorizing an orchestration as **Marketing** has several effects:

* It allows only marketing [email senders](/getting-started/features/customer-engagement-platform/settings/channels#email-senders).
* It checks that emails include an unsubscribe link.
* It automatically adds a `STOP` opt-out mechanism to SMS messages.
* It targets only contacts opted in to marketing email or SMS communications.

{% hint style="info" %}
Marketing or transactional status is evaluated only when Batch sends an SMS or email. Users can enter a Trigger Automation even when they opted out of SMS or email communications. Batch does not send them SMS or email messages.
{% endhint %}

Conversely, categorizing an orchestration as **Transactional** has several effects:

For email messages:

* It skips unsubscribe link checks on emails.
* It limits available [email senders](/getting-started/features/customer-engagement-platform/settings/channels#email-senders) to transactional senders, maximizing deliverability.
* It can send emails to contacts opted out of marketing emails.

For SMS messages:

* It removes the automatic `STOP to unsubscribe` add-on.
* It can send SMS messages to contacts opted out of marketing SMS messages.

{% hint style="info" %}
To know more about transactional email sending in Batch, check [How to send a transactional email with Batch?](/getting-started/other/implementation-guides/how-to-send-a-transactional-email-with-batch).
{% endhint %}

{% hint style="info" %}
Note that this setting does not affect push communications. Push does not use separate opt-ins for marketing and transactional messages.
{% endhint %}

## Adding steps to the scenario

**To build your scenario, the Automation builder offers 3 main step types:**

#### Message steps

You can create SMS, Email, Push messages, Universal Channel steps (to manage WhatsApp, etc.) and place them wherever you want in the scenario. On each message step you have the same composition interface as for Campaigns and Recurrings, complete with the same capabilities.

* On the push channel you will be able to target either iOS and/or Android and/or Web devices.

{% hint style="info" %}
**Universal Channel is a paid offering**. Contact your CSM or Account Manager to learn more.
{% endhint %}

#### **Split steps**

You can split your audience into different branches thanks to 2 main branching options. You can even nest multiple decision branches as desired.

* **Yes/No Splits:** your audience is split into 2 groups depending on whether they match or not:
  * The targeting condition(s) you specified in the split.
  * The trigger event filters you specified in the split.
    * The operator between the two query blocks (”Segmentation” ie profile targeting and trigger event filtering) is always **`AND`**. This means a user must match both the profile query and the trigger event query to follow the "Yes" branch.
    * In addition to this, the operator between the different filtering conditions for the trigger event is always the same, either **`AND`** or **`OR`**.
    * Currently, complex attributes like arrays and objects are not supported for filtering in the trigger event query block.
    * The estimated reach calculation will only be displayed for the profile targeting part of the query. This is because it's not possible to accurately predict which profiles matching the targeting will also trigger the event with the correct attributes. If a Yes/No split only contains a trigger event query, the estimated reach will not be displayed.
    * If a client changes the trigger event for an Automation, a confirmation modal will appear to warn them of potential impacts. If they approve the change, the filter event query will be cleared.
* **Random Splits:** your audience can be split into up to 4 algorithm-based random groups. Please note that if a specific user enters the Automation several times, they will not go into the same branch each time.
  * This feature is useful to run AB tests on the entire scenario, on a specific branch or message.

#### **Wait steps**

You can make your users wait for a defined period and/or for specific events.

* **The “Delay” step** in the Automation Builder contains 4 different options.
  * The **“Wait for”** option makes it possible to set waiting times from 1 minute to 90 days between the various steps of the scenario. The wait duration is calculated from the exact time the profile enters the step.
    * Ex: If a user enters a Wait for step at 11 a.m. with a wait time of 1 day, they will exit the Wait step at 11 a.m. the following day.
  * The “**Wait until**” option which makes it possible to define the time and, optionally, the weekday at which users will proceed to the next step.
    * Ex: If a user enters an automation at 11 a.m. with the first message step set to wait until 10 a.m., they will receive the message at 10 a.m. the following day.
  * The “**Wait until date attribute**” option which makes it possible to wait until a specific time before or after the date of a date attribute associated with the trigger event.
    * Ex: If your event is add\_to\_cart and you have associated it with the date when the sales end, you can wait 1 day before the sales end to send your next message.
    * For each of these delay options, exit events can be set. If one of these events is triggered by a user during the wait time, they will exit the automation.
  * The **"Wait until best time"** option which makes it possible to wait, for each user, until the time when they are most likely to engage with the following message.
    * Ex: If a user enters an automation at 11 a.m. and Batch IA engine has calculated that the Best Time to send a message to this user is 6 p.m., so he will exit the wait until best time step at 6 p.m. the same day and he will receive the following message straight away.
    * A profile entering the Wait step will exit at most 24 hours later (time to go through all the potential best sending times).
    * A fallback hour (in profile's local time) must be configured — it applies when no engagement data is available or a technical error occurs.
    * An exit event can also be defined to handle status changes while a profile is waiting.
    * Quiet times are compatible with Best Time but applied independently (at the message level). If the Best Time falls within a Quiet Time window, sending is delayed until the Quiet Time ends.
    * Send Rate is compatible but may introduce slight delays compared to the computed Best Time for some profiles — this is expected behavior.

{% hint style="info" %}
**Best Send Time (BETA)** is a priced offering. Reach out to your CSM or Account Manager to learn more.
{% endhint %}

* **The "Event" step** in the Automation Builder allows to wait for up to 4 events over a defined time period. It works as follows: once the user enters the Event step, they are put on hold for a customer-defined duration. Two outcomes are possible:
  * **The user triggers one of the expected events.** They will then immediately proceed down that event's branch (without waiting for the timer to expire). Allowed events are:
    * **Custom Events**: (except the Automation trigger event which is not supported)
      * You can filter the events on their attributes (e.g., wait for a `purchase` event where `category` = "shoes").
      * It is not possible to filter on complex attributes like arrays or objects, all other attribute types are supported.
      * Event filtering is optional.
        * If an expected event occurs (e.g., `purchase`) but does *not* match the specified attributes (e.g., `category` = "pants"), the event will be ignored and the profile will continue to wait.
    * **Retargeting Events**: You can wait for `Opened message` or `Clicked message` events.
      * For technical consistency with clicks, this step listens for all `Opened message` events, not just "initial opens."
      * Retargeting event filtering is mandatory.
      * You have to select the Campaign or Automation you want to retarget.
      * You can retarget the same Automation you are creating by selecting “This Automation”.
      * When retargeting an Automation you can define a specific step to retarget or not (if you do not specify a step, reactions to all messages of the Automation are taken into account).
  * **The user does not trigger any of the expected events.** They will wait for the timer to expire and then proceed down the timer's branch.
    * The wait time is configurable from 1 minute up to 90 days.
  * Specific behaviours:
    * **Parallel Automations specific behaviour :** When Parallel Automations option is enabled on your Automation, retargeting is limited to messages of the same Automation (”This Automation” is enforced).
    * **Targeting Check:** As with delay steps, the profile's eligibility for the Automation's targeting is re-checked when they exit the step (either on event or timeout). If they no longer match the targeting, they will exit the automation.

To be noted that:

* When inserting an event step or a split step into an automation that already has downstream steps, a "Move to" modal appears to ask how to handle those following steps.

#### **AI Smart Naming for Trigger Automations Steps**

We provide you an AI assistant, a "Step Name Creator” within the Automation Builder. This feature automatically generates descriptive labels for **Message** (excluding Universal Channel for now) and **Yes/No Split** steps based on their actual content and configuration.

The feature is triggered automatically upon step completion once the side-sheet is closed or you navigate back to the scenario. It can also be manually activated via the sparkle icon in the name input.

## Handling the marketing pressure of the Automation

To make sure each user entering the Automation receives an appropriate amount of messaging and receives messages at the right time you can:

* **Leverage automation level capping** already described above.
* **Leverage label capping**: This capping applies to all types of orchestrations (Campaigns, Recurrings and Trigger Automations). You can add up to 10 labels to your scenario. In the Automation Builder, after a message has been skipped (not sent) due to a capping rule, the user will not exit the automation flow, and instead continue to the next step.
* **Specify a quiet time:** At the entry point of your scenario, the Quiet Time feature allows you to specify a time slot or days during which your audience won’t be messaged.
  * By enabling **Daily Quiet hours**, you define a time slot during which users will not receive messages.
  * By enabling **Weekly Quiet Days**, you define one or several days during which profiles will not receive messages.
  * You can enable Quiet hours on its own but Quiet days can only be enabled when Quiet hours is also activated (to make sure we will not send messages at midnight + 1 minute on the following day).
  * When you activate Quiet hours / Quiet days, you need to define what is the required behaviour for the messages that should have been sent during the Quiet time:
    * **Send at the next available time** (ex: an SMS message should have been sent on Sunday, which is a Quiet day. It will instead be sent in the first hour of the open message slot on Monday and, only after that, the user will continue their journey).
    * **Skip the message step and continue** (ex: an SMS message should have been sent on Sunday, which is a Quiet day, it will not be sent and the user continues their journey directly).
  * When Quiet Times (Quiet hours/Quiet days) are enabled, they are applied by default to all automation messages. However, it is possible to deactivate Quiet time from the Advanced Settings of each Automation message. Note that: The Quiet times (Quiet hours/Quiet days) are based on Profile's local time. If no local time can be found for a Profile, the Quiet times will be based on the Universal Time (UTC) Timezone.

## Analysing Automation with Analytics

In the Automation, you have 2 views:

* **The “Builder” view:** the one on which you land by default, allowing you to create, update and review your scenario by consulting key metrics.
* **The “Analytics” view:** the one on which you can check how your Automation is performing in details, from an engagement and delivery perspective.

{% hint style="info" %}
You can access the Analytics view of your Trigger Automations directly from the Automations listing on the three dots kebab menu.
{% endhint %}

**In the Builder view, you can view (over the last 7, 30, or 90 days)** **:**

* The display of key engagement metrics and their trends on message steps.
  * Sent, Opened, Clicked and Unsubscribed rates (metrics vary by channel).
* The display of user paths metrics:
  * The number of profiles that have entered and exited the Automation.
  * The number of profiles currently waiting on each delay step of the Automation (real time data).
  * The percentage of users who went down each branch of a Yes/No split.

**The Analytics view** has up to 4 sections, depending on how many different channels and steps are used within the Automation:

* The “**Step by step**” section: a table that sets out the key engagement data for each of the messages in your scenario, no matter the channel.
  * This section is displayed when there is more than one step in the Automation.
* The “**Email”** section: gathers all the data of your email channel in the Automation, in other words the data of all your email messages. This section is similar to the Analytics available on Email Campaigns and Recurring Emails.
  * This section is displayed when there is at least one email message step in the Automation.
* The “**Push**” section: same as for email.
* The “**SMS**” section: same as for email.

{% hint style="warning" %}
What is explained on this page is focused on how Trigger Automations works for Email, SMS and Push v2 channels. For Push v1, the experience is slightly different, with a form based interface, allowing you to create single push message sendings based on events received, by Platform (iOS, Android, Web).
{% endhint %}


# In-App Automations

In-App messages are messages **displayed inside your app**. You can trigger them when users open your app or perform a specific action *(e.g. tapping a button, browsing a page, etc)*. They can be managed from the “Automations” tab of your dashboard.

#### **Synchronization workflow**

When the app is launched, the SDK automatically retrieves from Batch's servers the list of automations available at that moment.

This implies that every events and attribute that have been collected during the **current** session won't be taken into account for the targeting of an In-App automation until the **next** session.

For instance, if you set the targeting to a count of events, then the user's own count has to match the targeting criteria at the app launch rather than during the session in order to display the In-App automation.

**Please note the following:**

* If the user has a limited network connection, the synchronization may be delayed. After a certain time, the SDK will stop the synchronization and will not display any more message to avoid impacting the user experience.
* During the user’s **very first session it is not possible to display an in-app** **message** within the session.

## **Creating an In-App Automation**

The first thing you need to do to save your In-App automation is to **name it**. You can also attach up to 10 **labels** to it, which allows you to define a label capping in the settings. Note that any changes to your labels and label capping can take up to 20 minutes to be effective. See the [**documentation on labels**](/getting-started/features/customer-engagement-platform/settings/labels) for more information.

### **Choosing the right trigger**

<figure><img src="/files/03iAF1asyjqsTO9s6tHI" alt=""><figcaption></figcaption></figure>

You have several settings available to define when your in-app message will be displayed to your users.

* First, you can choose **1 to 10 events to trigger its display**. As soon as one of your users triggers any of these events, it will initiate the in-app's display (provided they meet other targeting criteria and conditions).
  * Custom trigger events must be **events triggered by your users on their iOS or Android applications**, which are sent via our SDK following the tagging plan established with our teams. It's not possible to trigger an in-app message based on an event triggered by API.
  * You can also trigger your In-app with the **native event `New session`** so the message will appear on the next launch of your user’s app or when the user returns to the foreground after being in the background for at least 5 minutes.
    * When a user matching the set targeting opens the app and therefore starts a new session, Batch’s SDK will retrieve all the information related to the automation. It will then trigger the automation as soon as the synchronization is finished.
* You can then **filter these events based on their string attributes** (one filter at a time) or **labels**.
  * For example, if you want to specify multiple pages where the in-app message can be displayed, and the page name is an event attribute, you simply need to call the trigger event multiple times with a different filter each time.
* You can also specify a **delay between the event trigger and the in-app display**. This delay can be up to **60 seconds** and allows you to make your in-app messages less intrusive for your users.
  * If the application is in the background when the timer ends, the message will not be displayed. It will be shown the next time the event is re-triggered.

Finally, you can also refine your display by setting a **capping and grace period:**

{% hint style="info" %}
If you do not have capping or a grace period on your in-app, it can be displayed every time a user triggers one of the triggering events, including within the same session.
{% endhint %}

* The **capping** allows you to limit the maximum number of times an In-App automation will be displayed to a user. This is useful to avoid overwhelming your users with the same message.
  * If you have already had deliveries for your in-app message and **you apply capping later, previous deliveries will be taken into account.** For example, if I have an in-app message that has been running for two weeks and I add a capping of 1, any profiles that have already displayed the in-app message at least once since it was published will not see it again.
* The **grace period** allows you to set a delay between each display of the same In-App message. This feature is quite handy to avoid your user to see the same message multiple times in a single session.
  * Just like with Capping, **previous sends are taken into account when you apply a Grace Period after the fact.** For example, if an in-app message was shown to a profile 30 minutes ago and I apply a Grace Period of 1 hour, that profile will not be able to trigger the in-app message again for another 30 minutes.

{% hint style="info" %}
info : Capping and grace period are applied at the **profile level**, not the device level. For example, with a **capping of 2**, only two in-app messages will be displayed in total, regardless of the user's number of devices. This means the user might not see the in-app message on one of their devices.
{% endhint %}

### **Defining your targeting**

Check [**this documentation**](/getting-started/features/customer-engagement-platform/orchestration/targeting) to know more about targeting.

For in-app automations, **targeting is checked after each trigger event occurs** to ensure profiles still comply with the criteria before displaying the message.

Under your Targeting you can check your In-app **estimated reach**, that is to say the number of profiles with installs with SDK version 3.1 and higher that match your targeting. The estimate gives a breakdown by device type (iOS and Android, excluding web).

### **Defining your timing**

<figure><img src="/files/XSWWP3ZOnonlV8u28qUk" alt=""><figcaption></figcaption></figure>

This section lets you program your In-App automation. You can **schedule the start and the end date of your automation** based on Universal time or Profile’s local time.

You have more control over your timing thanks to the **Quiet Times block**: this feature allows you to specify a time slot or days during which your Profiles won’t be displayed messages.

* By enabling **Quiet hours**, you define a time slot during which profiles will not be displayed messages.
* By enabling **Weekly Quiet Days**, you define one or several days during which profiles will not be displayed messages.
  * You can enable Quiet hours on its own but Quiet days can only be enabled when Quiet hours is also activated (to make sure we will not send messages at midnight + 1 minute on the following day).
  * Note that: The Quiet times (Quiet hours/Quiet days) are based on device's local time.
    * Even if a user bypasses Quiet Hours by changing the date on their device, our backend will still prevent the message from being displayed. This is because the time is also verified server-side.

### **Composing your message**

Check [**this documentation**](/getting-started/features/customer-engagement-platform/message/in-app) to know more about our In-App Composer and Settings.

Note that In-App messages **support multi-language and A/B testing**, mirroring the capabilities available for Mobile Landings.&#x20;

## **Managing an In-App Automation**

### **Modifying an In-App Automation**

Batch doesn't send live updates to your app when you save changes for an In-App automation. These **changes will be detected the next time your users open the app or** returns to the foreground after being in the background for a few minutes.

During that session, the SDK will sync again with Batch servers. The SDK may still display an outdated version of your campaign or an In-App automation recently disabled. All the changes received from Batch servers will be applied in the next session. This is why we recommend you include an end date in your automations or double-check the wording of your automation before activating it:

{% hint style="info" %}
The only element that is **automatically synchronized** and doesn't require restarting the application to apply the latest changes is the **targeting**.
{% endhint %}

### **Stopping an In-App Automation**

If you need to stop an In-App Automation you can do so at any time.\
When an In-App message is about to be displayed, the SDK performs an automatic check against the server to confirm:

* The campaign is still active (not stopped).
* The user's profile still matches the defined targeting criteria.

However, be aware of a brief delay due to the SDK's internal caching mechanism:

* The SDK caches the Automation's status. If the Automation was synchronized (downloaded to the device) less than 30 seconds ago, the message might still be displayed without immediately checking the server for the "stopped" status.
* After this 30-second cache window expires, the SDK will re-query the server, and the message will stop displaying immediately.

In summary, **while the Automation can be stopped immediately on the server side, it might take up to 30 seconds for the change to take effect on a user's device if the message was recently synced.**


# Message


# Overview

Message composition follows a similar process for:

* **Campaigns**
* **Recurring Automations**
* **Trigger Automation Steps**

Refer to the corresponding channel documentation for detailed guidance on message composition:

* [Email](/getting-started/features/customer-engagement-platform/message/email)
* [Push](/getting-started/features/customer-engagement-platform/message/push)
* [In-App & Mobile Landing](/getting-started/features/customer-engagement-platform/message/in-app)
* [SMS](/getting-started/features/customer-engagement-platform/message/sms)
* [Universal Channel](/getting-started/features/customer-engagement-platform/message/universal-channel)

## Multi-language selection

### Composition

Message composition handle multiple languages versions across all channels. Languages come from your systems, fed to Batch via APIs or captured by Batch SDKs.

When enabled, you can easily create and manage different language versions of the same message. Profiles will receive the version matching the language set in their profile.

A **default language** message is mandatory to ensure delivery to profiles whose language is not covered by the redacted versions.

To streamline the creation of new language versions:

* **Email:** The default language template is duplicated and can be customized independently for each language.
* **Push:** Media and icons from the default template are duplicated and can also be customized independently.
* **In-App & Mobile Landing:** Structure of the in-app(=template) is the same across all languages. Text, images and CTA actions can be specified by language. When a new language is added, images and CTA actions are duplicated from the default language and can also be customized independently.
* **SMS:** No information is duplicated from the default language.

Alternatively, Automated AI translation (Beta) can be used to translate your Email, Push and SMS messages:

* Translations are generated from the default language using AI.
* Personalization attributes, URLs, and message structure are preserved and not altered.
* Up to 5 target languages can be generated in a single action (10 for Push and SMS).
* For Email: subject line, pre-header, body text, CTA button text, alt text, and accessibility values are translated while HTML structure, tracking links, and personalization variables are preserved.
* For Push notifications, images, icons, and mobile landings are duplicated when generating a new language.

Languages can be added or removed at any time even when the orchestration is live.

### Analytics

Results can be analyzed by language. However, splits are only available for non-deleted language versions.

## A/B Test

The A/B testing feature is available for Push, In-App, Email Campaigns and Recurring Automations.

### Creating an A/B Test

To create an A/B test, simply enable the **“A/B Testing”** toggle at the top of the message composer.

A/B testing can be used in combination with **Multi-Language**: you can set specific languages for each variant.

Once A/B testing is activated, you can create up to **four variants**:

* By duplicating an existing variant.
  * We recommend that you first add the languages and message content per language to the variant you want to duplicate, as the languages will also be duplicated.
* By creating a new variant from scratch.
* **\[Beta]** By generating a new variant with AI *(available for Push notifications and Email subject lines only).* The AI can suggest additional variants (B, C, D) based on the content of your existing ones. \
  If several variants already exist (e.g., A & B), the AI uses them all as input context when generating the next one (e.g., C).

Profiles are distributed randomly and equally among the variants. For example, with four variants, each will receive 25% of the profiles.

Each field, such as sender, subject, reply-to, and email body for email, or message title, body, deeplink, image, and custom icon for push, can be customized for each variant.

**Note:** Parameters in the “Advanced settings” section (e.g., priority, payload) are common to all variants.

### Managing a Running A/B Test

Once an orchestration with an A/B test is launched, adding or deleting variants is not possible to maintain consistency.

* To test new variants alongside existing ones, replicate the orchestration (this will replicate all variants, even if a winner has been chosen) and launch a new orchestration.

However, you can modify the content of variants after launch. Keep in mind that such changes may bias the test.

* It is recommended to only edit variants for critical errors (e.g., typos, incorrect images).

**Note:** It is not possible to activate A/B testing on a standard Recurring Automation that has already been launched. You can duplicate it to allow this add-on.

### Specific Cases for Recurring Automations

**Variant stability**: Profiles re-entering the automation will always remain assigned to the same variant they were assigned previously until a winner is elected.

* Example: If a profile was assigned to Variant A initially, they will continue receiving Variant A until a winner is selected.
* This ensures consistent communication with users.

You can choose a winner from the **Analytics** page, using the **“Pick Winner”** button in the A/B test results table to send this variant for all profiles targeted by the Automation.

* Once a winner is chosen, other variants can no longer be reactivated and variant stability is no longer applied.
* If you want to start a new test, replicate the automation.

### Reviewing A/B Test Results

An **A/B test results table** is available in the Analytics section, showing key metrics for each variant.

For emails, the best-performing metrics (e.g., highest open/click rates, lowest unsubscribe rate) are highlighted in green. For push, the highest open rate is highlighted. These indicators help you choose the winning variant based on performance.

The results table has two statuses:

1. **Test Period**: Metrics are updated in real-time as messages are sent. Filters on the Analytics page apply to this data.
2. **Post-Test Period**: Once a winner is selected, metrics for the variants are fixed and no longer update (except for interactions with messages sent before the winner selection). The table is greyed out and moved to the bottom of the page. Analytics filters no longer apply to the A/B test results. **Example**: If Variant A is chosen as the winner, and a user opens Variant B (sent before the winner selection), the open metric for Variant B will still update in the results table. However, any interactions with Variant A after it is declared the winner will not update the test metrics.

Channel metrics (all metrics outside the A/B test results table) data combines the statistics from the AB test phase (from the different variants) and the post-test phase following the winner's choice. In other words, it shows all messages delivered since the launch of the Orchestration.

If you want to see the statistics for the winner only, use the date filters, setting the start date to the date on which the winner was elected.

### **Optimizing A/B Tests Campaigns with Automatic Winner Selection**

You can perform AB tests on your Email Campaigns and automatically select the highest-performing variant to send to the rest of your audience. This optimizes Campaigns based on concrete data and improves engagement rates.

To do so, enable the Automatic Winner Selection toggle in the Experiment bloc.\
Once it is activated, you need to define:

* The size of the test group:
  * The percentage of the audience to include in the test group (from 1% to 99% of the audience can be affected to the test group).
  * We display an estimate of the number of profiles that will be in the test group to assess the statistical significance of the test.
* The winner selection criteria:
  * Open rate = Unique Opens / Delivered.
  * Click rate = Unique Clicks / Delivered.
* The winner variant launch:
  * When the winning variant is sent to the remaining audience.
    * The minimum delay between Campaign launch and sending the winning variant is 1 hour.
    * The maximum delay is 30 days.
    * "Global Time" is forced for simplified time management (not possible to send the Campaign on local time).

**Please ensure you consider the following information when managing your A/B tests with Automatic Winner Selection:**

* If the statistics service does not respond, or if there is perfect equality between the variants, the AB test continues by splitting the audience equally among the variants.
* The sending time of a Campaign with a winning variant cannot be modified once the Campaign has been launched.
* The parameters of the experiment cannot be modified either once the Campaign has been launched.
* Stopping a campaign is definitive.
* The targeting of the Campaign is re-evaluated when sending the winning variant, and the individuals who have already received a variant are removed from the target. Thus the number of profiles in the Audience can evolve over the duration of the test.
* It should also be noted that opens and clicks may be recorded after the winner has been selected, which may have an impact on the results of the test period.

{% hint style="info" %}
Note that the [Random Split capability](/guides-and-best-practices/orchestration/how-to-use-the-random-split-feature) in Trigger Automation can be an alternative way to test different messages, contents or flows, leading A/B testing or multivariate testing strategies. Performance of the different branches can be observed and lead to decisions to pick the most engaging flow.
{% endhint %}

### Enabling incrementality measurement with Control Group

The A/B testing feature is available for Push, In-App and Email Campaigns in the "Advanced Experimentation" section.

It allows you to **defined a percentage of the targeted audience who will be held back from receiving the message.**&#x20;

Please note the following Control Group behaviors:&#x20;

* **Not available on "Transactional" campaigns** — these must always be sent.
* Control Group size is **configurable per campaign** — recommended around 10%, capped at **20%**.
* The group uses **random allocation.**&#x20;
* The feature can be activated **even with a single variant** (1 variant + 1 Control Group), letting CRM teams measure a standalone campaign's impact or keep monitoring a previously-selected A/B winner.
* When Control Group and **Automatic Winner Selection** are enable, profiles in the Control Group receive no message and are excluded from both the A/B test and the final winning group.
* Control Group conversions are measured using the **same conversion window** **and conversion parameters** as standard Conversion Goals (e.g. a 5-day window applies 5 days after the message was skipped due to Control Group).
* The feature works even if Conversion Tracking isn't activated.
* Once sending has started, the **Control Group can't be added, removed, or modified** on that campaign. If you made a mistake, we invite you to stop the Campaign and to replicate it.&#x20;
* Profiles in a control group can be **exported through the Profile Export Events API.** The export includes both `custom_id` and `orchestration_id`, so you can identify which profile belongs to the control group of a given orchestration.

{% hint style="info" %}
Control Group is available on request for certain customer tiers. Reach out to your Customer Success Manager to learn more.
{% endhint %}

## Preview as & Send a test

### **Preview as**

Preview messages using any profile to check how personalization is applied. Simply enter the profile's Custom ID. If needed, you can locate the Custom ID by searching the Profile View with the email address or installation ID.

The Profiles previously used for previews are automatically saved, making them easily accessible for future checks.

### **Send a test**

Testing your message before sending it to your audience is highly recommended to ensure proper delivery and correct rendering.

For each channel, input the relevant recipient details:

* **Email:** Enter email addresses separated with commas (,).
* **SMS:** Enter a phone number in international format (e.g., +33...).
* **Push, In-App and Mobile Landing:** Enter an installation ID or Custom ID, or a Push Token.&#x20;

Recipient details for tests are also saved automatically for quick access during future tests.

The test message sent will match your current configuration in the Batch dashboard, specifically:

* The profile being impersonated using the **Preview as** feature.
* The language version currently visible (if multi-language is enabled).
* The A/B test variant currently visible (if A/B testing is enabled).

This setup allows maximum flexibility to test any message composition effectively.

For **Push** and **In-App**, recipients can be saved for quick access and reused across future tests. There are two ways to do this:

* Save a named recipient from **Settings > Channels > Push**, under the **Test recipients** tab, by entering a Custom ID, Installation ID, or Push Token. See the [Saved test recipients](/getting-started/features/customer-engagement-platform/settings/channels#saved-test-recipients) section for details.
* Save a device from a profile's page in **Data > Find Profile**: open the device by clicking **Inspect**, then click **Save test device**.

For additional details on test email-specific behaviors, refer to the dedicated section [Email](/getting-started/channels/email).

## Error prevention

If your message is incomplete, you’ll receive a detailed warning, and the orchestration cannot be launched. However, it can still be saved as a draft for completion later.

Refer to the dedicated sections for each channel to see what elements are mandatory.<br>

{% hint style="warning" %}
Note that what is explained on this page is focused on how messages works for email, SMS, In-App v2 and Push v2 channels. For Push v1, the behavior is slighly similar with a few differences. For exemples the AB test has only 2 variants.&#x20;
{% endhint %}


# Email

An email message is composed of header information and a body. The body can be designed directly in Batch or uploaded as a pre-built HTML template.

All fields support [personalization](https://doc.batch.com/getting-started/features/customer-engagement-platform/message/personalization), except the sender address, which must be selected from predefined options configured in **Settings**.

<figure><img src="/files/p8WKeiPOR4ZP5J4zAW6O" alt="email composer"><figcaption></figcaption></figure>

***

### Header Information

#### Email sender

The sender name and address are displayed as the source of the message. Senders are categorized by orchestration type (marketing or transactional) and must be configured in **Settings** before use. Learn how to configure email senders in [Channels](/getting-started/features/customer-engagement-platform/settings/channels#email-senders).

{% hint style="info" %}
To know more about transactional email sending in Batch, check [How to send a transactional email with Batch?](/getting-started/other/implementation-guides/how-to-send-a-transactional-email-with-batch).
{% endhint %}

#### Reply-To *(optional)*

By default, replies are directed to the sender address. You can override this by specifying a custom reply-to address.

If a **Default Reply-To** has been configured in your [Channel Settings](/getting-started/features/customer-engagement-platform/settings/channels#email-settings), it will be pre-filled here automatically. You can edit, change, or remove it for this specific orchestration without affecting the default.

#### Subject line

The subject is the first element recipients see in their inbox. Personalization is supported and recommended to improve open rates.

#### Preheader *(optional)*

The preheader is the short text displayed next to the subject line in most email clients. By default, it is taken from the beginning of the email body. You can override it with custom text for better control over the preview.

***

### Email body

The email body can be created in two ways:

#### 1. Email Composer

Batch's **Email Composer**, powered by Stripo, lets you design emails visually from scratch or from existing templates and modules.

Useful resources:

* [Email guides](https://doc.batch.com/guides-and-best-practices/message/email)
* [Stripo Education Portal](https://stripo.email/education/)

**Timer Block**

The Timer Block is an optional feature that can be enabled on demand — contact your Customer Success Manager to activate it.

{% hint style="warning" %}
**Replication behavior:** When an email is replicated (via orchestration replication, A/B test, or multi-language variants), timer blocks are **synchronized** across all copies. Any change made to one timer block will apply to all others. If you need each variant to have an independent countdown, **duplicate the timer block** within each copy to break the synchronization and ensure they are distinct.
{% endhint %}

#### 2. Upload HTML template

If you have a pre-designed email template, you can upload it directly as HTML.

See: [How to upload your email templates?](https://doc.batch.com/guides-and-best-practices/message/email/templates-and-modules-management/how-to-upload-your-email-templates)

***

### Preview

Use the **Desktop** and **Mobile** preview modes to verify how your email renders across different screen sizes before sending.

***

### Send a test

You can send a test email at any stage of composition. A few things to note:

* The subject line is prefixed with **\[TEST]** for easy identification.
* The **list-unsubscribe header** is not included in test emails.
* Other behaviors are consistent with test messages across all channels. See [Overview](/getting-started/features/customer-engagement-platform/message/overview#send-a-test) for details.

***

### Opt-in management

#### Unsubscribe link

An unsubscribe link is **required** in all marketing emails. When a recipient clicks it:

* They are unsubscribed from your marketing emails.
* They are redirected to a confirmation landing page. See how to proceed in [Choosing a confirmation landing page](https://doc.batch.com/guides-and-best-practices/message/email/link-and-tracking-settings/how-to-add-an-unsubscribe-link-to-your-email-template-1#choosing-a-confirmation-landing-page).

Learn how to add an unsubscribe link: [How to add an unsubscribe link to your email template?](https://doc.batch.com/guides-and-best-practices/message/email/link-and-tracking-settings/how-to-add-an-unsubscribe-link-to-your-email-template-1)

#### Suppression Rules

Batch automatically maintains a suppression list based on the following rules:

| Event                      | Outcome                                                                                          |
| -------------------------- | ------------------------------------------------------------------------------------------------ |
| Hard bounce                | Address added to suppression list for **all** emails (marketing & transactional)                 |
| 5 consecutive soft bounces | Address added to suppression list for **marketing** emails only                                  |
| Spam complaint             | Recipient marked as **unsubscribed** (marketing); address is *not* added to the suppression list |

#### **Open tracking consent**

You can add a consent withdrawal link in your email templates. When a recipient clicks it:

* The profile's native attribute `$email_open_tracking_consent` is set to `denied`.
* Batch stops inserting the open tracking pixel in emails sent to that profile.
* The recipient is redirected to a confirmation landing page.

See more information in [Managing Email Tracking Pixels](/guides-and-best-practices/email-deliverability/email-authentication-and-sending-structure/email-open-tracking-and-tracking-pixels/managing-email-tracking-pixels)

***

### Email Deliverability

Batch provides detailed resources on deliverability, sender reputation, and IP warm-up strategies. See [Email Deliverability](https://doc.batch.com/guides-and-best-practices/email-deliverability).


# Push

## Overview

Push channel refers to both mobile (iOS, Android) and web push.

Each push message can be sent to all platforms at once or to a subset of them. By default only iOS and Android platforms are enabled, but this can be changed at any moment.

Your message can be previewed on iOS, Android, Web (Mac OS) and Web (Windows).

A push message is composed of:

* A title
* A message body
* (optional) A custom icon (Android & Web only)
* (optional) A media: an image (iOS, Android and web notifications for Chrome), video (iOS) or audio (iOS)
* (optional) A deeplink redirection
* (optional) A Mobile Landing
* Advanced settings (see dedicated section)

<figure><img src="/files/Gv1YYTtIG6TNqo7G4AuW" alt="push composer"><figcaption></figcaption></figure>

## Title and Message body

This is the most important part of your push notification, make sure your message is not too long and to write it **accordingly to your targeted audience**.

### Emoji emoticons

You can add emoji emoticons to the title or the body of your iOS, Android, Windows or web push notifications.

If you want to insert an emoji in your message you can:

* **Chrome 68+**: Right-click any text field and select *"Emoji"* or *"Emoji & Symbols"*.
* **Windows**: Simply press the Windows key + the period button to display Windows's emoji keyboard on Windows 10. In case you are using an older version of Windows, you can copy-paste an emoji from emojipedia: [iOS](http://emojipedia.org/apple/) / [Android](http://emojipedia.org/google/) / [Windows](http://emojipedia.org/microsoft/).
* **Mac**: Press CTRL + CMD + Space to display the emoji keyboard and pick an emoji.
* **Custom emojis**: Some device manufacturers use a set of custom emojis. See how they look here: [Samsung](http://emojipedia.org/samsung/) / [LG](http://emojipedia.org/lg/).

### Image & Custom Icon

You have two options to add an attachment:

* Browse an image from your computer.
* Use a media URL (supports image, video, and audio). These URLs can also use personalization.

#### Image (optional)

Batch lets you send large-format notifications with a large image attachment on iOS, Android and Chrome (Web). We require a landscape image in PNG or JPG format, with a minimum size of 300×200 px and a maximum file size of 10 MB. For web push notifications, the image is displayed only on Chrome for Windows and Android, but it will not appear on other browsers like Chrome (macOS) or Firefox.

#### Video (optional)

On iOS, you can attach a video file to your push notification via a URL. The video must be in MP4 format (max. 50 MB), with a valid mime type and hosted on an HTTPS server. The video will be downloaded automatically on your users' devices and iOS will drop the download if it takes more than 30 seconds.

You can also attach a GIF file to your push notification. The GIF file must have a valid mime type and be hosted on an HTTPS server.

If notifications are sent to Android and/or Web in addition to iOS, you can select an image as a fallback, since video is not supported on Android or Web push notifications.

#### Audio (optional)

On iOS, you can attach an audio file to your push notification via a URL. The audio must be in MP3 format (max. 5 MB) with a valid mime type, hosted on an HTTPS server. The OS will automatically download the mp3 file and drop the download if it takes more than 30 seconds.

If notifications are sent to Android and/or Web in addition to iOS, you can select an image as a fallback, since audio is not supported on Android or Web push notifications.

#### Custom Icon (optional)

On Android and Web, you can add a specific icon for the notifications sent by a push campaign. Batch requires a square image, PNG, JPG or WebP, with a minimum **width of 192px**. On Web, if a default icon is set in the settings, this custom icon overrides it. The custom Icon is not an iOS setting and does not impact iOS messages.

### **Deeplink URL** (optional)

Deeplinks allow you to **direct users to a specific place** in your app. Batch Push campaigns can accept this link scheme to direct users to a particular area within your app **upon opening** the push notification *(i.e. The news you mention in your notification, etc)*.

Please note that the Deeplink URL must be a link based on a URL scheme that you specify within your app and should begin with "app\://", "http\://", or "https\://". URLs starting with "[www](http://www)." are not compliant.

If the same push orchestration is targeting several platforms, the deeplink URL can be specified by platform.

## Mobile Landing

Mobile Landing is a specific application of our In-App messaging feature, enabling you to optionally configure an In-App message to display immediately after a user opens a push notification.

**Requirement:** To successfully display a Mobile Landing triggered by a push notification, the user must have a compatible version of your application and the Batch SDK installed. If the version is not compatible, the Mobile Landing message will not be displayed upon push open.

For comprehensive details on how to create, design, and customize Mobile Landing messages, including information on available blocks, customization options, and actions, please refer to the main [In-App & Mobile Landing](/getting-started/features/customer-engagement-platform/message/in-app)documentation section. Mobile Landing messages are built using the same composer and capabilities described there.

## Advanced settings

### Custom payload

An optional JSON string that can contain **additional parameters** that your application can handle when receiving push notifications if configured to do so. The root of the JSON must be an Object and cannot have the reserved key `com.batch`. You can use `{BATCH:TITLE}`, `{BATCH:BODY}` and `{BATCH:DEEPLINK}` variables. They will be replaced.

For example, you can use the custom payload to:

* Set a badge value for your app icon on iOS
* Customise your notification sound on iOS
* Add action buttons to your notification
* Send silent notifications

### FCM/APNS Priority

Defines the priority of your message on iOS *(APNS)*, Android *(FCM)* and Web. The default value is **high**.

On Android, you can use the high priority if you have a messaging/voip app and if you notice delivery issues due to native *(Doze)* or constructor related *(Samsung Smart Manager, etc)* energy saving features.

{% hint style="info" %}
High priority Android notifications can drain your user's battery faster since they 'wake up' the device and open a network connection. Switch to *Normal* priority if your notification is not time-sensitive.
{% endhint %}

### FCM Collapse key

Defines how notifications are managed when an **offline device goes online**. If enabled, the device will only show the most recent notification. If disabled, it will show all the notifications received when the device was offline.

You should disable the collapse key if all your notifications matter *(E.g. messages, etc)*. You can use up to 3 different collapse keys if you want users to get only one notification of each kind when coming online *(E.g. marketing message, alert, etc)*.

### Expiration (TTL)

You can set an expiration delay or a **Time to Live** *(TTL)* in hours for your notification. The notification won't be displayed if the device doesn't receive the notification or doesn't come back online within this time.

By default, Batch sets a TTL of 14 days for all the notifications you send. If your user's device comes back online before being off for two weeks, it will display the last notification you sent to your user *(iOS)* or all the notifications sent over the previous two weeks *(Android and web push)*.

In addition to setting an expiration delay for your push campaign, you can set a **global expiration delay** that will be applied to all your notifications. This can be done from the **dashboard settings > Channels > Push settings**.

{% hint style="warning" %}
We strongly recommend you set a short global TTL for web push notifications to prevent customers from wanting to opt-out. Users who accept to receive web push notifications are more likely to turn off their device *(e.g. a laptop at home, etc)* and receive many notifications from your website when they go back online.
{% endhint %}

## Send a Test

* When specifying a Custom ID, the test will only be sent to installations on platforms enabled for the given push message. For example, if the push message is configured for Android and Web only, no test will be sent to an iOS installation.
* Similarly, if an installation ID is specified but corresponds to a platform not enabled for the push message, the test will not be sent.
* When choosing a push token, platform must be specified.
* Other behaviors are similar to test messages across all channels.&#x20;

## Safari APNS

For web push, Safari APNS is no longer supported. As of macOS Ventura (13.0), Safari implements the same Web Push Protocol other browsers do and does not require any additional configuration from your part.

## Inbox

Inbox is an optional feature. If you are interested, reach <support@batch.com>.

The **Inbox API** allows you to fetch and process notifications that users have previously received, even if their device was offline. You can then do anything you want with the data, such as making a **"notification center"**, where the user can catch up with previous notifications in a list.

The API gives you **access to the entire notification**, including its raw payload. It also lets you know if the notification has already been read. Once received/stored in the inbox, your push notifications will remain for a **3 months period**.

## Zoom on how Mobile Push works

Batch relies on Apple (APNS: Apple Push Notification Service) and Google (FCM: Firebase Cloud Messaging) push services to send push notifications on iOS and Android.

### Understanding How Batch's SDK Works <a href="#understanding-how-batchs-sdk-works" id="understanding-how-batchs-sdk-works"></a>

Batch SDK must be integrated into your app. Your integration is attached to an app on Batch's side thanks to the "API key" you specified in your code when you completed the integration.

On the first app open, the SDK will start and Batch will register a new install. For every new install, Batch generates an anonymous "installation ID".

<figure><img src="/files/o4WzmpAf5QuoQvxr2xxM" alt=""><figcaption></figcaption></figure>

All the data collected from the app until users uninstall it will be attached to that "installation ID":

<figure><img src="/files/GxBi2Go0121E0eWnToOg" alt=""><figcaption></figcaption></figure>

### Collecting a Push Token <a href="#collecting-a-push-token" id="collecting-a-push-token"></a>

In order to send a push notification to a device, Batch needs to collect a "token". That  token is anonymous and delivered by Apple and Google push services.

<figure><img src="/files/P0HQ0XLkBw0LhNHNCrj7" alt=""><figcaption></figcaption></figure>

Here is how Batch collects a new token:

1. The app requests and receives a token from APNS/FCM. On iOS, this can happen when the app starts or when users accept push notifications, depending on the background refresh support.
2. Batch SDK collects that token and sends it to Batch servers.&#x20;

The token is refreshed on every app start. This makes sure Batch always has a valid token to push your user.

### Sending a Mobile Push Notification <a href="#sending-a-push-notification" id="sending-a-push-notification"></a>

In order to send a push notification to several devices, Batch servers provide the list of tokens that need to be pushed to the Apple / Google push notification service. Batch also provides a payload, containing all the data the app needs to display properly the notification (message, image, deeplink, etc).

<figure><img src="/files/QhFKkeIOeBH9CsEXb3Et" alt=""><figcaption></figcaption></figure>

Then, Apple/Google push notification service handles the delivery to the device. They provide feedback on errors or issues (e.g. invalid tokens, push certificate issues, etc). Batch cleans automatically your userbase based on this feedback. Batch SDK also sends feedback to Batch Servers when users click a notification.

## Zoom on how Web Push works

Batch supports sending push notifications directly to web browsers, on desktop and mobile, even if your website is closed. Batch relies on two different technologies to deliver push notifications to the browser of your users, on desktop or mobile:

* The Push API W3C standard
* Service Workers

Any browsers implementing both technologies will be compatible with our Web SDK and will be able to receive push notifications: Google Chrome, Mozilla Firefox and any Chromium-based browsers (Microsoft Edge, Opera, Vivaldi, etc).

### Understanding How Batch Works <a href="#understanding-how-batch-works" id="understanding-how-batch-works"></a>

Integrating Batch into your website is simple. You must:

1. Upload Batch's service worker to the root of your website
2. Add Batch's javascript tag to the code of your web pages

Your integration is attached to an app on Batch's side thanks to the "API key" specified in the javascript tag the dashboard automatically generates for you.

On the first session, the javascript tag will start and Batch will register a new install. For every new install, Batch generates an anonymous "installation ID".

<figure><img src="/files/2jnobdxyFLvOSKR3Ufju" alt=""><figcaption></figcaption></figure>

All the data collected from the website until users clear site data will be attached to that "installation ID".

<figure><img src="/files/aj0Nd5Cd4iF4braXftQI" alt=""><figcaption></figcaption></figure>

### Collecting a Token <a href="#collecting-a-token" id="collecting-a-token"></a>

In order to send a push notification to a device, Batch needs to collect an endpoint. That endpoint is anonymous and delivered by the servers of each browser (e.g. Google, Mozilla, etc).

<figure><img src="/files/Jcq9uWsLUbFsEzvUjC4l" alt=""><figcaption></figcaption></figure>

Here is how Batch collects an endpoint and generates a token:

1. The javascript tag triggers the native permission prompt.
2. If users turn on push notifications, the browser requests an endpoint to the push notification service.
3. The push notification service then generates a public endpoint and sends it to the browser.
4. Batch service worker collects that endpoint and the javascript tag sends it to Batch servers.

Batch servers store that endpoint for the installation and generate a "token". That token contains:

* An endpoint: the anonymous id generated by the push notification service for the browser (endpoint)
* The public key of the user's browser that allows it to decode the notification Batch will send (p256dh). The browser of every subscriber has a different public key.
* A secret key (auth).

Here is what a token looks like:

```
{
	"endpoint": "https://fcm.googleapis.com/fcm/send/f1JDSGNXoZM:APD91bFRRV4I-WCFDcEmSNGYii_7MyzG8gVgP0bYWGknKoNEmPkuDpUdkAKqb6O0Dr0xTO_2xDXqDnp4quk7iL_5PK3-J22RPrT-9Hsb4c_G4SBxNHqPX7Do5VHvNAm_SOk_foHGtA5u",
	"keys": {
		"p256dh": "BC2bogMsUCbFwomx4l1gXD984UYeNrz5qh3x_pHCt-UKfNFNaJp6xoQQo7MYqi_aglI780qcraGSut1CvRs67NI",
		"auth": "RFKT6wLk1X5lPwsMTOyKcA"
	}
}
```

### Sending a Web Push notification <a href="#sending-a-push-notification" id="sending-a-push-notification"></a>

<figure><img src="/files/sTHumljzozm4TolDzAUe" alt=""><figcaption></figcaption></figure>

Here is how Batch sends push notifications to your users:

1. First, Batch encodes the content of the notification for every subscribed browser, based on the public key. The message sent from Batch can only be decoded by your user's browser.
2. Batch servers send the notification over HTTPS to the push notification service, signing the requests using a "private VAPID key" known exclusively by Batch.
3. Then the push notification service only reads the header to know which endpoint should be targeted. It cannot decode the message. The push notification service will also check if Batch is allowed to push that browser based on the private VAPID key and check if the endpoint is still valid (e.g. in case users cleared site data or uninstalled the browser).&#x20;
4. Finally, the browser receives the push notification. Batch service worker decodes it and displays it.

Batch uses the feedback received from the push service to delete tokens that may be invalid in your profile base. Batch Service Worker will also send feedback to Batch servers when users click the notification. You can find both information in your campaign reports.


# SMS

SMS is one of the fully native channel supported by Batch, from composition to billing and reporting. Discover in this section its main components.

{% hint style="info" %}
To go beyond SMS and send RCS messages, contact your CSM. Batch offers several ways to support this channel.
{% endhint %}

## URL shortening and tracking

When you enable the URL shortening option in your settings, any URLs included in your SMS messages starting with `https://` , `http://` , `www.` or `tel://` will automatically be converted to a shortened link, such as `https://sms.sh/xxxxxx`. This applies to all URLs, including those passed as profile or event attributes.

This feature offers two main benefits:

* Shorter, cleaner messages: shortened URLs take up fewer characters, keeping your SMS messages concise and improving their appearance.
* Better analytics: shortening URLs allows us to track clicks, which unlocks a new key metric for your analytics: SMS link clicks.

Note that Batch will re shorten any links that have already been shortened by an external tool. The "Send test" feature also shortens links, giving you an accurate preview of how the final message will appear to recipients.

## **Sender ID**

At the top of the SMS composer, one of your alphanumeric Sender IDs is displayed. This is typically the same across all countries.

However, in certain countries (e.g., Belgium and Italy), alphanumeric Sender IDs are not allowed. For these countries, SMS messages are sent from a Shortcode.

## **Countries**

During the initial setup of the SMS channel with Batch, you must specify the list of countries where SMS should be sent:

* SMS sent to phone numbers in unsupported countries will fail and appear as bounces in the analytics.
* To add more eligible countries, contact us.

## **Marketing SMS & STOP Keywords**

For marketing SMS campaigns, Batch automatically appends the appropriate **STOP** keyword and number based on the recipient’s country. For example, in France, the appended text is **“STOP 36184”** , which takes 11 characters in your SMS.

When a recipient replies with the STOP keyword Batch immediately updates all profiles associated with that phone number, setting their SMS marketing opt-in status to **“unsubscribed.”**

## **SMS Parts & Encoding**

An SMS may consist of one or multiple parts depending on:

1. **Message Length:** The number of characters in the message.
2. **Character Encoding:** Either **GSM-7** (default) or **Unicode (UNI)** if special characters are used.

The GSM-7 character set includes the basic Latin alphabet (A-Z), numbers (0-9), and a set of common symbols:

```
A B C D E F G H I J K L M N O P Q R S T U V W X Y Z a b c d e f g h i j k l m n o p q r s t u v w x y z 0 1 2 3 4 5 6 7 8 9 : ; < = > ? ¡ ¿ ! " # ¤ % & ( ) ' * + , - . / Ä Ö Ñ Ü § ä ö ñ ü à @ £ $ ¥ è é ù ì ò Ç Ø ø Å å Δ _ Φ Γ Λ Ω Π Ψ Σ Θ Ξ Æ æ ß É
```

Note: the following characters are also part of the GSM-7 character set, however, they count as 2 characters instead of one:

```
€ ^ { } [ ] ~ |
```

B. The Unicode (UNI) character set includes all characters that are not part of the GSM-7 set listed above. For instance:

* Additional accented letters (ë, â, ï, etc)
* Non-Latin alphabets (Arabic, Chinese, Cyrillic, etc)
* Emojis
* Other symbols (©, ™, ★, etc)

## **Character Limit by Encoding:**

The number of characters allowed in a message part varies depending on the used character encoding.

For multi-part messages, additional **invisible data headers** are added to enable concatenation, reducing the character limit per part.

### **GSM-7:**

* 1 part = up to **160 characters**
* Multi-part SMS = up to **153 characters** per part

### **Unicode (UNI):**

* 1 part = up to **70 characters**
* Multi-part SMS = up to **67 characters** per part

{% hint style="info" %}
Batch does not allow sending SMS longer than 4 parts (approx. 612 GSM-7 or 268 Unicode characters) to ensure reliable delivery. For more details on character encoding and its impact, refer to this [guide](https://doc.batch.com/getting-started/features/customer-engagement-platform/message/sms#sms-parts-and-encoding).
{% endhint %}

Batch helps you estimate the number of parts for a given message, However. when personalization is used, this estimate may not be accurate, as the length of attributes can vary between profiles.

An SMS message can be composed of one or several message parts, each part being limited to a maximum number of characters. The number of characters allowed per message part depends on two factors:

1. The type of characters used in the message
2. The number of required message parts (one or several)

## Marketing vs Transactional SMS <a href="#h_cc62889741" id="h_cc62889741"></a>

Transactional SMS is used to relay transactional information. You can use this type of SMS to share important information such as order status, delivery notifications, etc.

On the other hand, Marketing SMS is used to share promotional content. Unlike the former, this type of SMS requires prior consent from the recipient as well as clear unsubscription instructions within the message.

Thus, when an SMS automation or campaign is set to only target users who are subscribed to your SMS Marketing communications, Batch will automatically append unsubscription instructions at the end of your message.

Note: The number of characters required for the STOP mention will be included in the character count of your SMS.

{% hint style="info" %}
An SMS orchestration requires one field: the **SMS message**. You cannot send messages if this field is empty.
{% endhint %}

<figure><img src="/files/Ne0V9IrUkKLsjMTyVSCc" alt="sms stop"><figcaption></figcaption></figure>

## **Pricing**

SMS pricing depends on:

* **Recipient’s Country:** The cost is based on the phone number’s home country, even if the recipient is roaming abroad.
* **Number of Parts:** Each part is charged as a separate SMS. For example, a 2-part message costs twice as much as a 1-part message. It is more likely to have a higher number of message parts when using Unicode encoding since the message part character allowance is lower.

You can view the number of SMS parts in:

* **Orchestration Analytics:** For each orchestration.
* **Billing Section:** Provides a detailed cost breakdown.

{% hint style="info" %}
Contact your CSM to learn more about Batch SMS pricing.
{% endhint %}

## **Delivery Speed**

Delivery speed for SMS can be customized during the onboarding process to meet your specific needs, ensuring messages are sent at the optimal pace, whether for time-sensitive campaigns or large-scale orchestrations.


# In-App & Mobile Landing

In-App messages are messages **displayed inside your app**. You can trigger them when users open your app or as contextual reminders when they perform a specific action *(e.g. tapping a button, browsing a page, etc)*. This is great to communicate with all your users, even with users who have **turned off push notifications**.

You can also trigger an In-App message after your users open a push notification. That's what we call a **Mobile Landing**.

**The process for creating content for both Mobile Landing and In-App messages is similar.** Unless specified otherwise, the information in this section applies to both features. Mobile Landing specificities are covered within the [Push](/getting-started/features/mobile-engagement-platform/push) section.

{% hint style="info" %}
**SDK Version Requirements:** Using the In-App feature requires SDK version 3.1 or higher. The Mobile Landing feature is compatible with SDK version 3.0 or higher.
{% endhint %}

Messages can be targeted to either both iOS and Android platforms or filtered for a single specific platform.

These messages are designed using a drag & drop composer.&#x20;

<figure><img src="/files/pNHoLTJIjgiKMjcSdJOE" alt=""><figcaption></figcaption></figure>

## Formats

Available In-App message formats include:

* **Modal**: A pop-up displayed over a portion of the screen. Modals can be positioned at the center, top, or bottom of the screen.

  * **Center Modals:** These appear in the middle of the screen and include a translucent backdrop that prevents interaction with the app content behind them.
  * **Top/Bottom Modals:** They were previously referred to as "**banners**" in the MEP. They are displayed at the top or bottom edge of the screen and do not have a backdrop, allowing users to continue interacting with the app content behind them. These modals can be "attached" directly to the screen edge by setting their margins to zero.

  The vertical size of all modals automatically adjusts to fit their content.
* **Fullscreen:** A message that occupies the entire screen, overlaying the app content.

<div data-full-width="true"><figure><img src="/files/hl87w6KP4uOj4AatdfsG" alt=""><figcaption><p>Modal</p></figcaption></figure> <figure><img src="/files/8IgEqEviwwv7KNmyCI0I" alt=""><figcaption><p>Banner</p></figcaption></figure> <figure><img src="/files/aA9zjVhag6qArAViKaHq" alt=""><figcaption><p>Fullscreen</p></figcaption></figure></div>

Various visual customization options are available for these formats:

<table><thead><tr><th width="153.0546875">Customization</th><th width="282.24609375">Description</th><th width="150.52734375">Value Type</th><th>Applies to Format(s)</th></tr></thead><tbody><tr><td><strong>Modal Position</strong></td><td>Controls the vertical alignment of the modal pop-up on the screen.</td><td><code>top</code>, <code>middle</code>, <code>bottom</code></td><td>Modal only</td></tr><tr><td><strong>Fullscreen Content Position</strong></td><td>Determines the vertical alignment of the message content block within the fullscreen container if the content does not fill the entire screen.</td><td><code>top</code>, <code>middle</code>, <code>bottom</code></td><td>Fullscreen only</td></tr><tr><td><strong>Background Color</strong></td><td>Sets the background color of the message container, including opacity.</td><td>Color</td><td>Modal, Fullscreen</td></tr><tr><td><strong>Margin</strong></td><td>Defines the spacing between the edges of the device screen and the In-App message content. Can be configured independently for top, bottom, left, and right sides.</td><td>Pixels</td><td>Modal only</td></tr><tr><td><strong>Radius</strong></td><td>Controls the roundness of the corners for the message container.</td><td>Pixels</td><td>Modal only</td></tr><tr><td><strong>Border</strong></td><td>Sets the thickness of the border around the message container. (Optional)</td><td>Pixels</td><td>Modal only</td></tr><tr><td><strong>Border Color</strong></td><td>Sets the color of the border around the message container, including opacity. (Optional)</td><td>Color</td><td>Modal only</td></tr></tbody></table>

#### **Close options**

To allow users to dismiss the In-App message, several close options are available. Unless a button action within your message is specifically configured to dismiss the In-App, you must enable at least one of these options:

* **Close Icon:** Displays a ‘X’ dismissible icon in the top right corner of the message. You can customize the color and background color of this icon separately.
* **Auto-Dismiss:** The message automatically disappears after a specified duration. A visual gauge is displayed to show the remaining time. The auto-dismiss duration is customizable (in seconds).
* Platform-specific dismissal methods (like swipe gestures on iOS or the back button on Android) are always possible.

#### **Color picking**

When configuring color options within the composer, click the color swatch (the colored square) next to a setting to open the color picker interface. This tool allows you to visually select a color, refine it using a spectrum slider, and quickly choose from a list of recently used colors. The chosen color's code (e.g., in Hex format) is displayed and can also be directly entered or copied and pasted.

## Blocks description

Using our drag & drop composer, your In-App messages are composed of various blocks.

### Text

The Text block allows you to include textual content within your message. It supports personalization to dynamically insert profile specific information. See [Personalization](/getting-started/features/customer-engagement-platform/message/personalization)for more details.

The following visual customization options are available for the Text block:

<table><thead><tr><th width="154.9140625">Customization</th><th width="431.7109375">Description</th><th>Value type</th></tr></thead><tbody><tr><td><strong>Margin</strong></td><td>Configures the spacing around the text block, independently for top, bottom, left, and right sides.</td><td>Pixels</td></tr><tr><td><strong>Text alignment</strong></td><td>Controls the horizontal alignment of the text within the block.</td><td>left/center/right</td></tr><tr><td><strong>Color</strong></td><td>Sets the color of the text.</td><td>Color</td></tr><tr><td><strong>Font size</strong></td><td>Sets the size of the text using predefined scale options.</td><td>XS/S/M/L/XL</td></tr><tr><td><strong>Font decoration</strong></td><td>Applies visual styles to the text. Multiple decorations (Bold, Italic, Underline, Strikethrough) can be selected simultaneously.</td><td>bold/italic/underline/strikethrough</td></tr></tbody></table>

### Button

The Button block allows you to include interactive buttons in your message layout.

Each button should contain text. The customization options for this text (e.g., font size, color, decoration) are inherited from the **Text block** and applied directly to the button's label.

Buttons must also have an **action** associated with them, defining what happens when the user interacts with the button. By default the **Dismiss** action is selected.

#### **Available built-in actions**

Configurable built-in actions that buttons can trigger include:

* **Dismiss** Closes the In-App message.
* **Deeplink** Closes the In-App message and opens the specified deeplink or web page.
* **Copy to clipboard** Copies the provided text to the device's clipboard. The In-App message will be dismissed. Optionally, a deeplink or web page can also be specified to open after copying.
* **Smart Push re-optin** Displays the system push notification authorization prompt to eligible users. If the user has already been asked for push notifications opt-in, it opens the system notification settings instead. If the user is already opt-in, the message will disappear after clicking the button but no further action will be triggered.
* **Rating**
  * **iOS:** Displays the app rating dialog. Note that the system limits this dialog to a maximum of three displays within a 365-day period. Your automation triggering this action should be rate-limited accordingly (e.g., maximum three times per year per user).
  * **Android:** Displays the Google In-App Review feature. Your automation triggering this action should also be rate-limited. The `play-core` library is required in your application to display the Google In-App review feature. See [SDK integration](/developer/sdk/android/sdk-integration#in-app-review).
* **Redirect to settings** Opens the notification settings for the current application, where notification permissions can be managed.

In addition to these built-in options, you can also configure custom actions that are registered within your application. See corresponding documentation for [Android](https://doc.batch.com/developer/sdk/android/advanced/custom-actions) and [iOS](https://doc.batch.com/developer/sdk/ios/advanced/custom-actions).

The following visual customization options are available for the Button *container* itself:

<table><thead><tr><th width="163.99609375">Customization</th><th width="433.96875">Description</th><th>Value type</th></tr></thead><tbody><tr><td><strong>Margin</strong></td><td>Configures the spacing around the button block, independently for top, bottom, left, and right sides.</td><td>Pixels</td></tr><tr><td><strong>Padding</strong></td><td>Configures the internal spacing between the button's text content and its border/edges.</td><td>Pixels</td></tr><tr><td><strong>Width</strong></td><td>Sets the width of the button relative to its container.</td><td>Percentage</td></tr><tr><td><strong>Button alignment</strong></td><td>Controls the horizontal alignment of the button block within its parent container.</td><td>left, center, right</td></tr><tr><td><strong>Button color</strong></td><td>Sets the background color of the button, including opacity.</td><td>Color</td></tr><tr><td><strong>Radius</strong></td><td>Controls the roundness of the button's corners.</td><td>Pixels</td></tr><tr><td><strong>Border</strong></td><td>Sets the thickness of the border around the button. (Optional)</td><td>Pixels</td></tr><tr><td><strong>Border Color</strong></td><td>Sets the color of the border around the button, including opacity. (Optional)</td><td>Color</td></tr></tbody></table>

### Image

The Image block allows you to display images within your message layout.

Images can be provided by uploading an image file directly or by referencing an image URL. Supported image formats are PNG and JPEG. Uploaded image files must not exceed 4MB in size.

Images can optionally have an action associated with them, similar to buttons. Clicking the image will trigger this action. The available built-in actions are detailed in [#available-built-in-actions](#available-built-in-actions "mention").

The following visual customization options are available for the Image block:

<table><thead><tr><th width="148.95703125">Customization</th><th width="392.18359375">Description</th><th>Value type</th></tr></thead><tbody><tr><td><strong>Margin</strong></td><td>Configures the spacing around the image block, independently for top, bottom, left, and right sides.</td><td>Pixels</td></tr><tr><td><strong>Height</strong></td><td>Sets the height of the image block. Explained below.</td><td>either <code>auto</code>, <code>fill space</code> or with a custom number of pixel</td></tr><tr><td><strong>Sizing</strong></td><td>Controls how the image scales to fit within the block dimensions. Explained below.</td><td>fill or fit</td></tr><tr><td><strong>Radius</strong></td><td>Controls the roundness of the image block's corners.</td><td>Pixels</td></tr></tbody></table>

#### **Height setting**

The **Height** of the image block can be set to `auto` , `fill space` or a custom pixel value. When set to `auto`, the height is automatically determined based on the image's intrinsic aspect ratio and the available width of the block's container, ensuring the image is displayed without distortion using its natural proportions. The custom option allows you to specify a fixed height in pixels.

The  `fill space` option is available exclusively for Fullscreen in-app experiences. When you choose this, the image expands vertically to occupy all available space within the in-app, dynamically adjusting to the device's screen dimensions. If you have multiple images set to 'Fill space', they will each evenly share the remaining vertical space.

We recommend checking how your images display across various screen sizes when using this setting. This ensures optimal presentation, as images may not appear if the available screen space is insufficient.

#### **Accessibility description**

You can provide an accessibility description (alt text) for an image. This description should only be filled in if the image conveys information essential for understanding the content of the In-App message. This text is used by screen readers and other assistive technologies.

#### Image selection guidelines

Choosing the right images is key for effective In-App messages on all devices. The wide variety of screens means a perfectly identical display everywhere is impossible. Follow these tips to optimize your images. \
**File specifications**

* **Formats:** Use standard web formats: PNG, JPG.
* **Size:** Ensure images are lightweight for quick display. In-App messages should not exceed 4MB.
* **Minimum Dimensions:** Aim for a minimum width of 640px to ensure good resolution.

**Display modes (sizing)**

You can control the height of the Image block using the **Height** setting. The **Sizing** setting (Fill/Fit) then controls how your image adapts to this block size. This setting is only applicable when the **Height** is set to a custom pixel value (not `auto`).

* **Fill:** The image scales proportionally to **fill the entire block**. This may **crop** parts of the image if aspects ratios don't match. We recommend a square file, with a width of 1200px.
* **Fit:** The image scales proportionally to be **entirely visible** within the block. Nothing is cut off. This may leave **empty space** on the sides if aspect ratios don't match.

<div align="right" data-full-width="true"><figure><img src="/files/vt2J8CqYjYkybhbXKgiB" alt="" width="188"><figcaption><p><strong>Fill</strong> display mode: left and right sides of the image are cropped </p></figcaption></figure> <figure><img src="/files/HwYXdytD3J6GBHN4WMDU" alt="" width="188"><figcaption><p><strong>Fit</strong> display mode: image is fully visible, there are some empty <br>spaces at the top and bottom of the image</p></figcaption></figure></div>

**Design recommendations**

* **Put key info in Text/Button Blocks:** Don't put crucial messages only in the image. Text and buttons managed outside the image adapt better to various screens.
* **Image composition:** Avoid placing text or important elements near image edges to prevent cropping in "Fill" mode. **Center** the most important element in your image.
* **Dimensions and aspect ratio:** There's no single ideal size. **Landscape** format images (e.g., 2:1 or 3:1 ratios) work well for Fullscreen and Modal themes. Portrait formats suit designs where the image is the main focus.

**Crucial step: Test on devices**

The most important step is to **test** your message and images on real devices thanks to the **Send test** option. This verifies the final display on different screens before sending your campaign.

### Divider

The Divider block allows you to insert a horizontal rule to visually separate content elements within your message layout.

The following visual customization options are available for the Divider block:

<table><thead><tr><th width="144.1796875">Customization</th><th width="449.56640625">Description</th><th>Value type</th></tr></thead><tbody><tr><td><strong>Margin</strong></td><td>Configures the spacing around the divider block, independently for top, bottom, left, and right sides.</td><td>Pixels</td></tr><tr><td><strong>Width</strong></td><td>Sets the width of the divider line relative to its container.</td><td>Percentage</td></tr><tr><td><strong>Alignment</strong></td><td>Controls the horizontal alignment of the divider line within its container.</td><td>left, center, right</td></tr><tr><td><strong>Thickness</strong></td><td>Sets the visual thickness of the divider line using predefined scale options.</td><td>XS/S/M/L/XL</td></tr><tr><td><strong>Color</strong></td><td>Sets the color of the divider line, including opacity.</td><td>Color</td></tr></tbody></table>

### Spacer

{% hint style="info" %}
**Note:** The Spacer functionality is available starting with SDK version **3.1**
{% endhint %}

The Spacer block allows you to introduce customizable vertical space between content elements in your message layout. The available customization option for the Spacer block ensures flexible design implementation to meet your specific layout requirements.

<table><thead><tr><th width="148.8193359375">Customization</th><th width="467.916015625">Description</th><th>Value type</th></tr></thead><tbody><tr><td><strong>Height</strong></td><td>Sets the height of the spacer block. Explained below.</td><td>Pixels / Fill space</td></tr></tbody></table>

#### **Height setting**

Configures the vertical space of the spacer block. For modal and fullscreen layouts, you can set a custom number of pixels.&#x20;

For fullscreen layouts, the **"Fill space"** option also allows the spacer to occupy all remaining vertical space, distributed evenly if multiple spacers are present.

### Columns

The Columns block acts as an invisible container that allows you to arrange other blocks horizontally in multiple columns, supporting up to 5 columns.

You can place any Text, Button or Image blocks inside a Columns block.

The following settings are available for configuring a Columns block:

<table><thead><tr><th width="172.28125">Setting</th><th width="398.51953125">Description</th><th>Value type</th></tr></thead><tbody><tr><td><strong>Number of columns</strong></td><td>Sets the number of vertical divisions within the block.</td><td>2 to 5</td></tr><tr><td><strong>Sizing</strong></td><td>Defines how the available horizontal space is distributed among the columns. Can be set to auto (equal distribution) or custom percentages (a list of percentages for each column, which must total 100%).</td><td>auto / custom sizing (in percentages)</td></tr><tr><td><strong>Spacing</strong></td><td>Sets the horizontal space between individual columns.</td><td>Pixels</td></tr><tr><td><strong>Padding</strong></td><td>Configures the internal spacing between the content and the column edges.</td><td>Pixels</td></tr><tr><td><strong>Content alignment</strong></td><td>Controls the vertical alignment of blocks placed inside each column.</td><td>top, middle, bottom</td></tr></tbody></table>

## **Additional options**

### **Dark mode**

You can configure a dark mode version for each In-App template to match user device settings. With dark mode enabled, you can specify separate color values for light and dark themes. Each mode can be previewed directly within the In-App composer.

Note that when using the “Send test option”, the In-App message will render according to the test device's dark mode setting, not the mode selected in the composer preview.

<figure><img src="/files/uqQTDG7A9tdxy95QVJox" alt="" width="375"><figcaption></figcaption></figure>

### **Advanced settings**

**Priority**

You can select a priority level between Standard, Important and Critical. Priority works on automations with identical trigger event, and identical label if one is specified. **When two or more automations should be displayed at the same time, the system selects the automation with the highest priority**: this is the one that will be displayed after the trigger event occurred.

If multiple automations have the same priority level, we rely on our automatic priority system to automatically define priority based on multiple criteria.

Default priority value is standard.

Here are a couple of examples of usage of priorities:

* Standard-level priority could be selected for your long-term use cases: onboarding, app review, etc.
* Important level priority could be selected for temporary campaigns: conversion or subscription campaigns, account creation, reopt-in campaign, etc.
* Critical level priority could be selected for emergency campaigns: downtime or out-of-service messages, asking your user to update the app, etc

**Tracking ID**

This setting is only usefull for apps with an **event dispatcher solution setup**.

The tracking ID provides an **additional tracking dimension** at the Orchestration-level in your analytics solution.

**Payload**

An optional JSON string that can contain **additional parameters** that your application can handle when receiving In-app messages if configured to do so. The root of the JSON must be an Object and cannot have the reserved key `com.batch`.&#x20;

This feature is often used by your technical teams to add data to your in-app messages and retrieve it via SDK APIs.

### Custom fonts

\
By default, Batch uses the system font set on the user's device.&#x20;

To use a custom font for your brand, it requires **implementation in your application's native code**.

For bold or italic text styles to display correctly, the corresponding **bold** and **italic** font files must be provided and implemented alongside the regular font.

Refer to the documentation for [Android](https://doc.batch.com/developer/sdk/android/mobile-landings#setting-a-custom-typeface) and [iOS](https://doc.batch.com/developer/sdk/ios/mobile-landings#setting-a-custom-font) for custom font platform-specific implementation details.

### Preview and device testing

The In-App composer preview is a useful tool for designing your message, but final appearance and behavior can vary across devices and operating systems. Always test your In-App message on actual devices using the "Send test option" to ensure it looks and works as intended.

## Templates

Templates are reusable blueprints for your In-App message layouts. Saving your In-App structure and styling as a template allows you to quickly create new messages with a consistent look and feel without starting over each time. Saving a message as a template is **optional**; In-App messages function independently of whether they were saved as templates.

Modifications made to a template do not affect existing In-App messages or live campaigns that were created using that template, and vice versa. You can update the structure and styling of an existing In-App message and choose to save these changes by overwriting the original template or by creating a new template.

As a starting point, a selection of pre-built Batch templates is available to showcase various In-App message possibilities. These specific templates are read-only and cannot be modified or overwritten.

A template defines the *structure* and *styling* of an In-App message. This includes:

* The type and position of each block (e.g., Image block, Text block, Button block, Columns block, Divider block).
* The visual customization settings applied to each block (e.g., margins, colors, sizes, corner radius).

Importantly, templates **do not** include the *content* or specific *behavioral configurations*. This means the following are *not* saved in a template:

* The actual text written in a text block.
* The image file uploaded or the image URL used in an Image block.
* The specific action configured for a button or Image block, including the action type (e.g., deeplink, rating, smart re-optin) and any associated parameters (e.g., the target URL for a deeplink, the text for copy to clipboard).

Importantly, when multi-language support is enabled, the template structure and styling are common across all languages while the content is managed separately for each language.


# Universal Channel

{% hint style="info" %}
Universal Channel is a paid offering. Contact your CSM or Account Manager to learn more.
{% endhint %}

Universal Channel lets you activate an external channel or system from a Batch **trigger automation**.\
It calls a third-party API to perform actions such as:

* sending a message,
* triggering a workflow,
* updating or creating data in an external system.

Universal Channel lets you manage marketing activities from one place. It uses everything you know about your customers.

Here are examples of use cases that Batch supports through Universal Channel:

* Manage wallets, for example through our partner [The Wallet Crew](https://www.thewalletcrew.io/en).
* Send support requests through Zendesk.
* Send WhatsApp messages through Meta or partners such as [WAX](/integrations/universal-channel/how-to-trigger-a-whatsapp-automation-wax) and [Simio](/integrations/universal-channel/how-to-trigger-a-whatsapp-automation-simio).
* Send RCS messages through [Sinch](/guides-and-best-practices/message/universal-channel/how-to-send-a-rcs-message-sinch).
* Send [Slack](/integrations/universal-channel/how-to-send-a-slack-message-slack) messages for testing.
* Send direct mail, for example through [Service Postal](https://www.servicepostal.com/).
* Send voice messages, for example through [Mailingvox](https://www.mailingvox.com/).
* Update a third-party database, such as an ERP or a sales automation platform.
* Trigger a Batch profile update or event. A triggered automation can listen for it through the [Profile API](/developer/api/cep/profiles).

{% hint style="info" %}
Find use cases and examples in [Universal Channel Integrations](/integrations/universal-channel). If your use case is not listed, follow [*How to set up Universal Channel with any third-party service*](/integrations/universal-channel/how-to-set-up-universal-channel-with-any-third-party-service). You can also contact Support for assistance.
{% endhint %}

***

## **Structure of a Universal channel message**

A Universal channel step consists of:

* **A destination URL**
* **An HTTP method** (Batch supports `POST` requests)
* **Headers** (standard or credential-based)
* **A body** (JSON)

Batch currently supports POST requests with a JSON body and authentication using **Basic** or **Bearer token**.\
If your integration requires a more advanced setup, please contact us.

***

## **Parameter reference**

### **Destination URL**

The endpoint that Batch will call when the Universal Channel step runs. It can be personalized with profile, trigger event or catalogs attributes using our personalization language.

***

### **HTTP method**

Batch uses the **POST** method.

***

### **Headers & Credential headers**

Optional HTTP headers included in the request.\
It can be personalized with profile, trigger event or catalogs attributes using our personalization language.

If a header contains sensitive information (such as an authentication token), store it as a **Credential Header**.\
Credential Headers are securely managed and can be reused across multiple Universal Channel steps.\
See [Channels](/getting-started/features/customer-engagement-platform/settings/channels#universal-channel-settings) for more information.

***

### **Body**

The JSON body defines the instruction sent to the external system.

It can include personalization referring to:

* profile attributes
* trigger event attributes
* catalogs attributes

Use **“Format body”** to validate and neatly format your JSON payload.

***

## **Zoom on how Universal channel works**

When an automation reaches a Universal channel step:

1. **Batch composes the request**
   * Personalization attributes are resolved using the triggering profile and event.
   * Headers and body are assembled into the final API call.
2. **Batch sends the request to the external API**\
   The external system determines what action to perform based on the request sent.\
   For example:

   * a `"template_id"` field instructs a partner to send a specific WhatsApp message,
   * a `"status": "completed"` field updates an order,
   * a `"trigger": "start_flow"` field launches a workflow.

   *Universal channel does not impose a structure — the external system defines how the JSON should be interpreted.*
3. **The external system executes the action**\
   Examples:
   * sending a message,
   * updating a record,
   * creating an object,
   * starting an automation.
4. **Batch records the result**\
   Analytics use terminology aligned with communication channels:
   * **Sent** – Batch successfully issued the request
   * **Delivered** – The external system acknowledged the request with a successful response
   * **Bounced** – The external system returned an error or did not respond

These statuses allow you to verify how the external system received your request.

***

## **Test API**

The **Test API** feature allows you to validate your Universal Channel configuration before enabling the automation.

1. **Select a profile**\
   Personalization attributes will be resolved using this profile’s attributes.
2. **A real call is performed**\
   Because it uses your actual external endpoint, the external action *will take place* (message sent, update performed, etc.) for the selected profile.
3. **Inspect the response**\
   The interface displays the result returned by the external system, helping you diagnose errors and adjust the configuration.

This step ensures your Universal channel works end-to-end before going live.

***

## Behavior Based on HTTP Status Codes

### Retry

The delivery behavior of Universal Channel messages depends on the HTTP status code returned by the target endpoint:

| HTTP Status Code                        | Behavior                                                                                                                                                                                                         |
| --------------------------------------- | ---------------------------------------------------------------------------------------------------------------------------------------------------------------------------------------------------------------- |
| 1xx                                     | Delivery failed. No retry.                                                                                                                                                                                       |
| 2xx                                     | Delivery succeeded. No retry needed.                                                                                                                                                                             |
| 3xx                                     | Delivery failed. No retry.                                                                                                                                                                                       |
| 4xx                                     | Delivery failed. No retry, except for 429.                                                                                                                                                                       |
| 429                                     | Retry behavior depends on the presence of the Retry-After header: If Retry-After is present: wait for the specified delay or until the indicated date.If Retry-After is missing: wait 5 seconds before retrying. |
| 5xx                                     | Delivery failed. Retry is attempted.                                                                                                                                                                             |
| Network errors / connection interrupted | Treated as transient errors. Retry is attempted.                                                                                                                                                                 |

Note: After 5 retry attempts, the delivery is considered failed.

### Supported HTTP Status Codes

Our service supports all standard HTTP status codes as defined by the IANA: 🔗 [IANA HTTP Status Code Registry](https://www.iana.org/assignments/http-status-codes/http-status-codes.xhtml)

If the response contains a non-standard or unrecognized HTTP status code, it will be reported with a status code value of 0.


# Personalization

## Introduction

Personalization allows you to tailor messages based on each profile's characteristics and actions. You can personalize content by:

* **Referencing** profile attributes or trigger event attributes (for *Automations*).
* Applying **formatting**, such as capitalizing a last name or displaying a birthdate in a specific format.
* Using **conditions** to customize content (e.g., showing different messages based on country or loyalty level).
* Implementing **loops** to dynamically display multiple items (e.g., all products in a profile’s cart or recently purchased items).
* Referencing data from **Catalogs** (e.g., showcasing top products or articles in a newsletter).

Personalization is available across all channels and orchestration types *(Campaigns, Recurring Automations, and Trigger Automations)*. All message text fields support personalization, except the email sender field.

{% hint style="info" %}
Note that [a public GPT Agent](https://chatgpt.com/g/g-695f83b0843481918371ae624dece4f2-batch-personalization-assistant) for personalization in Batch is available. "Batch Personalization Assistant" helps you create, check and troubleshoot personalization and conditional content expressions, directly from ChatGPT.
{% endhint %}

### Personalization global behavior

Batch dynamically replaces personalized attributes with profile or event specific values at the time of sending, ensuring each recipient receives a tailored message.

During message creation, personalization code can be modified by clicking on the message content and previewed by selecting a specific profile. You can also send a test message based on the selected profile. If no profile is selected, attributes will be treated as empty in the send test.

There are two ways to reference and format attributes:

* **Using the `{...}` Insert Variable button** (also called *Dynamic Content* for email): This opens a guided modal that helps you select and format attributes, automatically inserting the correct code into your message.

<figure><img src="/files/uTWGYpg6X3dzzfWIjFmd" alt="" width="563"><figcaption><p>Dynamic Content Insertion Modal</p></figcaption></figure>

* **Writing directly in Batch syntax**: This allows for more advanced formatting options and greater flexibility when referencing and formatting attributes.

## Referencing attributes

* First of all, to be available for personalization and appear in the selection modal, an attribute must be enabled in the **Custom Data** section. [Learn more about Custom Data here.](/getting-started/features/customer-engagement-platform/profiles/custom-data)
* Two types of attributes can be referenced in personalization:
  * **Profile Attributes**

    Available in all orchestration types *(Campaigns, Recurring Automations, and Trigger Automations)*, these include details such as a recipient's first name. They can be either [Data Lifecycle](/getting-started/features/customer-engagement-platform/profiles/data-lifecycle#native-attributes) or custom attributes.
  * **Trigger Event Attributes**

    Specific to *Trigger Automations*, these attributes are based on the event that triggered the automation, such as the list of products a profile just purchased.

### **Referencing attributes in messages**

Attributes must be enclosed in double curly braces:

**Profile custom attributes**: `{{ your_attribute }}`\
\
\
**Profile native attributes**: `{{ b.your_attribute }}`\
**Trigger event attributes**: `{{ trigger_event.your_attribute }}`

**Example:**

```
Hello {{ firstname }}, your {{ trigger_event.product_name }} is waiting for you!
```

### **Handling different data types**

This syntax supports most data types (*string, integer, boolean, etc.*), with specific behaviors for **array** and **object** attributes.

**Arrays**

Array attributes must be transformed before use; they cannot be inserted as-is.\
**Example:**

<pre><code><strong>You've already beaten those levels: {{ levels_done|join(',') }}
</strong></code></pre>

More formatting options for arrays are available in the [#formatting-attributes](#formatting-attributes "mention") section.

**Objects (trigger event only)**

Object attributes can contain multiple properties, but only these specific properties can be referenced—never the entire object itself.\
**Example:**\
If a Trigger Event includes an attribute named `delivery_address` with the following properties:

```json
{
  "city": "Paris",
  "zip_code": "75001",
  "street": "1 rue de Rivoli"
}
```

You can reference the properties like this:

{% code overflow="wrap" %}

```
Your order will be delivered in {{ trigger_event.delivery_address.city }}, 
{{ trigger_event.delivery_address.zip_code }} {{ trigger_event.delivery_address.street }}
```

{% endcode %}

**Note:** Object attributes are only accessible in Trigger Event Attributes.

### Default values (optional) <a href="#default-values" id="default-values"></a>

If an attribute is missing or null, personalization output is empty by default. However, you can define a fallback value.

**Example:**

```
Special offer: Get {{ special_offer|default('-5%') }} by subscribing today!
```

If the profile's `special_offer` attribute is `-15%` then it evaluates to:

```
Special offer: Get -15% by subscribing today!
```

If `special_offer` is missing:

```
Special offer: Get -5% by subscribing today!
```

### Whitespace handling

To ensure smooth message formatting, whitespace (new lines and leading spaces) before an empty attribute is automatically removed.\
\
**Example:**

```
Hello {{ firstname }}!
```

With a `firstname` attribute defined, this evaluates to:

```
Hello Vincent!
```

Note the space after `Hello` is kept.

If `firstname` is missing, the space is removed:

```
Hello!
```

This behavior can be overridden, see [#whitespace-control](#whitespace-control "mention") for more information.

### Audience data <a href="#audience-data" id="audience-data"></a>

If you have uploaded specific profiles with the Audience API with their own attributes.

They can be referenced in your message **when the orchestration targets the corresponding audience**, by using the `{{ audienceAttribute(<audience name>, <attribute name>) }}` expression.

#### Example: <a href="#example-1" id="example-1"></a>

Take the following Audience API Update call:

```json
{
  "name": "EXAMPLE",
  "ids": [
    {
      "action": "add",
      "id": "CUSTOM-ID-1",
      "attributes": {
        "account_level": 20
      }
    }
  ]
}

```

The following message:

```
Congratulations, you have reached level {{ audienceAttribute('EXAMPLE', 'account_level') }}!
```

will result in:

```
Congratulations, you have reached level 20!
```

### Native attributes

Some Batch native attributes can be used with Personalization to refer to Batch internal data.&#x20;

To access a native attribute, use the following syntax: `{{ b.your_native_attribute }}`\
The following is a non-exhaustive list of Batch Profiles native attributes:

* `campaign_token`
* `creation_date`
* `custom_id`
* `email`
* `email_domain`
* `has_custom_id`
* `install_date`
* `is_email_optin`
* `is_push_optin`
* `is_sms_optin`
* `language`
* `last_activity_date`
* `last_email_click`
* `last_email_click_marketing`
* `last_email_marketing_click`
* `last_email_marketing_open`
* `last_email_open`
* `last_email_transactional_click`
* `last_email_transactional_open`
* `last_visit_date`
* `phone_number`
* `region`
* `timezone`

## Referencing catalog data

To reference the attributes of a catalog item, use the `lookup` function with the catalog name and an item ID. The item ID can come from a **profile attribute**, a **trigger event attribute**, or a **static value**.

#### Fetching a catalog item

**From an attribute** (profile or trigger event):

```
{% set $vehicle = lookup('vehicle_catalog', favorite_vehicle_id) %}
{{ $vehicle.brand }} {{ $vehicle.model }} — {{ $vehicle.color }}
```

```
{% set $product = lookup('products', trigger_event.product_id) %}
{{ $product.name }}
```

**From a static value**, useful for editorial content that doesn't depend on the profile:

```
{% set $featured = lookup('daily_picks', 'featured_1') %}
{{ $featured.title }}
{{ $featured.subtitle }}
```

#### Chained lookups

A `lookup` can return an attribute that serves as the item ID for a second `lookup` in a different catalog:

```
{% set $schedule = lookup('weekly_schedule', 'monday_prime') %}
{% set $show = lookup('shows', $schedule.show_id) %}
{{ $schedule.air_time }}
{{ $show.title }}
{{ $show.synopsis }}
```

Here, the `weekly_schedule` catalog contains a `show_id` field that references an item in the `shows` catalog.

## Formatting attributes

You can apply formatting options to attributes to ensure they are displayed in the most relevant way. Formatting should be applied based on the attribute type.&#x20;

### Transformations with arguments

You may have noticed some transformations take arguments. When this is the case, there is two way to give the arguments:

* Using a named argument as such: `join(separator=',')`
* Directly giving the value as such: `join(',')`

In the following reference we will denote arguments that can be given unnamed as such: `argName?: type` where the `?` indicates the argument is optional.

### General transformations

<details>

<summary>formatDate</summary>

**Input type**\
date

**Arguments**

* `pattern`: string or (`dateStyle`: string, `timeStyle`: string)

**Optional arguments**

* `timezone`: string, `locale`: string

**Return type**\
string

**Description**\
Formats a date using either the pattern provided or the combined `dateStyle`/`timeStyle`.\
Ex: `{{ installation_date|formatDate(pattern: 'yyyy-MM-dd') }}` will result in **2025-01-01**

Ex: `{{ installation_date|formatDate(dateStyle: 'LONG', timeStyle: 'SHORT') }}` will result in **Wednesday, January 1, 2025 12:00 AM**

The `timezone` argument allows you to format the date into a specific timezone.\
Ex: `{{ installation_date|formatDate(dateStyle: 'SHORT', timeStyle: 'LONG', timezone: 'Europe/Paris') }}` will result in **1/1/25 9:00:00 AM CET**

The `locale` argument allows you to format the date using a specific locale. A locale controls region-specific behavior when formatting a date. For example, with the US locale, the time will be suffixed with **AM** or **PM**, but not with the UK locale.\
Ex: `{{ installation_date|formatDate(dateStyle: 'SHORT', timeStyle: 'LONG', locale: 'UK') }}` will result in **01/01/25 09:00:00 CET**

</details>

### Transformations for numbers only

<details>

<summary>abs</summary>

**Input type**\
number or duration

**Return type**\
integer

**Description**\
Returns the absolute value of a number, duration, or distance.

**Example**\
`{{ -13|abs }}` will result in **13**

</details>

<details>

<summary>round</summary>

**Input type**\
number or duration or distance

**Return type**\
integer

**Description**\
Returns the closest `integer` of a number, duration, or distance, rounding up.

**Examples**\
`{{ 46.8|round }}` will result in **47**\
`{{ 46.3|round }}` will result in **46**

</details>

<details>

<summary>ceil</summary>

**Input type**\
number or duration or distance

**Return type**\
integer

**Description**\
Returns the closest `integer` that is greater than the number, duration, or distance.

**Example**\
`{{ 46.2|ceil }}` will result in **47**

</details>

<details>

<summary>floor</summary>

**Input type**\
number or duration or distance

**Return type**\
integer

**Description**\
Returns the closest `integer` that is lower than the number, duration, or distance.

**Example**\
`{{ 46.8|floor }}` will result in **46**

</details>

<details>

<summary>formatNumber</summary>

**Input type**\
number

**Arguments**\
*none*

**Optional arguments**

* `decimals`: number
* `locale`: string

**Return type**\
string

**Description**\
Formats a number.

For a `weight` float attribute of value `26.5` and a user using a US locale:\
Ex: `{{ weight|formatNumber }}` will result in **26.5**

The `decimals` argument allows you to control how many decimals should be printed:\
Ex: `{{ weight|formatNumber(decimals: 2) }}` will result in **26.50**

The `locale` argument allows you to format the number using a specific locale. A locale controls region-specific behavior when formatting numbers, such as setting the appropriate decimal separator. By default, the user's locale will be used.\
Ex: `{{ weight|formatNumber(locale: 'fr', decimals: 2) }}` will result in **26,50**

</details>

<details>

<summary>formatCurrency</summary>

**Input type**\
number

**Arguments**\
*none*

**Optional arguments**

* `decimals`: number
* `locale`: string
* `symbol`: string

**Return type**\
string

**Description**\
Formats a number as currency.

For a `price` float attribute of value `2406.5` and a user using a US locale:\
Ex: `{{ price|formatCurrency }}` will result in **¤ 2,406.50**

The `symbol` argument controls the currency symbol:\
Ex: `{{ price|formatCurrency(symbol: '$') }}` will result in **$ 2,406.50**

The `decimals` argument allows you to control how many decimals should be printed:\
Ex: `{{ price|formatCurrency(symbol: '$', decimals: 3) }}` will result in **$ 2,406.500**

The `locale` argument allows you to format the number using a specific locale. A locale controls region-specific behavior when formatting numbers, such as setting the appropriate decimal separator.

*Note: The locale has no impact on the currency symbol. By default, the user's locale will be used.*

Ex: `{{ price|formatCurrency(symbol: '$', locale: 'fr') }}` will result in **2 406,50 $**\
Ex: `{{ price|formatCurrency(symbol: '€', locale: 'fr') }}` will result in **2 406,50 €**

</details>

### Transformations for strings only

<details>

<summary>lower</summary>

**Input type**\
string

**Return type**\
string

**Description**\
Converts a string to lowercase.

**Example**\
`{{ 'VINCENT'|lower }}` will result in **vincent**

</details>

<details>

<summary>upper</summary>

**Input type**\
string

**Return type**\
string

**Description**\
Converts a string to uppercase.

**Example**\
`{{ 'vincent'|upper }}` will result in **VINCENT**

</details>

<details>

<summary>capitalize</summary>

**Input type**\
string

**Return type**\
string

**Description**\
Converts the first letter to uppercase and all other letters to lowercase.

**Example**\
`{{ 'john Smith'|capitalize }}` will result in **John smith**

</details>

<details>

<summary>title</summary>

**Input type**\
string

**Return type**\
string

**Description**\
Converts the first letter of each word to uppercase and all other letters to lowercase.

**Example**\
`{{ 'johN smith'|title }}` will result in **John Smith**

</details>

<details>

<summary>append</summary>

**Input type**\
string

**Arguments**

* `text?`: string

**Return type**\
string

**Description**\
Appends the text to the value.

**Example**\
`{{ 'john'|append(' smith') }}` will result in **john smith**

</details>

<details>

<summary>prepend</summary>

**Input type**\
string

**Arguments**

* `text?`: string

**Return type**\
string

**Description**\
Prepends the text to the value.

**Example**\
`{{ 'john'|prepend('smith ') }}` will result in **smith john**

</details>

<details>

<summary>length</summary>

**Input type**\
string

**Return type**\
integer

**Description**\
Returns the length of the string

**Example**\
`{{ 'john'|length }}` will result in **4**

</details>

<details>

<summary>trim</summary>

**Input type**\
string

**Arguments**\
*none*

**Optional arguments**

* `nullIfEmpty`: boolean

**Return type**\
string

**Description**\
Removes leading and trailing spaces from a string.\
If `nullIfEmpty` is set to `true`, the function will return `None` instead of an empty string when all characters are trimmed.

**Examples**

&#x20;`{{ " hello world "|trim }}` will result in **"hello world"**

</details>

<details>

<summary>replace</summary>

**Input type**\
string

**Arguments**

* `search`: string
* `replacement`: string

**Return type**\
string

**Description**\
Returns the string with every occurrence of the `search` substring replaced by the `replacement` substring. If the `search` substring is not found, the string is returned unchanged.

**Example**\
`{{ 'Mister Smith'|replace('Mister', 'Mr.') }}` will result in **Mr. Smith**\
`{{ product_ref|replace('_', ' ') }}` will result in **spring jacket** (for a `product_ref` attribute of value `spring_jacket`)

</details>

### Transformations for arrays of strings only (previously tag collections)

<details>

<summary>join</summary>

**Input type**\
array of strings

**Arguments**

* `separator?`: string

**Return type**\
string

**Description**\
Returns a string which is the concatenation of all tag values separated by the provided separator.

**Example**\
`{{ interests|join(' ') }}` will result in **sports politics music**\
(for someone with `["sports", "politics", "music"]` in their `interests` tag collection)

</details>

<details>

<summary>at</summary>

**Input type**\
array of strings

**Arguments**

* `index`: integer

**Return type**\
string

**Description**\
Returns the tag value at the given index. Index `0` is the first element. Negative indexes count from the end of the array: `-1` is the last element, `-2` the second to last, and so on.

**Example**\
`{{ interests|at(1) }}` will result in **politics**\
(for someone with `["sports", "politics", "music"]` in their `interests` tag collection)

</details>

<details>

<summary>first</summary>

**Input type**\
array of strings

**Return type**\
string

**Description**\
Returns the first tag value. Equivalent to `|at(0)`.

**Example**\
`{{ interests|first }}` will result in **sports**\
(for someone with `["sports", "politics", "music"]` in their `interests` tag collection)

</details>

<details>

<summary>last</summary>

**Input type**\
array of strings

**Return type**\
string

**Description**\
Returns the last tag value. Equivalent to `|at(-1)`.

**Example**\
`{{ interests|last }}` will result in **music**\
(for someone with `["sports", "politics", "music"]` in their `interests` tag collection)

</details>

<details>

<summary>contains</summary>

**Input type**\
array of strings

**Arguments**

* `element?`: string

**Return type**\
boolean

**Description**\
Returns `true` if the tag collection contains the given argument.

**Example**\
`{{ interests|contains('politics') }}` will result in **true**\
(for someone with `["sports", "politics", "music"]` in their `interests` array of strings)

</details>

### Transformations for arrays of objects and arrays of strings only

<details>

<summary>count</summary>

**Input type**

array of strings or array of objects

**Return type**\
int

**Description**\
Returns the number of elements in the array.

**Example**\
With fruits equals to `['apple', 'banana', 'cherry']`  `{{ fruits|count }}` will result in **3**

</details>

#### Chaining transformations

It is possible to chain transformations to produce more complex results, however you need to make sure the input and output types are compatible between transformations.

For example, you can't call `formatDate` on a number or even a string, the type has to be a date. Look at the table above to know what transformations are compatible.

Here is a valid example of chaining multiple transformations:

```
Your next exam is on {{ exams|last|date|formatDate('yyyy-MM-dd') }}
```

Given a user with this array of strings `exams`: `["2025-10-09T14:53:54Z", "2025-10-11T16:53:54Z"]` the example evalutes to:

```
Your next exam is on 2025-10-11
```

As you can see we take the `last` value of the array which returns a `string`, then pass that to `date` which parses it and returns a `date` type. Finally we pass that to `formatDate`.

## Conditions&#x20;

Conditions allow you to display specific parts of your message only to profiles that meet certain criteria.

Conditions must be enclosed within `{% ... %}` and follow this syntax:

```
{% if condition %}
   Content to display if the condition is met.
{% endif %}
```

You can add alternative conditions using `else if`, allowing different content to be displayed based on multiple conditions. Additionally, you can use `else` to define a default fallback when none of the previous conditions are met.

```
{% if condition1 %}
   Content if condition1 is met.
{% elseif condition2 %}
   Content if condition2 is met (only if condition1 is not met).
{% else %}
   Default content if none of the conditions are met.
{% endif %}
```

**Example:**&#x20;

Suppose you want to congratulate a user based on how far he is into your game.

You could write something like this:

<pre data-overflow="wrap"><code><strong>{% if current_level > 3 %}
</strong>Good job on beating level 3! You're now halfway through the game, keep pushing!
{% else if current_level > 5 %}
Almost there! One more level and you beat the game!
{% else if current_level == 6 %}
Amazing! You've beat the game! Go take a look at the amazing perks you unlocked!
{% endif %}
</code></pre>

Now depending on the value of the user's `current_level` attribute, the message will be one of the 3 possibilities.

### Comparison <a href="#comparison" id="comparison"></a>

Conditions can be based on the presence of an attribute.\
**Example:**

```
{% if not birthday %}
  It looks like we don’t have your birthday on record! If you’d like to receive a surprise, don’t forget to add it.
{% endif %}
```

Alternatively, conditions can be based on comparisons using various operators:

```
{% if loyalty_status == 'VIP' %}
...
{% endif %}
```

**Note:** String values should always be enclosed in single quotes.

#### Operators <a href="#operators" id="operators"></a>

* `==` compares two values for equality
* `!=` compares two values for inequality
* `>` returns true if the left hand side is greater than the right hand side
* `>=` returns true if the left hand side is greater than or equal to the right hand side
* `<` returns true if the left hand side is lower than the right hand side
* `<=` returns true if the left hand side is lower than or equal to the right hand side

#### Combining comparisons <a href="#combining-comparisons" id="combining-comparisons"></a>

As in any programming languages, you can combine comparisons easily:

* `and` returns true if both the left hand side and the right and side are true
* `or` returns true if either the left hand side is true or the right hand side is true
* `not` negates a statement
* `(` and `)` to group expressions.

#### Handling strings containing only spaces in conditions

Strings consisting only of spaces (e.g., `" "`) are not inherently empty and will evaluate as `true` in `if` conditions.

To treat such values as empty, use `trim(nullIfEmpty: true)`, which converts them to `None`:

```
Hello {% if firstname|trim(nullIfEmpty:true) != None %} {{ firstname }} {% endif %}!
```

**Speaks function**

To customize contents according to the profile's language, you can use the **speaks** function.\
It accepts one or more languages as parameters, and returns true if the profile's language matches one of them.

<pre><code><strong>{% if speaks('fr') %}
</strong>Bonjour ! 
{% else %}
Hello!
{% endif %}
</code></pre>

## Loops <a href="#loops" id="loops"></a>

Loops allow iterating over a list of values, such as displaying a list of products a user has purchased. The `for` loop enables structured iteration over arrays:

<pre data-overflow="wrap"><code><strong>{% for $interest in interests %}  
</strong>  - {{ $interest }}
{% endfor %}
</code></pre>

If `interests` contains `["sports", "music", "travel"]`, the output will be:

```
- sports
- music
- travel
```

#### **Handling Arrays of Objects**

An **array of objects** is a list where each element is an object. Arrays of objects can be nested up to three levels deep, meaning an object inside an array can contain another array of objects, and so on.

**Data in arrays of objects must be accessed using a `for` loop.** It is not possible to reference a specific object within the array directly. Instead, the loop iterates over all objects in the array. \
For an array of objects **product\_list** such as:

```json
[
    {
      "name": "T-shirt",
      "price": 25
    },
    {
      "name": "Jeans",
      "price": 45
    },
    {
      "name": "Sneakers",
      "price": 60
    }
  ]
```

the corresponding syntax is:&#x20;

```
{% for $product in product_list %}
  Product: {{ $product.name }}, price: {{ $product.price }}$!
{% endfor %}
```

#### **Combining loops and conditions**

You can combine loops (`for`) and conditions (`if`) to dynamically personalize content based on multiple attributes.

For example, when working with Trigger Event attributes, you may need to iterate over a list of orders and, within each order, iterate over the products it contains. Additionally, conditions can be applied to display specific content based on attribute values.

```
{% for $order in trigger_event.orders %}
Order #{{ $order.id }} details:
{% for $product in $order.products %}
  - {{ $product.name }} - {{ $product.price }} {{ $product.currency }}
{% endfor %}
{% if order.total_amount > 50 %}
    Shipping is free for you! 
{% endif %}
{% endfor %}
```

#### **Loop metadata**

Inside a `for` loop, the `$loop` variable gives you information about the current iteration:

* `$loop.index`: current iteration number, starting at 1
* `$loop.first`: `true` on the first iteration
* `$loop.last`: `true` on the last iteration
* `$loop.length`: total number of items in the array

**Example: adding a separator between items**

Using the `product_list` array from the previous example:

```
{% for $product in product_list %}
    {{ $product.name }}{% if not $loop.last %}, {% endif %}
{% endfor %}
```

This evaluates to:

```
T-shirt, Jeans, Sneakers
```

**Example: line break every 3 items**

```
{% for $product in product_list %}
    {{ $product.name }}{% if $loop.index % 3 == 0 %}<br>{% endif %}
{% endfor %}
```

This inserts an HTML line break after every third item.

**Note:**&#x20;

* `$loop` is only available inside the loop body. Referencing it outside a loop results in an empty value.
* `$loop` is a reserved name and can't be used as a loop variable, so `{% for $loop in product_list %}` is not allowed.
* In nested loops, the inner `$loop` overwrites the parent one. Save the parent index first if you need both: `{% set $parent_index = $loop.index %}`.

### Whitespace handling

Statements (`{% ... %}`) always strips the trailing newlines, so there is no need to keep everything on the same line.

Example:

```
{% set $hour = now|formatDate('hh')|int %}
{% set $morning = $hour < 12 %}
{% set $evening = $hour > 19 %}
Good {% if $morning %}
morning
{% else if not $morning and not $evening %}
afternoon
{% else %}
evening
{% endif %}!
```

This evaluates to:

```
Good morning!
```

Depending on the current time it will change to `afternoon` or `evening`.

This behavior can be overridden, see [#whitespace-control](#whitespace-control "mention")for more information.

### Email block conditions

**Email block conditions**

For email messages, display conditions can be set directly on blocks and structures from the Email Composer without writing code syntax.

For advanced block-level logic, use Personalization language directly:

* `for` loops
* `customAudience`, `set`
* Nested or complex conditions

For detailed examples and use cases, see [How to add display conditions to your email](https://doc.batch.com/guides-and-best-practices/message/email/personalization-and-display-logic/how-to-add-display-conditions-to-your-email).

## Advanced transformations

#### Variables and arithmetic <a href="#variables-and-arithmetic" id="variables-and-arithmetic"></a>

Sometimes it might be handy to compute some value and keep a *reference* to it so you can reuse it multiple times inside your template.

It is mainly a quality of life improvement but still useful.

For example, suppose you want to compute an expiration date based on multiple user attributes and remind the user when their subscription will expire.

Given the following rules:

* premium users have 90-days subscription
* users subscribed to the newsletter have a 75-days subscription
* users younger than 25 and not premium have a 60-days subscription
* all other have a 50-days subscription

You could write something like this:

{% code overflow="wrap" %}

```
{% if premium %}
{% set $expiration_date = subscription_date + 90d %}
{% else if has_newsletter_subscription %}
{% set $expiration_date = subscription_date + 75d %}
{% else if age < 25 %}
{% set $expiration_date = subscription_date + 60d %}
{% else %}
{% set $expiration_date = subscription_date + 50d %}
{% endif %}
Hey {{ first_name ~ last_name }}, friendly reminder that your subscription will expire on {{ $expiration_date|formatDate('yyyy-MM-dd') }}
```

{% endcode %}

This evaluates to:

```
Hey John Smith, friendly reminder that your subscription will expire on 2026-01-03
```

Obviously the date will change based on what kind of subscription the user has.

There are a couple of new features here:

* Defining a variable with `set $variableName = <expression>`. A valid expression has to return a single value of any type.&#x20;
* Arithmetic. You can do simple math inside a template. Conveniently, you can add also do arithmetic on a *date* by using a duration.
* Concatenation. You can concatenate multiple values into a single one using the `~` operator. I’m&#x20;

### Data types <a href="#comparison" id="comparison"></a>

#### Standard <a href="#standard" id="standard"></a>

Standard types include:

* *string*. You can write a literal string by using a `'` character like this: `'This is a string'`. To use a `'` inside your string you need to double it like this: `'It''s great'`
* *integer*. You can write a literal integer like this: `230`.
* *float*. You can write a literal float like this: `20.30`
* *boolean*. A boolean is either `true` or `false`

#### Date <a href="#date" id="date"></a>

Date is a special type that can't be created by a literal. However they are produced in a couple of cases:

* if an attribute is a date (that is either a `NSDate` or a `java.util.Date` for iOS and Android respectively).
* by converting a UNIX timestamp (number of seconds since January 1, 1970): `{{ 1491814800|date|formatDate('yyyy-MM') }}`
* by using the keyword `now` which returns the date at the time of execution

#### Duration <a href="#duration" id="duration"></a>

Duration is a special integer with a time unit. Units can be:

* days: `40d`
* hours: `24h`
* minutes: `30m`
* seconds: `46s`

#### Distance <a href="#distance" id="distance"></a>

Distance is a special integer with a distance unit. It is also always positive. Units can be:

* meters: `5600m`
* kilometers: `83km`

#### Casting rules <a href="#casting-rules" id="casting-rules"></a>

You can cast values into different types by using a *casting operation*, provided the types are compatible. The casting operation looks like this:

```
{{ my_string_attribute|float|int }}
```

Casting looks exactly like a transformation but it simply converts the original value to the type if the rules allow it.

The rules of casting are as follows:

| from / to | string | int | float | bool | date | distance | duration |
| --------- | ------ | --- | ----- | ---- | ---- | -------- | -------- |
| string    |        | ✓   | ✓     | ✓    | ✓1   | ✓        | ✓        |
| int       | ✓      |     | ✓     | ✓    | ✓2   | ✓        | ✓        |
| float     | ✓      | ✓   |       | ✓    | X    | ✓        | ✓        |
| bool      | ✓      | ✓   | ✓     |      | X    | X        | X        |
| date      | ✓      | ✓2  | X     | X    |      | X        | X        |
| distance  | ✓3     | ✓   | ✓     | ✓    | X    |          | X        |
| duration  | ✓4     | ✓   | ✓     | ✓    | X    | X        |          |

**1** The string has to follow the pattern `yyyy-MM-dd'T'HH:mm:ss` or the resulting date will be empty.

**2** Casting from `date` to `integer` will return the UNIX timestamp in seconds. Casting from `integer` to `date` will treat the integer as a UNIX timestamp in seconds.

**3 Distance Rules**:

* casting from `string` to `distance` will treat the string as an integer representing the distance in meters.
* casting from `integer` to `distance` will treat the integer as the distance in meters.
* casting from `float` to `distance` will remove the decimal part and treat it as an integer representing the distance in meters.
* casting from `boolean` to `distance` will treat `false` as 0 and `true` as 1.

You can pass a conversion distance unit as a parameter to the `distance` transformation.

Valid distance units are detailed above.

Examples:

* `{{ '100'|distance }}` will result into the distance `100m`
* `{{ '12km'|distance('m') }}` will result into the distance `12000m`
* `{{ 2000|distance('km') }}` will result into the distance `2000km`
* `{{ 43.20440|distance }}` will result into the distance `43m`
* `{{ true|distance('km') }}` will result into the distance `1km` (not that you'd ever do that)

**4 Duration Rules**:

* casting from `string` to `duration` will treat the string as an integer representing the duration in days.
* casting from `integer` to `duration` will treat the integer as the duration in days.
* casting from `float` to `duration` will remove the decimal part and treat it as an integer representing the duration in days.
* casting from `boolean` to `duration` will treat `false` as 0 and `true` as 1.

You can pass a conversion duration unit as a parameter to the `duration` transformation.

Valid duration units are detailed above

Examples:

* `{{ '100'|duration }}` will result into the duration `100d`
* `{{ '100h'|duration }}` will result into the duration `100h`
* `{{ '48h'|duration('d') }}` will result into the duration `2d`
* `{{ 405|duration() }}` will result into the duration `405d`
* `{{ 43.409|duration('m') }}` will result into the duration `43m`
* `{{ true|duration('s') }}` will result into the duration `1s`

#### Math rules <a href="#math-rules" id="math-rules"></a>

Math operations on `integers` and `float`s work as you would expect:

```
{{ (10 + 2) / 2 - (5 * 20) }}
```

Will evaluate to:

```
-94
```

There are a couple of rules for operations on `date`s, `duration`s and `distance`s:

* adding or subtracting a `duration` from a `date` will return a new `date`.
* subtracting two `date`s will return a `duration`.
* all operations between a `duration` and a `number` are allowed and will return a `duration` in the original unit.
* all operations between a `distance` and a `number` are allowed and will return a `distance` in the original unit.

Some *unusual* operators are available for your convenience:

* `//` divides two numbers and returns the truncated integer result. Example: `{{ 20 // 7 }}` evaluates to `2`.
* `%` returns the remainder of the integer division of two numbers. Example: `{{ 11 % 7 }}` evaluates to `4`.
* `**` raises the left hand side to the power of the right hand size. Example: `{{ 2 ** 3 }}` evaluates to `8`.

### Type comparison rules <a href="#type-comparison-rules" id="type-comparison-rules"></a>

When comparing two values, they have to be of the same type otherwise it won't work.

The rules are as follows:

* A `string` can only be compared with another `string`
* A `date` can only be compared with another `date`
* A `duration` can be compared with another `duration` or a `number`. When comparing with a `number` it is treated as days; in other words `{{ $myDuration == 3 }}` is equivalent to `{{ $myDuration == 3d }}`.
* A `distance` can be compared with another `distance` or a `number`. When comparing with a `number` it is treated as meters; in other words `{{ $myDistance == 200 }}` is equivalent to `{{ $myDistance == 200m }}`
* A `number` can be compared with another `number` or a `boolean`.

**Example:**

```
{% set $isYoungAdult = age > 18 and age < 26 %}
{% set $hasEnoughBandwidth = has_fiber or (has_mobile and mobile_connection_type == '4g' %}
{% if $isYoungAdult and $hasEnoughBandwidth %}
Don't forget you can stream the match in 4k by subscribing!
{% else %}
Don't forget you can stream the match by subscribing!
{% endif %}
```

### Whitespace control override <a href="#whitespace-control" id="whitespace-control"></a>

If the default behaviour doesn't suit you, you can force the behaviour with the following syntax:

* `{{+ +}}` or `{%+ +%}` will force every whitespace to be kept
* `{{- -}}` or `{%- -%}` will force every whitespace to be stripped

You can mix and match of course: `{{+ ... -}}` is completely valid.

Example:

```
Hello {{- first_name }}!
```

Now that we forcefully remove the leading whitespace, with a `first_name` defined it evaluates to:

```
HelloVincent!
```

Another example:

```
Hello {{+ first_name }}!
```

Here we forcefully keep the leading whitespace, with no `first_name` defined it evaluates to:

```
Hello !
```

Note the space is kept.


# Settings


# Overview

Settings regroup all the elements that should be setup properly, to be able to orchestrate the greatest engagement strategies.


# General

In this section, you can setup the general parameters of the apps and the the website part of your projects.

{% hint style="info" %}
Note that there can only be one iOS app, one Android app and one website per roject. Also, projects creation, apps creation, deletion and add-on Projects is managed via your CSM.
{% endhint %}

<figure><img src="/files/zLXjb2TlyyC8MNKA2ma1" alt="Project General"><figcaption></figcaption></figure>

## Projects Information

That settings section contains basic information about your project, app or website.

### Project Name

**Required** - Name of your app or project. You can defined it freely. The icon will be automatically defined based on apps and website part of the project.

### Project Icon

The icon is automatically deduced from the apps part of your project.

{% hint style="info" %}
Batch won't use this icon in the push notifications.
{% endhint %}

### Project Key

The project key is used to leverage Batch APIs by specifying the project you want to work on.

## Managing Environments Separately

If you need to manage development, staging and production environments separately, you can create separate projects on the dashboard and rename them accordingly (e.g. \[DEV] MyProject, \[PROD] MyProject, etc).

## Apps and Websites Information

### App/website Name

**Required** - Name of your app or website. Batch will prefill that field based on the information gathered from the App Store, the Play Store or the metadata of your website. This name is not visible in the Dashboard, only the project name is.

{% hint style="info" %}
Note that Batch won't use this name in the push notifications.
{% endhint %}

### URL

**Required, Web only** - The URL of your website. Batch uses that URL to get the name and the icon of your website. Batch also uses your website URL to generate the SDK Auth key.

### SDK

**Required, iOS/Android only** - Platform or framework used to develop your app. You can choose between iOS/Android (Native), Cordova, React Native, Flutter. Modifying that parameter will adjust the integration steps.

## API Keys

Here you can see the list of all the IDs needed to leverage our APIs, SDKs integrate the SDK or implkement the Inbox.

### SDK API Keys

Batch generates an SDK API key for every app and website added to your company. The SDK API key identifies your website or your app on a specific platform. For example, you will notice your iOS app, your Android app and your website don't have the same SDK API key.

The SDK API key has two purposes:

* **APIs**: The SDK API key is the unique reference to your website or your app on a specific platform when you call Batch REST APIs.
* **Integration**: The SDK API key authenticates the requests sent to Batch servers and allows Batch to attach the data to the right app or website.

{% hint style="info" %}
Restricted to users with **App** or **Administrate** rights.
{% endhint %}

### REST API Key

The REST API key authenticates the calls made to Batch APIs targeting your apps/websites API keys.

The REST API key is sensitive information as it allows you to send push notifications, display In-App messages, send data, and more from Batch APIs. Do not expose it to your users and avoid sharing it in your company. Batch only generates one valid REST API key per company.

If you suspect your REST API key is compromised, send an email to <support@batch.com> describing the issue. Our team will invalidate the REST API key and generate a new one after receiving validation from a user with the "administrate" right.

{% hint style="info" %}
Restricted to users with **Administrate** rights.
{% endhint %}

### Inbox secret

The Inbox secret key is the authentication key required to use the Inbox feature in your app.

{% hint style="info" %}
Restricted to users with **App** or **Administrate** rights.
{% endhint %}


# Channels

You will find here all the settings related to your different channels.

<figure><img src="/files/p5FjkRPfZ9zdG4AgFDSc" alt=""><figcaption></figcaption></figure>

## Email Settings

### Email senders

Email settings is where you setup **email senders**, such as "<coupons@company.com>".

The latter part of the email sender (e.g.: "@company.com") is setup a implementation time with Batch teams, and associated to one of the sender types defined below.

You can freely define the first part of the email sender (e.g.: "coupons") in this Settings section.

**Three sender types exist:**

* Marketing: senders used for marketing purposes, such as email blasts and promotional campaigns.
* Transactional: senders used for transactional purposes, such as account creation or purchase confirmation.
* All: senders that can be used for both purposes. This is mostly useful for pre-production / testing purposes.

These senders type are linked to different IP ranges. This is made to make sure deliverability is optimal, especially for transactional messages.

When you will create a marketing or transactional orchestration, senders will filters based on their types.

Also, when you send a campaign via the Campaign API, you can specify the sender you want to use bases on the sender ID visible on this page.

### Orchestration default settings

#### Reply-To

You can configure a default reply-to address that will be automatically pre-filled on all new email orchestrations created in this project.

* If set, new orchestrations will have their reply-to field pre-populated with this address.
* The reply-to can still be edited, changed, or removed directly in each orchestration.
* Existing orchestrations are not affected, only orchestrations created after the default is set will use it.

#### Send rate

You can specify the number of email messages to be sent per minute to protect your app or website architecture.&#x20;

Even tough the Send rate is different for Push and Email, it operates identically (the default value is different but the functional logic is identical). Check [Push Send rate documentation](#send-rate-1) a bit further down this page.&#x20;

### Email open tracking consent

This setting allows you to restrict email open tracking to profiles that have explicitly provided consent.

**Behavior**

When the setting is disabled:

* An open tracking pixel is added to all emails
* Open events are generated when emails are opened

When the setting is enabled:

* An open tracking pixel is added only if the recipient has provided consent
* Consent is read from the profile attribute `$email_open_tracking_consent` , possible values are:
  * `granted`: If consent is granted: the open tracking pixel is added and opens are tracked
  * `denied`: If consent is **not** granted: the pixel is not added, opens are not tracked, and no open events are generated
  * If the attribute is missing(null), the profile is treated as "consent not granted" (`denied`).

This means that when the setting is enabled profiles who have not provided consent will not be included in the open rate, will not generate open data for retargeting or A/B testing, and will not have any open events visible in the profile view or event exports, since no open tracking is performed for them.

## Push Settings

You will find here all the settings related to push notifications, from uploading your iOS certificate, editing your FCM IDs to editing the push delivery speed.

**Separate settings apply to Push v1 and Push v2**, and you will find a dedicated section for each in the interface:

* You will find the Push V2 settings in a ‘Push’ tab in the Channels settings.
* And the Push V1 settings via the ‘Settings v1’ dropdown in the top right of the Channels settings.
*

```
<figure><img src="/files/gIxyhq9VA9xaBKhoCG1S" alt=""><figcaption></figcaption></figure>
```

Note that :

* Push configurations operate identically for both Push V1 and Push V2, as do the following settings: priority, expiration TTL, and collapse key.&#x20;
  * The only difference is that the push V2 default Orchestrations settings (TTL, priority, Collapse key) are common to the different platforms (IOS, Android, Web).
* Managing message sending speed works differently between Push V1, where the feature is called **'delivery speed,'** and Push V2, where it's named **'send rate'.**

**To learn more about Push V1 settings, check** [**this documentation**](/getting-started/features/mobile-engagement-platform/settings/app-settings)**.**&#x20;

{% hint style="info" %}
Restricted to users with **App** or **Administrate** rights.
{% endhint %}

### **Saved test recipients**

You can save Push recipients (Installation ID, Custom ID, or Push Token) directly in the Push V2 settings for iOS, Android, and Web. These saved recipients are available at the project level and can be selected directly when sending a test from the Push or In-app message editor.

### Push configuration

#### **Apple Push Notification Service (APNS)**

On iOS, Batch servers need to have a valid certificate to communicate with Apple Push Notification Services (APNS). There are two types of files you can use:

* **p8 files (recommended)**: Valid for all the apps added to your Apple developer account. You will need to specify the Application Identifier (App ID) or the Bundle ID of your app on Batch's dashboard.
* **p12 certificates**: Generated for a unique App ID and are only valid for one year.

If you are using a p8 file, here are the fields you will need to fill in:

* **App ID / Bundle ID / Topic**: We recommend you use the bundle ID you will find in Xcode. You can also use the app ID available from the [Developer Console](https://developer.apple.com/account/ios/identifier/bundle).
* **Team ID**: The team ID is also available from the [Developer Console](https://developer.apple.com/account/#/membership/).

{% hint style="info" %}
On iOS, if the development version of your app uses a different bundle ID than your production app, you will need to create two separate apps on the dashboard.
{% endhint %}

#### **Firebase Cloud Messaging (FCM)**

**Basic Setup**

On Android, Batch needs a Service Account Key issued from your Firebase project to send notifications. Service Account Keys can be generated from the [Firebase Console](https://console.firebase.google.com/).

Once you are logged in, select your project then click the ⚙ next to your project name and "Project settings". Click on the "Service Accounts" tab, and then on the blue *"Generate new private key"* button to create and download a key.

**Using Several FCM Service Account Keys**

You can provide several service account keys for a single Android app. Batch will automatically use the appropriate key when sending notifications to a token.

This is useful if you have to switch to another Firebase project (e.g. lost Firebase credentials, etc) and want to keep sending push notifications to users who didn't update the app yet. You can also use that feature to avoid creating two separate apps if you don't use the same Firebase project in staging and production.

Click the **"Update FCM config"** button and confirm. You can now upload a new service account key.

#### **Web**

**Web push API settings (Chrome, Firefox, Safari on macOS Ventura or higher)**

**Vapid Keys**

Each website has a pair of VAPID keys associated with it:

* **A public key**: Inserted in the JavaScript tag and used to request a subscription to the browser's push service when users turn on push notifications.
* **A private key**: Used by Batch servers to sign the authorization headers sent to the push service of each browser, when you want to send a notification to your opt-in users.

If needed, you can change the VAPID keys to match the one you were using with another provider.

**SDK Auth Key**

The SDK Auth Key is a key generated by Batch for every website added to the dashboard, using the SDK API Key and the URL declared when you added your website. A new SDK Auth Key will be generated if you change the URL of your website in the dashboard settings.

The Auth Key is used in the JavaScript Tag on your website. It authenticates the requests sent to Batch servers. If that SDK Auth Key doesn't match an existing Auth Key generated in the past for your SDK API Key, Batch will reject the request (e.g. 401 error - unauthorized).

If you need to test your integration on a different domain than the one declared in the dashboard settings, you will need to set the "dev" parameter to true in your JavaScript tag and declare your development origins.

**Subdomain Name**

**Only used in deprecated HTTP / multidomain mode**

Name of the subdomain Batch will use for your website.

**Safari (≥ macOS Ventura)**

For Safari (< macOS Ventura), Batch needs a website name to communicate in the push package requested by Safari before displaying the authorization prompt to a user. This is the name that will appear on your Safari push notifications.

Batch also needs a list of allowed domains as well as push certificates associated with each domain in order to communicate with Apple Push Notification Services (APNS). Each certificate is generated for a unique Website Push ID.

**Allowed Dev Origins**

List of additional origins authorized in development mode, only when the 'dev' parameter is set to true in your JavaScript tag.

**Web Push Icons**

* **Default icon**: This icon is displayed on all web push notifications. It is mandatory to upload one for Safari web push configuration.
* **Small icon**: This icon is displayed on web push notifications received on Android devices.

### Orchestration default settings

### **Send rate**

Send rate :

* Is counted in messages per minute.
  * If a Profile has several installations, then messages will always be sent at the same time to all these installations, so there is no risk of a user receiving the same communication but at different times on different installations.
* Is common to all platforms (iOS, Android, Web).
* Is round down to the lowest integer, e.g. for a rate of 1000 msg/min that's 16.66 msg/s, which we round up to 16msg/s so we can assure that we will never send faster than the specified rate.

Send rate is set in 3 places:

* In Channel settings, where it is set as the default value. You can activate it or not, and set a value if activated.
  * The default send rate will apply to new Orchestrations only, existing Orchestrations will not be impacted by changes to these default settings.
  * We provide an estimation of the sending time based on the size of the userbase and the defined delivery speed.
* In Orchestration settings, where you can change the default value to apply a different send rate to an Orchestration.
* In the Campaign API for Campaigns sent via API. Check the following documentation to learn more on the [Campaign API](/developer/api/cep/campaigns/create).&#x20;

Restrictions and limitations:

* Minimum and Maximum Send rate :
  * Minimum: 1,000 messages/minute.&#x20;
  * Maximum: 1,000,000 messages/minute.&#x20;
* Maximum Sending Time: when an Orchestration sending time exceed 12 hours, remaining messages are dropped / will not be sent. This prevents excessively long sending durations that could impact Orchestrations effectiveness.

### **Expiration (TTL)**

You can set a global expiration delay or a Time To Live (TTL) in hours for all the notifications sent to your app/website users. The notification won't be displayed if the device doesn't receive it or doesn't come back online within this time.

By default, Batch sets a TTL of 14 days for all the notifications you send. If your user's device comes back online before being off for two weeks, it will display the last notification you sent to your user (iOS) or all the notifications sent over the previous two weeks (Android and web push). On iOS, APNS should only store for one month the notification waiting to be displayed.

If you setup a different TTL between iOS and Android and send a push on both platforms, iOS TTL will be leveraged.

### **Priority**

Defines the priority of your notifications on iOS (APNS) and Android (FCM) and Web. The default value is high.

On Android, you can use the high priority if you have a messaging/VoIP app and if you notice delivery issues due to native (Doze) or constructor related (Samsung Smart Manager, etc) energy-saving features.

If you setup a different a different priority between iOS and Android and send a push on both platforms, iOS TTL will be leveraged.

{% hint style="info" %}
High priority Android notifications can drain your user's battery faster since they wake up the device and open a network connection. Switch to Normal priority if your notification is not time-sensitive.
{% endhint %}

### **Collapse Key**

#### **Android only**

Defines how notifications are managed when an offline device goes online. If enabled, the device will only show the most recent notification. If disabled, it will show all the notifications received when the device was offline.

You should disable the collapse key if all your notifications matter (e.g. messages, etc). You can use up to three different collapse keys if you want users to get only one notification of each kind when coming online (e.g. marketing message, alert, etc).

## SMS Settings

Most SMS settings are configured during implementation. For more information, visit the [SMS Channel page](/getting-started/features/customer-engagement-platform/message).

#### URL shortening and tracking

[SMS](/getting-started/features/customer-engagement-platform/message/sms#url-shortening-and-tracking) can be toggled on or off anytime in the SMS settings page.

## Universal channel settings

{% hint style="info" %}
Universal Channel is a paid offering. Contact your CSM or Account Manager to learn more.
{% endhint %}

#### Credential headers

Credential headers are managed in the **Settings** section so that sensitive information is entered once and reused securely across Universal Channel steps. Storing them in Settings ensures they remain hidden for security reasons and cannot be exposed when building automations.

Credential headers created as a credential collection, which may contain one or several individual headers (such as authorization tokens or signatures).\
If a Universal channel step requires an **Authorization** header, it must be stored in a credential collection, as this information is considered sensitive and cannot be added directly in the step.

After creation, credential values are hidden for security reasons and cannot be viewed again.

Credential collections can also be deleted, but this is not recommended, as any Universal Channel step relying on them will stop working until a new credential is provided.

{% hint style="info" %}
This approach ensures credential headers are securely stored, encrypted at rest, and kept separate from automation logic, preventing sensitive data (such as authorization tokens) from being exposed in configuration steps or execution logs.
{% endhint %}


# Team

The **Team** tab lists the members of your team who have access to the project currently selected, along with the permissions they hold.

Use the platform selector at the top of the page to switch between the iOS, Android and Website apps of your project: access is granted per app, so the list changes from one platform to the next.

Users with the **Administrate** permission can change who reaches the selected platforms with the **Edit access** button.&#x20;

{% hint style="info" %}
This tab controls **who can reach a given app**. The permissions themselves — Administrate, Review, App, Campaign, Privacy — are shown here for reference but are set from Manage Team.
{% endhint %}

<figure><img src="/files/8ILHaGR6tv71pYtbIUIu" alt="team access"><figcaption></figcaption></figure>


# In-App Templates

In-App templates are utilized in In-App messaging within the Batch platform. They provide a structured framework for orchestrating in-app and mobile landing engagement strategies.

A template defines the structure of an in-app message, not its specific content. For further details on template functionality, refer to the [In-App & Mobile Landing](/getting-started/features/customer-engagement-platform/message/in-app#templates) section of the documentation.

About content visualization, note that during template editing, text and images can be included for visualization purposes. This content is not saved with the template. Specific content is added when a message is created using the template.

### **Template management functions:**

The In-App templates page offers the following capabilities:

* Create templates: New templates can be created from scratch or based on existing templates.
* Rename templates: Custom templates can be renamed.
* Delete templates: Custom templates can be deleted.
* Search templates: Templates can be located using the search function.
* Modify templates: Existing templates can be modified and saved as a new template or by overwriting the current version.

{% hint style="info" %}
**Note:** Pre-built Batch templates cannot be updated, renamed, or deleted. They can be used as a foundation for creating custom templates.
{% endhint %}


# Labels

Labels have two main purposes:

1. **Marketing pressure limit**: You can set a specific marketing pressure limit on all the campaigns attached to the same label (e.g. no more than 1 push a week for all campaigns using the "onboarding campaigns" label).
2. **Filtering**: You can filter the list of your campaigns based on the labels attached to your campaigns (e.g. "onboarding campaigns"):

{% hint style="info" %}
Restricted to users with **App** or **Administrate** rights.
{% endhint %}

<figure><img src="/files/Qjiy8YELieLzIlABdUCQ" alt=""><figcaption></figcaption></figure>

## Creating a Label

You can create as many labels as you want. Every label you create has: 

* **A code**: Unique id of a label. Use it as a reference in your calls to the Batch API. Avoid editing label codes. By changing a label's code, you might trigger errors on your API calls if you don't update them with the new name. This may also reset the frequency capping limits on running campaigns already using this label.
* **A name**: Used to identify your label on the dashboard.

## Managing Labels

You can edit the code and the name of existing labels or delete them if needed. Batch shows the number of orchestrations attached to each label so you can understand the impact of deleting or modifying one.

{% hint style="info" %}
Note that labels created in the Omnichannel tab can be leveraged in Email, SMS, In-app v2 and Push v2 orchestrations. Labels created in iOS, Android and Web tabs are related to Push v1, siloed by platform.
{% endhint %}


# Cappings

Frequency capping allows you to limit the number of messages a profile can receive in a certain time frame.

<figure><img src="/files/ozzSi7Oxbz2fP13wKRRZ" alt="capping"><figcaption></figcaption></figure>

{% hint style="info" %}
The feature is restricted to users with **App** or **Administrate** rights.
{% endhint %}

## Label-based Capping

You can create a frequency capping for all the orchestrations attached to a specific label. It works for orchestrations created via the Dashboard or Batch's APIs.

Batch dynamically checks the number of messages across all channels (email, SMS, push) that have been sent in the last X hours/days to see if the message has to be sent or not.

If you send a multiplatform push message, it counts as one sending even if the person might receive the push on several devices.

> **Important notes**: \
> \
> Messages sent very closely or at the same time may not be taken into account by the capping feature.\
> \
> Labels added to a completed orchestration have no effect on capping — since the orchestration is no longer running, no sends occur.

## Global Capping

You can either define a simple limit that will be applied to all the notifications you send or fine-tune your global frequency capping:

* **All push notifications**: The capping rules affects all your push notifications.
* **Orchestrations**: The capping rules only affects notifications coming from campaigns and automations created on the dashboard or with the Campaign API.
* **Transactional**: The capping rules only affects notifications sent with the Transactional API.
* **In-app messages**: This capping rules only affects In-app messages. It can be setup by session or interval of time.

All these rules can work together. For example, you can set a global capping of 5 push notifications per day and create two additional rules that will ensure users won't receive more than 1 transactional push every 2 hours and 1 push from a marketing campaign per week.

{% hint style="info" %}
Global capping is only available on Push v1 and thus siloed by platform (iOS, Android, Web). In Push v2, it is possible to apply the same capping rule on all orchestrations putting on them the same label.
{% endhint %}

## Capping analytics

You can see the number of messages that were not delivered because users already reached the limit defined in your dashboard settings. The corresponding metric is called "Skipped".


# Debug

Batch provides simple debug tools that allow you to test your integration (⚙ Settings → Debug) and debug your calls to the Transactional API.

<figure><img src="/files/6R3enRVxwAPoqBumd4xw" alt="debug"><figcaption></figcaption></figure>

## Integration Debug Tool

#### Reviewing Data Attached to an ID

Batch provides a simple tool you can use to see the list of installs tied to a specific ID and the data Batch collected for each one of them. You can search installs based on:

* **An advertising ID**: IDFA (iOS) or GAID (Android). You can find your advertising ID by using [My Device ID](https://apps.apple.com/fr/app/my-device-id-by-appsflyer/id1192323960) on iOS or by going to your device settings → Google → Ads on Android.
* **A Custom User ID**: Your own user IDs shared with Batch.
* **An Installation ID**: ID generated by Batch for all the installs the first time your users open the app. You can get your installation ID in the log of your app or display it in your app for debug purposes.

You can also see the data collected for random installs in your userbase.

For every install, the debug tool displays basic information on the left side:

* **Basic information**: Device type, last SDK start date, country, language, installation date, push op-tin status, app/OS/SDK version.
* **API Key**: API key tied to the install. This can be your live or your dev API key.
* **Custom user ID**: Custom User ID set for the install. The field will be empty if no custom user ID is set.
* **Installation ID**: ID generated by Batch for the install when user opened the app for the first time.
* **Push Token**: Push token attached to the install. The field will be empty if Batch hasn't received any token yet for the install or if the token has been invalidated (e.g. uninstall).

On the right side, you will find the list of all the data collected for a specific install:

* **Native data**: app version, bundle ID, carrier code, city code, device brand/type, installation date, last location, and more.
* **Custom data**: You will find here the list of all the attributes, tag collections and events received from the SDK or the Custom Data API. You search a specific value in the list if needed.

The dashboard will display the most recent install first. Simply click again the "Debug" or "Reload" button to refresh the list of installs and update the attributes/events list.

#### Sending a Test Notification

Batch enables you to send a test notification to all the installs attached to the ID you are debugging. Click the **"Send Test Push"** button at the top of the installs list:

If you need to send push notifications to your device on a regular basis, then you should add your ID as a test device by clicking the **"Save as a test device"** button.

#### Debugging a Trigger Campaign

You can also see if a specific install is or has been in the user journey of a trigger automation. Click the ⚡️ lightning icon in the top right corner of the debug tool. This will show the list of trigger campaigns that targeted your install at some point.

For every campaign, you can see when your install entered the user journey and when/why it exited that user journey:

* **push\_done**: Batch sent a push to the install when the timer finished
* **cancel\_event**: Your user triggered the cancellation event before the timer finished.
* **stop**: The trigger campaign has been stopped before the timer was finished.
* **no\_pushtoken**: Batch tried to send a notification to the install, but it didn't have a token. This may happen if users didn't see the opt-in prompt yet or didn't turn off push notifications on iOS.
* **pushtokennot\_registered**: The token attached to the install was not valid anymore when Batch tried to push it. This usually happens when users reinstall or uninstall the app.
* **query\_mismatch**: The install was not matching anymore the targeting of the campaign when the timer finished.

#### Troubleshooting

There are several points you should check if you don't find any installs matching your advertising ID (IDFA/GAID):

* **App restriction**: Your app may not be able to collect advertising IDs. This happens frequently on iOS, especially if it doesn't displays ads.
* **Device settings**: Check your device settings to be sure you didn't turn on limited ad tracking in Settings → Privacy → Advertising.
* **Batch integration**: Make sure that the advertising id collection hasn't been disabled.

## Transactional API Debug Tool

Batch provides a simple debug tool that lets the list of all the targeted push tokens for any given API call to the Transactional API. Go to ⚙️ Settings → Debug, select "Transactional" and input the token generated by the API on each successful call:

The advanced analytics view gives you detailed information for a specific transactional push:

* **Sent**: The total amount of sent push notifications.
* **Not Found**: Number of Custom User ID or installation ID are not linked to any push token.
* **Undeliverable**: Number of push tokens that were flagged as invalid by Apple/Google. Your app may have been uninstalled.
* **Errors**: Number of APNS/FCM/WNS errors.

{% hint style="info" %}
Note that Debug is only relative to **Push v1**, which is siloed by platforms (iOS, Android, Web). CEP offers a richer cross-channel Profile view, described in Profiles section.
{% endhint %}


# Account Settings & Security

You can edit your account settings by expanding the menu in the top right corner, clicking on your initials.

## Basic Information

Allows you to edit basic information about your account such as your first name, last name and the email address used to login.

## Security

If the Single Sign-On (SSO) feature is disabled, you can edit here the settings related to the security of your account. Otherwise, you will see "Your security settings are managed by your organization".

### Password Modification

Use that part of the settings to change your password. If you don't remember your password, log our request for a password reset [here](https://batch.com/password-reset).

### Two-factor Authentication (2FA)

You can easily enable/disable Two Factor Authentication (2FA).

2FA adds an extra layer of security to your dashboard by asking for an auto-generated code from a second device each time you login. This protects your account in case your password is compromised.

Once enabled, Batch will generate a QR Code you will be able to scan with an authentication app and provide a list of recovery codes.

{% hint style="warning" %}
Make sure you print or save your recovery codes as this will be the only way to restore access to your account.
{% endhint %}


# Manage Team

Manage team allows full coordination of your team work on Batch.

<figure><img src="/files/JHaL9xRmer10w3HxfS2P" alt=""><figcaption></figcaption></figure>

## Manage Team

Team management is handled at the company level, by users with the **Administrate** permission. The **Manage team** page lists every member of your company with their authentication method, their permissions and the apps they can access, and shows how many of your seats are currently in use.

You can control access along three axes:

* **What a user can do** — the permissions granted to their account.
* **Which apps and projects they can see** — app-level access.
* **Which countries and languages they can address** — targeting restrictions.

### Managing permissions

Batch lets you set specific permissions at the user level to facilitate team collaboration. Permissions are cumulative: a user can hold several of them.

| Permission       | What it grants                                                                                                                                     |
| ---------------- | -------------------------------------------------------------------------------------------------------------------------------------------------- |
| **Administrate** | Full access to the company account: team members, user permissions, billing and company settings. An account can have more than one administrator. |
| **Review**       | Read-only access to the dashboard. Review users can browse orchestrations, templates and analytics, but cannot create, edit or launch anything.    |
| **App**          | Rights to edit and manage the projects and apps the user has access to, including in-app templates and themes.                                     |
| **Campaign**     | Rights to create, edit, launch and delete orchestrations — both Campaigns and Automations — across the channels enabled on the project.            |
| **Privacy**      | Rights to manage GDPR settings and handle data subject requests.                                                                                   |

{% hint style="info" %}
Permission names in this page match the labels shown in the dashboard. **Campaign** covers every type of orchestration, one-shot Campaigns as well as Automations.
{% endhint %}

{% hint style="danger" %}
To reinforce access control, the dashboard requires administrators to use **multi-factor authentication** for sensitive operations such as inviting a user or changing permissions. If your company has no MFA method configured, you will be asked to confirm with your password.
{% endhint %}

### Scoping access to apps and projects

A user with **Administrate** rights can grant another user access to a selected set of apps rather than to the whole account. The **Apps** column of the team list shows the current scope of each user.

Granting a user every app of a project gives them access to that project. This is how you make sure a team only sees the perimeter it is responsible for — one project per brand, per market or per business unit is the most common setup.

The user holds the same permissions on every app assigned to them.

To check who currently has access to a given app, open the Team tab in the settings of the corresponding project.

{% hint style="info" %}
Permissions cannot differ between the channels of a single project. A user has the same rights on the iOS, Android and Web apps of a project, and those rights automatically apply to the Email, SMS and Universal Channel orchestrations of that project.
{% endhint %}

### Authentication methods

The **Authentication** column shows how each member signs in — `Standard` for email and password, `2FA` when two-factor authentication is enabled on their account. Use it to check the security posture of your team at a glance.

Members enable two-factor authentication themselves from their own account settings. If your company uses Single Sign-On, sign-in is handled by your identity provider and security settings are managed by your organisation.

### Country and language restrictions

On top of project-level access, a user can be restricted to a set of countries and/or languages. Restricted users can only work on the part of your audience they are responsible for — typically local marketing managers in a decentralised organisation.

Once a restriction is set:

* **Visibility** — the user only sees orchestrations that target their authorised countries and languages, plus drafts that have no targeting defined yet.
* **Targeting** — in the targeting block, the user can only select the countries and languages they have rights on.
* **Guardrails** — the user cannot save or launch an orchestration that does not include at least one of their authorised values. A user restricted on both a country and a language must include both: a user restricted to France/French cannot address French-speaking profiles in Belgium.
* An orchestration mixing authorised and unauthorised countries is not visible to the restricted user.

{% hint style="info" %}
Country and language restrictions are configured by Batch. Reach out to your Customer Success Manager to have them set up for your team.
{% endhint %}

### Designing your governance model

Large or decentralised teams usually combine the three axes above:

* **Split by perimeter** — one project per brand, market or business unit, and project-level access granted accordingly. Assets (orchestrations, templates, segments, analytics) are naturally scoped to their project.
* **Split by market inside a shared perimeter** — a single project, with country and language restrictions to keep each local team within its own audience.
* **Open in read-only** — the **Review** permission for stakeholders who need visibility on what is being sent without the ability to change it.

{% hint style="info" %}
Your Customer Success Manager can help you map your organisation onto Batch and set up the right combination for your team.
{% endhint %}

## Troubleshooting

### I didn't receive my invite

Here are some suggestions to find the issue:

1. **Check your spam folder** and look for an email sent by <hello@batch.com>.
2. **Resend the invite**: Ask the administrator of Batch account to double-check the email address they used or resend the invite.
3. **Validation link**: If none of the above work, your manager can send you the confirmation link he will see after inviting you.

### I Get "\[Email Address] Is Already Registered On Batch.Com"

If one of your teammates already has a Batch account registered with his email address, he needs to contact our support team (<support@batch.com>) with the following information:

* Email address of his first account.
* Email address of the team he wants to join.

We will add him to your team with all the apps he created with his previous account.

### Can I Manage Several Accounts With The Same Email Address?

You cannot manage more than one account with the same email address.

If you have a Gmail account or use Google Apps, you can add a "+" at the end of your username to benefit from dynamic alias (e.g. <andrew+secondaccount@gmail.com>).

### How Can I Delete My Account?

Just ask us to delete your account at <support@batch.com>. Our team will let you know when it's done.


# Company Settings

Company settings encompass several Administrate right related elements.

## Company Name

You can edit here the company name that will be displayed in the dashboard of your teammates.

## Making 2FA Mandatory

Account administrators can require new and existing teammates to use two-factor authentication (2FA) when they sign into Batch.

## Reset API Key

Account administrators can reset the API key if needed, for example if it leaked in a chat conversation, by mistake. All services leveraging Batch APIs will have to get the new key after the reset.


# Plans & billing

Plans & Billing allows users to monitor volumes of message sent and Monthly Active profiles (MAPs) by Project.

<figure><img src="/files/g24WojbY78Mv9OMnF3mK" alt=""><figcaption></figcaption></figure>


# GDPR & privacy

This is where brands brands manage their GDPR settings and can see Data Processing Agreement document.

<figure><img src="/files/z0JwFYXLohBFsMPDKFel" alt="GDPR"><figcaption></figcaption></figure>


# Mobile Engagement Platform


# Analytics


# Audience

The **Audience** tab is the first screen you see when you click on the *Analytics* tab. It shows five basic metrics: Daily Active Users *(DAU)*, installs, starts, push and redeems.

These indicators are updated **on a 24h basis**.

<figure><img src="/files/9EB69BId3zz8KsQKLIS2" alt="audience tab"><figcaption></figcaption></figure>

## Selecting a date range

By default, the dashboard displays **one month** of data for the app you've selected. You can choose a custom date range in the date picker.

Batch can also show you the number of installs an app receives **hourly** *(UTC)*. All you need to do is select a time period *(no greater than 3 days)* in the date picker. This is a great way to find out at what times during the day your users are the most receptive.

Additionally, you can see how your userbase is distributed around the world in order to optimize your marketing strategies or decide in **which language** you should localize your next push notification.

The counters per region displayed on the map are calculated based on the data collected at the first application start. If the user's region changes overtime or is overwritten, the counters will remain unchanged.

## Interpreting your statistics

There are **5 metrics** you should check daily to see how your app is performing over time and measure the impact of your push campaigns:

**DAUS**

*"AVG DAUs"* stands for average number of **Daily Active Users**. It's a basic metric that shows the average number of users who open your app on a daily basis.

Pay attention to the evolution of your app's DAUs. They're a good indicator for seeing if the **involvement of your users** is increasing or if you need to send a push notification to re-engage them.

The **DAUs/Installs ratio** is also a basic indicator to measure the ‘stickiness’ of your app. Depending on the category of your app, this ratio can vary between 15% or 30%.&#x20;

**Installs**

Number of new installs over a period of time. Updates and reinstalls are considered as new installs.

Bear in mind that users coming from an older version of your app and upgrading to a version with Batch's SDK *(after a first release or a token import)* are considered as new installs.

**Starts**

Number of times the SDK *"starts"* in your app over a period of time. The SDK starts every time a user opens your app.

The starts/DAUs ratio can help you to measure the average number of sessions initiated by your users.

**Push**

Total number of marketing and transactional push notifications sent over a period of time. Click on the [Notifications tab](/getting-started/features/mobile-engagement-platform/analytics/notifications) if you want to see a full report on your push strategy *(global open-rate, global re-engage rate, etc)*.

**Revenue**

Income generated in your app. Make sure you are sending custom data on transactions to see this indicator.

**Uninstalls**

Number of invalid tokens deleted daily, based on the feedback received from the platform push services (e.g. APNS on iOS, FCM on Android, etc). Tokens are considered invalid when users uninstall the app or clear your website data (web push notifications only). Batch receives these feedback every time a token is targeted by a push campaign. You may notice an increased number of uninstalls on days when you send many campaigns, as Batch will receive more feedback from the push services.

**Rolling MAU**

*"MAU"* stands for **Monthly Active Users**. It shows the number of users who opened your app at least once in the last 30 days.


# Reach

The *Reach* tab shows how the reach of your push campaigns evolves over time. At a glance, you can see the total number of installs opt-in to push notifications and the number of new opt-in/opt-out installs every day.

## Global analytics

<figure><img src="/files/9tLXtnrQfK3hVj1dzjoi" alt="reach global"><figcaption></figcaption></figure>

Gives you valuable information on the volume of new installs opt-in to push notifications everyday. You can choose a custom date range in the top right corner if you want to analyse a specific period of time.

* **Total tokens**: Total number of installs with a token.
* **Total opt-ins**: Number of installs with a token opt-in to push notifications.
* **New opt-ins**: Number of new opt-in installs.
* **Opt-outs**: Number of new opt-out installs.

## Detailed stats

<figure><img src="/files/HgSKJvMZrDhkKlCSwF7D" alt="detailed reach"><figcaption></figcaption></figure>

The second part of the Reach analytics shows the same stats in a table. You can sort columns in ascending or descending order by clicking on the column header. This is helpful to find your best performing days.

You can export all your stats by clicking **Download CSV**.


# Notifications

The *Notifications* tab **centralizes the stats** on all the notifications sent from the dashboard or the API. At a glance, you can see how your messages perform over time to improve your push strategy. If you want to go further, you can easily export all your stats in **CSV format**.

Batch shows your notifications stats in two different categories:

* [Global analytics](#global-analytics): Average performance of your push campaigns. It shows the number of sent notifications, the open rate and more.
* [Detailed stats](#detailed-stats): Detailed stats on all your notifications, ordered by date and category.

## Global analytics

<figure><img src="/files/Rm8tExF4NoJZU2QoVXxp" alt="global notification analytics"><figcaption></figcaption></figure>

Gives you valuable information on the volume of notifications sent every day. You can choose a custom date range in the top right corner if you want to analyze a specific period of time.

* **Total push sent**: The total amount of sent push notifications.
* **Campaigns**: Number of notifications sent from the dashboard or using the Campaigns API.
* **Transactional**: Number of messages sent from the Transactional API.
* **Errors**: Number of APNS/FCM/WNS errors retrieved during the selected period of time.

You can also see the average performance of all your messages:

* **Open rate**: Indicates the percentage of users who opened your notification directly or indirectly. We calculate it as follows: direct opens + influenced opens / total sent notifications.
* **Direct**: Total number of users who opened your app by tapping the notification.
* **Influenced**: Total number of users who received a notification and opened your app within 3 hours.
* **Reengage rate**: The percentage of users reengaged out of the total push notifications sent during the campaign.
* **Users**: Users who received the notification and became engaged 3 days after receiving it.

## Detailed stats

<figure><img src="/files/4i2vjjheizoDL1nDrTTt" alt="detailed notifications analytics"><figcaption></figcaption></figure>

The second part of the Notifications analytics shows detailed stats of all your sent notifications:

* **Daily**: Day by day view of the campaigns and transactional notifications sent by Batch.
* **Campaigns**: List of all the campaigns sent from the dashboard or the campaigns API.
* **Transactional**: List of all the transactional notifications sent during the selected period of time.

You can sort columns in ascending or descending order by clicking on the column header. This is helpful to find your best performing campaigns and transactional push notifications.

### Exporting data

You can export all your stats by clicking **Download CSV**. The CSV file contains detailed information on your campaigns such as:

* **Date**: Send date of the campaign *(E.g. 2020/06/27)*.
* **Time**: Send time of the campaign *(E.g. 11:30)*.
* **Timezone**: Timezone setting used for the campaign *(now, GMT or local)*. See more on campaign scheduling [here](/getting-started/features/mobile-engagement-platform/push/timing-delivery).
* **Kind**: Type of notification sent, transactional or marketing.
* **Group or campaign**: Name or group\_id of the campaign *(E.g. new\_follower)*.
* **Sent**: Total number of sent notifications.
* **Direct open**: Total amount of direct opens.
* **Influenced open**: Total number of influenced opens.
* **Reengaged users**: Total number of reengaged users.
* **Errors**: Total amount of APNS/FCM errors.


# Troubleshooting

If you are having trouble understanding why Batch is not showing correct data for your app, here are some suggestions.

## I’m not seeing any data on my dashboard

If Batch is not showing any data on your dashboard, here are some suggestions to find the issue:

* **24h delay**. Keep in mind that installs, DAU, starts and redeems are updated on a 24h basis.
* **Integration issue**: If you still don't see any stats for your app 24h after changing the API key, you should follow again the basic setup of the SDK.

## The number of installs is too low after my first update with Batch

This can happen for several reasons:

### **First session**

Your users need to open the app once after updating it to a version built with Batch. Batch will place them in the NEW segment and retrieve their device token so you can send them a message right away.

The number of installs/push tokens will increase progressively the first week, as your users migrate and make their first session.

### **Token imports**

If you’re coming from another push provider, you may need to import your push tokens and send a notification to your old users to accelerate the transition. Make sure you don't target the new segment the week following the integration of Batch in your app.

## The number of installs is different from my other tools

The reason data on Batch and your usual analytics tool or app store analytics may differ slightly, is that Batch may use different methodology and metrics to process and display the stats *(timezones, data collection method, etc)*.

If the difference is too big be sure Batch runtime is integrated correctly.

{% hint style="info" %}
Feel free to ping us at <support@batch.com> or if you have any other questions on your analytics.
{% endhint %}

## I'm wondering how often are the analytics refreshed

### Audience tab <a href="#audience-tab" id="audience-tab"></a>

The Audience tab is the first screen you see when you click the *Analytics* tab ([more information here](https://batch.com/doc/dashboard/analytics/overview.html)). Daily Active Users, installs, starts and the revenue shown on the Overview tab are refreshed daily, at 12:00 PM GMT.&#x20;

### Notifications tab <a href="#h_74a6b239cb" id="h_74a6b239cb"></a>

The analytics shown on the Notifications tab is refreshed in real-time for the current day.

Note that the reengage rate and the repartition between influenced and direct opens are based on an estimate, which is recalculated within a few days after the campaign has been sent.

### Userbase tab <a href="#userbase-tab" id="userbase-tab"></a>

The userbase tab gives you a complete overview of your current userbase ([more information here](https://batch.com/doc/dashboard/userbase.html)). There are two kinds of data displayed on the Userbase tab:

### Basis statistics <a href="#basis-statistics" id="basis-statistics"></a>

The number of installs and tokens are refreshed in real-time:

<figure><img src="https://downloads.intercomcdn.com/i/o/1078116572/ca3d68d1e1b37c0fb110f875/CleanShot+2024-06-11+at+12_08_48.png?expires=1742485500&#x26;signature=8c722b0e3eed45a7b2421949305bfc7dd19780773bd843b02944637a68a6c042&#x26;req=dSAgHsh%2Fm4RYW%2FMW1HO4zbqQifkdWQNQTQCzSt%2FlybX6hElFofijx%2FRU8fhj%0AxThfk06%2FUd%2FD0oe1ONQ%3D%0A" alt="userbase"><figcaption></figcaption></figure>

### Native and custom data <a href="#native-and-custom-data" id="native-and-custom-data"></a>

The data is refreshed daily, at 12:00 PM GMT. Please note new custom attributes sent from the Custom Data API may take up to 24h to appear on the dashboard.

<figure><img src="https://downloads.intercomcdn.com/i/o/1078117273/6a0cfa74dfaad801afd99131/CleanShot+2024-06-11+at+12_09_37.png?expires=1742485500&#x26;signature=3620f2eee7b0e0cc02711f84975abde1dfa4c9fee5a22294179f7e90c53f4345&#x26;req=dSAgHsh%2FmoNYWvMW1HO4zbmfa4171p%2F9HfnxChnjBe3lxubRAITvly6pRZQq%0AZc9u33BFNLppu4LXGdM%3D%0A" alt="native et custom data"><figcaption></figcaption></figure>


# Userbase

The userbase tab gives you a complete overview of your current userbase, allowing you to elaborate new push strategies and understand how to best engage with your users.

There are three kind of information you can see on your userbase:

* [Basic statistics](#basic-statistics): Total number of users, opt-in rate, etc.
* [Smart Segments](#smart-segments): Distribution of your users in Batch Smart segments.
* [Native and custom segments](#native-and-custom-attributes) statistics.

{% hint style="danger" %}
Newly tracked attributes, tags and events are hidden by default. You will need to manually display them from the dashboard "Custom data" tab located in Settings section.
{% endhint %}

## Basic statistics

<figure><img src="/files/bMqqF3HC5hXpwMxPvcga" alt="basic userbase"><figcaption></figcaption></figure>

There are **4 metrics** you should check to see how your app is performing:

### **Installs**

Total **number of installs** of your app since you released it with Batch SDK. This number includes users who still have your app on their device or who already uninstalled it.

{% hint style="info" %}
The number of users is updated in real time.
{% endhint %}

### **Opt-ins**

This is the percentage of users **who have opted-in** to push notifications in your app or website.

**Number of tokens**

Appears on hover on *"Opt-ins"*. The interpretation of this metric differs from an OS to another:

#### **Android**<br>

On Android, Batch retrieves automatically the token of your new users. Users who have a token are users who **still have your app** on their device.

#### **iOS**

On iOS, the token collection can depend on the *background refresh*. You can go in Xcode and see if *"Remote notifications"* is checked as a background mode in your app's Capabilities to see if it's enabled.

* **If enabled**: Batch collects tokens for all your users, even for those who choose not to receive push notifications. In this case, users who have a token are also users who have your app on their device.
* **If disabled**: Batch only collects tokens for users who opt-in for push notifications. In this case, users who don't have a token are users who didn't accept notifications or uninstalled your app.

Please note that users can disable background refresh for your application so these stats may be imprecise.

## Smart Segments

<figure><img src="/files/vDXSWjcrzscHJm5k1I0q" alt="smart segments"><figcaption></figcaption></figure>

Smart Segments are automatically created by Batch using **a proprietary algorithm**. They let you visualize precisely who is using your app, and who is not, who is buying your product, and who is churning away.

Our **algorithm** analyses the sessions of your users from the moment they install your app and put them in 4 different segments. Here is a short definition of every segment:

* **New**: Newcomers to your app that haven't yet established themselves as engaged, lasting users.
* **Engaged**: Congratulations! These users are actively using your app.
* **Dormant**: These promising users haven't used your app in a while. Reengage them!
* **One-time**: Users that have had your app for a while but have only opened it once.

We are also showing the predictive and intermediate Smart Segments that our algorithm calculates:

* **Risky Engaged**: Users with a high risk of becoming dormant in the next days if you don’t re-engage them with a targeted notification.
* **Promising New / Dormant** users: Users who are about to become engaged. Don’t miss the opportunity to send them a message!

Batch also shows the number of **imported tokens** who haven't been reintegrated to Batch Smart Segments yet.&#x20;

{% hint style="info" %}
You will find more information on Smart Segments targeting  [here](/getting-started/features/mobile-engagement-platform/push/user-targeting).
{% endhint %}

## Native & Custom attributes

Batch's userbase analytics also allow you to see how your users are distributed in the different segments of your app.

### **Native attributes**

<figure><img src="/files/AiuBXepplNHOsF3j1aop" alt="attributres custom et natives"><figcaption></figcaption></figure>

These segments are built automatically using data from users’ devices. This data is very practical to:

* **Region / Language**: Localize the content of your push notifications in a specific language.
* **Custom user identifier**: See how many users are logged in in your app.
* **OS version / App version**: Invite your users to update your app if an important part of your userbase is still using an old version.
* **Device type**: Keep supporting an old model of Android/iOS device.
* **Mobile carrier**: Know which carrier are using your users.
* **Custom identifier**: Know how many users have a custom ID. This may be useful for apps with login walls or that require an account to make significant actions *(purchase, etc)*.
* **City**: Know in which city most of your users are living. Batch uses Wi-Fi-based geolocation to find the city of your users.

{% hint style="info" %}
See [here](/getting-started/features/mobile-engagement-platform/push/user-targeting) to know more on Batch native attributes.
{% endhint %}

### **Custom data**

<figure><img src="/files/ZKTh0wSr7GawjCTbpea7" alt="custom data"><figcaption></figcaption></figure>

Batch allows you to create your own segments based on custom data *(attributes, collections of tags and events)*. This is useful to see what your users are **doing in your app**, which feature they are using the most and more.

All you need to do is to tag your app first. Then you will be target these specific segments from the dashboard or the API.&#x20;


# Push


# Naming and labelling

### Naming your campaign

After you have set up your app to send push notifications, you can click the "Push" tab and choose **New Push Campaign** to send your first push notification.

The first step in creating a campaign is to give it a name. Keep in mind that it is how you are going to be able to distinguish it from the many others you are going to create, so try to be as specific as possible.

### Adding a label

You can simply attach **up to 3 labels** to a campaign via the **Associate labels** button.

Labels have two main purposes:

* **Marketing pressure limit**: You can set a specific marketing pressure limit on all the campaigns attached to the same label *(e.g. no more than 1 push a week for all campaigns using the "onboarding campaigns" label)*.
* **Filtering**: You can filter your campaigns list based on the labels attached to your campaigns *(e.g. "onboarding campaigns")*:

In case you are using **Batch's APIs**, you can also attach one or several labels to a campaign created from the Campaigns API or to notifications sent from the Transactional API.


# User targeting

This is where you make all of your targeting selections and decide the audience of your push campaign.

## Adding conditions

Click the **"Add conditions"** button to see the list of native and custom conditions you can add to your campaign. By default, if you don't select any group, Batch assumes you intend to target your **whole audience**.

<figure><img src="/files/Gr0X70VQA7mLH1gJ49uC" alt="targeting"><figcaption></figcaption></figure>

You can organise your conditions into subgroups. This allows you to use different **AND & OR operators** between each group of conditions. You can add up to 31 target conditions and up to 64 values in each target condition.

## Smart Segments

Smart Segments are automatically generated by Batch from the moment the SDK is implemented in your app. They allow you to take action on your userbase in a meaningful manner, based on their engagement level.

<figure><img src="/files/zdSnixj6ucBc1L3F2oWr" alt="smart segments"><figcaption></figcaption></figure>

### **New**

The **NEW** segment contains **newcomers** to your app that haven't yet established themselves as engaged, lasting users. They're still trying to understand what your app can do for them or how amazing your game is.

Don't overwhelm them with information they don't need or repetitive notifications. Use Batch to **welcome them** and present them with the features they may need to discover in order to engage them from the start. E.g. *Send a welcome push notification to New users only (1 daily recurring push campaign with a capping of 1).*

### **Engaged**

Users of the **ENGAGED** segment are your **regular users**. They open your app frequently, they enjoy it the way it is and know exactly why they're using it. For all these reasons, they are the most receptive users you have and you want to keep them engaged.

Don't bother them with random push notifications to promote basic features of your app or to remind them to come back. They already do. Communicate the aspects of your app **they probably don't know** about yet, make them discover new features after an update or show them you care about them with special offers. E.g. *Automatically send your users a notification when they become Engaged (1 daily recurring push campaign with a capping of 1).*

### **One-time**

One-timers are users who **did not come back** after they first launched your app. They probably didn't understand what your app can do for them, installed your app and forgot to come back or they just didn't want to go further if your app has a login. Still, they might come back in the future if you send them the right message.

Don't send them notifications too often asking them to perform a specific actions in your app. They probably don't care. Focus on **what they probably miss** or they can obtain from using your app. E.g. *Entice One Time users to come back with a weekly notification (1 weekly recurring campaign for one timers with capping).*

### **Dormant**

Dormant users were 'engaged' at one point, but have not launched your app for a long time. They're basically **not using it any more**, but they still remember it and probably why they installed it.

Don't just ask them to come back. **Give them a good reason** to start using your app again such as new features, a special offer or anything showing that you've improved since their last session. E.g. *Re-engage Dormant users with a weekly notification (1 weekly recurring campaign for Dormants and no capping)*

### **Imported**

The imported segment contains all the push tokens we have imported if you **migrated from another push provider**. These users will be progressively analyzed and transferred to other segments after their first session.

{% hint style="info" %}
Note that we are also showing the predictive and intermediate Smart Segments that our algorithm calculates:

* Engaged risky: Users with a high risk of becoming dormant in the next days if you don’t re-engage them with a targeted notification.
* New promising / Dormant promising users: Users who are about to become engaged. Don’t miss the opportunity to send them a message!
  {% endhint %}

## Custom Audiences

Custom audiences allow you upload **static segments** exported from your userbase *(e.g. top 500 buyers, etc)* or created by third-party tools. You can easily retarget these custom audiences with a push or an In-App campaign from the dashboard. You can easily create a custom audience from the dashboard settings or using the Custom Audience API.

Either you are editing a push or an In-App campaign, you can select a custom audience from the campaign editor:

<figure><img src="/files/o6x6SqyqCoo7YDWuT5gK" alt="custom audiences"><figcaption></figcaption></figure>

You can also use the *"Custom audience"* attribute. Click the *"Add conditions"* button, then go to the *"Native attributes"* tab to find it. This is useful if you are planning to include a custom audience in complex segmentation with different operators (AND/OR). You can also use it to **target or exclude** up to 3 different custom audiences.

## Countries and languages

Batch automatically detects the country and the language of your users. This allows you to easily **limit the range of your push campaign** to one or several countries/languages with only one click from the dashboard. No need to segment your database yourself.

<figure><img src="/files/tvI0tlZLnSSiiPKWf7JU" alt="country languages"><figcaption></figcaption></figure>

### Countries targeting

You can leave this section blank to target globally, or you can specify your grouping of countries by using the drop-down menu or typing. There is no limit to the number of countries you can select.

### Languages targeting

Leaving this section blank will target all languages and increase the reach of your campaign. If you don't have a message in the language of a user *(e.g. Japanese)*, Batch will deliver the message in the **default language** of your app. You can check the default language of your app in ⚙ Settings → General.

If you only want to send a notification to users speaking a specific language, then you can target them here. It may be useful if you want to target a **multilingual country** and you only have a message in one language.

Here are a couple of examples:

* **Belgium**: Dutch, French.
* **Canada**: English, French.

## Native attributes

Native attributes allow you to target users based on data the SDK collects automatically. Several conditions can be set in the same campaign and with different operators *(equals to, lower than, greater than, etc)*.

<figure><img src="/files/hC1ekYy4EOCam1tVVc7H" alt="native"><figcaption></figcaption></figure>

### **OS / app version**

These attributes allow you to target a specific OS/app version to send **update reminders** and more. All you have to do is to select the OS or the app version you want to target in the dropdown menu:

### **OS / Browser model**

*Web push only* These attributes allow you to target a specific OS/Browser model.

### **Device type**

On **iOS**, the device type attribute value must be a valid model name *(e.g. iPhone8,1, iPad2,1, etc)*.

On **Android**, the device type value must be the name of a valid device. A list of all the devices supported by the PlayStore [is available here](https://support.google.com/googleplay/answer/1727131?hl=en-GB). Make sure you chose a value in the *"model"* column *(e.g. SM-G900H)*.

### **Device category**

This attribute allows you to target users depending on their device category : mobile or desktop. Note: tablets belong to the mobile category.

{% hint style="info" %}
This is *Web push only*
{% endhint %}

### **Installation date**

Allows you to target users based on the number of hours / days elapsed since the install. The days are counted in sections of 24 hours from the hour of install.

With this attribute you can easily create several onboarding campaigns, sent several days after the install *(e.g. D +1: Welcome message / D +3: Recommend a feature / D +8: Rate the app)*.

{% hint style="info" %}
Recommendation: Users coming from an older version of your app and upgrading to a version with Batch's SDK *(after a first release or a token import)* are considered as new installs. If you are planning to use this attribute to send 1-3-7 days post-install notifications, we recommend that you wait at least 7 days to make sure you only target your new users.
{% endhint %}

### **Last push date**

The last push date attribute allows you to target users according to the last date they received a push via the dashboard or the Campaigns API. The days are counted in sections of 24 hours from the hour of last push. This is especially useful if you want to avoid bothering users that have already received a push from you lately.

### **Last visit date**

The *Last visit date* attribute allows you to push users based on the time elapsed since their last visit. The days are counted in sections of 24 hours from the hour of the last visit. This is useful to reengage users who haven't opened the app for a while.

### **Mobile carrier**

Allows you to target users based on the mobile carrier they use. The code shown next to the carrier name is a combination of the *Mobile country code (MCC)* and the *Mobile network code (MNC)*. The full list of MCC and MNC codes is [available here](https://en.wikipedia.org/wiki/Mobile_country_code).&#x20;

{% hint style="info" %}
Please note that some mobile carriers may have several MCC+MNC codes.\
This attribute is not supported on iOS 16.4 and higher.
{% endhint %}

### **Has custom user ID**

Allows you to target users who  have a custom user identifier. Apps with login walls or that require an account to make significant actions *(purchase, etc)* can use this option to increase the number of logged in users.

### **Transactions tracked**

The Transactions Tracked attribute allows you to target users who already have or haven't made any purchases in your app yet. This is useful to improve your onboarding process if you have an mcommerce app.

{% hint style="info" %}
Make sure you are sending custom data on transactions to use this attribute.
{% endhint %}

### **City**

The "City" attribute allows you to target your users based on the city Batch guessed for your users using IP-based geolocation. Data is refreshed every time your users open your app or visit your website.

The accuracy of IP-based geolocation varies depending on the network connection of your users. The detection tends to be more accurate if users are connected to a Wi-Fi network. You can test the accuracy of the detection by checking the value Batch has on your install using the debug tool.

### **Last location**

The last location attribute allows you to send contextual push notifications to users who have been detected in a specific area using their GPS location. All you have to do is to type an address and adjust the size of the targeted area (in meters). Data is refreshed every time your users open your app.

{% hint style="info" %}
Do not request GPS location in your app to track it exclusively with Batch. The geolocation authorization needs to be asked for a legitimate purpose, related to a feature of your app (e.g. store locator, route calculation, etc). For the last location attribute to be operational, you need to share the GPS location collected by the app to Batch using the native methods of the SDK ([Android](/developer/sdk/android/profile-data/events#tracking-user-location) / [iOS](/developer/sdk/ios/profile-data/events#tracking-user-location)).
{% endhint %}

### **Retarget audience / opens**

You can easily retarget or exclude users based on the push notifications they have received or opened recently. This will work for any campaigns created from the dashboard or the Campaigns API over the last 14 days.

#### **Retarget Push Audiences**

The *"Retarget audience"* attribute allows you to retarget or exclude users who have *received a notification* from a specific push campaign.

You can use that condition to retarget users who have recently received a push containing a coupon code and forgot to use it. This is also useful if you want to target all your userbase, except users who were targeted by a specific campaign targeting a [custom audience](#custom-audiences) for example.

#### **Retarget Push Openers**

The *"Retarget opens"* attribute lets you retarget or exclude users users who have *opened a notification* coming from a specific push campaign.

This is helpful if you want to communicate with users who show interest for a certain type of content. You can also use that attribute to avoid bothering users who are not opening your notifications.

#### **Retarget In-App Viewers**

The *"Retarget In-App Viewers"* attribute allows you to retarget or exclude users who have *seen* an In-App message from a specific In-App or push campaign.

You can use that condition in your push campaign to exclude users who have seen your In-App message for example.

### Custom attributes

With Batch you can **track events** and **assign custom attributes** to your users in order to send contextual notifications.

<figure><img src="/files/ejwWB8VR60HjYUpsrtqz" alt="custom install"><figcaption></figcaption></figure>

{% hint style="warning" %}
Newly tracked attributes, tags and events are hidden by default. You will need to manually display them from the dashboard settings > ["Custom data" tab](/getting-started/features/customer-engagement-platform/profiles/custom-data).
{% endhint %}

#### **Attributes**

Attributes can **define users** based on their settings *(signup\_date, etc)*, user profile *(user\_city, user\_gender, etc)* or their current status *(nb\_remaining\_credits, etc)*. They can contain different type of data *(string, number or decimal, boolean, date)*.

You can use custom attributes to:

* **Improve your onboarding flow** *(e.g. "Post a comment and be part of the events" if has\_commented is false)*.
* **Optimize your inapp content sales** *(e.g. "Hurry! 40% off on our coins packs!" if nb\_remaining\_coins < 5)*.
* **Target the right users** *(e.g. "Free delivery today for our London users!" if user\_city is "London")*.

#### **Tag collections**

A tag is a **collection of strings**. Tags may be called *Channels* or *Topics* with other push providers. The difference is that Batch attaches a *"tag"* to your user and will only make the list of users once you have created your campaign on the dashboard or from the API.

You select several tags and use an AND/OR operator. This allows you to segment your userbase based on:

* **Users interests**: You can use a tag collection to know what your users' favorite brands/items/etc are and send them contextual notifications.
* **Thematic opt-in**: You can also use them to manage thematic push optin in your app.

#### **Events**

Events allow you to target your users based on **how they interact** with your app *(read\_article, play\_video, follow\_user)*. Every event has a key, an occurence date, an optional label, and an optional data object.

You can use events to:

* **Entice users to come back** *(e.g. "3 news you cannot miss this week!" if they haven't read an article over the last 7 days)*.
* **Invite your loyal users to share your app** *(e.g. "Enjoying the app? Invite your friends to unlock a special character" if they never invited friends)*.
* And many more, depending on your app and your tagging plan.

## Potential Reach

The potential reach indicator shows you the **approximate number of users** who are going to receive your message, based on your current targeting options.

<figure><img src="/files/PvmWcMLNbFSBb1p3z7CH" alt="estimated reach"><figcaption></figcaption></figure>

It gives you a good idea of the impact your push campaign will have and helps you to understand how relevant your targeting is.

You can also see the percentage of **users who have opted in** to receive push notifications by hovering the number of targeted users.


# Timing & delivery

<figure><img src="/files/yWmiLByx1rV06Ah4W6D5" alt="when"><figcaption></figcaption></figure>

Batch handles all the tricky **scheduling and timezones issues** for you. Our technology makes sure your users always receive their message when you want them to, whether it's a hot news, a scheduled announcement or a **recurring message**. Simply choose the time, select a few simple options and forget about it. We’ll take care of the rest.

There are several options to choose from:

* **Now**: Use it to send your notification as soon as you click the "SEND" button.
* **Scheduled**: Select that option to schedule a campaign in the future based on your users' local time or on global time (UTC).
* **Recurring**: Create push campaigns that repeat at specified intervals based on your users' local time or on global time (UTC). This is handy for long term automated campaigns or expiry alerts.
* **Trigger**: Trigger campaigns allow you to send push notifications after users installed the app or triggered an action (e.g. add to cart, etc). Use that option for all your abandoned cart and onboarding scenarios.

## Now

Send a push notification instantly to your users **regardless of their timezone**. This is the best option if you work in the media and want to **be the first** to announce breaking news.

E.g. *“Royals beat Mets in Game 1 of World Series, 5-4 in 14 innings. Game 2 is Wednesday night.”*

<figure><img src="/files/qyjc3hy0jMmn1ioCe1tE" alt="now"><figcaption></figcaption></figure>

{% hint style="info" %}
Note that a push notification cannot be stopped after sending. Carefully verify its timing, content and targeting.
{% endhint %}

## Scheduled

The Scheduled option allows you to reach your users **at a specific time** in the future. You can schedule a push notification based on:

<figure><img src="/files/y2lGUHLDMLBz8bflskE8" alt="scheduled"><figcaption></figcaption></figure>

### **Local time**

The **Local Time** option lets you send a push notification that will be received at the same hour in every country. This ensures that marketing efforts target your users **at a uniform time**.

When you choose a specific date and time, Batch will send the first notifications at the chosen time starting with users just west of the International Dateline *(GMT+12)* and each hour afterwards for 24 hours until the conclusion of the campaign.

For example, if your push campaign is scheduled to be sent on Friday, July 19th at 6pm, your American, French and Chinese users will receive it on Friday, July 19th when it's 6pm in their country.

#### **Safety net**

If you set a **specific date and time** and the date/time you've selected has already passed for a particular time-zone, the campaign will not deliver a push to the users within that time-zone unless they are within 30 minutes of the campaign start time.

This **safety net** will catch any users that might have been missed and deliver the push, though you should avoid setting last-minute campaigns, as they could be delivered at undesired times.

#### **Stopping a push campaign**

**Stopping a local time based campaign** only cancels it for users located in timezones that have not yet reached the scheduled sending time. For example, if the push campaign is scheduled for 2PM (local time) and is canceled at 3PM UTC, a targeted user located in the US (UTC-4) will not receive that campaign.

### **Global time (UTC)**

The **Global Time (UTC)** option allows you to send a push notification to your users **at a specific UTC time** regardless of their location.

For example, if your push campaign is scheduled to be sent on Friday, July 19th at 6pm **global time (UTC)**, *your users will receive it:*

* *At 2PM in the US (UTC -4)*
* *At 8PM in France (UTC +2)*
* *At 2AM on July 20th in China (UTC +8)*

{% hint style="info" %}
Note that a **global time (UTC)** push notification cannot be stopped after sending. Carefully verify its timing, content and targeting.
{% endhint %}

## Recurring

You can create push campaigns that **repeat at specified intervals** based on your users' local time or on global time (UTC). You can also use a capping to limit the number of times users receive a recurring push notification.

<figure><img src="/files/GKCMtqXrswefOzAPqmcW" alt="Recurring"><figcaption></figcaption></figure>

Depending on the recurrence you choose, you can send two different types of notifications:

#### **Retention notifications**

Sent every week/month to your inactive users. You can either target specific Smart Segments or use the Last visit date native attribute.

You can send a notification every weekend to the users in the Dormant segment, with a capping of 3 to make sure you don't overpush them.

#### **Onboarding notifications**

Sent automatically at a specific moment, depending on:

* [**The installation date**](#installation): Allows you to create a complete onboarding flow with notifications sent on day 1, 3, 7 after the install.
* **The last visit date**: Recommended if you want to push users who are becoming dormant *(e.g. 10 days after the last visit)*.
* [**A custom attribute**](/getting-started/features/customer-engagement-platform/profiles/custom-data): To create push scenarios based on custom data. Example: Automatically push users who haven't made a purchase in 20 days.

Onboarding notifications should be sent everyday, with a capping of 1. This will make sure the notification is sent at the right moment for each user, and only once. Please note that your campaign capping will not work if you target the **Imported** segment.

{% hint style="info" %}
**Frequency capping**: We recommend you set a global frequency capping if you want to limit the number of notifications a device can receive in a customisable time frame.
{% endhint %}

## Trigger

The trigger option enables you to send a notification from one minute to several days after users have installed the app or triggered an action in the app.

Trigger campaigns are useful to manage a wide variety of use cases, from simple welcome notifications sent shortly after users install the app to advanced abandoned cart alerts.

<figure><img src="/files/iIvOwPsIjQMDmhTJ8j2N" alt="trigger"><figcaption><p>Trigger</p></figcaption></figure>

### Understanding How User Journeys Work

To enter the user journey and receive a push notification from a trigger campaign, users need to:

1. **Trigger**: Trigger the event specified in the campaign (e.g. add to cart). Users immediately exit the user journey when they trigger the cancellation event (e.g. checkout).
2. **Timer**: Wait until the timer set in the campaign is finished. The timer will be reset if users perform again the trigger action (Unless the [multi-trigger mode](#multi-trigger-mode) is activated).
3. **Targeting**: Finally, match the targeting set in your campaign when the timer is finished.

<figure><img src="/files/Aus35dA4SszxvzRxwhxm" alt="trigger schema"><figcaption><p>User journey diagram</p></figcaption></figure>

Users may enter the user journey again after receiving a push notification if they trigger the right event later. They will receive another notification depending on the frequency capping limit and the grace period set in the campaign.

You can see how many users are still waiting for the timer to finish or why they exited the user journey from the campaign analytics.

### Setting Up a Trigger Campaign

#### **Choosing a Trigger**

The trigger action is the most important part of your campaign. Some trigger events are available by default, or you can use custom events.

#### **Installation**

The "Installation" trigger is available by default on **iOS and Android campaigns**. Users trigger it when they open the app for the first time.

**Important note:** Use the “Installation” trigger only for campaigns **without any additional targeting conditions** (e.g. “Country” = “UK” or “Has custom user ID” = “false”). As user data might not be saved on Batch side yet when the “Installation” trigger occurs, users might not enter the journey of the campaign.

#### **Installed then opted-in**

The "Installed then opted-in" trigger is available by default on **iOS and Android campaigns**. Users trigger it when they opt-in to push notifications within 24 hours after they opened the app for the first time.

The Installation date is attached to the native event "Installed then opted-in", you can use it to define the Push timing (see below).

#### **Subscription**

The « Subscription » trigger is available by default on **web push campaigns** starting with version 3 of the Web SDK. Users trigger is when they opt-in to push notifications on your website.

**Important note:** Use the “Subscription” trigger only for campaigns **without any additional targeting conditions** (e.g. “Country” = “UK” or “Has custom user ID” = “false”). As user data might not be saved on Batch side yet when the “Subscrption” trigger occurs, users might not enter the journey of the campaign.

#### **Custom Events**

You can choose any events that have been tagged in your app during the integration of the SDK. You can also apply filters to your event based on any additional data that is attached to it (Label, Attributes, Tag collection) if you want to trigger the notification on a specific action.

<figure><img src="/files/cnaDS7AjI20wVS1m8oxm" alt="Trigger Event Filters"><figcaption></figcaption></figure>

#### **Setting the Timer**

The push timing can be set to « Immediately » meaning the push would be sent right after the trigger event is tracked or it can be based on a timer. The timer defines the time interval in minutes, hours or days to wait for receiving a notification. Batch will wait this amount of time from the chosen trigger date which can be either the **date of the event** or a **custom date** attached to the event (ex: send a push notification 1h before or after a said date).

The minimum push timing is **1 minute** and maximum push timing is **30 days**.

![Trigger timer options](/files/X0mwteRr4OZ6KkumerP5)

#### **Cancellation Event**

You can add one or several cancellation events. Users who trigger one of the cancellation events before the push is sent will exit the user journey and won't receive the notification. You can use an event tagged in your app and apply filters based on additional event data too (Label, Attributes, Tag collection).

#### **Frequency Capping / Grace Period**

The **frequency capping** allows you to limit the maximum number of times an install with a token receives a notification. This is useful to avoid overwhelming your users with the same message.

Use the **grace period** to set a period of time in days or hours during which new trigger events will be dismissed after a notification has been sent to the same opt-in install. This is handy to avoid sending too many messages to users too close together.

{% hint style="warning" %}
If the [multi-trigger mode](#multi-trigger-mode) is activated, the frequency capping and grace period settings will not be applied to the total number of notifications sent by the campaign. It will be applied individually to each user journey (e.g. trigger a maximum of 2 notifications with a minimum delay of 10h between each notifications, for each item added to the cart).
{% endhint %}

#### **Start / End Date**

You can schedule the start and the end date of your trigger campaign based on:

* **Local time**: Batch will take into account the timezone of your users to start/end the campaign.
* **Global time**: The campaign will start/end at a specific time (UTC) regardless of your users' timezone.

#### **Multi-trigger mode**

By default, if the user fires multiple times the trigger event of the campaign, the timer of the campaign will be reset.

You may want to parallelize journeys, and allow the user to trigger several times the same campaign. You can do that by activating the multi-trigger mode.

The multi-trigger mode allows you to schedule a push for each time the user fires the trigger event with a new ID (e.g. Trigger a push for each trip booked by the user on the app based on the trip ID). This ID must be one of the attributes attached to the event or the event label and can only be a **String**.

<figure><img src="/files/QcM0EbD8udDylacEN8JS" alt="Mutil-trigger Mode"><figcaption></figcaption></figure>

{% hint style="info" %}
If the [multi-trigger mode](#multi-trigger-mode) is activated, only cancellation events with the same ID as the trigger event can cancel the trigger.
{% endhint %}

### Modifying a Running Trigger Campaign

Here is everything you need to know before modifying the targeting or the user journey of your trigger campaign.

#### **Modifying the Trigger**

**Trigger event**: Users who performed the trigger event before you modified it will remain in the waiting queue.

**Cancellation event**: The new cancellation event will be taken into account immediately, even for users who are already in the waiting queue.

#### **Modifying the Timer**

**Increasing the Timer Duration**: Batch will apply the new timer duration for users who are already in the waiting queue and for new users entering the user journey.

**Decreasing the Timer Duration**: Batch will only apply the new timer duration for new users entering the user journey. Users who were already in the waiting queue will receive a notification based on the previous timer duration.

#### **Modifying the Targeting**

Users will remain in the waiting queue even if you modify the targeting of your campaign. They will exit the user journey if they don't match anymore the targeting of the campaign once the timer is finished.

#### **Modifying the Frequency Capping Limit**

The new frequency capping limit will be applied immediately to users who enter the user journey.

Regarding users who already received several push notifications from your campaign, Batch will apply the new capping limit the next time they enter the user journey.

E.g. If your trigger campaign had a capping limit of 5 push notifications and you change it to 3, users who have already received 3 notifications and are currently in the user journey will receive one last notification.

The new frequency capping limit will be applied the next time they enter the user journey. They will not receive another notification from that campaign as they already reached the limit.

### Using Trigger Campaigns

Trigger campaigns are useful to manage a wide range of use cases such as:

#### **Onboarding Campaigns**

Triggered a few minutes/hours after the first session of the user or up to 7 days later.

<figure><img src="/files/tqcyzFwkLNO0eaeoX3oq" alt="onboarding"><figcaption></figcaption></figure>

Make sure the first notification you send to your users is relevant and brings value to the user :

* **If you have an e-commerce app**, you can onboard your new users with a welcome promocode and/or direct them to the list of your most popular items.
* **If you have a media app**, you can direct them to the list of trending articles or invite them to test your premium subscription for free.
* You can also **focus on important actions** users need to take to fully enjoy your app and services: create an account, personalize their feed, etc.

#### **Abandoned Cart Alerts**

Trigger campaigns are handy to manage all your abandoned cart use cases. This applies perfectly to all your e-commerce use cases. E.g. alert users 30 minutes after they added an item and didn't place an order) and to a variety of other scenarios.

<figure><img src="/files/bTYSvx7IASVm5KPkmAaE" alt="cart abandonment"><figcaption></figcaption></figure>

Following the same logic, you can use trigger campaigns to alert users who left the app while they were in the middle of something important:

* **Medias**: send a reminder to users who have checked your paywall but haven't subscribed yet.
* **Finance/services**: alert users who have left the app without validating a step of the account creation (e.g. document upload for identity confirmation, etc) or who were about to subscribe to a new product and haven't validated the subscription yet.

#### **Update Reminders**

This can be done in two steps if you need to invite users to update to a major new version of your app (e.g. redesign, new features, breaking change or new subscription model).

**Targeting**: Add the app version condition in the targeting part of your campaign. In this case, we will use the app version attribute to target all users who are using a version anterior to version 1.18 of the app.&#x20;

**Scheduling**: Pick an event that users should trigger in almost any session (e.g. read article, checked\_item, etc).&#x20;

#### **Interest-based Campaigns**

Using an [In-App Campaign](/getting-started/features/mobile-engagement-platform/in-app-messaging) may be more appropriate to manage that kind of use cases, but you can also use a trigger campaign to recommend products and additional content to users based on their last action:

* **Ecommerce**: users who recently placed a purchase in your app are more likely to place a new one a short period later, especially if you push them an exclusive offer (e.g. free delivery, selected items, etc) of if you personalize the content of your notification (see more here).
* **Media**: If your app offers thematic subscriptions, then you can push users who have recently read/watched content on a specific topic and offer them to subscribe. Here is how you could set up your campaign.

![Trigger media targeting](/files/SqSOqhOTS2EBc1TBDtNQ) ![Trigger media scheduling](/files/SFwGBigLLaxej64ucZSR)

#### **Scheduled reminders**

You can use trigger campaigns to remind your users of important information related to an upcoming event. E.g. Alert users 24 hours before and upcoming trip they booked on your app.

<figure><img src="/files/pyzEOWbkuo3IqaLeb4zF" alt="trip information"><figcaption></figcaption></figure>

The `trip_id` received with every event in this example will act as a deduplication id. This means users will receive as many reminders as they booked trips, not only for the last one they booked.

Using a similar logic, you can schedule a notification after an important event. E.g. Share a satisfaction survey 3 days after a user's checkout date.

#### **Troubleshooting**

There are several points you should also check if specific users never received the notification they were supposed to receive from a trigger campaign:

* **Debug tool**: Use the [debug tool](/getting-started/features/customer-engagement-platform/settings/debug) to see why a specific install didn't receive a push notification from a trigger campaign:
* **Trigger**: Make sure the event used in the campaign is triggered correctly in your app. Otherwise, some users will not be able to enter or exit the user journey set in your campaign. You can use the debug tool to run some tests.
* **Opt-in status**: On iOS, users may not have turned on yet push notifications when Batch triggers the notification. This may happen with most of your onboarding campaigns. Use the debug tool to check the opt-in state of a specific install.
* **App in foreground**: If you set a timer in minutes, users may still be in the app when Batch triggers the notification. The notification will not be displayed on iOS if the app is in the foreground, except if you added support for that feature. On Android, an icon will appear in the status bar if users have the app opened in the foreground.


# Message edition

The message editor lets you create notifications in **several languages**, A/B test them and see them on your device before you send them your users.

<figure><img src="/files/JE7MXR8jDDt4R4ABReu5" alt="editor"><figcaption></figcaption></figure>

## Language selection

You can add as many **localized versions** of your message as you want by clicking on **"+"**. Batch will automatically send the message in the right language to every targeted users.

{% hint style="info" %}
If you don't have a message in the language of a user, Batch will deliver the message **in the default language** of your app.\
You can check the default language of your app in ⚙ Settings → General.
{% endhint %}

## Title and message body

### **Title (optional)**

You can set a custom title that will appear on iOS and on Android. On iOS, the title is displayed on devices running **iOS 10** *(and higher)*, on the **Apple Watch** or in the notification center *(since iOS 8)*.

### **Message body**

This is the most important part of your push notification, make sure your message is not too long and to write it **accordingly to your targeted audience**.

### **Message personalization**

If you want to improve the conversion rate of your push campaigns, you can personalise the content of your notification for every customer, based on the same attributes you may already be using for user segmentation.

All you need to do is to click the **{...}** button next to the title or the body of your message and pick an attribute:

<figure><img src="/files/zWbagXUU0dX112YAJVkv" alt="personalization"><figcaption></figcaption></figure>

Batch will replace dynamically the attribute with a custom value for each user. If no value is found for a targeted user, Batch will send the message without the value or use the **default value** you set when you added the attribute.

{% hint style="info" %}
You will find more information on message personalization in [this page](/getting-started/features/mobile-engagement-platform/push/message-personalization).
{% endhint %}

### **Emoji emoticons**

You can add emoji emoticons to the title or the body of your iOS, Android, Windows or web push notifications.

If you want to insert an emoji in your message you can:

* **Chrome 68+**: Right-click any text field and select *"Emoji"* or *"Emoji & Symbols"*.
* **Windows**: Simply press the Windows key + the period button to display Windows's emoji keyboard on Windows 10. In case you are using an older version of Windows, you can copy-paste an emoji from emojipedia: [iOS](http://emojipedia.org/apple/) / [Android](http://emojipedia.org/google/) / [Windows](http://emojipedia.org/microsoft/).
* **Mac**: Press CTRL + CMD + Space to display the emoji keyboard and pick an emoji.
* **Custom emojis**: Some device manufacturers use a set of custom emojis. See how they look here: [Samsung](http://emojipedia.org/samsung/) / [LG](http://emojipedia.org/lg/).
* **Android 4.4**: On Android versions before 4.4, emoji emoticons might not be displayed correctly.

### **A/B testing**

The A/B testing feature allows you to test **two different messages** in the same campaign. A/B testing is key to sending the most effective message and vastly improving your open and re-engagement rates. You can easily A/B test your messages with one click on the *"Start A/B testing"* button.

What kind of content can I A/B Test?

* Length of the wording —find our best practices here for mobile push
* The tone of the message
* Emojis
* Dynamic Content (on mobile push notification only)
* Image
* Deeplink

How to preview each version?

* Click on the Eye icon to select the version to show in the preview and to send as a test.

How can I compare the analytics?

* Once your campaign is live, you can compare the performance of each variant.\
  In the detailed results of your campaign, you will see how each message performs over time in a tabbed view.

How can I keep the best wording?

* If it is a recurring or trigger campaign, you can disable the one that performs poorly. To disable a version, go on the Automations tab and click on your campaign.

## Mobile Landing

Mobile Landings allow you to display an In-App message when users open your push notification. This is great to manage scenarios that require a specific action from your users *(update reminders, etc)* or to have all their attention *(new feature announcement, exclusive offers, etc)*.

{% hint style="info" %}
See SDK documentation about it for [iOS](/developer/sdk/ios/mobile-landings) and [Android](/developer/sdk/android/mobile-landings).
{% endhint %}

You can choose between several formats depending on your use case: Fullscreen, Banner, Modal, Image or Webview.

You can easily add a Mobile Landing to your push campaign by switching on the *"Mobile Landing"* option:

<figure><img src="/files/iug7VnTC4B9KUQ3qRjWU" alt="mobile landing"><figcaption></figcaption></figure>

### Why Should I Use a Mobile Landing? <a href="#why-should-i-use-a-mobile-landing" id="why-should-i-use-a-mobile-landing"></a>

Mobile Landings can be useful in a wide variety of use cases:

* Increase your open rate: When sending a push notification you want to keep your notification short, sweet and inviting. So Mobile Landing lets you express yourself without sending a very long push notification to your users.
* Keep your user base updated: When announcing a new feature or service, put all the details on the Mobile Landing.
* Ease the payment process: when announcing a discount code in your notification let your user benefit from the 1-Click process by adding a button that will automatically apply the discount code to the basket.
* Follow your user journey: When a new feature is announced after presenting it to your user base, you can direct them to the mentioned feature so they can discover it.
* Give more context before directing users to a website: when directing to a page outside the app (for example your YouTube page),  trigger a landing page when users open the app and let them click or not the In-App button if they are still interested.

### How to Create a Mobile Landing? <a href="#how-to-create-a-mobile-landing" id="how-to-create-a-mobile-landing"></a>

Here are the two main steps you need to take to create a Mobile Landing:

1. Pick or create a new template for your Mobile Landing
2. Then edit the content of your Mobile Landing (text, image, etc).

If you already have created a Mobile Landing or an In-App message, then head to step 2.

Step 1: Create a new In-App theme

Go to the Settings > Themes section of the dashboard. Select one of the four formats available:

* Fullscreen: This format lets you mix images and text. Add buttons to let your users get a full understanding of what you are talking about. As it is a full-screen format, you can use it for long messages explaining a specific matter;
* Banner: Banners can be displayed at the top or the bottom of the screen with up to two buttons. This is very useful for informative purposes;
* Modal: The modal format will always be displayed in the centre of the screen. You can add an image, disable text fields, and buttons and change their colour. You can also set a 10-second timer to auto-dismiss the In-App message;
* Image: The image format is useful if you want to use a 100% custom design or simply reuse an image your team already prepared for a marketing campaign. Batch allows you to display a full-screen image or to display it as a modal with a close button or an auto-close timer

Step 2: Edit your message

Now that your template is ready to use, you can attach a Mobile Landing to your push notification.

Once you are done with the conception of the push notification, turn on the "Mobile Landing" option by activating the toggle.

Then select the template you want to use in the drop-down menu.

Here are some specs about the Mobile Landing components:

* Button: There are three types of actions allowed in a button. It can either dismiss the Mobile Landing, direct to a specific page inside or outside the app or trigger a custom action (open the settings of the device, apply a discount code.
* Image: they have to be at least 300 pixels in width & height and weigh no more than 5MB.

## Sending a test

{% hint style="info" %}
You will need to find and save your device token first to send your first test notification: [iOS](https://doc.batch.com/guides-and-best-practices/message/push-notifications/how-to-send-a-test-push-notification-to-your-mobile) / [Android](https://doc.batch.com/guides-and-best-practices/message/push-notifications/how-to-send-a-test-push-notification-to-your-mobile) / [Web](https://doc.batch.com/guides-and-best-practices/message/push-notifications/how-to-send-a-test-push-notification-to-my-web-browser).
{% endhint %}

You can click the *"Send a test"* button to see how your message looks on your device, test your deeplink or see if the Mobile Landing is displayed correctly.

You will find the list of all the registered test devices from Settings > Push Settings and send them a test message. This is helpful to check if the token of your saved devices are still valid and delete them if it's not the case.

## Advanced settings

### Deeplink URL

Deeplinks allow you to **direct users to a specific place** in your app. Batch Push campaigns can accept this link scheme to direct users to a particular area within your app **upon opening** the push notification *(i.e. The news you mention in your notification, etc)*.

Please note that the Deeplink URL must be a link based on a URL scheme that you specify within your app.

### Attachments

You have two options to add an attachment:

* Browse media from your computer
* Use a URL to your media:

<figure><img src="/files/ATjcjFRFKguVSLLgNqJn" alt="media url"><figcaption></figcaption></figure>

{% hint style="info" %}
If you use a URL, Batch won’t be hosting audio and video files: make sure you can handle potential traffic surges.
{% endhint %}

You can add dynamic data to customize your media URL.

#### **Custom icon**

On Android, you can add a specific icon for the notifications sent by a push campaign. Batch requires a square image, PNG or JPG, with a minimum **width of 192px**.

#### **Image**

Batch lets you send large-format notifications with a large image attachment. We require a landscape image, PNG or JPG, with a minimum **width and height of 200px** (max. 10MB).

Images can be displayed on:

* **iOS 10+**: Make sure your iOS app supports rich notifications.
* **Android 4.1+**
* **Web**: Chrome 56+ on Windows/Android.

#### **Audio**

**iOS 10+ only**. The file must be an mp3 file (max. 5 MB) with a valid mime type, hosted on an HTTPS server. The OS will automatically download the mp3 file and drop the download if it takes more than 30 seconds.

#### **Video / GIF**

**iOS 10+ only**. You can add a video attachment using an mp4 file (max. 50 MB), with a valid mime type and hosted on an HTTPS server. The video will be downloaded automatically on your users' devices and iOS will drop the download if it takes more than 30 seconds.

You can also attach a GIF file to your push notification. The GIF file must have a valid mime type and be hosted on an HTTPS server.

### Custom payload

An optional JSON string that can contain **additional parameters** that your application can handle when receiving push notifications if configured to do so. The root of the JSON must be an Object and cannot have the reserved key `com.batch`. You can use `{BATCH:TITLE}`, `{BATCH:BODY}` and `{BATCH:DEEPLINK}` variables. They will be replaced.

For example, you can use the custom payload to:

* Set a badge value for your app icon on iOS
* Customise your notification sound on iOS
* Add action buttons to your notification&#x20;
* Send silent notifications&#x20;

### FCM/APNS Priority

Defines the priority of your message on iOS *(APNS)* and Android *(FCM)*. The default value is **high** on iOS and Android.

On Android, you can use the high priority if you have a messaging/voip app and if you notice delivery issues due to native *(Doze)* or constructor related *(Samsung Smart Manager, etc)* energy saving features.

{% hint style="info" %}
High priority Android notifications can drain your user's battery faster since they 'wake up' the device and open a network connection. Switch to *Normal* priority if your notification is not time-sensitive.
{% endhint %}

### FCM Collapse key

Defines how notifications are managed when an **offline device goes online**. If enabled, the device will only show the most recent notification. If disabled, it will show all the notifications received when the device was offline.

You should disable the collapse key if all your notifications matter *(E.g. messages, etc)*. You can use up to 3 different collapse keys if you want users to get only one notification of each kind when coming online *(E.g. marketing message, alert, etc)*.

### Expiration (TTL)

You can set an expiration delay or a **Time to Live** *(TTL)* in hours for your notification. The notification won't be displayed if the device doesn't receive the notification or doesn't come back online within this time.

By default, Batch sets a TTL of 14 days for all the notifications you send. If your user's device comes back online before being off for two weeks, it will display the last notification you sent to your user *(iOS)* or all the notifications sent over the previous two weeks *(Android and web push)*.

In addition to setting an expiration delay for your push campaign, you can set a **global expiration delay** that will be applied to all your notifications. This can be done from the **dashboard settings > Push settings**.

{% hint style="warning" %}
We strongly recommend you set a short global TTL for web push notifications to prevent customers from wanting to opt-out. Users who accept to receive web push notifications are more likely to turn off their device *(e.g. a laptop at home, etc)* and receive many notifications from your website when they go back online.
{% endhint %}

## Review

While the review page is self-explanatory, it's not to be dismissed. Look over and verify all the details of the campaign before saving all of your work or activating the campaign. If you need more time to edit your campaign, you can **save it as a draft**.

## Duplicate

After saving your campaign as a draft, you can **duplicate it** easily by clicking on the "Replicate" button. The campaign duplication also works between iOS and Android apps.

You can also duplicate your campaign from the Actions menu, next to your campaign's name.


# Analytics

## Basic analytics

<figure><img src="/files/VaFo6mWN2Rwrjrt0AzO6" alt="campaigns"><figcaption></figcaption></figure>

Understanding the results of a push campaign is key to analyzing the performance of a message. The campaign list gives you basic information on all your push campaigns:

* **Sent**: The total amount of sent push notifications. This number is updated every few minutes.
* **Open rate**: The percentage of users who opened your notification directly or indirectly. Please note that the open rate of a campaign scheduled in local time may change over time since Batch can take more than 12 hours to deliver push notifications to all your users in different timezones ([see more here](/getting-started/features/mobile-engagement-platform/push/timing-delivery)).

## Campaign analytics

**Campaign analytics exports** can be downloaded from the dashboard. The export is in the form of a CSV file containing campaigns metrics, settings, and much more. It allows you to filter your campaigns' metrics & data to include in your export. These exports are available from the Push tab.

For example, you can:

* Analyze push notifications campaigns performance
* Analyze A/B test campaigns
* Compare campaigns metrics by label, type, source, country, etc.
* Run in-depth analysis thanks to the extended data exported: sending time, targeting type, message content, etc.
* Analyze Trigger campaigns' user journey metrics
* Etc.

### **Set your export from the Campaigns list**

First, click on "Filter" and select the status, date range, labels, sources, and types of campaigns. Click on "Apply filters" button to save your choices.

<figure><img src="/files/LQPDnwIU0VIfnXUCEnwq" alt="export" width="563"><figcaption></figcaption></figure>

Then, click on "Export" button on top of the last column.

### **Export filters**

Before downloading the CSV Export, you can specify the granularity of your export. By default we are exporting the campaigns corresponding to the filters you selected. You also have the possibility to export directly the metrics for all your campaings by checking "All campaigns" button.

### **Campaign’s metrics & data**

All exports automatically contain essential data by default:

* **Essentials metrics** represent all the metrics available in your CSV export by default, they are always included. Here is the list of the metrics: *token*; *type; source*; *status*; *sent date* (now/scheduled); *label*; *campaign*; *sent*; *sent opt-ins*; *direct open*; *influenced open*; *reengaged users*; *errors*; *uninstalls*; *skipped*; *opt-outs-feedback*.

In addition to the default export data, you can add additional data:

* **Extended data** allows you to enrich your CSV export with the following campaigns setup information: *start date (recurring et trigger)*; *end date (recurring and trigger)*; *sent time (now/scheduled and recurring)*; *utc/local (now/scheduled and recurring)*; *smart segments*; *country*; *custom audience (YES/NO)*; *languages*; *targeting applied (fullbase or custom targetting)*; *message*; *rich media (YES/NO)*; *deeplink*; *custom payload*.

### **Split data**

You can choose the level of granularity of your CSV export. The **campaign** granularty is always selected, you have the possibility to go further in the granularity of your CSV export by choosing to split the data by **days** and/or by variation by selecting the **A/B versions**.

## Advanced analytics

If you want to see more detailed stats about a specific campaign, you can click the *Stats* icon in the campaign list.&#x20;

<figure><img src="/files/TGkOz8mWQCyBsSoowleH" alt="statistics"><figcaption></figcaption></figure>

Let's dive into the details of the available statistics here:

### Summary

You can find here global data on your campaign, since it has been created. The metrics displayed here can depend on the campaign's nature and status:

* **Target**: Total number of installations that meet your campaign's conditions.
* **Sent**: Total amount of push notifications accepted by Apple or Google, but not necessarily delivered to the end device.
* **Bounced**: Total number of notifications Apple or Google couldn't deliver because users didn't have the app anymore or because of other errors.
* **Opened**: Total number of users who clicked the notification (direct open) or opened the app in a 3 hours range after receiving the push (influenced open).
* **Open Rate**: Total of opened notifications (direct + influenced) / Total of notifications sent to users who accepted push notifications and are not in the imported segment.

#### How to modify my open rate calculation?

Batch allows you to choose between 2 relevant ways to calculate your open rate.

* Monitoring direct and influenced opens: This is the default calculation method. It generates a coherent open rate since it is based on only users who actually received your push campaigns.
* Monitoring direct opens exclusively: This method excludes the influenced opens. Influenced opens may be irrelevant for media apps because users open the app frequently, regardless of the notifications received in the last 3 hours.

Need to change the way Batch calculates the open rate for your app? Please contact our team at <support@batch.com> or use the live chat.

### Performance

The Performance report is built like a conversion funnel. It allows you to measure your campaign's success at a glance:

* **Opt-ins**: Number of notifications sent to opt-in users.
* **Direct**: Number of users who clicked the notification.
* **Influenced**: Users who received the notification and did not click it, but opened the app in a 3 hours range afterwards.
* **Reengaged**: Dormant users who received a notification, opened it and then came back to the app/website in the 3 days following the notification reception.

If you attached a [Mobile Landing](/getting-started/features/mobile-engagement-platform/push/message-edition#mobile-landing) to your push campaign, you will find additional stats:

* **Landing display**: Total number of users who displayed the Mobile Landing.
* **1st/2d button**: Number of clicks on the first or the second button of your Mobile Landings. Hover over the tooltip to see the content.

### Delivery

The Delivery report gives you detailed information on the status of all the device tokens targeted by your campaign:

#### **Sent**

* **Opt-ins**: Notifications sent to users who were opt-in to push notifications when the campaign targeted them.
* **Opt-outs**: Notifications sent to users who were not opt-in to push notifications when the campaign targeted them.
* **Imported**: Notifications sent to imported users.
* **Dev API Key**: Notifications sent for installations on the Dev Api Key. A high number of notifications sent on the Dev Api Key can mean that your production app version does not integrate the right Batch API Key.

#### **Undelivered**

* **Skipped**: Number of unserved notifications because the capping limit was reached for the targeted installation.
* **Uninstalls**: We tried to send the campaign to those devices but they no longer have the app installed.
* **Errors**: Errors sent by the push provider *(FCM/APNS)*. Click the list icon to see the list of errors.

### A/B testing

Batch also shows relevant information on your campaign if you are using the A/B testing feature. In the detailed results of your campaign, you will see how each message perform over time in a tabbed view.

If you want to track the number of marketing and transactional push notifications sent everyday from the dashboard or the Campaigns/Transactional API and see the global open-rate of your campaigns, take a look at Notifications, in the Analytics tab.

### User Journey

If you created a user journey, Batch will display an additional report in your campaign analytics. You will be able to see how many users are still waiting for the timer to finish and why they exited the user journey:

You will also see the number of push notifications sent every day from your trigger campaign:

![Trigger push sent](/files/u71lujwpXPJs2BlFhvOu)


# Message personalization


# Basics

## Introduction

You can **personalize your push notifications** from the campaign editor using the data you have collected on your users. Batch provides a system of dynamic contents and a templating engine, allowing you to make dynamic messages for your campaigns.

Using the templating engine, you can reference and use user data inside your message. You can also add conditions to a message so that the content changes if some condition is fullfilled.

Here's a quick example to see how a dynamic content with a user attribute looks.

## Dynamic Content

Before diving deep let's review the dynamic contents.

We have implemented a dedicated interface to allow you to use **user attributes** in dynamic content and display custom data easily. When editing your message, just click on the **{...}** button, choose the custom attribute you want to personalize your message with and the formatting.

*That's it!*

As some of the targeted users might not possess the attribute you are using, you can add a default value. The preview will let you see how the notification will look for 10 random installs.

### Referencing attributes in your messages

If you are using APIs to send your notifications, here is the syntax to use dynamic contents in a message. All attributes usable in a query are available in dynamic contents.

They are:

* `attribute` or `c.attribute` will refer to an installation attribute, collected from the SDK.
* `u.attribute` will refer to a user attribute, collected via the Custom Data API.

```django
You're only on level {{ c.current_level }}, come back and play !
```

If the user's `c.current_level` attribute is `6` this evaluates to:

```
You're only on level 6, come back and play !
```

### Referencing properties in object attributes

If you have an object attribute, you can reference its properties using the dot notation. Suppose you have an attribute `address` that is an object with the following properties:

```json
{
  "city": "Paris",
  "zip_code": "75001",
  "street": "1 rue de Rivoli"
}
```

You can reference the properties like this:

```django
You live in {{ address.city }}, {{ address.zip_code }} {{ address.street }}
```

Please note that, for now, object attributes are only accessible through event attributes.

### Default values

Note that with the previous dynamic content, if the user doesn't have the attribute the resulting message will be:

```
You're only on level, come back and play !
```

This is probably not what you want, so you can add a default value. The default value is used when the attribute doesn't exist.

Here is how to use them:

```
Special offer: Get {{ u.special_offer|default('-5%') }} by subscribing today !
```

If the user's `u.special_offer` attribute is `-15%` then it evaluates to:

```
Special offer: Get -15% by subscribing today !
```

Otherwise it evaluates to:

```
Special offer: Get -5% by subscribing today !
```

### Referencing tag collections

All tag collections usable in a query are available in a dynamic content.

They are:

* `t.tag` will refer to an installation tag collection.
* `ut.tag` will refer to a user tag collection.

However, there's a catch: since a tag is a *collection* of values and we can only output a single value using a dynamic content, we have to introduce the concept of *filters*. A filter is a function you can apply to a value to transform it.

In the case of a tag collection you can use the filter `join` to concatenate all values into a single string.

For example:

```
You've already beaten those levels: {{ t.levels_done|join(',') }}
```

Note that using a filter on a tag collection that doesn't exist always produces an empty string. Using the previous example, if the tag collection `t.levels_done` doesn't exist the dynamic content evaluates to:

```
You've already beaten those levels:
```

Loops are also available for tag collections, you can iterate over the values of a tag collection using the `for` loop, as explained in the [loop section](#loops).

### Formatting

Using raw data like this is great but you might want to format the attributes yourself.

Formatting is done by using the following filters:

* [formatDate](/getting-started/features/mobile-engagement-platform/push/message-personalization/advanced#general-filters) to format a date attribute
* [formatNumber](/getting-started/features/mobile-engagement-platform/push/message-personalization/advanced#general-filters) to format a number attribute

The two filters are explained in details in the reference but here is a small example:

```
You have accumulated {{ u.points|formatNumber(decimals=2) }} points, make sure to use them before {{ u.points_expiration_date|formatDate('yyyy-MM-dd') }}
```

This evaluates to:

```
You have accumulated 20.68 points, make sure to use them before 2017-02-30
```

Be sure to check out the reference documentation to learn about all options !

## Templating

Dynamic contents are already really powerful but they're not always enough.

For example, what if you want to display a completely different message based on which level a user is on, or how much fidelity points he has ?

This is a job for *templates*.

Templates allow you to do conditional statements, define variables and even do some light arithmetic.

### Conditions

You could write something like this:

```django
{% if premium %}
  {% set $expiration_date = c.subscription_date + 90d %}
{% else if c.has_newsletter_subscription %}
  {% set $expiration_date = c.subscription_date + 75d %}
{% else if c.age < 25 %}
  {% set $expiration_date = c.subscription_date + 60d %}
{% else %}
  {% set $expiration_date = c.subscription_date + 50d %}
{% endif %}

Hey {{ c.first_name ~ ' ' ~ c.last_name }},
friendly reminder that your subscription will expire on {{ $expiration_date | formatDate('yyyy-MM-dd') }}
```

This evaluates to:

```
Hey John Smith, friendly reminder that your subscription will expire on 2018-01-03
```

Obviously the date will change based on what kind of subscription the user has.

There are a couple of new features here:

* Defining a variable with `set $variableName = <expression>`. A valid expression has to return a single value of any type.&#x20;
* Arithmetic. You can do simple math inside a template. Conveniently, you can add also do arithmetic on a *date* by using a [duration](/getting-started/features/mobile-engagement-platform/push/message-personalization/advanced#duration)
* Concatenation. You can concatenate multiple values into a single one using the `~` operator.

## Referencing custom app data

Dynamic contents and templating also allow you to reference custom application data to use in your messages.

These are tables of *key*/*value* pairs that you can upload using our dashboard.

For example, given a table with the name `population_by_city` with the following content:

```
2988507,2244000
2996944,484344
2995469,850726
2973783,271782
3031582,239157
```

These are the population of Paris, Lyon, Marseille, Strasbourg and Bordeaux respectively.

You can now use them like this.

```
You live in a city of {{ lookup('population_by_city', b.city_code) }}
```

For someone in Paris, this evaluates to:

```
You live in a city of 2244000
```

You can use any attribute or literal value as the lookup key. This works too:

```
You live in a city of {{ lookup('population_by_city', 2988507) }}
```

However by doing this you lose the benefit of the custom app data table. This also works:

```
You live in a city of {{ lookup('population_by_city', c.my_custom_city_code) }}
```

## Language matching

The `speaks` function allows to customize contents according to the user language. It's recommended to use this function instead of the `b.language` native attribute as its value is not guaranteed to be stable. It accepts one or more languages as parameters, and returns true if the user language matches one of them according to the language matching rules.

## Referencing trigger event data

In the context of a trigger campaign, using data from the trigger event is possible by using the attribute named `trigger_event`. It is an object attribute that contains the attributes of the trigger event that triggered the campaign.

Here is how you can use it:

```
Your {{ trigger_event.product_name }} is waiting for you !
```

You can still access the trigger event label, tags and attributes using 3 specific functions:

* `triggerEventLabel()`: returns the label of the trigger event
* `triggerEventTags()`: returns the tag collection attached to the trigger event. It can be used the same way as the tag collections.
* `triggerEventAttr(attribute_key)`: returns the attribute value corresponding to the given key, it is the equivalent of `trigger_event.attribute_key`

Here are a few examples of how you can use them.

Using the product name the user added to its cart:

```
Your {{ triggerEventAttr('product_name') }} is waiting for you !
```

Or if the products are listed in the tag collection:

```
{{ triggerEventTags() | count }} items are still waiting for you in your cart !
```

## Use cases

After looking into how it works, let's look at some use cases for dynamic contents and templates that would otherwise be hard or even impossible to do.

### Electoral results

Suppose you want to report on electoral results for every city in France. There are currently 35416 cities in France and you want each user to have the result from their city when receiving the notification.

Without dynamic contents you could only do this by creating one campaign per city with a query matching the city. In that case you'd need more than 35k campaigns, this is obviously not good.

Instead you can do the following:

* create a table named `electoral_results_201710` for example.
* each row in the table should be `$city_code => $result`.

Example:

```
2988507,Yes 20.3% - No 79.7%
2996944,Yes 48.5% - No 51.5%
2995469,Yes 74% - No 26%
2973783,Yes 38% - No 62%
3031582,Yes 93.2% - No 6.8%
```

These are the results of Paris, Lyon, Marseille, Strasbourg and Bordeaux respectively.

* Then, create a message containing a lookup on the table and city code.

Example:

```
Election day result: {{ lookup('electoral_results_201710', b.city_code) }}
```

For someone in Paris this will evaluate to:

```
Election day result: Yes 20.3% - No 79.7%
```

Each user will have a customised message based on where he is.

### Loyalty program goals

Suppose you have a loyalty program for your application where the user can gain points and at some threshold you gain a loyalty level. Here is an example of a points scale:

* 100 points - regular
* 500 points - silver
* 1000 points - gold
* 5000 points - platinum

Suppose also that you attach special one time discounts every time the user gains a level.

Finally, suppose you want to remind a user that they're about to reach the next level with the following message:

```
Gain 55 more points to reach Gold and get a one time discount of 15%!
```

Let's break down what we need:

* the number of points to reach to get to a level
* the number of points that a user has to gain
* the discount for a level

**Prerequisites**

For this to work you need to feed us the data we'll be working with; you can do so using custom attributes or the Custom Data API.

We imagine the following user attributes:

`u.loyalty_points` an `integer` value representing the current number of points a user has

We also need two custom app data tables:

`loyalty_thresholds` containing this:

```
regular,100
silver,500
gold,1000
platinum,5000
```

**The query**

Before diving into the template let's look at what query we should use:

```
{
  "$or": [
    "$and": [
      "u.loyalty_points": {
        "$gte": 85
      },
      "u.loyalty_points": {
        "$lt": 100
      }
    ],
    "$and": [
      "u.loyalty_points": {
        "$gte": 475
      },
      "u.loyalty_points": {
        "$lt": 500
      }
    ],
    "$and": [
      "u.loyalty_points": {
        "$gte": 850
      },
      "u.loyalty_points": {
        "$lt": 1000
      }
    ],
    "$and": [
      "u.loyalty_points": {
        "$gte": 4950
      },
      "u.loyalty_points": {
        "$lt": 5000
      }
    ]
  ]
}
```

This will match any user that is just about to reach the next level.

**The template**

Here is how the template could look like:

```
Gain {{ $remaining }} more points to reach {{ $nextLevel|upper }} and get a one time discount of {{ $discount }}
```

### Special discounts after a purchase

Suppose you want to give a user a special discount if they didn't buy anything after a month, and at the same time you want to remind them what they bought.

Suppose also that the discount changes based on how much time has passed since the purchase:

* 20% after a month
* 40% after more than two months

For example you could have the following message:

```
Did you like your Nike Air Max ? Get a 20% discount on all purchase today!
```

Let's break down what we need:

* the product name of the last purchase
* the date of the last purchase

**Prerequisites**

Like before, for this to work you need to feed us the data we'll be working with; you can do so using custom attributes or the Custom Data API.

In this use case we'll use custom events so you need to have that working too.

We image the following user attributes:

`u.last_purchase_product_name` a `string` containing the product name of the last purchase. It should be a properly formatted string.

We also need one custom event:

`e.purchase` which tracks every time a user has purchased something.

**The query**

The query needs to filter users that haven't purchased anything since at least a month:

```
{
  "age(e.purchase)": {
    "$gte": "30d"
  }
}
```

**The template**

Here is how the template could look like:

Did you like your {{ u.last\_purchase\_product\_name }} ? Get a {{ $discount }} discount on all purchase today!


# Advanced

The following documentation goes into more details on how to use the personalization and templating engine.

You will learn about builtin filters, how to control whitespace if you include `if`/`else` statements, what kind of comparison you can use and more.

## Filters

### Sidenote - filters with arguments

You may have noticed some filters take arguments. When this is the case, there is two way to give the arguments:

* Using a named argument as such: `join(separator=',')`
* Directly giving the value as such: `join(',')`

In the following reference we will denote arguments that can be given unnamed as such: `argName?: type` where the `?` indicates the argument is optional.

### General filters

<details>

<summary>formatDate</summary>

**Input type**\
date

**Arguments**

* `pattern`: string or (`dateStyle`: string, `timeStyle`: string)

**Optional arguments**

* `timezone`: string, `locale`: string

**Return type**\
string

**Description**\
Formats a date using either the pattern provided or the combined `dateStyle`/`timeStyle`.\
Ex: `{{ installation_date|formatDate(pattern: 'yyyy-MM-dd') }}` will result in **2025-01-01**

Ex: `{{ installation_date|formatDate(dateStyle: 'LONG', timeStyle: 'SHORT') }}` will result in **Wednesday, January 1, 2025 12:00 AM**

The `timezone` argument allows you to format the date into a specific timezone.\
Ex: `{{ installation_date|formatDate(dateStyle: 'SHORT', timeStyle: 'LONG', timezone: 'Europe/Paris') }}` will result in **1/1/25 9:00:00 AM CET**

The `locale` argument allows you to format the date using a specific locale. A locale controls region-specific behavior when formatting a date. For example, with the US locale, the time will be suffixed with **AM** or **PM**, but not with the UK locale.\
Ex: `{{ installation_date|formatDate(dateStyle: 'SHORT', timeStyle: 'LONG', locale: 'UK') }}` will result in **01/01/25 09:00:00 CET**

</details>

### Filters for numbers

<details>

<summary>abs</summary>

**Input type**\
number or duration

**Return type**\
int

**Description**\
Returns the absolute value of a number, duration, or distance.

**Example**\
Ex: `{{ -13|abs }}` will result in **13**

</details>

<details>

<summary>round</summary>

**Input type**\
number or duration or distance

**Return type**\
int

**Description**\
Returns the closest `int` of a number, duration, or distance, rounding up.

**Examples**\
Ex: `{{ 46.8|round }}` will result in **47**\
Ex: `{{ 46.3|round }}` will result in **46**

</details>

<details>

<summary>ceil</summary>

**Input type**\
number or duration or distance

**Return type**\
int

**Description**\
Returns the closest `int` that is greater than the number, duration, or distance.

**Example**\
Ex: `{{ 46.2|ceil }}` will result in **47**

</details>

<details>

<summary>floor</summary>

**Input type**\
number or duration or distance

**Return type**\
int

**Description**\
Returns the closest `int` that is lower than the number, duration, or distance.

**Example**\
Ex: `{{ 46.8|floor }}` will result in **46**

</details>

<details>

<summary>formatNumber</summary>

**Input type**\
number

**Arguments**\
*none*

**Optional arguments**

* `decimals`: number
* `locale`: string

**Return type**\
string

**Description**\
Formats a number.

For a `weight` float attribute of value `26.5` and a user using a US locale:\
Ex: `{{ weight|formatNumber }}` will result in **26.5**

The `decimals` argument allows you to control how many decimals should be printed:\
Ex: `{{ weight|formatNumber(decimals: 2) }}` will result in **26.50**

The `locale` argument allows you to format the number using a specific locale. A locale controls region-specific behavior when formatting numbers, such as setting the appropriate decimal separator. By default, the user's locale will be used.\
Ex: `{{ weight|formatNumber(locale: 'fr', decimals: 2) }}` will result in **26,50**

</details>

<details>

<summary>formatCurrency</summary>

**Input type**\
number

**Arguments**\
*none*

**Optional arguments**

* `decimals`: number
* `locale`: string
* `symbol`: string

**Return type**\
string

**Description**\
Formats a number as currency.

For a `price` float attribute of value `2406.5` and a user using a US locale:\
Ex: `{{ price|formatCurrency }}` will result in **¤ 2,406.50**

The `symbol` argument controls the currency symbol:\
Ex: `{{ price|formatCurrency(symbol: '$') }}` will result in **$ 2,406.50**

The `decimals` argument allows you to control how many decimals should be printed:\
Ex: `{{ price|formatCurrency(symbol: '$', decimals: 3) }}` will result in **$ 2,406.500**

The `locale` argument allows you to format the number using a specific locale. A locale controls region-specific behavior when formatting numbers, such as setting the appropriate decimal separator.

*Note: The locale has no impact on the currency symbol. By default, the user's locale will be used.*

Ex: `{{ price|formatCurrency(symbol: '$', locale: 'fr') }}` will result in **2 406,50 $**\
Ex: `{{ price|formatCurrency(symbol: '€', locale: 'fr') }}` will result in **2 406,50 €**

</details>

### Filters for strings only

<details>

<summary>lower</summary>

**Input type**\
string

**Return type**\
string

**Description**\
Converts a string to lowercase.

**Example**\
Ex: `{{ VINCENT|lower }}` will result in **vincent**

</details>

<details>

<summary>upper</summary>

**Input type**\
string

**Return type**\
string

**Description**\
Converts a string to uppercase.

**Example**\
Ex: `{{ vincent|upper }}` will result in **VINCENT**

</details>

<details>

<summary>capitalize</summary>

**Input type**\
string

**Return type**\
string

**Description**\
Converts the first letter to uppercase and all other letters to lowercase.

**Example**\
Ex: `{{ "john Smith"|capitalize }}` will result in **John smith**

</details>

<details>

<summary>title</summary>

**Input type**\
string

**Return type**\
string

**Description**\
Converts the first letter of each word to uppercase and all other letters to lowercase.

**Example**\
Ex: `{{ "johN smith"|title }}` will result in **John Smith**

</details>

<details>

<summary>append</summary>

**Input type**\
string

**Arguments**

* `text?`: string

**Return type**\
string

**Description**\
Appends the text to the value.

**Example**\
Ex: `{{ john|append(' smith') }}` will result in **john smith**

</details>

<details>

<summary>prepend</summary>

**Input type**\
string

**Arguments**

* `text?`: string

**Return type**\
string

**Description**\
Prepends the text to the value.

**Example**\
Ex: `{{ john|prepend('smith ') }}` will result in **smith john**

</details>

### Filters for tag collections only

<details>

<summary>join</summary>

**Input type**\
tag collection

**Arguments**

* `separator?`: string

**Return type**\
string

**Description**\
Returns a string which is the concatenation of all tag values separated by the provided separator.

**Example**\
Ex: `{{ c.interests|join(' ') }}` will result in **sports politics music**\
(for someone with `["sports", "politics", "music"]` in their `c.interests` tag collection)

</details>

<details>

<summary>first</summary>

**Input type**\
tag collection

**Return type**\
string

**Description**\
Returns the first tag value.

**Example**\
Ex: `{{ c.interests|first }}` will result in **sports**\
(for someone with `["sports", "politics", "music"]` in their `c.interests` tag collection)

</details>

<details>

<summary>last</summary>

**Input type**\
tag collection

**Return type**\
string

**Description**\
Returns the last tag value.

**Example**\
Ex: `{{ c.interests|last }}` will result in **music**\
(for someone with `["sports", "politics", "music"]` in their `c.interests` tag collection)

</details>

<details>

<summary>contains</summary>

**Input type**\
tag collection

**Arguments**

* `element?`: string

**Return type**\
boolean

**Description**\
Returns `true` if the tag collection contains the given argument.

**Example**\
Ex: `{{ c.interests|contains('politics') }}` will result in **true**\
(for someone with `["sports", "politics", "music"]` in their `c.interests` tag collection)

</details>

### Chaining filters

It is possible to chain filters to produce more complex results, however you need to make sure the input and output types are compatible between filters.

For example, you can't call `formatDate` on a number or even a string, the type has to be a date. Look at the table above to know what filters are compatible.

Here is a valid example of chaining multiple filters:

```
Your next exam is on {{ t.exams|last|date|formatDate('yyyy-MM-dd') }}
```

Given a user with this tag collection `t.exams`: `["2017-10-09T14:53:54Z", "2017-10-11T16:53:54Z"]` the example evalutes to:

```
Your next exam is on 2017-10-11
```

As you can see we take the `last` value of the tag collection which returns a `string`, then pass that to `date` which parses it and returns a `date` type. Finally we pass that to `formatDate`.

## Expression

An expression is something that returns any kind of value. It can a math operation, a comparison, a function call, a reference to an attribute or tag or even a literal value.

Examples:

```
<div data-gb-custom-block data-tag="set"></div>

```

Expression are used in:

* `if`/`else if` conditions
* variable assignment
* expression output `{{ ... }}`

## Comparison

### Type comparison rules

When comparing two values, they have to be of the same type otherwise it won't work.

The rules are as follows:

* A `string` can only be compared with another `string`
* A `date` can only be compared with another `date`
* A `duration` can be compared with another `duration` or a `number`. When comparing with a `number` it is treated as days; in other words `{{ $myDuration == 3 }}` is equivalent to `{{ $myDuration == 3d }}`.
* A `distance` can be compared with another `distance` or a `number`. When comparing with a `number` it is treated as meters; in other words `{{ $myDistance == 200 }}` is equivalent to `{{ $myDistance == 200m }}`
* A `number` can be compared with another `number` or a `boolean`.

### Operators

* `==` compares two values for equality
* `!=` compares two values for inequality
* `>` returns true if the left hand side is greater than the right hand side
* `>=` returns true if the left hand side is greater than or equal to the right hand side
* `<` returns true if the left hand side is lower than the right hand side
* `<=` returns true if the left hand side is lower than or equal to the right hand side

### Combining comparisons

As in any programming languages, you can combine comparisons easily:

* `and` returns true if both the left hand side and the right and side are true
* `or` returns true if either the left hand side is true or the right hand side is true
* `not` negates a statement
* `(` and `)` to group expressions.

## Data types

### Standard

Standard types include:

* *string*. You can write a literal string by using a `'` character like this: `'This is a string'`. To use a `'` inside your string you need to double it like this: `'It''s great'`
* *integer*. You can write a literal integer like this: `230`.
* *float*. You can write a literal float like this: `20.30`
* *boolean*. A boolean is either `true` or `false`

### Date

Date is a special type that can't be created by a literal. However they are produced in a couple of cases:

* if an attribute is a date (that is either a `NSDate` or a `java.util.Date` for iOS and Android respectively).
* by converting a UNIX timestamp (number of seconds since January 1, 1970): `{{ 1491814800|date|formatDate('yyyy-MM') }}`
* by using the keyword `now` which returns the date at the time of execution

### Duration

Duration is a special integer with a time unit. Units can be:

* days: `40d`
* hours: `24h`
* minutes: `30m`
* seconds: `46s`

### Distance

Distance is a special integer with a distance unit. It is also always positive. Units can be:

* meters: `5600m`
* kilometers: `83km`

### Casting rules

You can cast values into different types by using a *casting operation*, provided the types are compatible. The casting operation looks like this:

```
{{ c.my_string_attribute|float|int }}
```

Casting looks exactly like a *filter* but it simply converts the original value to the type if the rules allow it.

The rules of casting are as follows:

| from / to | string | int | float | bool | date | distance | duration |
| --------- | ------ | --- | ----- | ---- | ---- | -------- | -------- |
| string    |        | ✓   | ✓     | ✓    | ✓1   | ✓        | ✓        |
| int       | ✓      |     | ✓     | ✓    | ✓2   | ✓        | ✓        |
| float     | ✓      | ✓   |       | ✓    | X    | ✓        | ✓        |
| bool      | ✓      | ✓   | ✓     |      | X    | X        | X        |
| date      | ✓      | ✓2  | X     | X    |      | X        | X        |
| distance  | ✓3     | ✓   | ✓     | ✓    | X    |          | X        |
| duration  | ✓4     | ✓   | ✓     | ✓    | X    | X        |          |

**1** The string has to follow the pattern `yyyy-MM-dd'T'HH:mm:ss` or the resulting date will be empty.

**2** Casting from `date` to `int` will return the UNIX timestamp in seconds. Casting from `int` to `date` will treat the integer as a UNIX timestamp in seconds.

**3**

Rules:

* casting from `string` to `distance` will treat the string as an integer representing the distance in meters.
* casting from `int` to `distance` will treat the integer as the distance in meters.
* casting from `float` to `distance` will remove the decimal part and treat it as an integer representing the distance in meters.
* casting from `boolean` to `distance` will treat `false` as 0 and `true` as 1.

You can pass a conversion distance unit as a parameter to the `distance` filter.

Valid distance units are detailed above.

Examples:

* `{{ '100'|distance }}` will result into the distance `100m`
* `{{ '12km'|distance('m') }}` will result into the distance `12000m`
* `{{ 2000|distance('km') }}` will result into the distance `2000km`
* `{{ 43.20440|distance }}` will result into the distance `43m`
* `{{ true|distance('km') }}` will result into the distance `1km` (not that you'd ever do that)

**4**

Rules:

* casting from `string` to `duration` will treat the string as an integer representing the duration in days.
* casting from `int` to `duration` will treat the integer as the duration in days.
* casting from `float` to `duration` will remove the decimal part and treat it as an integer representing the duration in days.
* casting from `boolean` to `duration` will treat `false` as 0 and `true` as 1.

You can pass a conversion duration unit as a parameter to the `duration` filter.

Valid duration units are detailed above.

Examples:

* `{{ '100'|duration }}` will result into the duration `100d`
* `{{ '100h'|duration }}` will result into the duration `100h`
* `{{ '48h'|duration('d') }}` will result into the duration `2d`
* `{{ 405|duration() }}` will result into the duration `405d`
* `{{ 43.409|duration('m') }}` will result into the duration `43m`
* `{{ true|duration('s') }}` will result into the duration `1s`

### Math rules

Math operations on `integers` and `float`s work as you would expect:

```
{{ (10 + 2) / 2 - (5 * 20) }}
```

Will evaluate to:

```
-94
```

There are a couple of rules for operations on `date`s, `duration`s and `distance`s:

* adding or subtracting a `duration` from a `date` will return a new `date`.
* subtracting two `date`s will return a `duration`.
* all operations between a `duration` and a `number` are allowed and will return a `duration` in the original unit.
* all operations between a `distance` and a `number` are allowed and will return a `distance` in the original unit.

Some *unusual* operators are available for your convenience:

* `//` divides two numbers and returns the truncated integer result. Example: `{{ 20 // 7 }}` evaluates to `2`.
* `%` returns the remainder of the integer division of two numbers. Example: `{{ 11 % 7 }}` evaluates to `4`.
* `**` raises the left hand side to the power of the right hand size. Example: `{{ 2 ** 3 }}` evaluates to `8`.

## Whitespace control

Up until now we haven't really talked about controlling how whitespaces are included - or not - in the message after the template has been rendered.

By whitespace we mean new line characters and leading spaces before either an expression or a statement.

Having control on this behaviour is important so that you can better structure your template and not have to write them all on the same line to avoid having newlines in your output.

### Default rules

The default rules are as follows:

* Expressions (`{{ ... }}`) strips the leading whitespaces if the output of the expression is empty

Example:

```
Hello {{ c.first_name }}!
```

With a `c.first_name` attribute defined, this evaluates to:

```
Hello Vincent!
```

Note the space after `Hello` is kept.

With no `c.first_name` attribute defined, it evaluates to:

```
Hello!
```

Note that there is only one space: the space after `Hello` has been removed

* Statements (`{% ... %}`) always strips the trailing newlines

Example:

```
<div data-gb-custom-block data-tag="set" data-0='hh' data-1='hh' data-2='hh' data-3='hh' data-4='hh' data-5='hh'></div>

```

```
Good 
```

!

This evaluates to:

```
Good morning!
```

Depending on the current time it will change to `afternoon` or `evening`.

### Forced behaviour

If the default behaviour doesn't suit you, you can force the behaviour with the following syntax:

* `{{+ +}}` or `{%+ +%}` will force every whitespace to be kept
* `{{- -}}` or `<div data-gb-custom-block data-tag="-"></div>` will force every whitespace to be stripped

You can mix and match of course: `{{+ ... -}}` is completely valid.

Example:

```
Hello {{- c.first_name }}!
```

Now that we forcefully remove the leading whitespace, with a `c.first_name` defined it evaluates to:

```
HelloVincent!
```

Another example:

```
Hello {{+ c.first_name }}!
```

Here we forcefully keep the leading whitespace, with no `c.first_name` defined it evaluates to:

```
Hello !
```

Note the space is kept.

## Custom Audience Data

The Custom Audience API (v1.1) supports attaching attributes and tags to installation IDs.

When a campaign targets such an audience, they can be used in your message by using the `{{ customAudienceAttribute(<audience name>, <attribute name>) }}` expression.

#### Example

Take the following Custom Audience API call, ran on the `SAMPLE-LEVELUP` audience:

```json
{
  "ids": [
    {
      "action": "add",
      "id": "INSTALL-ID-1",
      "attributes": {
        "account_level": 20
      }
    }
  ]
}
```

The following message:

```
Congratulations, you have reached level {{ customAudienceAttribute('SAMPLE-LEVELUP', 'account_level') }}!
```

will result in:

```
Congratulations, you have reached level 20!
```

## Audience Data

The Audience API supports attaching attributes and tags to profiles.

When a campaign or automation targets such an audience, they can be used in your message by using the `{{ audienceAttribute(<audience name>, <attribute name>) }}` expression.

#### Example

Take the following Audience API Update call:

```json
{
  "name": "EXAMPLE",
  "ids": [
    {
      "action": "add",
      "id": "CUSTOM-ID-1",
      "attributes": {
        "account_level": 20
      }
    }
  ]
}
```

The following message:

```
Congratulations, you have reached level {{ audienceAttribute('EXAMPLE', 'account_level') }}!
```

will result in:

```
Congratulations, you have reached level 20!
```

\
var onTitleClick = function(event) {\
&#x20;   var methodName = event.target.dataset.method;\
&#x20;   document.querySelector(".method-details\[data-method='" + methodName + "']")\
&#x20;       .classList.toggle("method-shown");\
}\
\
var titles = \[].slice.call(document.getElementsByClassName("method-title"));\
\
for (var i = 0; i < titles.length; i++) {\
&#x20;   titles\[i].onclick = onTitleClick;\
}<br>


# In-app messaging


# Overview

In-App messages are messages **displayed inside your app**. You can trigger them when users open your app or as contextual reminders when they perform a specific action *(e.g. tapping a button, browsing a page, etc)*.

You can also trigger an In-App message after your users open a push notification, as a mobile landing page. This is great to communicate with all your users, even with users who have **turned off push notifications**.

Batch's In-App messages allow you to cover a wide variety of use cases. You can use them to:

* **Boost your push opt-in rate**, by triggering a message on a meaningful action and explaining why your users should turn on push notifications.
* **Increase conversion**, by onboarding new users with special offers, recommending additional content to engaged users or reminding users they left items in their cart.
* **Optimise retention**, by presenting key features of your app, app updates, and more.
* **Or simply communicate** with all your users (e.g. scheduled maintenance, beta testing program, etc).

We have been working on native formats that bring the same experience to all your users regardless of the OS they are using.

## Choosing the right trigger

Batch allows you to trigger In-App messages in two different ways:

* **Mobile Landings**: The In-App message is displayed as a landing page when users open your push notification. Here's how to add them to a push campaign.
* **In-App automations**: The In-App message is displayed when users open your app or when they make a specific action in your app. The message can be displayed to users who are not opt-in for push notifications. This useful to communicate with your entire userbase or suggest actions when your users browse your app.

## Choosing the right format

All Batch formats are highly customisable. You can tailor the overall layout of the In-App message, colors, image and button from **Settings > Themes**.&#x20;

### Fullscreen

<figure><img src="/files/VI5Yh8hp0TSD2GcLgXzq" alt="fullscreen"><figcaption></figcaption></figure>

Use the fullscreen format for all your important messages, such as an update reminders, a last minute offer or anything that deserve to interrupt the navigation. Fullscreen In-App messages are also useful for detailed announcement as they can contain more text and a picture.\
\
We strongly recommend that you use:&#x20;

1. Title: 15-35 characters.
2. Body: 110-200 characters.
3. CTA: Up to 18 characters or simple action words (e.g: visit now, later, sell it now).

{% hint style="info" %}
The fullscreen format is supported from the 1.10 version of the SDK (and higher).
{% endhint %}

### Banner

<figure><img src="/files/SaTMDbMKmDN0Gtw5w5RH" alt="banner"><figcaption></figcaption></figure>

Banners are useful to suggest actions while your users are browsing the app and avoid bothering them when they are making important actions. Use them to promote features of your app, suggest interesting content or additional items *(e.g. premium delivery, related articles, etc)*.

We strongly recommend that you use:&#x20;

1. Title: 10-25 characters.
2. Body: 40-70 characters.
3. CTA: Up to 18 characters or simple action words (e.g: visit now, later, sell it now).

{% hint style="info" %}
Banners are supported from the 1.11 version of the SDK (and higher).
{% endhint %}

### Modal

<figure><img src="/files/kbXCvkOuf39qLpmie8XR" alt="modal"><figcaption></figcaption></figure>

The modal format is a good alternative if you need to show an important message to your users, without interrupting them with a full screen In-App message. Batch allows you to fully personalize your modal with several CTAs, an image and an auto-close timer.

{% hint style="info" %}
The modal format is supported from the 1.14 version of the SDK (and higher).
{% endhint %}

### Image

<figure><img src="/files/KyHcNITObu7xswkRw5Mo" alt="image"><figcaption></figcaption></figure>

The image format is useful if you want to use a 100% custom design or simply reuse an image your team already prepared for a marketing automation. Batch allows you to display a full screen image or to display it as a modal with a close button or an auto-close timer.

We strongly recommend that you use:

1. Title: 10-25 characters.
2. Body: 40-70 characters.
3. CTA: Up to 18 characters or simple action words (e.g: visit now, later, sell it now).

{% hint style="info" %}
The image format is supported from the 1.14 version of the SDK (and higher).
{% endhint %}

#### WebView

<figure><img src="/files/3MW3fZoBAjj3yrpXc447" alt="webview"><figcaption></figcaption></figure>

The WebView format is useful if you want to use content based on a custom responsive HTML page developed and hosted on your side, or based on a URL from a third-party tool. Batch allows you to include your custom design in a fullscreen or modal style.&#x20;

For more information, see this [technical guide](/developer/technical-guides/how-to-guides/mobile/in-app-webview).

{% hint style="info" %}
The WebView format is supported from the 1.17 version of the SDK (and higher).
{% endhint %}


# Edition

Start by clicking the **New Automation** button from the In-App tab on Batch's dashboard.

{% hint style="info" %}
In order to create your first In-App automation, you will need to [create a theme](/getting-started/features/mobile-engagement-platform/settings/app-settings#creating-a-theme) from the dashboard settings.
{% endhint %}

## Labels & targeting

Exactly like push automations, you are able to add labels to your In-App automations via the **Associate Labels** button. You can reuse an existing label or create new one. You will be able to filter your automations from the automations list based on the label you choose here.

The targeting process is exactly the same for In-App automations as it is for push automations. See [here](https://github.com/BatchLabs/product.tech-documentation-gitbook/blob/master/dashboard/push/user-targeting/README.md) for more information.

### Synchronization workflow

Though the targeting interface is similar, In-App and push automations work differently. When the app is launched, the SDK automatically retrieves from Batch's servers the list of automations available at that moment.

<figure><img src="/files/KX0ncBkw321pFJEu8Lyw" alt=""><figcaption></figcaption></figure>

This implies that every events and attribute that have been collected during the **current** session won't be taken into account for the targeting of an In-App automation until the **next** session.

For instance, if you set the targeting to a count of events, then the user's own count has to match the targeting criteria at the app launch rather than during the session in order to display the In-App automation.

### Potential reach

Unlike a push automation, Batch doesn't need any push token to display an In-App message to your users. As a consequence, the estimate will display the number of **targeted installs**.

## Trigger condition

In-App automations will appear on your users’ screen according to a **specific trigger**. This is especially useful to show the message to your user at the right moment.

For example, you can choose to display an In-App promoting a discount when a user is on the adequate category page. You could also invite a user to get a premium account after they read a certain category of article if you have a news app.

### **Choosing a trigger**

You can use a session start or **any event** that have been tagged during the integration of the SDK. You can be even more specific by choosing an event **label**.

<figure><img src="/files/hxbZ6Qu2YLfSju0iWu9H" alt=""><figcaption></figcaption></figure>

{% hint style="info" %}
If you don’t select any labels, Batch will trigger the message on every trigger of the selected event.
{% endhint %}

Starting from version 1.19 of the SDK, the native trigger event 'As soon as possible' is deprecated. It will be removed from the dashboard as soon as you update the SDK to the required version (1.19+).\
In addition, the functioning of the native trigger event 'New session' is revised. Explanations on the old and new versions are below.

For all current and future In-App automations, here is how the native trigger events work depending on the user’s SDK version:

**If the user's SDK version is greater than or equal to 1.19**

*New session*\
If you choose to display your In-App automation with the trigger 'New Session', the message will appear on the first launch of your app:

* When a user matching the set targeting opens the app and therefore starts a new session, Batch’s SDK will retrieve all the information related to the automation.
* It will then trigger the automation **as soon as the synchronization is finished**.

You can choose to set this trigger to promote functionalities such as thematic preferences, for optin automations, or even to inform users about an app maintenance for instance.

{% hint style="info" %}
If the user has a limited network connection, the synchronization may be delayed. After a certain time, the SDK will stop the synchronization and will not display any more message to avoid impacting the user experience.
{% endhint %}

Please note that during the user’s **very first session**, the SDK is not initialized yet and it is therefore not possible to display an in-app message within the session.

**If the user's SDK version is lower than 1.19**

*New session*\
If you choose to display your In-App automation with the trigger 'New Session', the message will appear on the second launch of your app:

* When a user matching the set targeting opens the app and therefore starts a new session, Batch’s SDK will retrieve all the information related to the automation, but not display it yet.
* It will then trigger the automation **as soon as the user launches the app for the second time**.

You can choose to set this trigger to promote functionalities such as thematic preferences, for optin automations, or even to inform users about an app maintenance for instance.

### **Choosing a priority**

You can select a priority level between Standard, Important and Critical. Priority works on automations with **identical trigger event**, and identical label if one was specified. When two or more automations should be displayed at the same time, the system selects the automation with the highest priority: this is the one that will be displayed after the trigger event occured.

{% hint style="info" %}
If multiple automations have the same priority level, we rely on our automatic priority system to automatically define priority based on multiple criteria.
{% endhint %}

&#x20;Here are a couple of examples of usage of priorities:

* Standard-level priority could be selected for your long-term use cases: onboarding, app review, etc.
* Important level priority could be selected for temporary campaigns: conversion or subscription campaigns, account creation, reopt-in campaign, etc.
* Critical level priority could be selected for emergency campaigns: downtime or out-of-service messages, asking your user to update the app, etc.

### **Setting a capping and grace period**

The **capping** allows you to limit the maximum number of times an In-App automation will be displayed to a user. This is useful to avoid overwhelming your users with the same message.

The **grace period** allows you to set a delay between each display of the same In-App message. This feature is quite handy to avoid your user to see the same message multiple times in a single session.

### **Setting a start/end time**

This section lets you program your In-App automation. You can schedule the start and the end date of your automation based on global time or local time.

{% hint style="info" %}
We highly advise you set an ending date. In-App automations are functional even in the absence of connectivity, so setting an ending date will prevent the automations to be displayed for disconnected users after you manually disable it from the dashboard.
{% endhint %}

## Message edition

<figure><img src="/files/Lc7PsjztOBBwT6AP96wA" alt=""><figcaption></figcaption></figure>

A few words on the message edition interface:

* First of all, notice that you can create translations if you are targeting several languages. Just click the \[ + ] button in the top left corner.
* You can select your theme in the top bar of the message edition section. Every text field that you have enabled during theme creation is now editable.
* You can use any PNG or JPG image wider than **640px** in your In-App message, preferably in a portrait format with a few pixel wide margin on the side if there is text in it. Don't exceed 2MB to be sure the image will load up quickly including with poor connectivity. You can add an image from your computer or use a URL to this image.
* Finally, try to be creative with your image by using a gradient or transparency, a nicely set up image will often improve your automation performance.

### Message personalization

If you want to improve the conversion rate of your in-app automation, you can personalise the content of your notification for every customer, based on the same attributes you may already be using for user segmentation.

All you need to do is to click the **{...}** button next to the title or the body of your message and pick an attribute:

Batch will replace dynamically the attribute with a custom value for each user. If no value is found for a targeted user, Batch will send the message without the value or use the **default value** you set when you added the attribute.

Message personalization is available on the Enterprise plan and, as an option, on other paid plans.

### Editing buttons with actions

Choose the action that will be triggered when your user presses a button on your in-App message. The available actions are detailed in this section.

<figure><img src="/files/DGqZAbDk3cEkWkTkmeGq" alt=""><figcaption></figcaption></figure>

#### **Built-in action Rules**

* The default action when using action buttons will be *"Dismiss"*.
* You can always add a custom action registered in the app. This allows you to combine custom actions registered in the app and built-in actions.&#x20;
* There can only be one action at a call-to-action level.

{% hint style="info" %}
Exception for the batch.clipboard action that you can associate to a deeplink action.
{% endhint %}

#### **List of available built-in actions:**

**Dismiss**

Dismiss the In-App message.

**Deeplink**

Dismiss the In-App message and open the deeplink or Web page out of the app or in the in-app browser.

**Clipboard**

{% hint style="info" %}
Available in Batch 1.17 and higher
{% endhint %}

Copy to the clipboard the provided text and dismiss the In-App message.

**Push Opt-In And Smart Re-Optin Prompt**

{% hint style="info" %}
Available for iOS from Batch 1.11 and 1.12 respectively

Available for Android from Batch 1.19.2
{% endhint %}

Both display the system push notification authorization prompt to eligible users. In addition to displaying it, the Smart Re-Optin prompt opens the system notification settings if the user has already been asked for push notifications opt-in.

{% hint style="info" %}
If the user is already opt-in, the message will disappear after clicking the button but no further action will be triggered.
{% endhint %}

**Rating**

{% hint style="info" %}
Available in Batch 1.17 and higher
{% endhint %}

**iOS**: Displays the app rating dialog. The In-App system dialog cannot be displayed more than three times in a 365 days period. Your automation should be rate-limited to three times per year per user.

**Android**: Displays the Google In-App review feature. Your automation should be rate-limited.

{% hint style="info" %}
The "play-core" library is required to display the Google In-App review feature.
{% endhint %}

**Smart App tracking prompt (iOS only)**

{% hint style="info" %}
*Available in Batch 1.16 and higher*
{% endhint %}

Displays the system prompt for tracking consent. Asks for Tracking consent using the AppTrackingTransparency framework. If the user has already been asked and refused to consent, it opens the app's settings where tracking can be enabled.

**Redirect to settings (iOS only)**

{% hint style="info" %}
Available in Batch 1.12 and higher
{% endhint %}

Open the notification settings of the current application where notifications can be enabled.

#### **Additional button actions:**

**Track An Event:** Set up an event with optional event labels and event attributes.

Batch allows you to select an existing event or to create a new one directly from here.

2 inputs are available when retrieving an event in your In-App message:

* Event name (mandatory)
* Event Label (optional)

**Track A Tag:** Batch allows you to track a tag in one of your existing tag collections.

3 inputs are mandatory when retrieving a tag in your In-App message:

* Select Add or Remove a tag
* Enter a tag collection name (string format)
* Enter the name of the tag to add or to remove (string format)

#### Using an In-App WebView theme

If you select a theme based on the WebView format, you need to fill the Webview URL field with a link to your custom HTML design (ensure that this format is responsive).

Once you have added a valid URL, a preview of your In-App Automation is displayed. You can test interactions by clicking on the screen.

{% hint style="info" %}
The preview will only be available for HTTPS URLs.
{% endhint %}

## Enabling your In-App automation

The editor interface gives you a quick recap of your automation.

If you're not ready to send it yet, be advised that you can save it as a draft for now and send it later. If everything's alright, then just hit the **Save & Run** button.

## Modifying your In-App automation

Batch doesn't send live updates to your app when you save changes for an In-App automation or disable a campaign on the dashboard.

These changes will be detected the next time your users open the app. During that session, the SDK will sync again with Batch servers. The SDK may still display an outdated version of your campaign or an In-App automation recently disabled. All the changes received from Batch servers will be applied in the next session. This is why we recommend you include an end date in your automations or double-check the wording of your automation before activating it:

<figure><img src="/files/dZpr7GwNJ0mM4joTwt8l" alt=""><figcaption></figcaption></figure>

## Case of In-App message display after disabling the In-App automation

In-App automations cannot be disabled immediately for users who already synced it. These users will see your In-App message one last time.

In-App automations cannot be disabled immediately. When you disable an In-App automation on Batch dashboard, Batch stops serving it to new installs and sets its status to "disabled", but users may still be able to display it if they already synced it before.

This happens because the SDK must sync with Batch servers at least once to be aware of the new status of preloaded In-App automations. The SDK syncs with Batch servers after displaying preloaded automations, when users open the app.

As a result, users who synced the automation before you disabled it on Batch dashboard will display it one last time. All the changes received from Batch servers will be applied in the next session. This is why we recommend you include an end date in your automation or double-check the wording of your automation before activating it:

<figure><img src="https://downloads.intercomcdn.com/i/o/260653162/27daecf3aa0b3a48c1682fa2/Artboard.png?expires=1742508900&#x26;signature=9faacfccc0c8d8eaba7c4219bf5ce6396d802144df2000f7bf4147639a6323f8&#x26;req=diYnEMx9nIddFb4f3HP0gGUVcZrmTsIUGHf3rcVjTud03UvOCdmwH70NzDYY%0A%2FOXayofWUwrTk%2FDbXA%3D%3D%0A" alt=""><figcaption></figcaption></figure>

## Troubleshooting

Are you not seeing your In-App automation while you fit the targeting? Here's a couple possible reasons:

* **Splash screen**: If it's your first implementation, be advised that if there is a **splash screen** in your app, Mobile Landings and In-Apps triggered at session opening might not work (or will be dismissed just after the splash screen's disappear). To temporarily pause the In-App messages display, you can use the **Do Not Disturb mode** to solve this issue.
* **Do not disturb issue**: Also, check in your implementation if the Do Not Disturb mode isn't activated by default and preventing In-App to be displayed.
* **Event tagging issue**: If the In-App automation is triggered by a custom event, check if that event is triggered as expected. This can be easily done by using the **Debug tool** from Settings > Debug.

If none of this reasons seems to help, don't hesitate to send us any of your questions to <support@batch.com>.


# Analytics

## Basic analytics

<figure><img src="/files/tKmXfVHBbpDIa6otStMK" alt=""><figcaption></figcaption></figure>

The automations list gives you some basic information on the performance of your In-App automation:

* **Trigger**: The event that triggers your In-App message.
* **Displayed**: Total number of unique devices that have already displayed the message.

## Automation analytics

**Automation analytics exports** can be downloaded from the dashboard. The export is in the form of a CSV file containing automations metrics, settings, and much more. It allows you to filter your automations' metrics & data to include in your export. These exports are available from the In-App tab.

For example, you can:

* Analyze In-App automations performance
* Compare automations metrics by label, type, source, country, etc.
* Run in-depth analysis thanks to the extended data exported: sending time, targeting type, message content, etc.
* Etc.

### **Set your export from the Automations list**

First, click on "Filter" and select the status, date range, and labels of automations. Click on "Apply filters" button to save your choices.

Then, click on "Export" button on top of the last column.

#### **Export filters**

Before downloading the CSV Export, you can specify the granularity of your export. By default we are exporting the automations corresponding to the filters you selected. You also have the possibility to export directly the metrics for all your automations by checking "All automations" button.

#### **Automation’s metrics & data**

All exports automatically contain essential data by default:

* **Essentials metrics** represent all the metrics available in your CSV export by default, they are always included. Here is the list of the metrics: *token*; *source*; *status*; *label*; *automation name*; *device synced*; *display*; *clicks*; *1st button*; *2nd button*; *close*.

In addition to the default export data, you can add additional data:

* **Extended data** allows you to enrich your CSV export with the following automations setup information: *start date (recurring and trigger)*; *end date (recurring and trigger)*; *smart segments*; *country*; *custom audience (YES/NO)*; *languages*; *targeting applied (fullbase or custom targetting)*; *trigger event*; *message*; *format*; *button 1 action*; *button 2 action*; *global action*; *tracking id*.

#### **Split data**

You can choose the level of granularity of your CSV export. The **automation** granularty is always selected, you have the possibility to go further in the granularity of your CSV export by choosing to split the data by **days**.

## Advanced analytics

Similarly to push automations, the *Analytics* button will let you see more detailed statistics about your automation.&#x20;

<figure><img src="/files/Vckq2XaQDpgcMukdZ8by" alt=""><figcaption></figcaption></figure>

Let's dive into the details of the available statistics here:

### Summary

* **Devices synced**: number of *unique* devices that were targeted by the automation and have downloaded, or *synced* the automation locally. This is not the number of displayed of the In-App, see below.
* **Displayed**: number of times the message was displayed.
* **Clicked**: number of clicks on one of the buttons of the In-App automation. The top-right 'X' close button is not included in this total.
* **Click rate**: total of clicked messages divided by the total of displayed messages.

### Performance

The performance section will run you through the results of your automation, from the number of displayed messages to click distribution.

* **Displayed**: Number of times the message was displayed.
* **Clicked 1st/2nd button**: Number of clicks on the message's buttons. Hover over the tooltips to read the content of the buttons in your message. (Fullscreen, Banner and Modal formats only)
* **Close**: Number of clicks on the native close button.
* **Buttons**: WebView format only - Total number of clicks on the message’s buttons. Click “See clicks details” to get the clicks and click rate per button.

### Daily statistics

The histogram view allows you to compare visually two metrics of your choice on a given time range. You can also choose the array view to see all the metrics at once:

* **Displayed**: Number of times the message was displayed.
* **Clicked**: Number of clicks on one of the message's button.
* **1st / 2nd button**: Number of clicks on the 1st / 2d button of the In-App message.


---

[Next Page](/llms-full.txt/1)