Adding notification actions
iOS 8 introduced actionnable notifications: action buttons can be attached to notifications. Batch includes support for them: this documentation describes how to make the best of Batch's features and how to integrate them with iOS' native features, including how to work with the new iOS 10 APIs without breaking backwards compatibility.
This guide has no intention of being a full replacement of Apple's official documentations of notification actions.
Note: Features described here require Batch 1.7 or higher.
Registering with the framework
In order to be able to use action buttons in your notifications, you will have to register them to the framework in the application itself.
To do so, you'll create Actions and group sets of them into Categories. Categories are what iOS will use to display a set of predefined buttons in local or remote notifications.
It is important that you figure out what categories you will want to associate to your notifications as updating them will require you to submit an updated build to the App Store and have your users update your app before you can push with your new actions.
Actions are defined by:
- An identifier. Your app will be called back with this identifier once the user tapped on the action so you can perform the action.
- A label. It is the text that the user will see.
- Optional behavior options such as:
- Destructive (the button will appear red)
- Touch ID/Passcode requirement
- Foregroung/Background action (whether tapping the button will open your app or perform the action in the background)
- ...
You can delcare these actions using the standard Apple UIKit documentation iOS8/9 / iOS10.
Once you've declared your actions and put them into categories, you can register them to Batch:
- Swift
- Objective-C
BatchPush.setNotificationsCategories(<your categories Set>)
BatchPush.registerForRemoteNotifications()
You can also use the native UIKit APIs to register them, as per Apple's documentation.
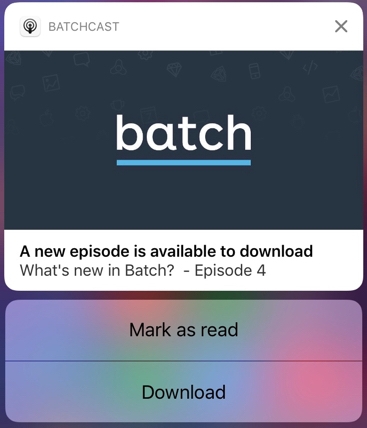
Note: You'll find an example implementation in Swift here in our Batchcasts sample project. It handles iOS 8/9/10 API changes and registers multiple actions in a category.
Responding to actions
iOS 10 (UserNotifications)
If you're using the UserNotifications framework, iOS will call you back in your UNUserNotificationCenterDelegate instance you've set as the UNUserNotificationCenter delegate.
For that, you'll need to implement userNotificationCenter:didReceiveNotificationResponse:withCompletionHandler:
You'll also need to make sure you don't accidentally try to run your own code for actions that are not linked to action buttons:
- Swift
- Objective-C
import UserNotifications
import Batch

@available(iOS 10.0, *)
@objc
class NotificationCenterDelegate: NSObject, UNUserNotificationCenterDelegate {

    func userNotificationCenter(center: UNUserNotificationCenter, didReceiveNotificationResponse response: UNNotificationResponse, withCompletionHandler completionHandler: () -> Void) {

        if response.actionIdentifier != UNNotificationDefaultActionIdentifier &&
            response.actionIdentifier != UNNotificationDismissActionIdentifier {
            // Perform your action here
        }

        BatchPush.handle(userNotificationCenter: center, didReceive: response)
        completionHandler()
    }
}
Earlier iOS versions
As most legacy notifications callbacks, iOS will call you back on your app delegate.
You'll need to implement application:handleActionWithIdentifier:forRemoteNotification:withResponseInfo:completionHandler:.
- Swift
- Objective-C
func application(_ application: UIApplication, handleActionWithIdentifier identifier: String?, forRemoteNotification userInfo: [AnyHashable : Any], completionHandler: @escaping () -> Void) {
    // Handle the action here
    completionHandler()
}
Link with Custom Actions
A great way to clean up your code is to use Custom Actions and link them to your action buttons.
It allows you to share code between the legacy and new callbacks, but also make your actions available to Mobile Landings and any future feature that will support calling actions you've defined remotely.
Once you've created your Custom Actions, make sure you register your UNNotificationAction instances with the same identifier as the ones you've picked for your Batch Custom Actions.
Then, you can trigger them manually from the callbacks:
- Swift
- Objective-C
// iOS 8/9
// In your application delegate

func application(_ application: UIApplication,
                 handleActionWithIdentifier identifier: String?,
                 forRemoteNotification userInfo: [AnyHashable : Any],
                 completionHandler: @escaping () -> Void) {
    if let identifier = identifier {
        var args: [String : AnyObject] = [:]
        if let payloadArgs = userInfo["action_args"] as? [String : AnyObject] {
            args = payloadArgs
        }
        BatchActions.perform(actionIdentifier: identifier, arguments: args)
    }

    completionHandler()
}

// iOS 10
import UserNotifications
import Batch

@available(iOS 10.0, *)
@objc
class NotificationCenterDelegate: NSObject, UNUserNotificationCenterDelegate {

    func userNotificationCenter(center: UNUserNotificationCenter, didReceiveNotificationResponse response: UNNotificationResponse, withCompletionHandler completionHandler: () -> Void) {

        if response.actionIdentifier != UNNotificationDefaultActionIdentifier &&
            response.actionIdentifier != UNNotificationDismissActionIdentifier {
            // If you want to add arguments to your action, this sample code will read from the "action_args" key of your custom payload
            var args: [String : AnyObject] = [:]
            if let payloadArgs = response.notification.request.content.userInfo["action_args"] as? [String : AnyObject] {
                args = payloadArgs
            }
            BatchActions.perform(actionIdentifier: response.actionIdentifier, arguments: args)
        }

        BatchPush.handle(userNotificationCenter: center, didReceive: response)
        completionHandler()
    }
}
Note: While Apple also calls action buttons added to notifications "Custom Actions", they are not directly linked to Batch's Custom Actions
Handling both notification APIs at the same time
Starting with iOS 10, Apple has deprecated UIUserNotificationAction and related classes in favor of UNNotificationAction. Applications compatible with iOS version lower than iOS 10 will have to deal with compatibility.
There are three ways of dealing with this:
Using the right API depending on the OS version your app is running on.
The way is the recommended one. You can use Objective-C/Swift feature detection and register accordingly:
- Swift
- Objective-C
if #available(iOS 10, *) {
    // We're on iOS 10
    registerActions()
} else {
    // We're on iOS 8/9
    registerLegacyActions()
}
Note: A full example of this implementation can be found in our BatchCasts iOS Sample
Using UIUserNotificationAction regardless of the OS version using Batch.
If you're using Batch to register for notifications rather than UIKit methods, switching to the new UserNotifications framework has already been done for you.
Calling BatchPush.registerForRemoteNotifications(<Categories set>) with legacy (UI*UserNotification) actions and categories will cause Batch to convert them to UNNotificationAction and UNNotificationCategory instances and use the new APIs transparently.
If you define categories with both Default and Minimal contexts for your action sets, Batch will complain in the logs, as this doesn't exist anymore with the new APIs. A long term fix is to migrate to the right API according to the iOS version you're running on, as described earlier.
Using UIUserNotificationAction regardless of the OS version using UIKit methods.
Registering notifications this way is supported by iOS, but should not be used: You should use the UserNotifications framework on iOS 10, since the old APIs have been deprecated.
You'll also have better callback support for anything related to notifications in your app.
Adding actions to your notification
You can now add actions to your iOS notifications by adding a category key to the payload of your push. Here is how it looks:
{"aps":{"category":"CATEGORY_NAME"}}