General
Batch sample apps
If you want to see a proper integration of the Batch SDK and to test any of its functionalities, you can take a look at our sample apps.
→ Download the sample app on GitHub
They are currently written for iOS in both Swift and Objective-C.
Manual framework integration
Step 1.
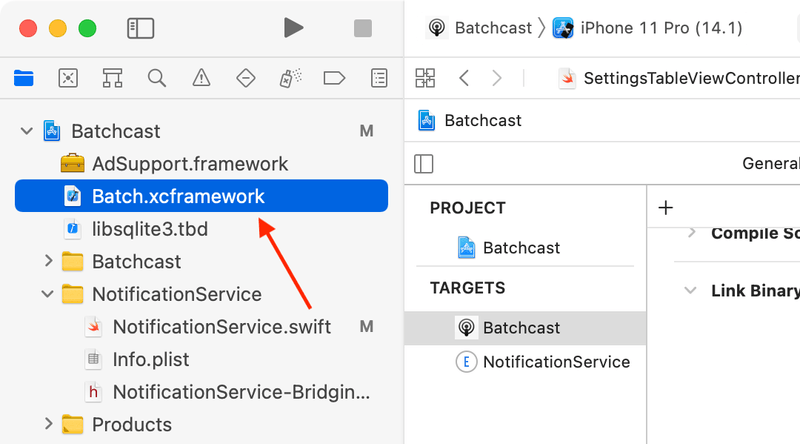
First, download the SDK. Include Batch.xcframework in your project by dragging and dropping it into the Project Navigator as shown here:
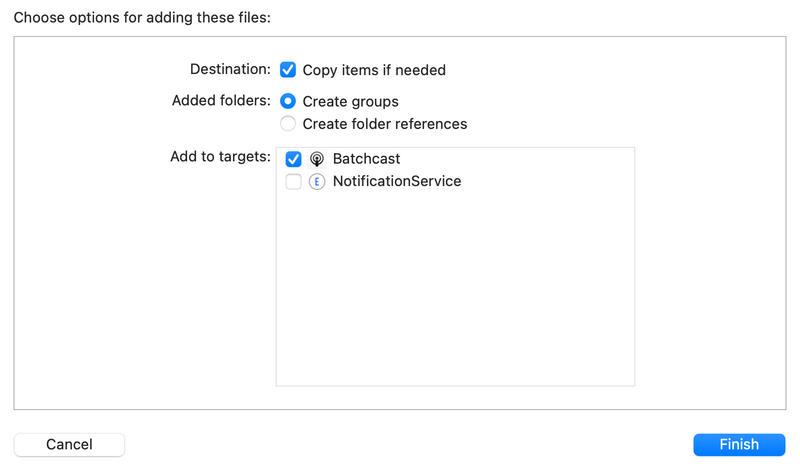
Unless you manually copied the XCframework folder into your project's directory, check Copy items if needed. Make sure the only checked target is your Application target: extensions should be unchecked.
Step 2.
Be sure Batch.xcframework and libsqlite3.tbd are in the Build Phases of your application target:
Step 3.
In order to avoid a link issue when building your application, add -ObjC -lz to Other Linker Flags, under Build Settings of your application target.
You can now proceed with the integration of the SDK.
Generating the .p12 certificate
Creating a certificate
Batch servers need to have a certificate in order to communicate with Apple Push Notification Services (APNS). This certificate is generated for an unique Application Identifier (App ID).
Important
If you already have a valid .p12 certificate, go to the next step: Uploading your .p12 certificate.
Step 1.
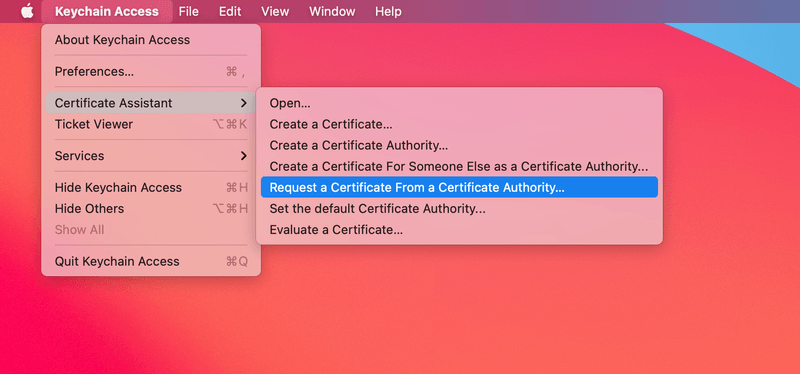
Open your Keychain application on your Mac. In the menu bar, select "Keychain Access" → "Certificate Assistant" → "Request a Certificate From a Certificate Authority…"
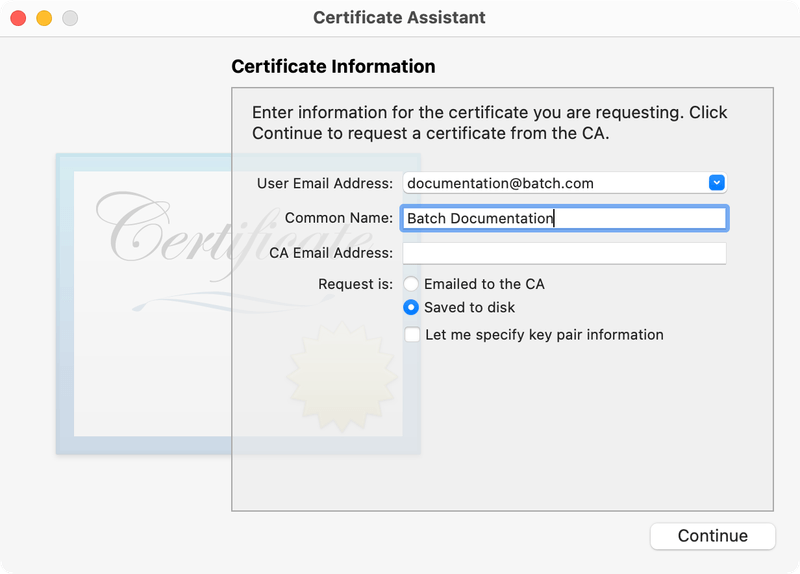
Then, enter your information in the required fields and select "Saved to disk". Save the "CertificateSigningRequest.certSigningRequest" file to your Desktop.
Step 2.
Head to the Apple Developer Member center, open the Identifiers section and create a new App ID (or choose an existing Explicit App ID) to configure Push Notifications.
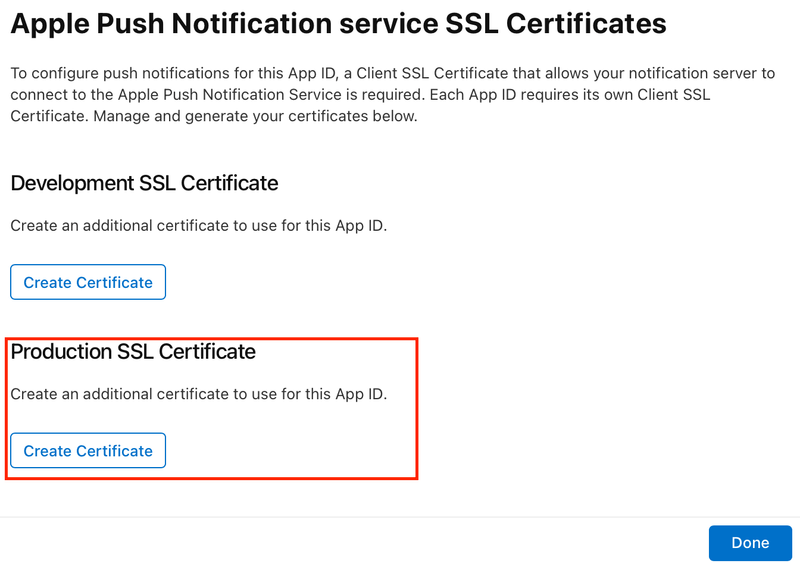
Scroll down to the Push Notifications section, check it if needed and click configure.
Under "Production SSL Certificate", click on "Create Certificate...". The Production certificate can push both sandbox and production environments.
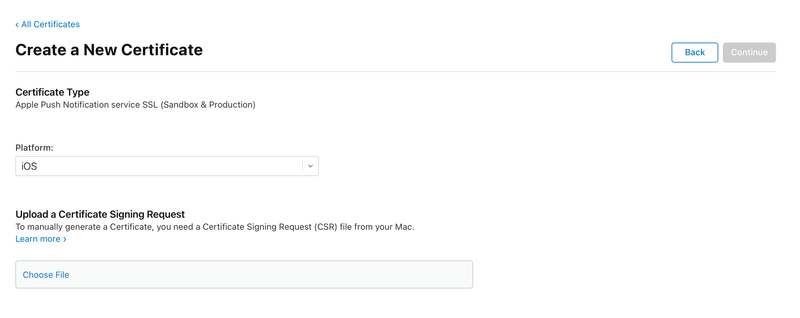
The next screen will ask us to upload the Certificate Signing Request (CSR), which we have created earlier.
Select "Choose File…" and locate the .certSigningRequest file on your desktop. Finally, select "Continue" and download the generated SSL certificate.
Generating the .p12 file
Now you have the certificate, you need to have it with its key bundled into a .p12 file format.
Step 1.
First, add the certificate to your Keychain by double clicking on the downloaded SSL certificate.
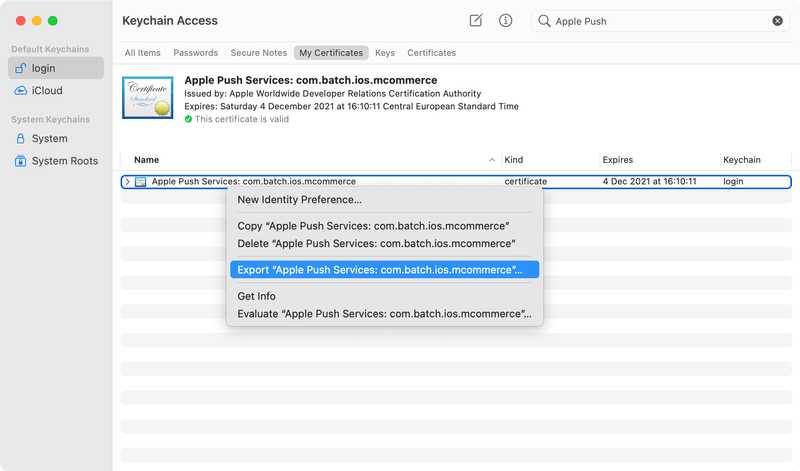
In Keychain Access, pick the default keychain (login on English systems) using the sidebar. Then, click on "My Certificates" and find the certificate you just added. It should be called "Apple Push Services:".
Certificates called "Apple Production IOS Push Services" and "Apple Development IOS Push Services" are not supported anymore. Please generate a new Production Certificate
Step 2.
Make sure that the certificate is collapsed (the arrow on the left ( > ) should point to the right).
Right-click on the certificate, select "Export Apple Push Services:…", and save it as a .p12 file.
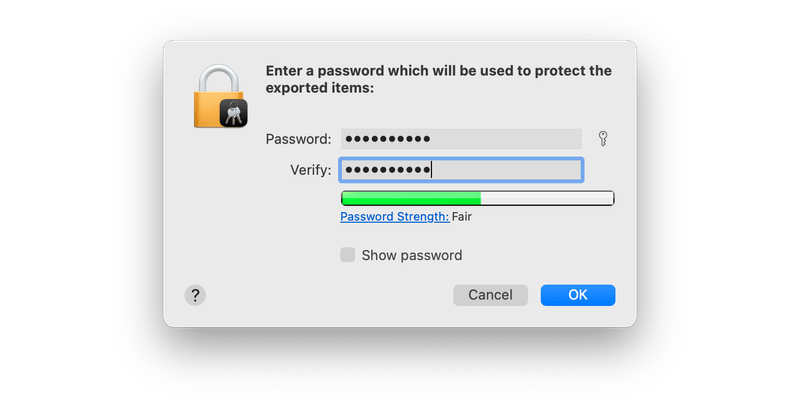
You will be prompted to enter a password which will be used to protect the exported certificate.
If the Personal Information Exchange (.p12) option is grayed out in the export sheet, make sure "My Certificates" is selected in Keychain Access.
Step 3.
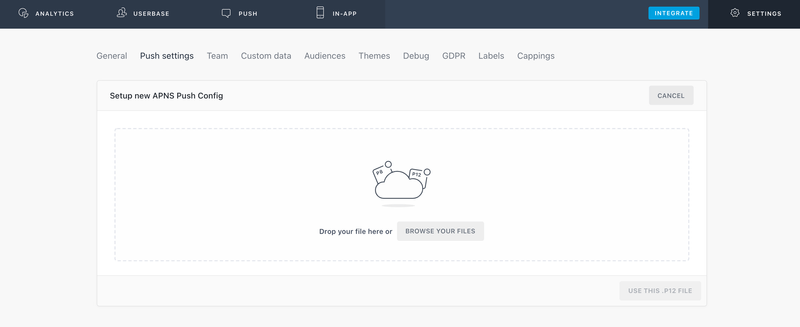
Now go to Batch's dashboard → ⚙ Settings → Push settings, and upload your P12 certificate.
Troubleshooting
If you're having trouble uploading your certificate, you can check our troubleshooting documentation.
Generating your Provisioning Profile
After creating a new App ID or modifying your existing one, you need to (re)generate your provisioning profile and build with it.
Step 1.
Go to Apple Developer website, then click on "Provisioning Profiles" from the iOS Apps section.
Click on the "+" button to create a new iOS Provisioning Profile or select an existing one.
If you already have one, make sure it has Push Notifications in the Enabled Services field.
Step 2.
In the Provisioning Profile creation wizard:
- Select Type: Choose "App Store".
- Configure: Choose the App ID you created before from the drop down and make sure to select your iOS Production certificate.
- Generate: Choose a name for this provisioning profile, such as "Batch Push App Profile" and select "Generate"
Then download the generated provisioning profile from the next screen by selecting the "Download" button.
Step 3.
Install the profile by double-clicking on the downloaded file.
Your new provisioning profile should appear in the Provisioning Profiles section in your Xcode settings under the "Accounts" section. Make sure that your developer certificate is installed in your Keychain.
Batch Push campaigns are sent to both the apps built with your Development and the Distribution provisioning profile.
Problems with your application delegate
If Batch tells you that it was unable to automatically integrate with your application delegate, it's probably because there is a conflict with another SDK.
Try calling [Batch setupWithAPIKey:] earlier in your application delegate.
Migration from BatchUserProfile
If you've previously used BatchUserProfile, you can easily use Batch User. You will still be able to set a custom region, language or identifier with the new API.
The main difference between Batch User and BatchUserProfile is that you'll now be required to use an editor object in order to make changes, and then save them. This transactional behaviour brings additional thread-safety and better performance.
That way, what used to be:
- Swift
- Objective-C
let userProfile = Batch.defaultUserProfile()
if let _userProfile = userProfile {
    // Use the user profile to set custom language and data
    _userProfile.language = "en" // Language must be 2 chars, lowercase, ISO 639 formatted
    _userProfile.region = "US" // Region must be 2 chars, uppercase, ISO 3166 formatted
    _userProfile.customIdentifier = "john.doe@gmail.com"
}
Will become this:
- Swift
- Objective-C
let editor = BatchUser.editor()
editor.setLanguage("en") // Language must be 2 chars, lowercase, ISO 639 formatted
editor.setRegion("US") // Region must be 2 chars, uppercase, ISO 3166 formatted
editor.setIdentifier("john.doe@gmail.com")
editor.save()
BatchUserProfileis now deprecated, but will continue to work. We still suggest you migrate in the near future, so you can take advantage of the new capabilities.
