Push setup
iOS Setup
You're now ready to implement Batch Push in your app. You have to ask the user to allow your app to send push notifications.
Whenever appropriate (e.g. the end of a welcome flow), show the notification request popup using BatchPlugin.Push.RegisterForRemoteNotifications().
If you don't have a specific place to put this, just add it after BatchPlugin.StartPlugin().
Android setup
Adding permissions and service
GCM needs 4 permissions to set up Push:
- com.google.android.c2dm.permission.RECEIVE
- android.permission.WAKE_LOCK
- android.permission.VIBRATE
- [YOUR-PACKAGE-NAME].permission.C2D_MESSAGE
Note that those 4 permissions will not show up in the PlayStore, so you don't need to worry about users asking about them.
Here's how your manifest should appear with these permissions:
<?xml version="1.0" encoding="utf-8"?>
<manifest xmlns:android="http://schemas.android.com/apk/res/android-v1"
    package="YOUR-PACKAGE-NAME"
    android:versionCode="1"
    android:versionName="1.0" >

    <uses-sdk
        android:minSdkVersion="8"
        android:targetSdkVersion="20" />

    <uses-permission android:name="android.permission.INTERNET" />

    <permission android:name="YOUR-PACKAGE-NAME.permission.C2D_MESSAGE" android:protectionLevel="signature"/>
	<uses-permission android:name="YOUR-PACKAGE-NAME.permission.C2D_MESSAGE"/>

	<uses-permission android:name="android.permission.WAKE_LOCK" />
	<uses-permission android:name="android.permission.VIBRATE" />
	<uses-permission android:name="com.google.android.c2dm.permission.RECEIVE"/>
Be sure to replace
YOUR-PACKAGE-NAMEwith your actual package name, for example: com.google.android
You must now declare the Batch service and receiver. They will handle notifications and display them for you, without any additional code.
Here's how to declare it in your application tag:
	<application
        ... >

        <meta-data
            android:name="com.google.android.gms.version"
            android:value="@integer/google_play_services_version" />

        <service android:name="com.batch.android.BatchPushService" />
        <receiver android:name="com.batch.android.BatchPushReceiver" android:permission="com.google.android.c2dm.permission.SEND">
		  <intent-filter>
		    <action android:name="com.google.android.c2dm.intent.RECEIVE" />
		    <category android:name="YOUR-PACKAGE-NAME" />
		  </intent-filter>
		</receiver>

    </application>
Enabling Batch Push
Activate Batch Push by setting the GCM Sender Id that you obtained earlier and calling BatchPlugin.Push.Setup(), right before setting the Batch API Key (either dev or live):
using UnityEngine;
using System;
using System.Collections;
using System.Collections.Generic;
using Batch;

public class MainMenu: MonoBehaviour
{

	public BatchPlugin BatchPlugin;

	void Start()
	{
		BatchPlugin.Push.GCMSenderID = "YOUR-GCM-SENDER-ID";
		Config config = new Config();
		config.AndroidAPIKey = "MY-ANDROID-APIKEY";
		BatchPlugin.Push.Setup();
		BatchPlugin.StartPlugin(config);
	}
}
That's it! If your implementation works, you should see your push token in your logs.
HIGHLY RECOMMENDED
Follow the [Customizing Batch notifications](/unity/advanced/customizing-notifications) guide to display your notification icon correctly and manage other aspects of your notification.
Your first notification
1. Obtaining your device token
You can find your device's token using the debug tool or locating the token Batch posts to the logcat/console on Studio/Xcode.
The line you are looking for within the logcat/console is:
D/Batch (20509): Batch.Push: Registration id: X

//Where X represents the Batch Push token for your device.
//If you are having troubles finding the entry,
//searching for _Batch_ will find the correct entries.
[Batch] - Push token (Production): X
OR
[Batch] - Push token (Development): X

//Where X represents the Batch Push token for your device.
//
//The token shown in the console will be Production or Development based on
//your Provisioning Profile. Be sure to note which token you are working with.
//If you are having troubles finding the entry, searching for Batch will
//find the correct entries.
2. Sending a test push
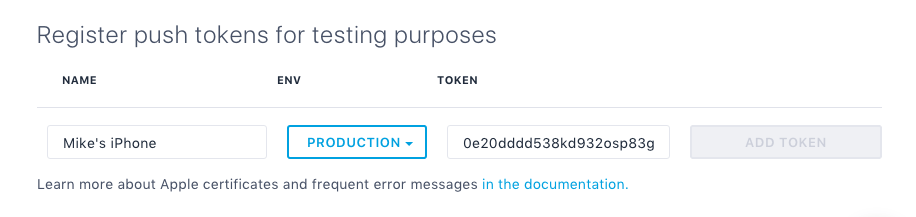
Go to ⚙ Settings → Push settings, paste your device's token and click on Save. On iOS, make sure you chose the right environment.
Then, all you have to do is to click on the "Send" button. If you sucessfuly set up the SDK, you will receive a notification on your device.
Troubleshooting
If you're having trouble sending test notifications, you can check our troubleshooting documentation:
What's next
Congratulations on finishing the integration of Batch Push!
Here are a couple of extra steps you can take before releasing your app:
- Live API key: Ensure you don't use Batch's DEV API key in the build you will upload to the AppStore / Play Store.
- Small icon / Accent color: Make sure the small icon you are using is opaque white. We also recommend you use an accent color.
- Custom user identifier: Add support for custom user identifiers if you are planning to use the Transactional or the Custom Data APIs.
- Token import: Import your existing tokens if you're coming from another push provider.