> For the complete documentation index, see [llms.txt](https://doc.batch.com/llms.txt). Markdown versions of documentation pages are available by appending `.md` to page URLs; this page is available as [Markdown](https://doc.batch.com/developer/technical-guides/how-to-guides/admin-setup-and-configuration/how-to-set-up-batchs-single-sign-on-using-okta-as-an-idp.md).
# How to set up Batch’s Single-Sign-On using Okta as an IdP?
See how to set up Single-Sign-On on Batch's dashboard.
{% hint style="warning" %}
**Batch is compatible with all IdPs that support the SAML standard.**
The article outlines the steps for setting up Single Sign-On using Okta as the IdP. **For any other IdP, the article can be used, but will need to be adapted based on your IdP's specific requirements.**
{% endhint %}
Here are the few steps you need to follow to set up Single-Sign-On on Batch’s dashboard.
## 1. Creating an app integration
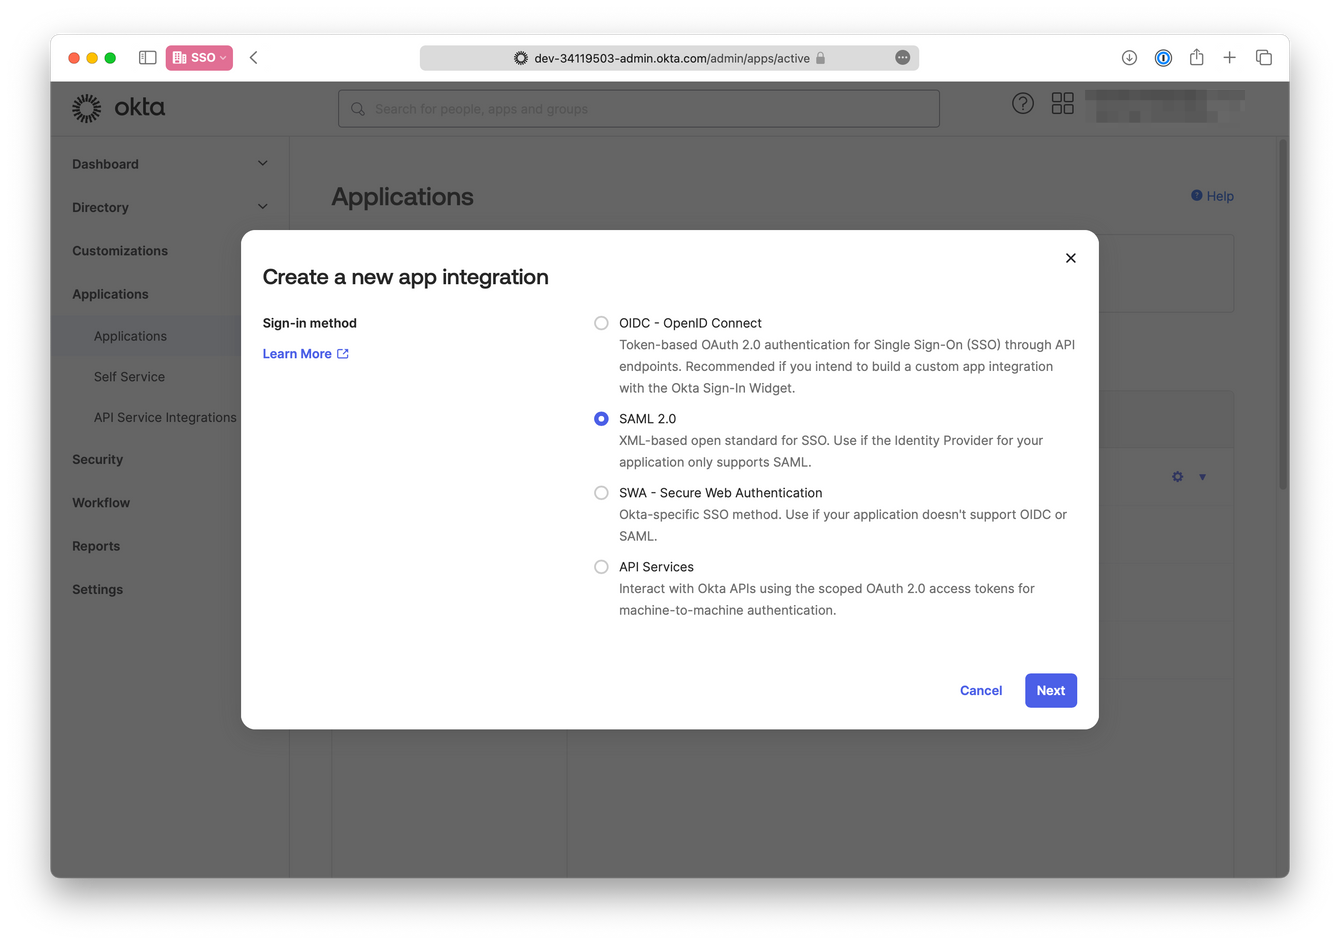
First, you need to create a new app integration on your Okta dashboard making sure to select “**SAML 2.0**” as the sign-in method.
Okat app creation
By clicking on the “**Next**” button, you can configure the SAML Integration as follows:
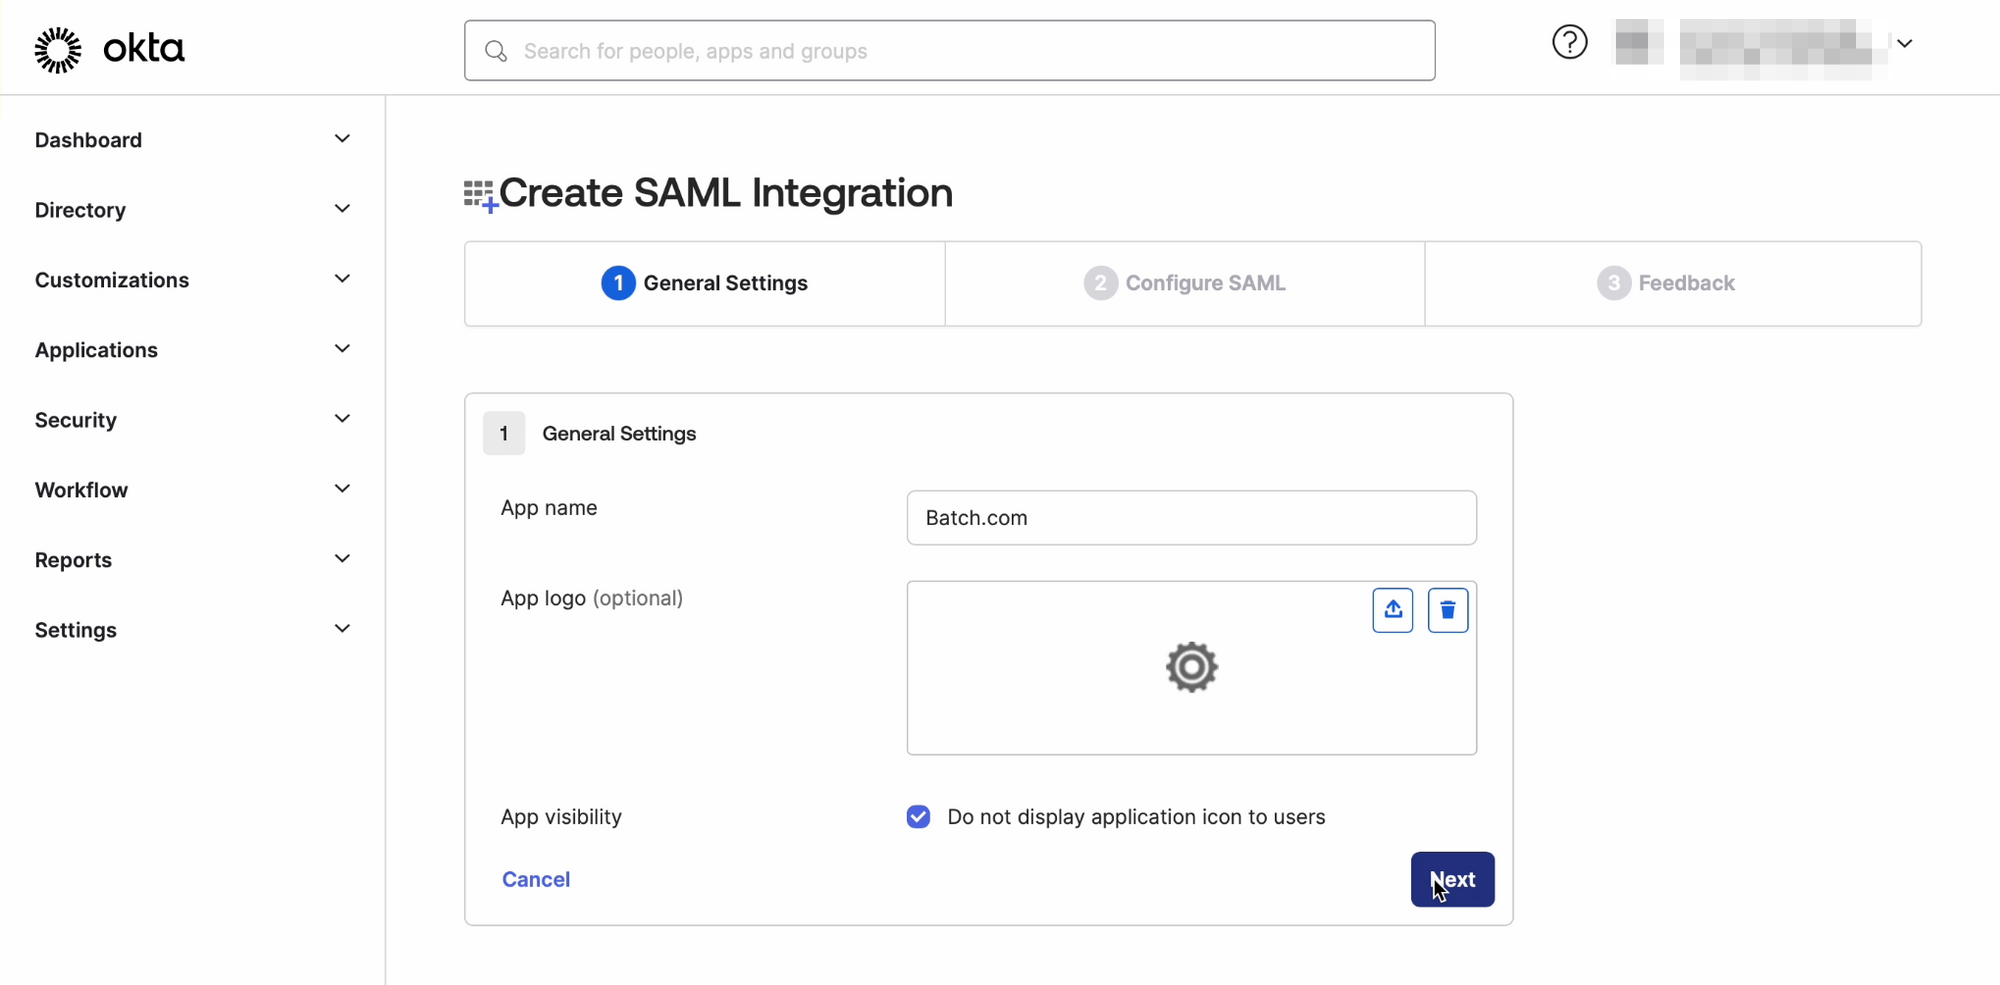
### General settings
Add an **App name** (E.g. Batch.com) and a **logo** (optional).
The Batch logo is available here 👇
### Configure SAML
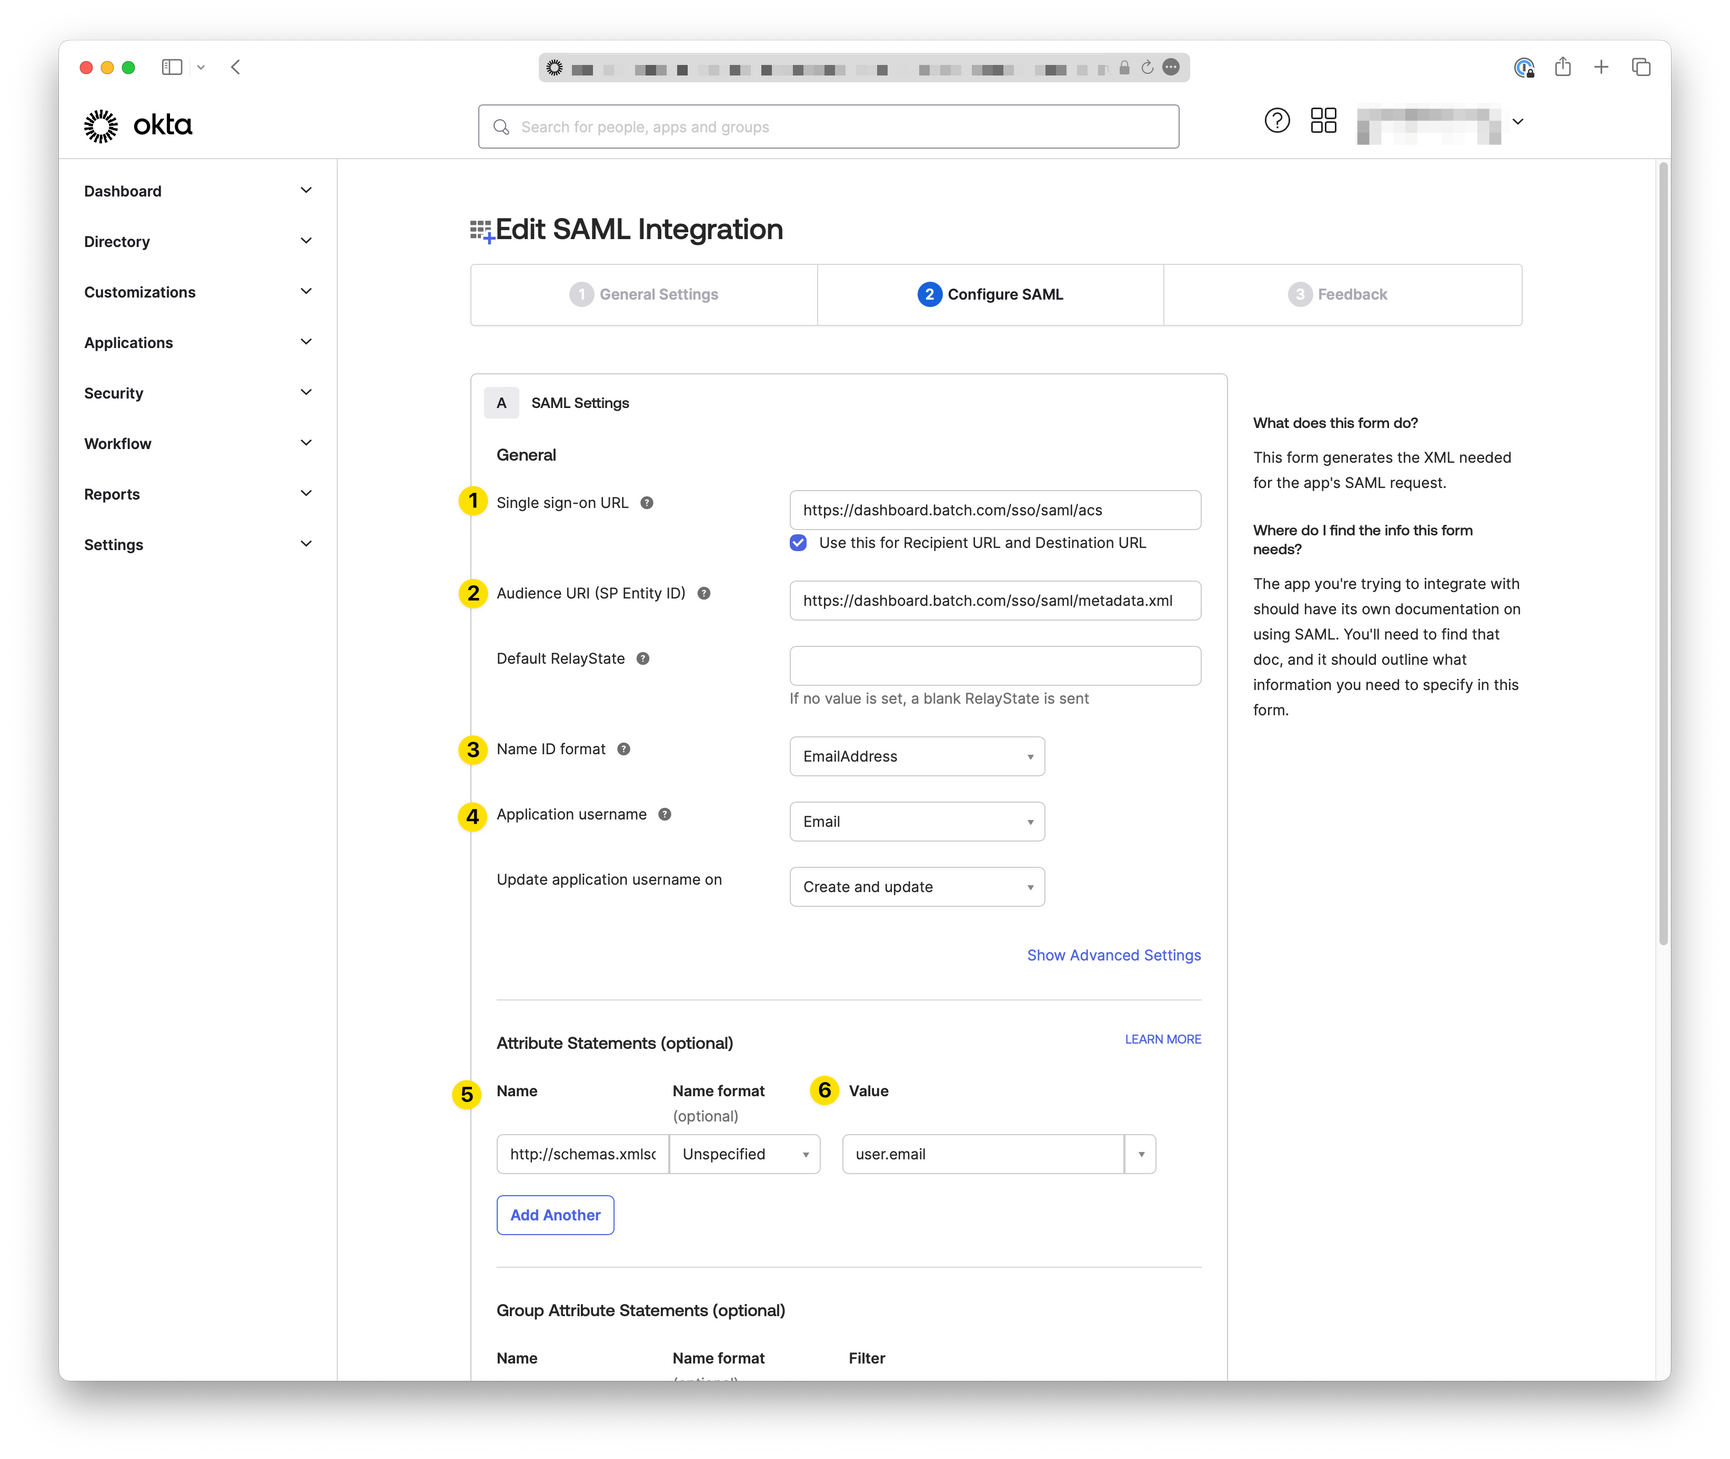
In this form, the 6 highlighted fields must be filled in with the following information 👇
1. Single sign-on URL → `https://dashboard.batch.com/sso/saml/acs`
2. Audience URL → `https://dashboard.batch.com/sso/saml/metadata.xml`
3. Name ID format → `EmailAddress`
4. Application username → `Email`
5. Attribute Statement Name → `http://schemas.xmlsoap.org/ws/2005/05/identity/claims/emailaddress`
6. Attribute Statement Value → `user.email`
## 2. Setup completion on Batch’s end
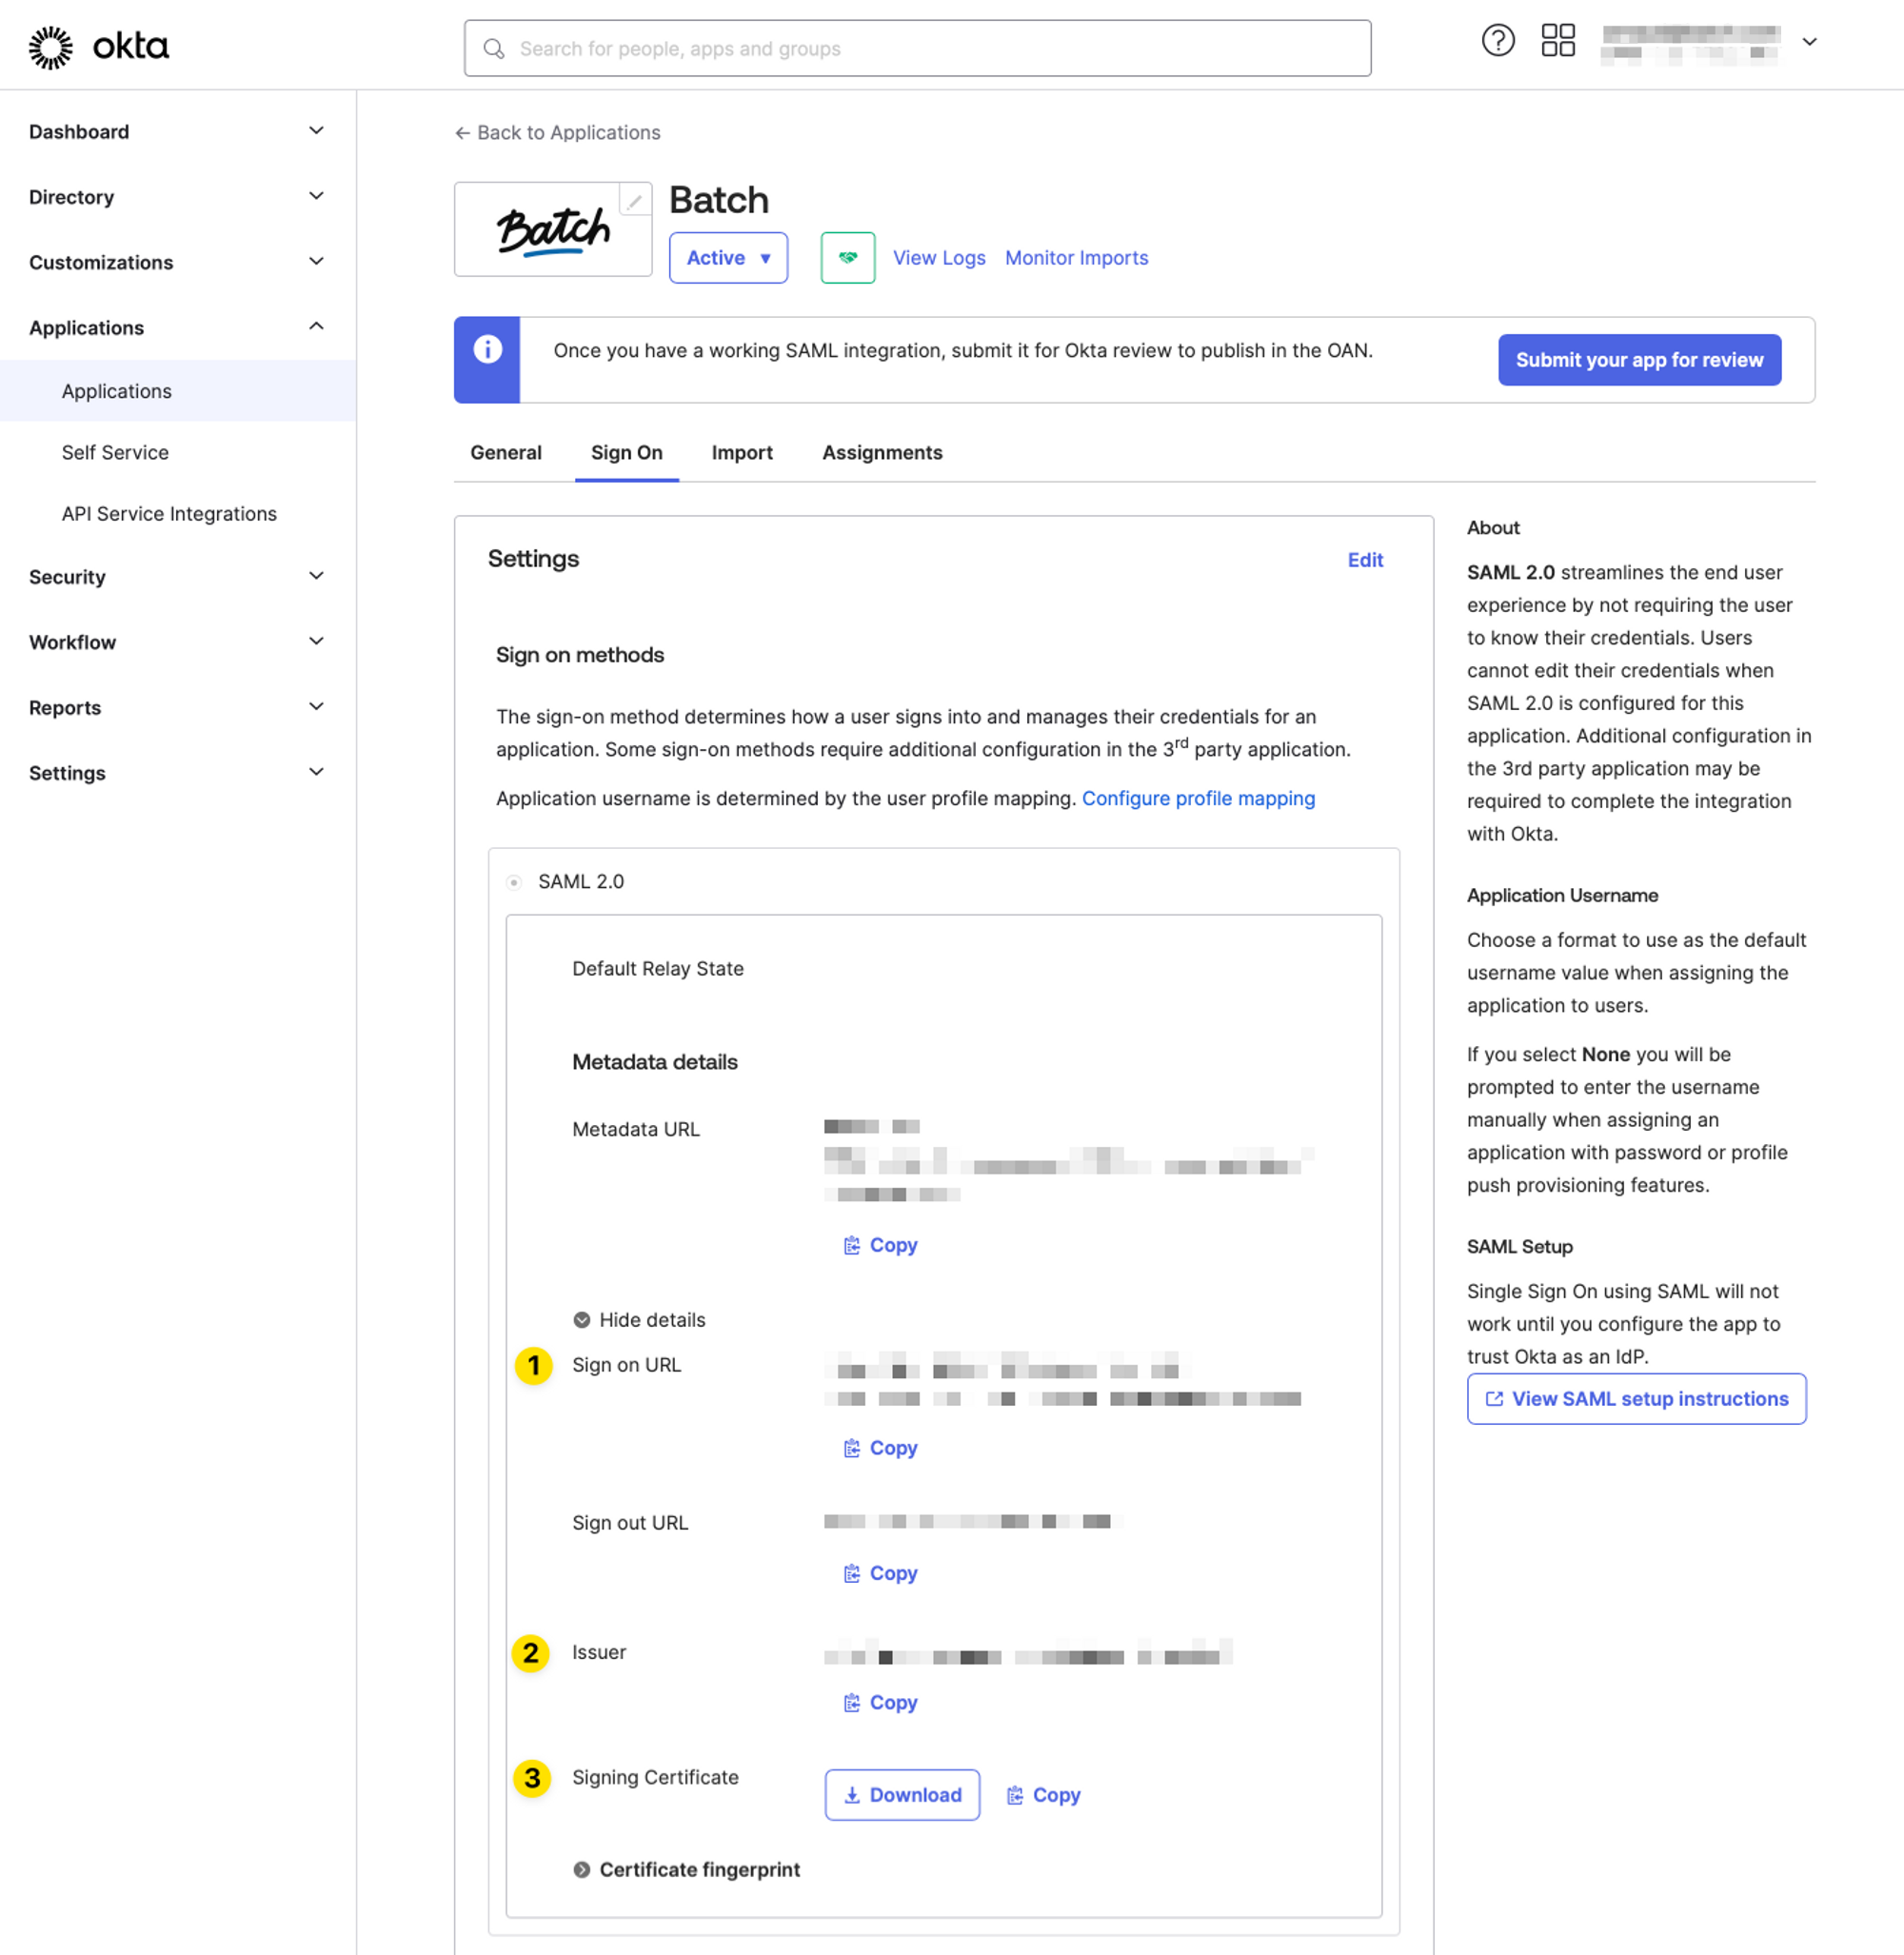
Once you complete creating your app integration on Okta’s dashboard, you should be redirected to the App’s ***Sign On Settings*** page. Here is the information you will need to share with Batch teams to complete your setup:
1. Sign on URL
2. Issuer
3. Signing Certificate
{% hint style="danger" %}
This information is highly sensitive and should be shared **in a secure manner** with restricted access.
{% endhint %}
## 3. User assignment
The final step on your end will be to assign users to whom you want to grant access to Batch’s dashboard. That can be managed on the “**Assignments**” tab of the previously created app integration in Okta’s dashboard.
---
# Agent Instructions
This documentation is published with GitBook. GitBook is the documentation platform designed so that both humans and AI agents can read, navigate, and reason over technical content effectively. Learn more at gitbook.com.
## Querying This Documentation
If you need additional information that is not directly available in this page, you can query the documentation by asking a question.
Perform an HTTP GET request on the following URL with the `ask` and `goal` query parameters:
```
GET https://doc.batch.com/developer/technical-guides/how-to-guides/admin-setup-and-configuration/how-to-set-up-batchs-single-sign-on-using-okta-as-an-idp.md?ask=&goal=
```
`ask` is the immediate question: it should be specific, self-contained, and written in natural language.
`goal` is what the user is ultimately trying to achieve, the reason they need the answer. Sharing it helps GitBook give you a better, more relevant answer. A goal is most helpful when it describes the outcome the user wants rather than restating the question. For example, with `ask=how do I create an API token`, a goal like `automate deployments from our CI pipeline` lets GitBook tailor the answer to that use case.
The response will contain a direct answer to the question and relevant excerpts and sources from the documentation.
Use this mechanism when the answer is not explicitly present in the current page, you need clarification or additional context, or you want to retrieve related documentation sections.